B-pillar VOLVO XC90 2017 Owner´s Manual
[x] Cancel search | Manufacturer: VOLVO, Model Year: 2017, Model line: XC90, Model: VOLVO XC90 2017Pages: 560, PDF Size: 9.97 MB
Page 27 of 560

INTRODUCTION
}}
25
and qualified Volvo service technician before installing any accessory in or on your vehicle.
• Accessories that have not been approved byVolvo may or may not be specifically testedfor compatibility with your vehicle. Addition-ally, an inexperienced installer may not befamiliar with some of your car's systems.
• Any of your car's performance and safetysystems could be adversely affected if youinstall accessories that Volvo has not tested,or if you allow accessories to be installed bysomeone unfamiliar with your vehicle.
• Damage caused by unapproved or improperlyinstalled accessories may not be covered byyour new vehicle warranty. See your Warrantyand Service Records Information booklet formore warranty information. Volvo assumes noresponsibility for death, injury, or expensesthat may result from the installation of non-genuine accessories.
WARNING
The driver is always responsible for operating the vehicle in a safe manner and for comply-ing with current statutes and regulations. It is also essential to maintain and service the vehicle according to Volvo's recommendationsas stated in the owner's information and theservice and warranty booklet. If the on-board information differs from the printed owner's manual, the printed informa-tion always takes precedence.
Related information
•
Volvo Structural Parts Statement (p. 25)
Volvo Structural Parts Statement
Volvo has always been and continues to be a leader in automotive safety.
Volvo engineers and manufactures vehicles designed to help protect vehicle occupants in theevent of a collision. Volvos are designed to absorb the impact of a collision. This energy absorption system including,but not limited to, structural components such asbumper reinforcement bars, bumper energyabsorbers, frames, rails, fender aprons, A-pillars,B-pillars and body panels must work together tomaintain cabin integrity and protect the vehicleoccupants. The supplemental restraint system including but not limited to air bags, side curtain air bags, anddeployment sensors work together with theabove components to provide proper timing forair bag deployment. Due to the above, Volvo Car USA does not sup- port the use of aftermarket, alternative or any-thing other than original Volvo parts for collisionrepair. Volvo Car USA also recommends using Volvo- approved replacement glass. The use of after-market glass, particularly a windshield, can havean adverse effect on collision avoidance andadvanced lighting systems. In addition Volvo does not support the use or re- use of structural components from an existing
Page 454 of 560

WHEELS AND TIRES
452
Tires
Your vehicle is equipped with tires according to the vehicle's tire information placard on the B-pillar (the structural member at the side of thevehicle, at the rear of the driver's door opening).
CAUTION
Some Volvo models are equipped with an Ultra High Performance tire and wheel com-bination designed to provide maximum drypavement performance with consideration forhydroplaning resistance. They may be moresusceptible to road hazard damage and,depending on driving conditions, may achievea tread life of less than 20,000 miles (30,000km). Even if this vehicle is equipped with Vol-vo
Page 457 of 560

WHEELS AND TIRES
455
10.
Maximum Load : Indicates the maximum
load in pounds and kilograms that can be carried by the tire. Refer to the vehicle's tireinformation placard located on the B-Pillarfor the correct tire pressure for your vehicle.
11. Treadwear, Traction, and Temperaturegrades .
12. Maximum permissible inflation pressure: the greatest amount of air pressure that should ever be put in the tire. This limit is setby the tire manufacturer.
Speed SymbolA tire's Speed Symbol (SS) indicates the maxi-mum speed for which the tire has been certifiedand should be at least equivalent to the vehicle'stop speed. Winter tires, with our without studs, are excep- tions and may use a lower SS. When winter tiresare installed, the vehicle may not be driven fasterthan the tires' SS. The vehicle's speed should always be determined by the posted speed limit and traffic and roadconditions, not the tire's SS. The following table indicates the maximum per- missible speed for each SS.
Speed Symbol
M 81 mph (130 km/h)
Q 100 mph (160 km/h)
T 118 mph (190 km/h)
H 130 mph (210 km/h)
V 149 mph (240 km/h)
W 168 mph (270 km/h)
Y 186 mph (300 km/h)
WARNING
• The wheel and tire sizes for your Volvo are specified to meet stringent stabilityand handling requirements. Unapprovedwheel/tire size combinations can nega-tively affect your vehicle's stability andhandling.
• Any damage caused by installation ofunapproved wheel/tire size combinationswill not be covered by your new vehiclewarranty. Volvo assumes no responsibilityfor death, injury, or expenses that mayresult from such installations.
Wheel (rim) designations Wheel and rim dimensions are shown in the fol- lowing table.
The vehicle has been certified with certain combi- nations of wheels and tires. The following table shows an
example of wheel
dimensions: 8Jx18x42.5. This particular wheel may not be available on your vehicle.
8 Wheel width in inches
J Rim flange profile
18 Wheel diameter in inches
42.5 Offset in mm (distance from the center of the wheel to the wheel's contact sur- face on the hub)
Related information
•Tire sidewall designations (p. 454)
Page 458 of 560
WHEELS AND TIRES
456
Tire terminology The following is a glossary of tire-related terms.
The tire suppliers may have additional markings, notes or warnings such as standard load, radialtubeless, etc.• Tire information placard
: A placard show-
ing the OE (Original Equipment) tire sizes,recommended inflation pressure, and themaximum weight the vehicle can carry.
• Tire Identification Number (TIN)
: A number
on the sidewall of each tire providing infor-mation about the tire brand and manufactur-ing plant, tire size and date of manufacturer.
• Inflation pressure
: A measure of the
amount of air in a tire.
• Standard load
: A class of P-metric or Metric
tires designed to carry a maximum load at35 psi [37 psi (2.5 bar) for Metric tires].Increasing the inflation pressure beyond thispressure will not increase the tires load car-rying capability.
• Extra load
: A class of P-metric or Metric
tires designed to carry a heavier maximumload at 41 psi [43 psi (2.9 bar) for Metrictires]. Increasing the inflation pressurebeyond this pressure will not increase thetire's load carrying capability.
• kPa
: Kilopascal, a metric unit of air pressure.
• PSI
: Pounds per square inch, a standard unit
of air pressure. •
B-pillar
: The structural member at the side
of the vehicle behind the front door.
• Bead area of the tire
: Area of the tire next
to the rim.
• Sidewall of the tire
: Area between the bead
area and the tread.
• Tread area of the tire
: Area of the perime-
ter of the tire that contacts the road whenmounted on the vehicle.
• Rim
: The metal support (wheel) for a tire or a
tire and tube assembly upon which the tirebeads are seated.
• Maximum load rating
: a figure indicating
the maximum load in pounds and kilogramsthat can be carried by the tire. This rating isestablished by the tire manufacturer.
• Maximum permissible inflation pressure
:
the greatest amount of air pressure thatshould ever be put in the tire. This limit is setby the tire manufacturer.
• Recommended tire inflation pressure
:
inflation pressure, established by Volvo,which is based on the type of tires that aremounted on a vehicle at the factory. Thisinformation can be found on the tire inflationplacard(s) located on the driver's side B-pillarand in the tire inflation table in this chapter.
• Cold tires
: The tires are considered to be
cold when they have the same temperatureas the surrounding (ambient) air. This tem- perature is normally reached after the vehiclehas been parked for at least 3 hours.
Page 462 of 560
WHEELS AND TIRES
460
CAUTION
•Snow chains should not be used on wheels larger than 19".
• Always follow the chain manufacturer'sinstallation instructions carefully. Installchains as tightly as possible andretighten periodically.
• Check local regulations regarding the useof snow chains before installing.
• Use single-sided snow chains only.
• Never exceed the chain manufacturer'sspecified maximum speed limit. (Underno circumstances should you exceed31 mph (50 km/h).
• Avoid bumps, holes or sharp turns whendriving with snow chains.
• The handling of the vehicle can beadversely affected when driving withchains. Avoid fast or sharp turns as wellas locked wheel braking.
Checking tire inflation pressure
Correct tire inflation pressure helps improve driv- ing stability, save fuel and increase the servicelife of the tires.
WARNING
• Under-inflation is the most common cause of tire failure and may result insevere tire cracking, tread separation, or"blow-out," with unexpected loss of vehi-cle control and increased risk of injury.
• Under-inflated tires reduce the load car-rying capacity of your vehicle.
Cold tiresInflation pressure should be checked when thetires are cold. The tires are considered to be cold when they have the same temperature as the sur-rounding (ambient) air. This temperature is normally reached after the vehicle has been parked for at least 3 hours. After driving a distance of approximately 1 mile (1.6 km), the tires are considered to be hot. If youhave to drive farther than this distance to pumpyour tire(s), check and record the tire pressurefirst and add the appropriate air pressure whenyou get to the pump. When weather temperature changes occur, tire inflation pressures also change. A 10-degree temperature drop causes a corresponding dropof 1 psi (7 kPa) in inflation pressure. Check yourtire pressures frequently and adjust them to theproper pressure, which can be found on the vehi-cle's tire information placard or certification label. If checking tire pressure when the tire is hot, never "bleed" or reduce air pressure. The tiresare hot from driving and it is normal for pressuresto increase above recommended cold pressures.A hot tire at or below recommended cold inflationpressure could be significantly under-inflated.
Recommended inflation pressures
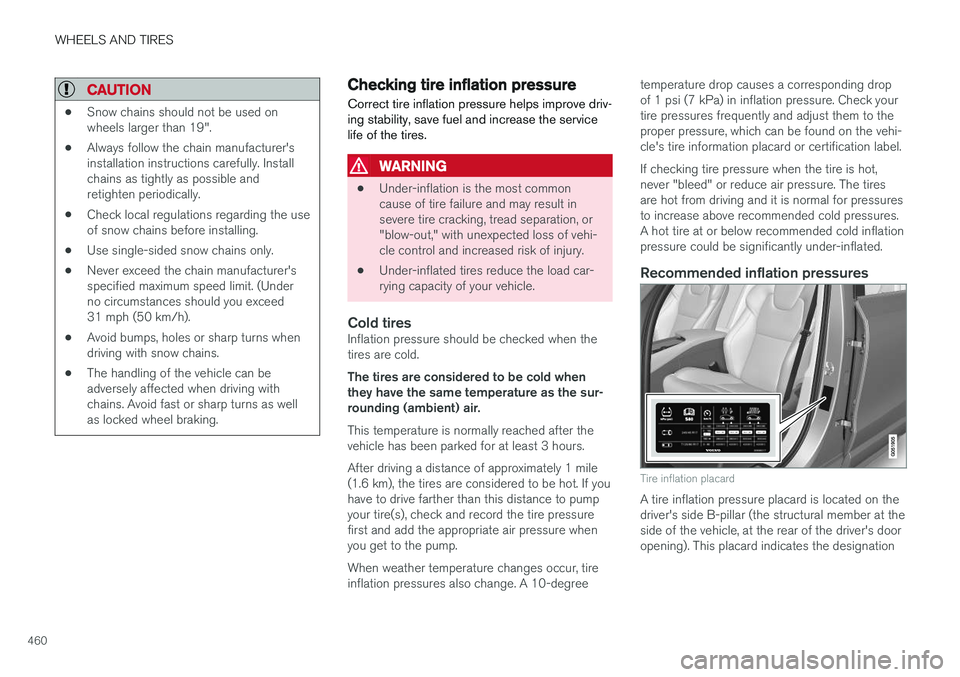
Tire inflation placard
A tire inflation pressure placard is located on the driver's side B-pillar (the structural member at theside of the vehicle, at the rear of the driver's dooropening). This placard indicates the designation
Page 471 of 560
WHEELS AND TIRES
}}
469
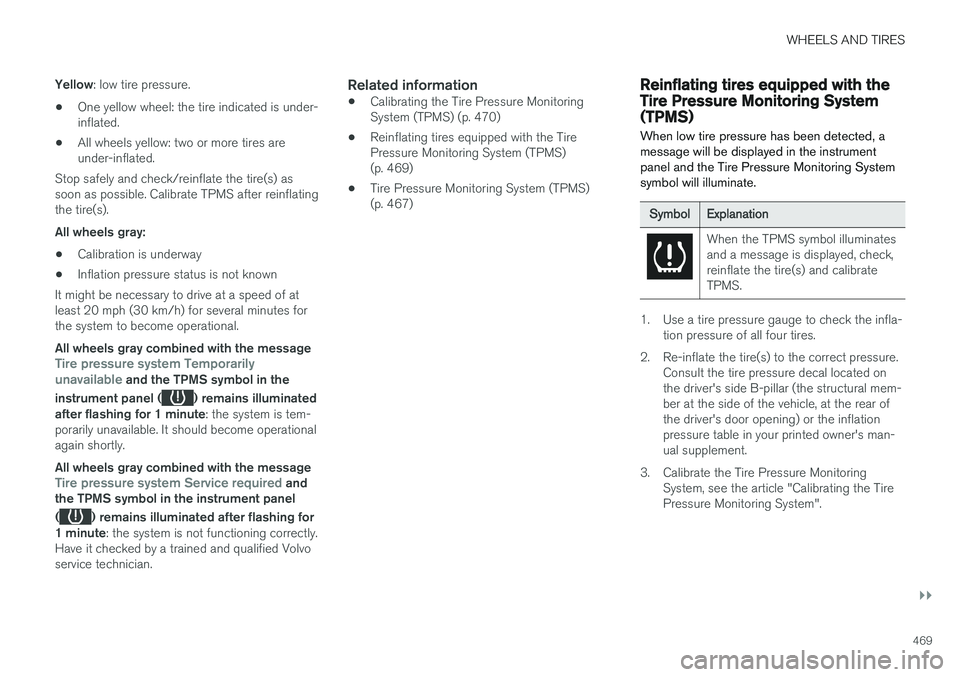
Yellow
: low tire pressure.
• One yellow wheel: the tire indicated is under- inflated.
• All wheels yellow: two or more tires areunder-inflated.
Stop safely and check/reinflate the tire(s) assoon as possible. Calibrate TPMS after reinflatingthe tire(s). All wheels gray:
• Calibration is underway
• Inflation pressure status is not known
It might be necessary to drive at a speed of at least 20 mph (30 km/h) for several minutes forthe system to become operational. All wheels gray combined with the message
Tire pressure system Temporarily
unavailable and the TPMS symbol in the
instrument panel (
) remains illuminated
after flashing for 1 minute : the system is tem-
porarily unavailable. It should become operational again shortly. All wheels gray combined with the message
Tire pressure system Service required and
the TPMS symbol in the instrument panel (
) remains illuminated after flashing for
1 minute : the system is not functioning correctly.
Have it checked by a trained and qualified Volvo service technician.
Related information
• Calibrating the Tire Pressure MonitoringSystem (TPMS) (p. 470)
• Reinflating tires equipped with the TirePressure Monitoring System (TPMS)(p. 469)
• Tire Pressure Monitoring System (TPMS)(p. 467)
Reinflating tires equipped with the Tire Pressure Monitoring System(TPMS) When low tire pressure has been detected, a message will be displayed in the instrumentpanel and the Tire Pressure Monitoring Systemsymbol will illuminate.
Symbol
Explanation
When the TPMS symbol illuminates and a message is displayed, check,reinflate the tire(s) and calibrateTPMS.
1. Use a tire pressure gauge to check the infla-
tion pressure of all four tires.
2. Re-inflate the tire(s) to the correct pressure. Consult the tire pressure decal located on the driver's side B-pillar (the structural mem-ber at the side of the vehicle, at the rear ofthe driver's door opening) or the inflationpressure table in your printed owner's man-ual supplement.
3. Calibrate the Tire Pressure Monitoring System, see the article "Calibrating the TirePressure Monitoring System".
Page 472 of 560
||
WHEELS AND TIRES
4704. In some cases, it may be necessary to drive
the vehicle for several minutes at a speed of at least 20 mph (30 km/h) to erase theTPMS telltale warning and the text message.Please be aware that the TPMS telltalewarning will not go out until the low tire pres-sure has been corrected and calibration hasbeen carried out.
NOTE
To help avoid incorrect tire inflation pressure, if possible only inflate the tires when they arecold. The tires are considered to be coldwhen they have the same temperature as thesurrounding (ambient) air. This temperature isnormally reached after the vehicle has beenparked for at least 3 hours. After driving a dis-tance of approximately 1 mile (1.6 km), thetires are considered to be warm.
CAUTION
When inflating tires, press the pump's mouth- piece straight onto the valve to help avoidbending or otherwise damaging the valve.
CAUTION
• After inflating the tires, always reinstall the valve cap to help avoid damage to thevalve from dirt, gravel, etc.
• Use plastic valve caps only. Metal capscould corrode and become difficult toremove.
WARNING
•Incorrect inflation pressure could lead to tire failure, resulting in a loss of control ofthe vehicle.
• Tire monitoring systems cannot indicatesudden tire damage caused by externalfactors (e.g., a blowout) in advance.
Related information
•Tire Pressure Monitoring System (TPMS)(p. 467)
• Checking tire inflation pressure (p. 468)
• Calibrating the Tire Pressure MonitoringSystem (TPMS) (p. 470)
Calibrating the Tire Pressure Monitoring System (TPMS)
In order for the Tire Pressure Monitoring System to work properly, tire pressure reference valuesmust be set correctly. This must be done eachtime wheels are changed or tire pressures aremodified.
Calibrating TPMSTo calibrate the system:
1. Switch off the engine.
2. Re-inflate the tire(s) to the correct pressure. Consult the tire pressure decal located on the driver's side B-pillar (the structural mem-ber at the side of the vehicle, at the rear ofthe driver's door opening) or the inflationpressure table in your printed owner's man-ual supplement.
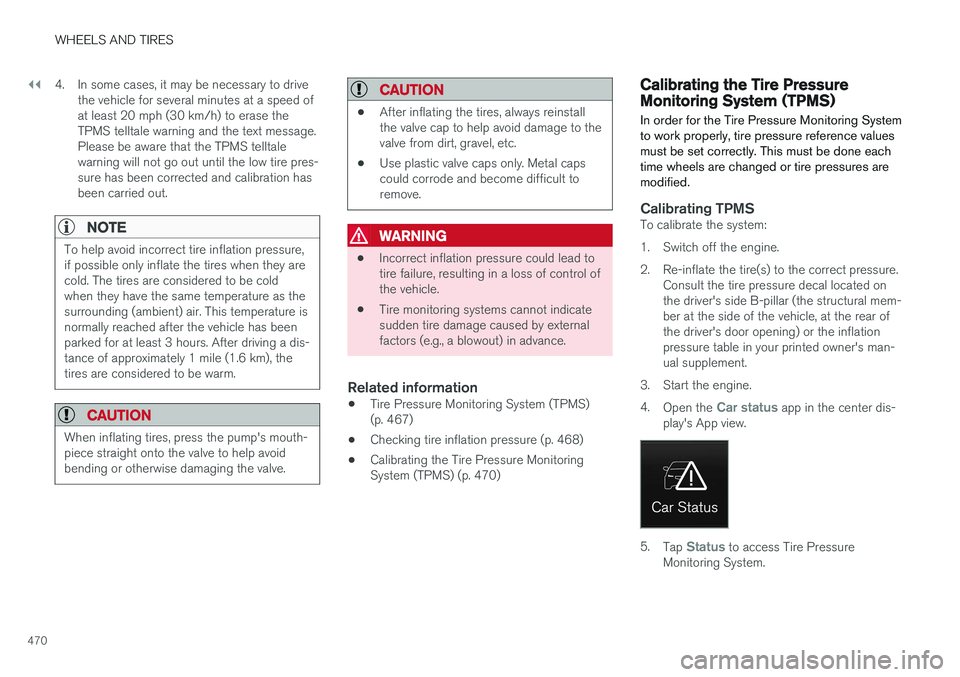
3. Start the engine. 4. Open the
Car status app in the center dis-
play's App view.
5. Tap Status to access Tire Pressure
Monitoring System.
Page 478 of 560
||
WHEELS AND TIRES
476
ice technician to have the bottle removed and properly disposed of.
WARNING
If heavy vibrations, unsteady steering behavior, or noises should occur while driving, reducespeed and park the vehicle in a safe place.Recheck the tire for bumps, cracks, or othervisible damage, and recheck its inflation pres-sure. If the pressure is below 19 psi (1.3 bar),do not continue driving. Have the vehicletowed to a trained and qualified Volvo servicetechnician.
15. Rechecking the pressure Reconnect the tire sealing system's hose to the tire's inflation valve. 16. Without starting the compressor, check the
inflation pressure on the air pressure gauge. •If the pressure is under 19 psi (1.3 bar), the puncture has not been sealed suffi-ciently and the vehicle should not bedriven. Have the vehicle towed to a trainedand qualified Volvo service technician.
• If the pressure is more than 19 psi(1.3 bar), connect the electrical wire to a12-volt socket, start the compressor andinflate the tire to the correct pressure(see the tire pressure decal on the on thedriver's side B-pillar (the structural mem-ber at the side of the vehicle, at the rearof the driver's door opening). Use the airrelease valve to release some air from thetire if necessary.
17. Switch off the compressor and disconnect the electrical wire from the 12-volt socket.Unscrew the hose from the tire
Page 536 of 560
||
SPECIFICATIONS
534
Engine oil. This label contains the recom-
mended engine oil specifications.
Vehicle Identification Number (VIN). The
VIN plate is located on the top left surface of the dashboard. The Vehicle IdentificationNumber (VIN) should always be quoted in allcorrespondence concerning your vehicle withthe retailer and when ordering parts.
Tire inflation pressures. This label indicates
the correct inflation pressures for the tires that were on the vehicle when it left the fac-tory.
Federal Motor Vehicle Safety Standards (FMVSS) specifications (USA) and Minis-try of Transport (CMVSS) standards(Canada). Your Volvo is designed to meet all
applicable safety standards, as evidenced bythe certification label on the driver's side B-pillar (the structural member at the side ofthe vehicle, at the rear of the driver's dooropening). This label also includes codes forpaint color, etc. For further information regar-ding these regulations, please consult yourVolvo retailer. U.S. models have the upperdecal; Canadian models have the lower one.