turn signal VOLVO XC90 2017 Owner´s Manual
[x] Cancel search | Manufacturer: VOLVO, Model Year: 2017, Model line: XC90, Model: VOLVO XC90 2017Pages: 560, PDF Size: 9.97 MB
Page 6 of 560
4
Using turn signals146
Passenger compartment lighting 147
Home safe lighting 150
Approach lighting 150
Messages in the instrument panel and center display 150
Handling messages in the instru-ment panel and center display 152
Handling messages stored from theinstrument panel and center display 154
Instrument panel App menu 155
Using the instrument panel App menu 156
Using the windshield wipers 157
Activating/deactivating the rain sensor 157
Windshield and headlight washers 158
Tailgate window wiper and washer 159
Steering wheel 160
Adjusting the steering wheel 161
Seats 162
Manually operated front seats 162
Power front seats *
163
Adjusting power front seats *
163
Adjusting the passenger's seat from the driver's seat * 164
Using the power seat memory function *
165
Multifunctional front seats *
166
Adjusting function settings in the multifunctional front seats *166
Rear seats 169
Adjusting the second row head restraints 170
Moving the second row seats for- ward/rearward 171
Adjusting the second row backrest tilt 172
Folding the second row backrests 173
Getting into and out of the third rowof seats 174
Folding the third row * backrests
175
Driver profiles 175
Selecting a driver profile 176
Editing a driver profile 177
Linking a remote key to a driver profile 177
Importing/exporting a driver profilefrom/to a USB flash drive 178
CLIMATE
Climate control system
182
Perceived temperature 182
Climate system sensors 183
Air quality 183
Clean Zone Interior Package (CZIP) *
184
Interior Air Quality System (IAQS) *
185
Passenger compartment air filter 185
Automatic climate control 186
Climate system controls 186
Climate system controls in the center display 187
Rear climate system controls on the tunnel console * 189
Setting the blower speed 190
Setting the temperature 191
Turning recirculation on and off 194
Defrosting windows and mirrors 194
Turning steering wheel heating * on
and off 197
Air conditioning 197
Turning seat heating * on and off
198
Turning front seat ventilation * on and off
200
Air distribution 201
Opening/closing/directing air vents 202
Adjusting air distribution 202
Page 12 of 560
10
Inflating a tire with the tire sealing system compressor477
MAINTENANCE AND SERVICING
Volvo's service program
480
System updates 482
Remote updates 483
Vehicle status 483
Booking service and repairs 484
Wi-Fi connection to a workshop 486
Climate system service 487
Start battery 488
Support battery 490
Battery symbols 491
Fuses 492
Replacing fuses 493
Fuses in the engine compartment 494
Fuses in the passenger compartment 498
Fuses in the cargo compartment 502
Replacing bulbs 505
Removing the rectangular headlight cover 507
Replacing low beam headlight bulbs 508
Replacing High Beam headlight bulbs 509
Replacing front turn signal bulbs 509
Replacing front parking light bulbs 510
Bulb specifications 511
Hoisting the vehicle 512
Opening and closing the hood 514
Engine compartment overview515
Engine oil 516
Checking and refilling engine oil 517
Windshield wipers in the service position 518
Replacing wiper blades 519
Refilling coolant 520
Refilling the windshield washer fluid reservoir 521
Cleaning the exterior 522
Cleaning the interior 525
Cleaning the center display 527
Corrosion protection 527
Paint damage 528
Touching up paint damage 529
Polishing and waxing 529
Page 96 of 560

INSTRUMENTS AND CONTROLS
* Option/accessory.
94
Instruments and controls
This overview shows the location of the primary displays, and controls/buttons/switches.
Display/function/control
Parking lights, daytime running lights, low beams, high beams, turn signals, front fog lights/corner illumination *, rear fog
lights, trip computer reset
Transmission manual shifting paddle *
Head-up-display*
Instrument panel
Wipers/washers, rain sensor *
Right-side steering wheel keypad
Display/function/control
Steering wheel adjustment
Horn
Left-side steering wheel keypad
Hood open
Display lighting, tailgate unlock, tailgate open/close*
Display/function/control
Front reading lights and courtesy lighting
Laminated panoramic roof *
Display/function/control
Ceiling console display
Manual rearview mirror auto-dim (certain markets only)
Display/function/control
Center display
Hazard warning flashers, max. defroster/ heated windshield*, media player, glove
compartment open
Gear selector
Start knob
Drive modes *
Page 130 of 560
||
INSTRUMENTS AND CONTROLS
128
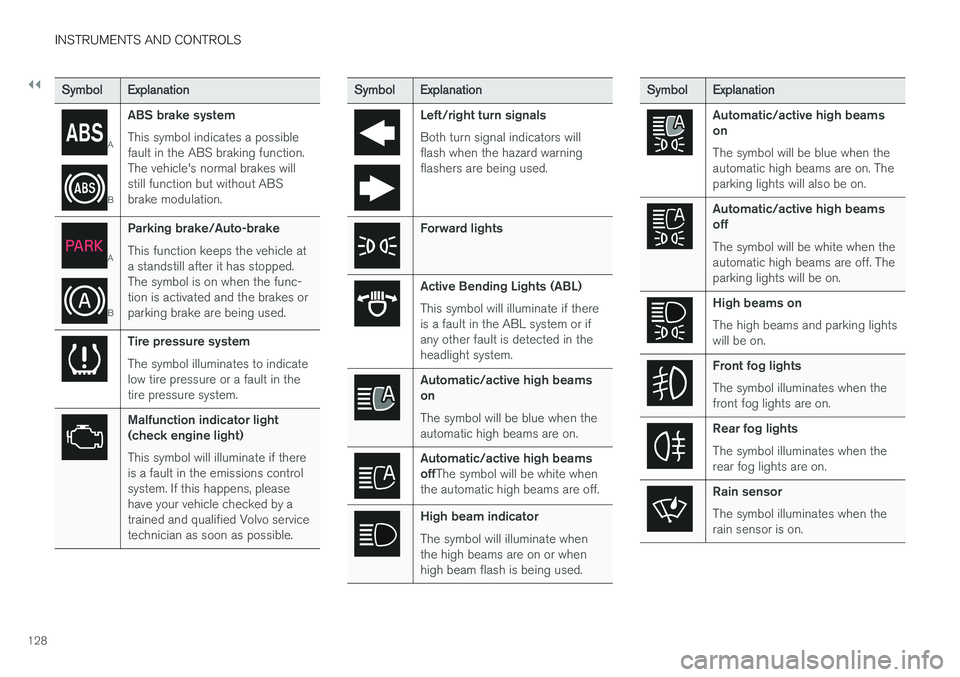
SymbolExplanation
A
BABS brake system This symbol indicates a possible fault in the ABS braking function.The vehicle's normal brakes willstill function but without ABSbrake modulation.
A
B
Parking brake/Auto-brake This function keeps the vehicle at a standstill after it has stopped.The symbol is on when the func-tion is activated and the brakes orparking brake are being used.
Tire pressure system The symbol illuminates to indicate low tire pressure or a fault in thetire pressure system.
Malfunction indicator light (check engine light) This symbol will illuminate if there is a fault in the emissions controlsystem. If this happens, pleasehave your vehicle checked by atrained and qualified Volvo servicetechnician as soon as possible.
Symbol
Explanation
Left/right turn signals Both turn signal indicators will flash when the hazard warningflashers are being used.
Forward lights
Active Bending Lights (ABL) This symbol will illuminate if there is a fault in the ABL system or ifany other fault is detected in theheadlight system.
Automatic/active high beams on The symbol will be blue when the automatic high beams are on.
Automatic/active high beams offThe symbol will be white when
the automatic high beams are off.
High beam indicator The symbol will illuminate when the high beams are on or whenhigh beam flash is being used.
Symbol Explanation
Automatic/active high beams on The symbol will be blue when the automatic high beams are on. Theparking lights will also be on.
Automatic/active high beams off The symbol will be white when the automatic high beams are off. Theparking lights will be on.
High beams on The high beams and parking lights will be on.
Front fog lights The symbol illuminates when the front fog lights are on.
Rear fog lights The symbol illuminates when the rear fog lights are on.
Rain sensor The symbol illuminates when the rain sensor is on.
Page 146 of 560
||
INSTRUMENTS AND CONTROLS
* Option/accessory.
144
NOTE
This function is only active in twilight or dark conditions, and only when the vehicle is inmotion.
Deactivating/activating the functionABL can be deactivated/activated in two ways in the center display:
Via Function view
Tap the Active Bending
Lights button.
Via settings
1. Tap Settings in Top view.
2. Tap
My CarLights and LightingExterior Lights.
3. Deselect/select
Active Bending Lights.
Related information
• Settings view (p. 109)
Front fog lights
*
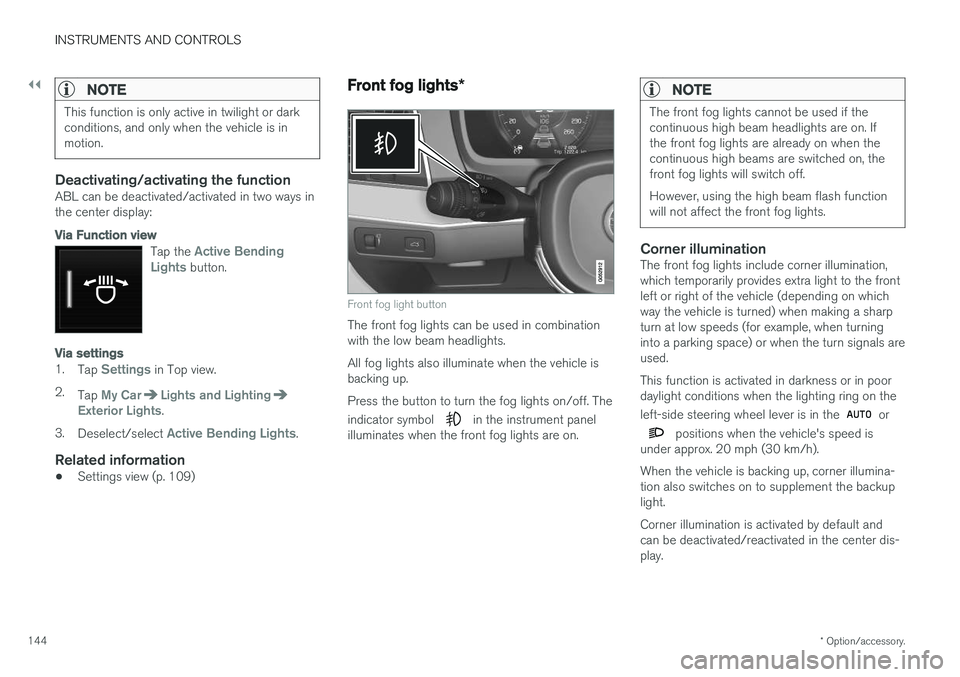
Front fog light button
The front fog lights can be used in combination with the low beam headlights. All fog lights also illuminate when the vehicle is backing up. Press the button to turn the fog lights on/off. The indicator symbol
in the instrument panel
illuminates when the front fog lights are on.
NOTE
The front fog lights cannot be used if the continuous high beam headlights are on. Ifthe front fog lights are already on when thecontinuous high beams are switched on, thefront fog lights will switch off. However, using the high beam flash function will not affect the front fog lights.
Corner illuminationThe front fog lights include corner illumination, which temporarily provides extra light to the frontleft or right of the vehicle (depending on whichway the vehicle is turned) when making a sharpturn at low speeds (for example, when turninginto a parking space) or when the turn signals areused. This function is activated in darkness or in poor daylight conditions when the lighting ring on the left-side steering wheel lever is in the
or
positions when the vehicle's speed is
under approx. 20 mph (30 km/h). When the vehicle is backing up, corner illumina- tion also switches on to supplement the backuplight. Corner illumination is activated by default and can be deactivated/reactivated in the center dis-play.
Page 148 of 560
INSTRUMENTS AND CONTROLS
* Option/accessory.
146
Brake lights The brake lights illuminate automatically when the brakes are applied.
In addition to illuminating when the brake pedal is depressed, the brake lights also illuminate whenone of the driver support systems (e.g., adaptivecruise control, City Safety or collision warning)slow the vehicle.
Related information
• Adaptive Cruise Control (ACC)
* (p. 269)
• City Safety
™ (p. 304)
• Emergency brake lights (p. 358)
Hazard warning flashers
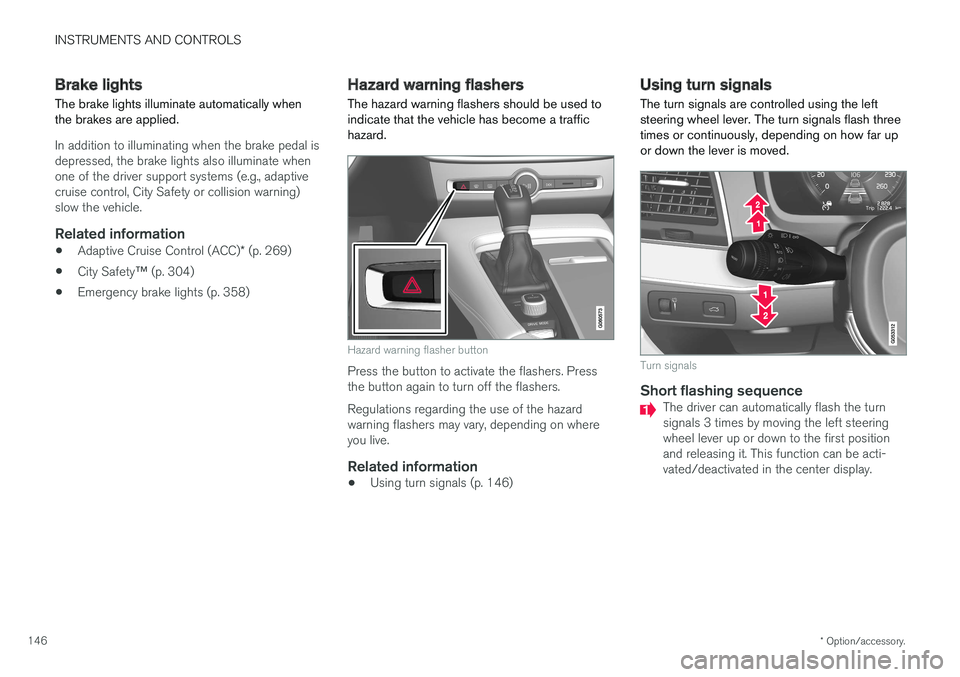
The hazard warning flashers should be used to indicate that the vehicle has become a traffichazard.
Hazard warning flasher button
Press the button to activate the flashers. Press the button again to turn off the flashers. Regulations regarding the use of the hazard warning flashers may vary, depending on whereyou live.
Related information
• Using turn signals (p. 146)
Using turn signals
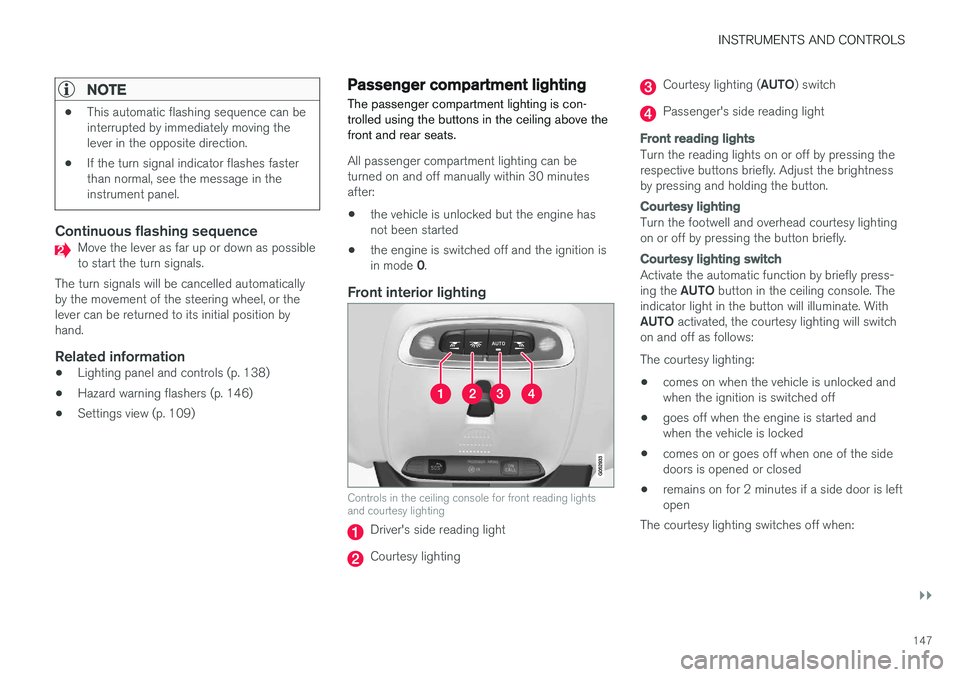
The turn signals are controlled using the left steering wheel lever. The turn signals flash threetimes or continuously, depending on how far upor down the lever is moved.
Turn signals
Short flashing sequenceThe driver can automatically flash the turn signals 3 times by moving the left steeringwheel lever up or down to the first positionand releasing it. This function can be acti-vated/deactivated in the center display.
Page 149 of 560
INSTRUMENTS AND CONTROLS
}}
147
NOTE
•This automatic flashing sequence can be interrupted by immediately moving thelever in the opposite direction.
• If the turn signal indicator flashes fasterthan normal, see the message in theinstrument panel.
Continuous flashing sequenceMove the lever as far up or down as possible to start the turn signals.
The turn signals will be cancelled automaticallyby the movement of the steering wheel, or thelever can be returned to its initial position byhand.
Related information
• Lighting panel and controls (p. 138)
• Hazard warning flashers (p. 146)
• Settings view (p. 109)
Passenger compartment lighting
The passenger compartment lighting is con- trolled using the buttons in the ceiling above thefront and rear seats.
All passenger compartment lighting can be turned on and off manually within 30 minutesafter:
• the vehicle is unlocked but the engine hasnot been started
• the engine is switched off and the ignition is in mode
0.
Front interior lighting
Controls in the ceiling console for front reading lights and courtesy lighting
Driver's side reading light
Courtesy lighting
Courtesy lighting ( AUTO) switch
Passenger's side reading light
Front reading lights
Turn the reading lights on or off by pressing the respective buttons briefly. Adjust the brightnessby pressing and holding the button.
Courtesy lighting
Turn the footwell and overhead courtesy lighting on or off by pressing the button briefly.
Courtesy lighting switch
Activate the automatic function by briefly press- ing the AUTO button in the ceiling console. The
indicator light in the button will illuminate. WithAUTO activated, the courtesy lighting will switch
on and off as follows: The courtesy lighting: • comes on when the vehicle is unlocked and when the ignition is switched off
• goes off when the engine is started andwhen the vehicle is locked
• comes on or goes off when one of the sidedoors is opened or closed
• remains on for 2 minutes if a side door is leftopen
The courtesy lighting switches off when:
Page 152 of 560
INSTRUMENTS AND CONTROLS
* Option/accessory.
150
Home safe lighting
The home safe lighting function illuminates the area in front of the vehicle in dark conditions.
This function turns on the headlights, parking lights, outer door handle lights * and license plate
lights for a set amount of time. The length of time that these lights remain illumi- nated can be set in the center display. Thedefault setting is 30 seconds. To activate home safe lighting:1. Switch off the ignition (mode 0).
2. Push the turn signal lever as far as possible towards the dashboard and release it.
3. Exit the vehicle and lock the doors.
Related information
• Using the center display (p. 44)
• Settings view (p. 109)
• Ignition modes (p. 380)
Approach lighting
Approach lighting (the parking lights, outer door handle lights *, license plate lighting, courtesy
lighting and footwell lighting) can be activated to provide light as you walk toward the vehicle.
To use this feature, deselect/select Welcome
Light in the center display's menu system.
If this function has been selected in the menu, it
is activated by pressing the unlock button on the remote key as you approach the vehicle .
If a door is opened while the function is activated, the lighting in the outer door handle * and cour-
tesy lighting will remain illuminated for a some- what longer period of time.
Related information
• Settings view (p. 109)
• Home safe lighting (p. 150)
• Remote key (p. 227)
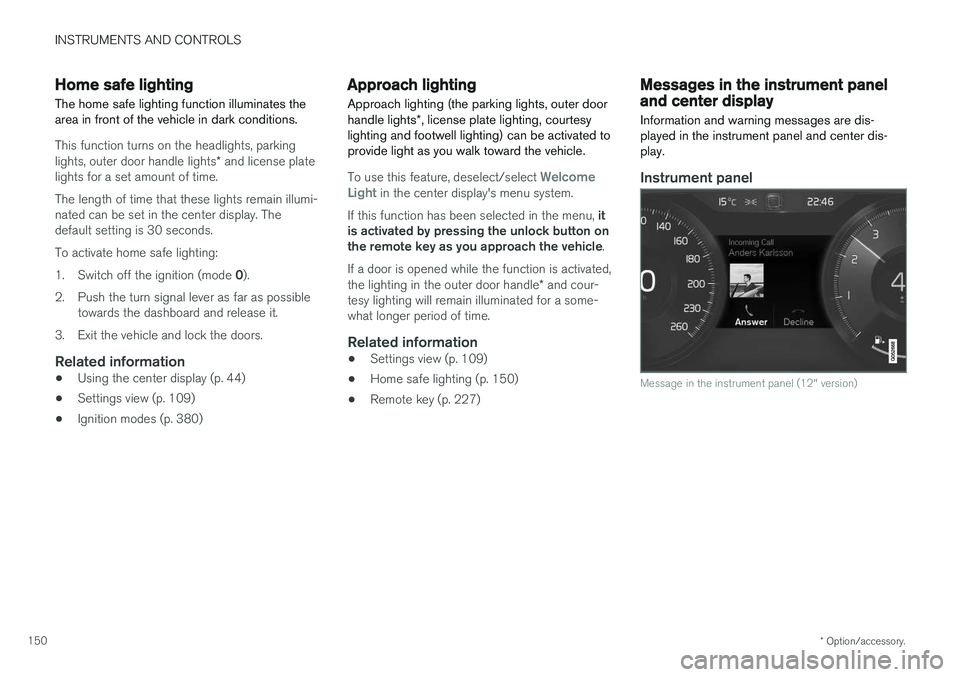
Messages in the instrument panel and center display Information and warning messages are dis- played in the instrument panel and center dis-play.
Instrument panel
Message in the instrument panel (12" version)
Page 230 of 560
||
LOCKS AND ALARM
* Option/accessory.
228 Each of the remote keys provided with the vehicle can be linked to a driver profile containing uniquepersonal settings that will be applied when thatparticular key is used. See also the article "Driverprofile" for additional information.
NOTE
Avoid placing the remote key closer than approx. (4-6 in.) (10-15 cm) to any metallicobjects or electronic devices such as cellphones, tablets, laptops or chargers.
If interference persists, unlock the vehicle with the detachable key blade and place the remotekey in the backup key reader in the tunnel con-sole cup holder to disarm the alarm.
WARNING
Always remove the remote key from the pas- senger compartment when leaving the vehicle and ensure that the ignition in mode
0, espe-
cially if there are children in the vehicle.
Key TagIn addition to the two remote keys provided, a smaller third key, called a Key Tag, is also provi-ded for vehicles equipped with the optionalPassive Entry system. This key functions in the same way as a standardremote key but does not have a detachable keyblade and its battery cannot be replaced; a newKey Tag has to be ordered.
Ordering new keysTwo remote keys are provided with the vehicle (a Key Tag
2
is also included for vehicles equipped
with the optional Passive Entry system). Addi- tional keys (a total of 12) can be ordered andused with the vehicle.
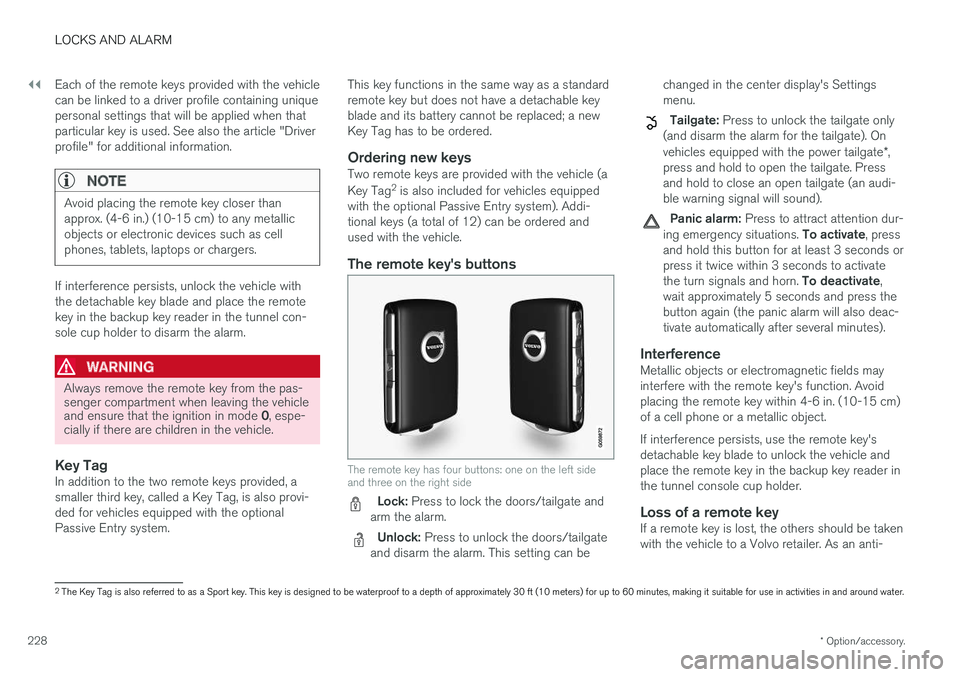
The remote key's buttons
The remote key has four buttons: one on the left side and three on the right side
Lock: Press to lock the doors/tailgate and
arm the alarm.
Unlock: Press to unlock the doors/tailgate
and disarm the alarm. This setting can be changed in the center display's Settings menu.
Tailgate: Press to unlock the tailgate only
(and disarm the alarm for the tailgate). On vehicles equipped with the power tailgate *,
press and hold to open the tailgate. Press and hold to close an open tailgate (an audi-ble warning signal will sound).
Panic alarm: Press to attract attention dur-
ing emergency situations. To activate, press
and hold this button for at least 3 seconds or press it twice within 3 seconds to activate the turn signals and horn. To deactivate,
wait approximately 5 seconds and press the button again (the panic alarm will also deac-tivate automatically after several minutes).
InterferenceMetallic objects or electromagnetic fields mayinterfere with the remote key's function. Avoidplacing the remote key within 4-6 in. (10-15 cm)of a cell phone or a metallic object. If interference persists, use the remote key's detachable key blade to unlock the vehicle andplace the remote key in the backup key reader inthe tunnel console cup holder.
Loss of a remote keyIf a remote key is lost, the others should be takenwith the vehicle to a Volvo retailer. As an anti-
2 The Key Tag is also referred to as a Sport key. This key is designed to be waterproof to a depth of approximately 30 ft (10 meters) for up to 60 minutes, making it suitable for use in activities in and around water.
Page 231 of 560
LOCKS AND ALARM
229
theft measure, the code of the lost remote key must be erased from the system. The number ofregistered keys for the vehicle can be found inthe center display's Top view.
NOTE
Additional or duplicate remote control keys can be obtained from any authorized Volvoretailer. You can also obtain additional or duplicate remote control keys from certain independentrepair facilities and locksmiths that are quali-fied to make remote control keys. Each keymust be programmed to work with your vehi-cle. A list of independent repair facilities and/or locksmiths known to Volvo that can cut andcode replacement keys can be found: •
on the Volvo website, www.volvocars.com/us
• by calling Volvo Customer Care at1-800-458-1552.
Related information
•
Remote key's range (p. 229)
• Detachable key blade (p. 231)
• Changing the remote key's battery (p. 225)
• Driver profiles (p. 175)
Remote key's range
In order to function correctly, the remote key must be within a certain distance of the vehicle.
Manual useThe remote key's functions, such as locking and unlocking the vehicle, which are activated by pressing the
or buttons, have a range of
approx. 65 feet (20 meters) from the vehicle. Buildings or other obstacles may interfere with the function of the remote key. The vehicle canalso be locked or unlocked with the key blade. If the vehicle's locks do not react, move closer and try again.
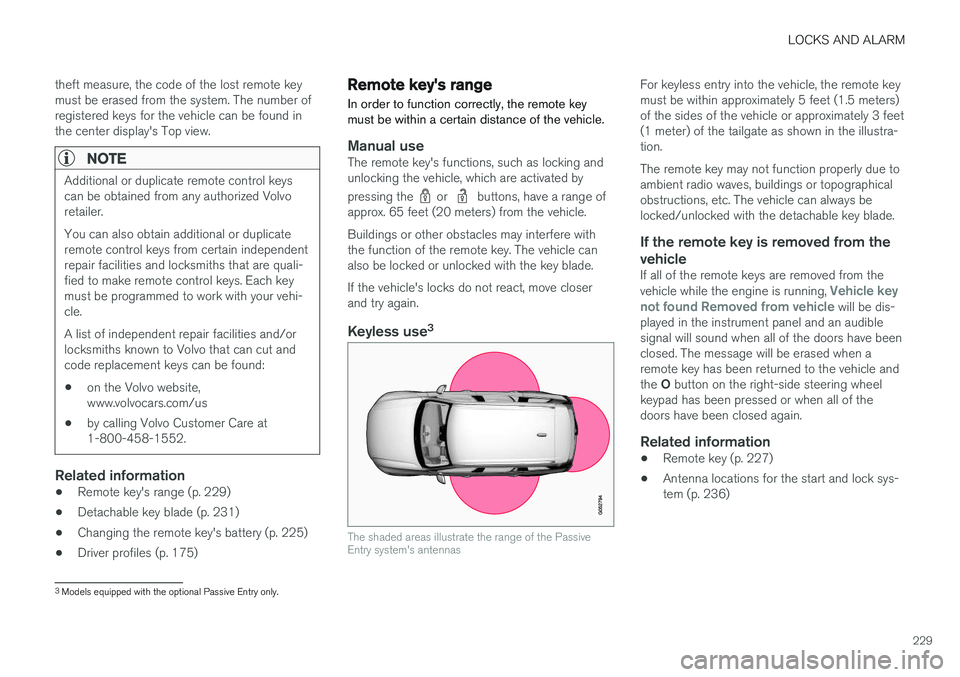
Keyless use 3
The shaded areas illustrate the range of the Passive Entry system's antennas
For keyless entry into the vehicle, the remote key must be within approximately 5 feet (1.5 meters)of the sides of the vehicle or approximately 3 feet(1 meter) of the tailgate as shown in the illustra-tion. The remote key may not function properly due to ambient radio waves, buildings or topographicalobstructions, etc. The vehicle can always belocked/unlocked with the detachable key blade.
If the remote key is removed from the vehicle
If all of the remote keys are removed from the vehicle while the engine is running, Vehicle key
not found Removed from vehicle will be dis-
played in the instrument panel and an audible signal will sound when all of the doors have beenclosed. The message will be erased when aremote key has been returned to the vehicle and the O button on the right-side steering wheel
keypad has been pressed or when all of the doors have been closed again.
Related information
• Remote key (p. 227)
• Antenna locations for the start and lock sys-tem (p. 236)
3
Models equipped with the optional Passive Entry only.