window VOLVO XC90 RECHARGE 2021 Quick Guide
[x] Cancel search | Manufacturer: VOLVO, Model Year: 2021, Model line: XC90 RECHARGE, Model: VOLVO XC90 RECHARGE 2021Pages: 48, PDF Size: 6.72 MB
Page 9 of 48

LOCKING/UNLOCKING Remote key
Press briefly to lock doors, tailgate and fuel filler door and arm the alarm. A long press closes all side windows simultaneously.
Press briefly to unlock doors and tailgate and disarm the alarm. Press and hold to open all door windows at the same time.
Press briefly to unlock and disarm only the tailgate. Press and hold to open or close the power* tailgate.
The panic alarm activates the turn signals and horn to attract attention in emergency situations. To activate, press and holdthe button for at least three seconds or press the button twicewithin three seconds. The function can be switched off usingthe same button after it has been activated for at least five sec-onds. Otherwise, it will switch off automatically after threeminutes.
Charger door Make sure the vehicle is unlocked and the ignition is off before con- necting or disconnecting the charging cable.
1. Press the rear section of the door and release.
2. Open the charger door.
3. Remove the charging socket's protective cover and secure it in the holder inside the charger door.
The charging cable's coupler will lock into the charging socket when charging has started. Charging is interrupted if the vehicle isunlocked but will restart after a short time if the cable is not dis-connected. Private (valet) locking Private locking locks the tailgate and the glove compartment, which can be practical when, for example, the vehicle is taken in forservice or at a hotel.
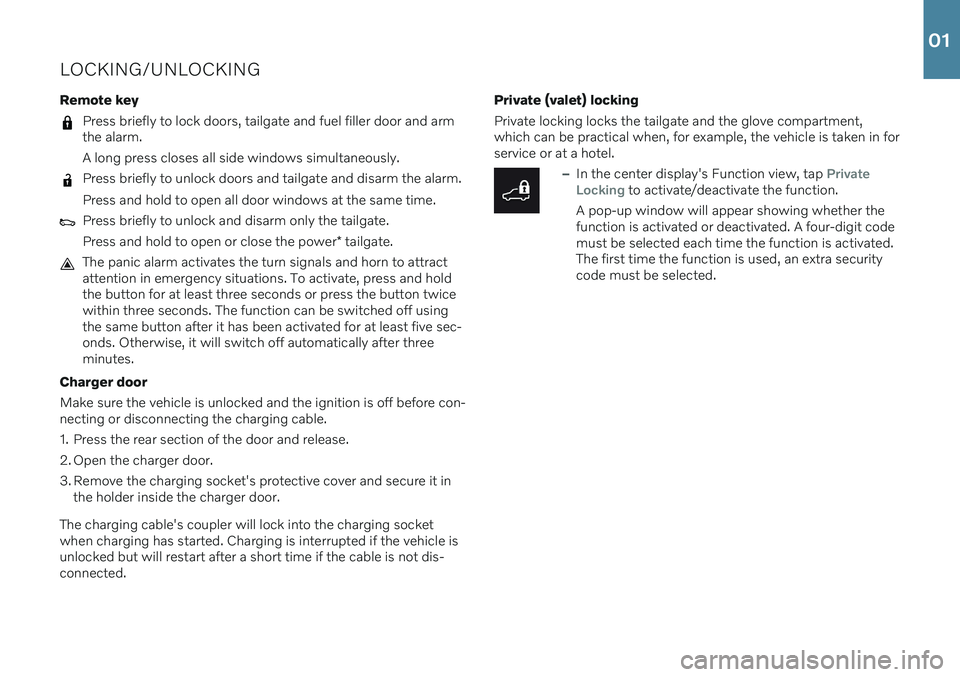
–In the center display's Function view, tap Private
Locking to activate/deactivate the function.
A pop-up window will appear showing whether the function is activated or deactivated. A four-digit codemust be selected each time the function is activated.The first time the function is used, an extra securitycode must be selected.
01
Page 18 of 48

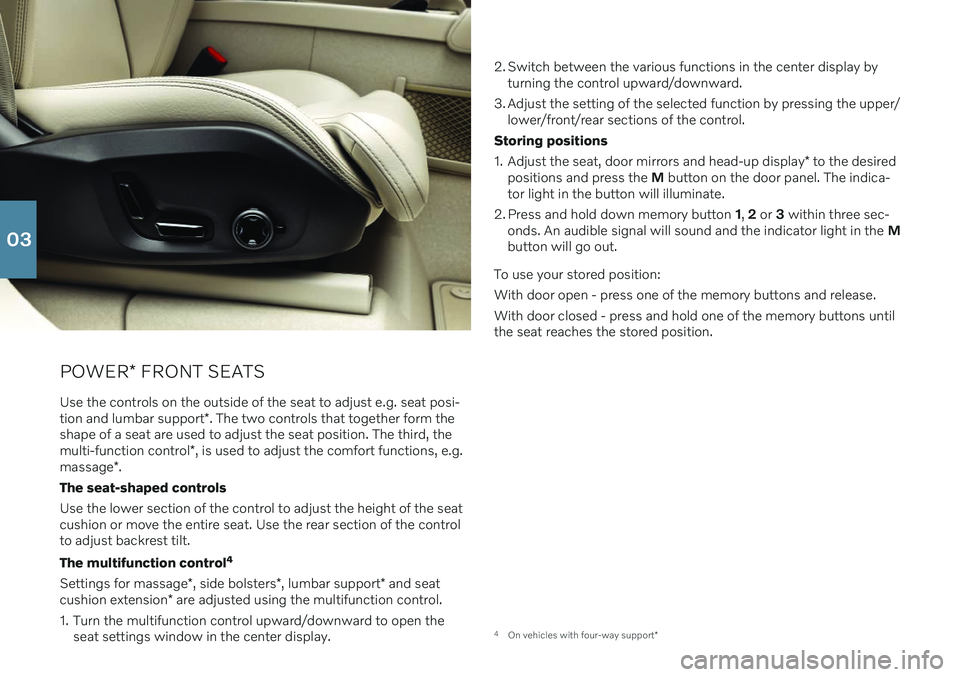
POWER* FRONT SEATS
Use the controls on the outside of the seat to adjust e.g. seat posi- tion and lumbar support *. The two controls that together form the
shape of a seat are used to adjust the seat position. The third, themulti-function control *, is used to adjust the comfort functions, e.g.
massage *.
The seat-shaped controls Use the lower section of the control to adjust the height of the seat cushion or move the entire seat. Use the rear section of the controlto adjust backrest tilt. The multifunction control 4
Settings for massage *, side bolsters *, lumbar support * and seat
cushion extension * are adjusted using the multifunction control.
1. Turn the multifunction control upward/downward to open the seat settings window in the center display. 2. Switch between the various functions in the center display by
turning the control upward/downward.
3. Adjust the setting of the selected function by pressing the upper/ lower/front/rear sections of the control.
Storing positions 1. Adjust the seat, door mirrors and head-up display * to the desired
positions and press the M button on the door panel. The indica-
tor light in the button will illuminate.
2. Press and hold down memory button 1, 2 or 3 within three sec-
onds. An audible signal will sound and the indicator light in the M
button will go out.
To use your stored position:With door open - press one of the memory buttons and release. With door closed - press and hold one of the memory buttons until the seat reaches the stored position.
4 On vehicles with four-way support *
03
Page 23 of 48

RIGHT-SIDE STEERING WHEEL LEVERThe right-side steering wheel lever controls the wipers and the rain sensor.
–Move the lever downward for a single sweep of the windshield.
–Move the lever upward in steps for intermittent, normal speed and high speed.
–Use the lever's thumb wheel to adjust intermittent wiping speed.
–Move the lever toward the steering wheel to start the windshield and headlight washers and toward the dashboard to start therear window washers.
Press the rain sensor button to activate/deactivate the rain sensor. The windshield wiper lever should be in position 0, or
in the single swipe position. The rain sensor monitors theamount of water on the windshield and starts the windshieldwipers automatically when needed. Turn the thumb wheelupward/downward for higher/lower sensitivity.
Press for rear window intermittent wiping.
Press for continuous rear window wiper speed.
Use the windshield wipers service position when you e.g. replace, wash or lift the wiper blade. Tap
Wiper Service
Position in the center display's function view to activate or
deactivate service position.
03
Page 33 of 48

FUNCTION VIEW AND APP VIEW
Function view In home view, swipe the screen from left to right 11
to access func-
tion view. From here, you can activate/deactivate various vehicle functions, such as
Lane Keeping Aid and Park Assist* . Activate/
deactivate a function by tapping its symbol. Some functions open in their own windows. App view In home view, swipe from right to left 11
to access app view. This
displays the vehicle's factory-installed apps as well as any apps you have downloaded and installed.
Managing and updating apps and systems
You can update many of the vehicle's systems inDownload Center in app view. The vehicle must be con-
nected to the Internet in order for this to be possible. In
Download Center, you can:
Download apps - Tap New apps and select the desired app. SelectInstall to download the app.
Update apps - Tap
Install all to update all apps. Or tapApplication updates to display a list of available updates. Select
the desired app and tap Install.
Uninstall apps - Tap
Application updates and select the desired
app. Tap
Uninstall to delete the app.
Update system software - Tap
System updates to display a list of
updates that can be installed in the vehicle. Tap Install all at the
bottom of the list to update all software or Install to update specific
software. If you do not want a list, select Install all near theSystem updates button.
Moving icons The apps and buttons for vehicle functions in app view and function view can be moved to customize these views. 1. Press and hold an app or button.
2. Drag the app or button to the desired location in the view and
release it.
11 Applies for left-hand drive vehicles. For right-hand drive vehicles, swipe the opposite way.
04
Page 41 of 48

PURER DRIVING PLEASURE
Planning your trips and driving economically can help increase driv- ing range using the electric motor while simultaneously reducingyour environmental impact. The ability to maximize driving rangevaries depending on the circumstances and conditions in which thevehicle is driven. Some factors you can influence and others youcannot. Greatest range is achieved during very favorable conditionswhen all factors have a positive impact. Plan your trips by always
Charging the hybrid battery before driving.
Preconditioning the vehicle.
Drive economically by
Activating the Pure drive mode.
Reducing the temperature in the passenger compartment and reducing blower speed.
Maintaining a consistent speed and planning ahead to help mini- mize braking.
Maintaining the recommended tire inflation pressure and check- ing it regularly.
Keeping the windows closed while driving.
Factors you cannot influence
The traffic situation.
Road condition and topography.
Ambient temperature and headwinds.
See your Owner's Manual for more tips on increasing driving range and driving economically.
05
Page 44 of 48

SUPPLEMENTARY INFORMATION
The Owner's Manual and other manuals contain safety instructions and all warning, caution andnote texts, which must be read. Some functionsonly apply to certain markets.
WARNING
GETTING STARTED Volvo On Call – The system's services only
work in areas in which Volvo On Call's partners have cellular coverage and in markets whereVolvo On Call is available. Just as with cellular phones, atmospheric distur- bances or areas with fewer transmitters, e.g.sparsely populated rural areas, can make con-nection impossible. For warning, caution and note texts for Volvo On Call services, see the Owner's Manual andthe applicable agreement for the Volvo On Callsubscription. Sensus Navigation * – Direct all your attention
to the road and make sure that your concentra- tion is focused on driving. Follow applicable traf-fic laws and use good judgment while driving.Road conditions can be affected by weather orseason, which may make certain recommenda-tions less reliable. EXTERIOR OVERVIEW Tailgate – Bear in mind the risk of pinching
when opening/closing the tailgate. Make sure that no one is in the path of the tailgate whocould be injured by its movement. Always oper-ate the tailgate with caution. Keyless locking/unlocking * – Check that chil-
dren or other passengers are not at risk of crush- ing when all the windows are closed with key- less closing *.
INTERIOR OVERVIEW Passenger airbag – Volvo recommends that all
occupants (adults and children) shorter than 140 cm (4 foot 7 inches) be seated in the rear seat of any vehicle with a front passenger sideairbag and be properly restrained for their heightand weight. Occupant Weight Sensor (OWS)
No objects that add to the total weight on the seat should be placed on the front passenger'sseat. If a child is seated in the front passeng-er's seat with any additional weight, this extraweight could cause the OWS system to ena-ble the airbag, which might cause it to deployin the event of a collision, thereby injuring thechild.
The seat belt should never be wrapped aroundan object on the front passenger's seat. Thiscould interfere with the OWS system's func-tion.
The front passenger's seat belt should neverbe used in a way that exerts more pressure onthe passenger than normal. This couldincrease the pressure exerted on the weightsensor by a child, and could result in the air-bag being enabled, which might cause it todeploy in the event of a collision, thereby injur-ing the child.
Always take the remote key with you when you
leave the vehicle. Make sure the ignition is inmode 0, especially if there are children in the
vehicle. Always apply the parking brake when parking
on an incline. Selecting a gear or putting the automatic transmission in P may not be suffi-
cient to keep the vehicle stationary in all situa-tions. CHARGING THE HYBRID BATTERY
Charging the hybrid battery may only be done from approved, grounded 120/240 V outlets(AC, alternating current). If the electrical circuitor electrical socket's capacity is not known, leta licensed electrician inspect the electrical cir-cuit's capacity. Using a charge level thatexceeds the electrical circuit's or electricaloutlet's capacity may start a fire or damagethe electrical circuit.
The charging cable must be grounded when inuse. It is equipped with a cord with a ground- ing conductor and a grounding plug. The plugmust be inserted into an appropriate outletthat is properly installed and grounded inaccordance with all local codes and ordinan-ces and is not damaged in any way.
Children should be supervised when in thevicinity of the charging cable when it is plug-ged in.
The charging cable and its components mustnot be rinsed or immersed in water.
High voltage is present in your electric meterhousing and power distribution service panel.Contact with high voltage can cause death orserious personal injury.
Do not use the charging cable if it is damagedin any way. A damaged or malfunctioningcharging cable may only be repaired by aworkshop – an authorized Volvo workshop isrecommended.
Always position the charging cable so that itwill not be driven over, stepped on, trippedover or otherwise damaged, or cause personalinjury.
Disconnect the charger from the wall outletbefore cleaning it.
Never connect the charging cable to an exten-sion cord or a multiple plug socket.
Avoid visibly worn or damaged electrical out-lets since they may lead to fire damage and/orpersonal injury if used.
Do not use one or more adapters between thecharging cable and the electric outlet.
Do not use an external timer between thecharging cable and the electrical outlet.
Also, refer to the manufacturer's instructions forusing the charging cable and its components. POWER FRONT SEATS Do not adjust the seat while driving. The seat must be positioned in a way that allows thedriver to fully depress the brake pedal. Adjust theseat as far rearward as comfort and controlallow. After adjusting the seat, make sure that itis securely locked into position before starting todrive. FOLDING DOWN THE REAR SEAT BACK- RESTS Make sure the backrest is correctly engaged before folding up and down and that the headrestraint is correctly engaged after folding up.The head restraints on the outboard second-rowseats must always be folded up when there are passengers in the third row of seats
*.
CONNECTIONS Do not use accessories with large or heavy plugs – they could damage the outlet or comeloose while you are driving.
Do not use accessories that could cause dis-ruptions to e.g. the vehicle's radio receiver orelectrical system.
Position the accessory so that there is no riskof it injuring the driver or passengers in theevent of heavy braking or a collision.
Pay attention to connected accessories asthey can generate heat that could burn pas-sengers or the interior.
DRIVER SUPPORT The vehicle's driver support systems are designed to offer supplementary assistance tothe driver, but cannot handle all situations in alltraffic, weather and road conditions. They arenever a substitute for the driver's attention andjudgment. The driver is always responsible forensuring the vehicle is driven in a safe manner,at the appropriate speed, with an appropriatedistance to other vehicles, and in accordancewith current traffic rules and regulations. Thedriver always has ultimate responsibility forbraking and steering the vehicle. Before driving your vehicle, read all sections of the Owner's Manual concerning driver supportsystems in the vehicle. PARKING ASSISTANCE SYSTEMS Park Assist Pilot is a supplementary driver sup-
port but cannot handle all situations. The func- tion is only intended to assist the driver whenparallel and perpendicular parking. The driverbears full responsibility for parking the vehiclesafely and braking when necessary. Objectslocated far into the parking space may not be
07
Page 45 of 48

detected when scanning. The driver is always responsible for assessing whether the spacesuggested by Park Assist Pilot is suitable forparking. Park Assist Camera is supplementary driver
support intended to assist when parking the vehicle. The function is never a substitute for thedriver's attention and judgment. The camerashave dead/blind spots where objects cannot bedetected. Pay particular attention to people andanimals near the vehicle. Bear in mind that thefront end of the vehicle may swing out towardsoncoming traffic during the parking maneuver. Before driving your vehicle, read all sections of the Owner's Manual concerning driver supportsystems in the vehicle. VOICE COMMANDS The driver is always responsible for ensuring that the vehicle is operated in a safe manner and thatall applicable traffic regulations are followed.
CAUTION
INTERIOR OVERVIEW Start knob – The vehicle cannot be started if the
charging cable is still plugged in. Make sure that the charging cable is removed from the chargingsocket before starting the vehicle. Do not use the OFF ROAD drive mode when
towing a trailer without an electrical connection. This could result in damage to the pneumaticsuspension system's bellows. The information is projected from a head-up
display unit * located in the dashboard. To help
prevent damage to the display unit's glass cover, do not place any objects on the glass and pre-vent objects from falling onto it. Wireless phone charger Keep cellular phones
and charger stations away from other objects while charging to help avoid overheating. Do notplace cards with NFC (Near Field Communica-tion), e.g. debit cards for contactless payment,next to the phone. This type of card could bedestroyed during charging. CENTER DISPLAY When cleaning
the center display, use a micro-
fiber cloth that is free from sand and similar deb- ris. When cleaning the center display, apply onlylight pressure to the display. Pressing too hardcould damage the display. Do not spray liquid or corrosive chemicals directly onto the center display. Do not use win-dow cleaners, cleaning agents, aerosol sprays,solvents, alcohol, ammonia or detergents thatcontain abrasives. Never use abrasive cloths,paper towels or tissue paper, as these mayscratch the display. CHARGING THE HYBRID BATTERY Charging cable - Never connect the charging
cable if there is a risk of a thunderstorm or there is lightning. Never detach the charging cablefrom the 120/240-volt outlet while charging isin progress – the 120/240-volt outlet could bedamaged in such circumstances. Always inter-rupt charging first and then disconnect thecharging cable – first from the vehicle's chargingsocket and then from the 120/240 V outlet. Power strips, extension cords, surge protectors or similar devices must not be used togetherwith the charging cable since this may involve arisk of fire, electric shocks, etc. An adapter maynot be used between the 120/240-volt outletand the charging cable. Control unit – Avoid exposing the control unit
and its plug to direct sunlight. In such cases, the overheating protection in the plug could reduceor cut off charging of the hybrid battery. Check that the 120/240-volt outlet has a power supply sufficient for charging electric vehicles –if uncertain, you should have the outlet checkedby a professional. Wipe the charging cable with a clean cloth lightly moistened with water or a mild detergent.Do not use chemicals or solvents. Do not sub-merge the charging cable. Only use the charging cable provided with your vehicle or a replacement cable purchased from aVolvo retailer.
Check the capacity of the socket.
Other electronic equipment connected on thesame fuse circuit must be disconnected if thetotal load is exceeded.
Do not connect the charging cable if thesocket is damaged.
Make sure that the fuse to the wall outlet canhandle the current specified for the chargingcable.
FOLDING DOWN THE REAR SEAT BACK- RESTS When the backrest is folded down, make sure there are no objects in the rear seat, and the seatbelts are not buckled. The integrated booster cushion */armrest * on the center seating position
must be in the stowed position. RIGHT-SIDE STEERING WHEEL LEVER Wiper blades in service position - Before plac-
ing the wipers in service position, ensure that they have not frozen to the windshield. If thewiper arms in service position are raised fromthe windshield, they must be folded backagainst the windshield before activating wiping,washing or rain sensor as well as before depar-ture. This is to prevent scratching the paint onthe hood. CONNECTIONS Electrical outlet – Each 12-volt socket can sup-
ply a maximum of 120 W (10 A).
NOTE
EXTERIOR OVERVIEW Foot-operated tailgate - There is a risk of
reduced or lost function if there are large amounts of snow, ice, dirt, etc. on the rearbumper. Make sure to keep the bumper clean. Please note that the system could be inadver- tently activated in a car wash or similar if theremote key is within range. Setting maximum opening height – If the sys-
tem has been working continuously for a pro- longed period of time, it will be switched off toavoid overload. It can be used again afterapproximately 2 minutes Electromagnetic fields and obstructing objectsmay interfere with
remote key functions . Avoid
storing the remote key near metal objects orelectronic devices, e.g. cell phones, tablets, lap-tops or chargers – preferably no closer than10-15 cm (4-6 in.). INTERIOR OVERVIEW OFF ROAD drive mode is not designed to be
used for normal street driving. With a cold start , idling speed may be consider-
ably higher than normal for certain engine types. This is done to get the emissions system up tonormal operating temperature as quickly as pos-sible, which minimizes exhaust emissions andprotects the environment. Head-up display * – When a City Safety function
is activated, the information in the head-up dis- play will be replaced by a City Safety graphic.This graphic will illuminate even if the head-updisplay is turned off. The driver's ability to see information in the head-up display may be impeded by the use ofe.g. polarizing sunglasses, a driving posture inwhich the driver is not centered in the seat,objects on the display unit's glass cover and/orunfavorable lighting conditions. People with cer-tain types of vision problems may experienceheadaches or eye strain when using the head-updisplay. STEERING WHEEL Trip computer - Calculation of driving range
may vary if your driving style changes. PASSENGER COMPARTMENT CLIMATE Heating/cooling cannot be accelerated by choosing a higher/lower temperature than thedesired temperature. Preconditioning is only available when the vehi-
cle is connected to an electrical outlet. A charg- ing post that is not always active, for examplebecause of a timer, can cause loss of function forpreconditioning. If the vehicle is not connectedto an electrical socket it is still possible in awarm climate to achieve brief cooling of the pas-senger compartment by direct starting precondi-tioning. The vehicle doors and windows should
07