suspension VOLVO XC90 T8 2016 Owner´s Manual
[x] Cancel search | Manufacturer: VOLVO, Model Year: 2016, Model line: XC90 T8, Model: VOLVO XC90 T8 2016Pages: 546, PDF Size: 10.26 MB
Page 10 of 546
8
Driving with a trailer367
Detachable trailer hitch 368
Trailer Stability Assist (TSA) 369
Ignition modes 370
Battery drain 372
Starting the engine 372
Turning the engine off 374
Driving systems 374
Hybrid battery charging cable 375
Hybrid charging cable circuit breaker 377
Hybrid-related symbols and messages 378
Preparations for charging the hybrid battery 380
Stopping hybrid battery charging 381
Initiating hybrid battery charging 382
Charging the hybrid battery 383
Hybrid battery charge status 385
Charger status indicators 387
Hybrid battery charging current 387
Long-term storage of a vehicle witha hybrid battery 388
Using the electric motor in city driving 389
Drive modes 390
ECO drive mode 394
Automatic transmission 395
Shiftlock396
Gear shift indicator 396
Gear selector positions 396
Steering wheel paddles *
398
Low Speed Control (LSC) 399
All Wheel Drive (AWD) 400
Suspension and leveling control *
400
INFOTAINMENT
The infotainment system
404
Sound settings 404
Radio 405
Radio settings 405
RBDS radio 406
Changing and searching for radio stations 406
HD Radio ™reception
407
Switching HD Radio on and off 409
HD Radio sub-channels 409
HD Radio limitations 410
SiriusXM ®
Satellite radio * 411
Using SiriusXM ®
Satellite radio radio *412
SiriusXM ®
Satellite radio * settings 413
Phone 414
Pairing a cell phone 415
Connecting/disconnecting a cell phone 416
Handling phone calls 417
Handling text messages 418
Phone settings 419
Text message settings 420
Connecting a Bluetooth ®
device 420
Connecting a device via theAUX/USB socket 420
Media player 421
Page 115 of 546
INSTRUMENTS AND CONTROLS
* Option/accessory, for more information, see Introduction.113
Sub-categories
Electric Parking Brake
Seats
Wipers
Suspension
Exterior SoundA
A
XC90 T8 Plug-in Hybrid, certain markets only.
Sound
Sub-categories
Sound Experience*
Tone
Balance
System Volumes
Navigation
Sub-categories
Map
Route
Traffic
Guidance
System
Media
Sub-categories
AM/FM RadioA
SiriusXM
Gracenote ®
Video
A
AM radio is not available in hybrid models.
Communication
Sub-categories
Phone
Text Messages
Bluetooth
Wi-Fi
Vehicle Wi-Fi Hotspot
Vehicle Modem Internet
Volvo On Call
Volvo Service Networks
ClimateThe main category Climate has no sub-catego-
ries.
System
Sub-categories
Date & Time
Language
Keyboard Layouts
Voice Control
Units
Storage
Software Updates
Factory reset
Services
Related information
• Settings view (p. 111)
• Changing system settings in Settings view (p. 114)
Page 392 of 546
STARTING AND DRIVING
390
Drive modes
Selecting a drive mode affects the vehicle's driv- ing characteristics to help make driving moreenjoyable or easier in certain types of situations.
The following systems are adapted to help pro- vide the best vehicle performance in the respec-tive drive modes: • Steering
• Engine/transmission/All Wheel Drive
• Brakes
• Suspension control
• Instrument panel
• Climate system settings
Select the drive mode best suited to the current driving conditions. Please be aware that not all modes can be selected in all driving situations. The selectedmode will be displayed in the instrument panel.
Selecting a drive mode
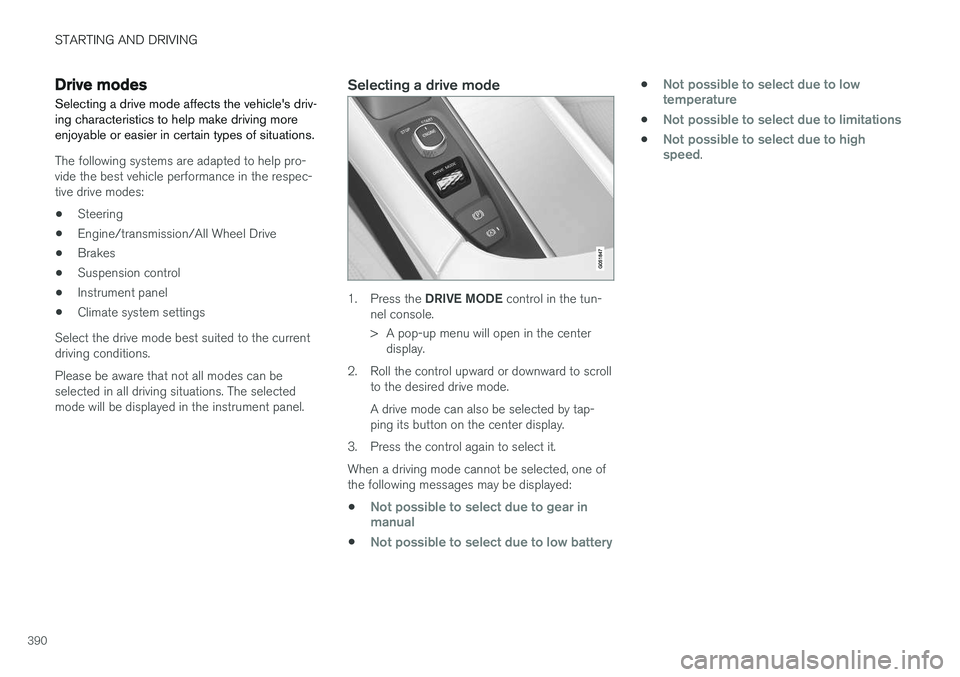
1. Press the DRIVE MODE control in the tun-
nel console.
> A pop-up menu will open in the center display.
2. Roll the control upward or downward to scroll to the desired drive mode. A drive mode can also be selected by tap- ping its button on the center display.
3. Press the control again to select it. When a driving mode cannot be selected, one of the following messages may be displayed:
•
Not possible to select due to gear in manual
•Not possible to select due to low battery
•Not possible to select due to low temperature
•Not possible to select due to limitations
•Not possible to select due to high speed.
Page 394 of 546
||
STARTING AND DRIVING
392
SAVE
This mode makes it possible to save electrical energy (hybrid battery charge) for times whenusing the electric motor is more suitable (e.g., citydriving). Using the electric motor only saves more fuel at low speeds than at high ones. Therefore, use theSAVE mode primarily when the hybrid battery'scharge level is high and driving will initially be athighway speeds but will end with city drivingwhen electric driving is preferable. If the hybrid battery's charge level is low when this mode is selected, the gasoline engine willstart and charge the hybrid battery up to approx.33%. If the battery's charge level is already above33%, this level will be maintained by the enginemanagement system, which will start/stop the gasoline engine in the same way as in
Hybriddrive mode. This mode increases fuel consumption because the gasoline engine is used to conserve batterycharge for later use.
OFF ROAD
This mode helps maximize the vehicle's capacity to traverse difficult terrain or poor roads. In OFF ROAD, ground clearance is maximized, the steering is light, All Wheel Drive and HillDescent Control are activated and a compassand altimeter will be displayed in the instrumentpanel.This drive mode can only be activated at lowspeeds (the permissible speed range will beshown on the speedometer). At higher speeds,OFF ROAD mode will be cancelled and AWD willbe activated. This mode is not intended for normal street driv- ing.
CAUTION
OFF ROAD drive mode may not be used if the vehicle is towing a trailer without an elec-trical connection. This could result in damageto the pneumatic suspension system's bel-lows.
Due to the increased ground clearance, if the OFF ROAD mode was selected when the enginewas switched off, it will also restart in this mode.
AWD
This mode offers improved traction using four- wheel drive and is intended primarily for low-speed driving on slippery surfaces. However, italso helps increase directional stability at higherspeeds. In this mode, both the electric motor and the gas- oline engine are used continuously, which resultsin higher fuel consumption.
POWER
Power mode is intended for sportier, more active
driving. This mode maximizes the combined effects of the electric motor and the gasoline engine andprovides power to all four wheels. Response topressure on the accelerator pedal is more imme-diate and the transmission shifts up at higherspeeds. Steering response is also more immedi-ate, the suspension is stiffer and lower groundclearance reduces body roll when cornering. In this mode, both the electric motor and the gas- oline engine are used continuously, which resultsin higher fuel consumption.
Page 395 of 546
STARTING AND DRIVING
* Option/accessory, for more information, see Introduction.393
INDIVIDUAL
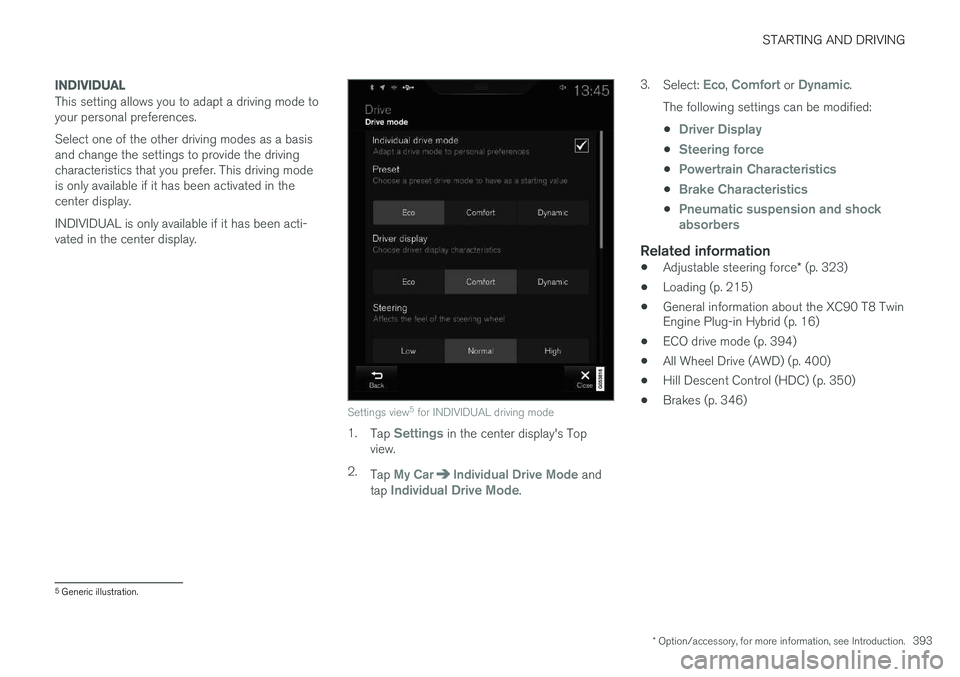
This setting allows you to adapt a driving mode to your personal preferences. Select one of the other driving modes as a basis and change the settings to provide the drivingcharacteristics that you prefer. This driving modeis only available if it has been activated in thecenter display. INDIVIDUAL is only available if it has been acti- vated in the center display.
Settings view5
for INDIVIDUAL driving mode
1. Tap Settings in the center display's Top
view.
2. Tap
My CarIndividual Drive Mode and
tap Individual Drive Mode. 3.
Select:
Eco, Comfort or Dynamic.
The following settings can be modified: •
Driver Display
•Steering force
•Powertrain Characteristics
•Brake Characteristics
•Pneumatic suspension and shock absorbers
Related information
• Adjustable steering force
* (p. 323)
• Loading (p. 215)
• General information about the XC90 T8 Twin Engine Plug-in Hybrid (p. 16)
• ECO drive mode (p. 394)
• All Wheel Drive (AWD) (p. 400)
• Hill Descent Control (HDC) (p. 350)
• Brakes (p. 346)
5
Generic illustration.
Page 396 of 546
STARTING AND DRIVING
* Option/accessory, for more information, see Introduction.
394
ECO drive mode
The Eco drive mode is a function designed to give the driver the opportunity to drive more eco-nomically and to help reduce fuel consumption.
When this mode is activated, the following cha- racteristics are modified:
• The automatic transmission's shifting points
• The engine management system and accel- erator pedal response
• Climate system settings: certain functionswill be temporarily reduced or deactivated
• The suspension's self-leveling function
* low-
ers ground clearance to help reduce windresistance
• Information is shown in an ECO gauge in theinstrument panel to help promote more eco-nomical driving
NOTE
When Eco is activated, several climate system parameters are changed and the function ofcertain current-consuming systems will bereduced. Some of these functions can be restarted manually but full functionality will not berestored until Eco is deactivated.
Selecting ECO modeWhen the engine is switched off, ECO mode is deactivated and must be reactivated each time the engine is started.
ECO will appear in the
instrument panel when the function is activated.
Via Function view
Select Driving mode ECO in
the center display's Function view. A green indicator light inthe button shows that the func-tion is activated.
With the drive mode control *
1.
Press the DRIVE MODE control.
> A pop-up menu will open in the center display.
2. Roll the control upward or downward to scroll to the desired drive mode and 3. Press the control again to select it. A drive
mode can also be selected by tapping its button on the center display.
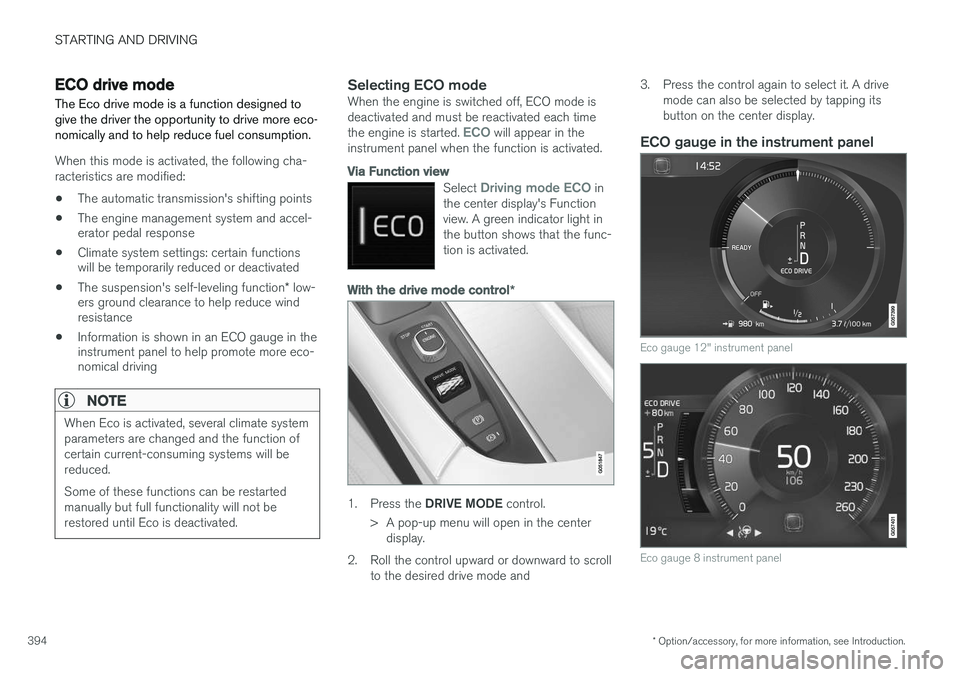
ECO gauge in the instrument panel
Eco gauge 12" instrument panel
Eco gauge 8 instrument panel
Page 402 of 546
||
STARTING AND DRIVING
* Option/accessory, for more information, see Introduction.
400
Activating LSC
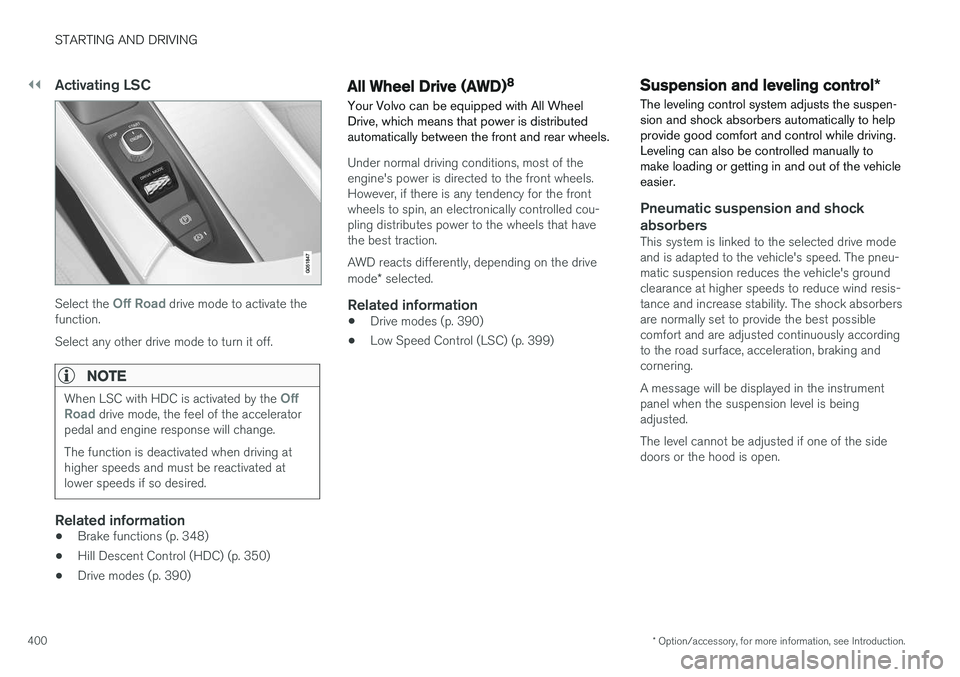
Select the Off Road drive mode to activate the
function. Select any other drive mode to turn it off.
NOTE
When LSC with HDC is activated by the Off
Road drive mode, the feel of the accelerator
pedal and engine response will change. The function is deactivated when driving at higher speeds and must be reactivated atlower speeds if so desired.
Related information
• Brake functions (p. 348)
• Hill Descent Control (HDC) (p. 350)
• Drive modes (p. 390)
All Wheel Drive (AWD) 8
Your Volvo can be equipped with All Wheel Drive, which means that power is distributedautomatically between the front and rear wheels.
Under normal driving conditions, most of the engine's power is directed to the front wheels.However, if there is any tendency for the frontwheels to spin, an electronically controlled cou-pling distributes power to the wheels that havethe best traction. AWD reacts differently, depending on the drive mode * selected.
Related information
• Drive modes (p. 390)
• Low Speed Control (LSC) (p. 399)
Suspension and leveling control
*
The leveling control system adjusts the suspen- sion and shock absorbers automatically to helpprovide good comfort and control while driving.Leveling can also be controlled manually tomake loading or getting in and out of the vehicleeasier.
Pneumatic suspension and shock absorbers
This system is linked to the selected drive mode and is adapted to the vehicle's speed. The pneu-matic suspension reduces the vehicle's groundclearance at higher speeds to reduce wind resis-tance and increase stability. The shock absorbersare normally set to provide the best possiblecomfort and are adjusted continuously accordingto the road surface, acceleration, braking andcornering. A message will be displayed in the instrument panel when the suspension level is beingadjusted. The level cannot be adjusted if one of the side doors or the hood is open.
Page 403 of 546
STARTING AND DRIVING
401
Suspension leveling settings
Easy entry
The vehicle can be lowered to entering and exit- ing easier. Select
SettingsVehicleEasy Entry/Exit
Control via the center display's Top view to lower
the vehicle when getting in or out. When the vehicle is parked and the engine is turned off, the level is lowered (if a side door isopened, the level adjustment will stop). When theengine is started and the vehicle begins to move,the level will be raised to the height set by theselected drive mode.
Turning off suspension and leveling control
In certain situations, this function has to be turned off, for example when lifting the vehicle ona jack or garage hoist. 1. Tap
Settings in the center display's Top
view.
2. Tap
My CarSuspension .
3. Select
Deactivate Suspension & Leveling
Control.
Changing suspension control
Three different levels of suspension control can be selected from the center display: 1. Tap
Settings in the center display's Top
view. 2.
Tap
My CarDrive Mode.
3. Under
Suspension Control, select Eco,Comfort or Dynamic.
Loading mode
Use the buttons in the cargo compartment to raise or lower the vehicle to make loading orunloading easier or when attaching a trailer.
Parking the vehicleWhen parking, be sure that there is adequatespace above and below the vehicle since itsground clearance may vary, e.g., depending onthe ambient temperature, how the vehicle is loa-ded, if loading mode is being used or the drivemode selected after the engine is started. The level may also be adjusted for a certain time after the vehicle has been parked to compensatefor possible height adjustments due to tempera-ture changes in the pneumatic suspension whenthe vehicle has cooled.
TransportWhen transporting the vehicle on a ferry, train ora tow truck, it may only be secured (lashed)around the tires, not using any other chassiscomponents. Changes in the pneumatic suspen-sion may occur during transport that could nega-tively affect the lashing and result in damage.
Related information
• Drive modes (p. 390)
• Driving with a trailer (p. 367)
• Loading (p. 215)
8
Standard equipment on certain models.
Page 453 of 546
WHEELS AND TIRES
}}
451
Snow tires and chains
The use of snow chains and/or winter tires can help improve traction in winter driving conditions.
Snow chains can be used on your Volvo with the following restrictions:
• Snow chains should be installed on front wheels only. Use only Volvo approved snowchains.
• If accessory, aftermarket or "custom" tiresand wheels are installed and are of a size dif-ferent than the original tires and wheels,chains in some cases CANNOT be used.Sufficient clearances between chains andbrakes, suspension and body componentsmust be maintained.
• Some strap-on type chains will interfere withbrake components and therefore CANNOTbe used.
• All Wheel Drive models
: Snow chains
should only be installed on the front wheels.
• Certain size tires may not allow the assemblyof snow chains/traction devices.
Consult your Volvo retailer for additional snow chain information.
CAUTION
• Snow chains should not be used on wheels larger than 19".
• Always follow the chain manufacturer'sinstallation instructions carefully. Installchains as tightly as possible andretighten periodically.
• Check local regulations regarding the useof snow chains before installing.
• Use single-sided snow chains only.
• Never exceed the chain manufacturer'sspecified maximum speed limit. (Underno circumstances should you exceed31 mph (50 km/h).
• Avoid bumps, holes or sharp turns whendriving with snow chains.
• The handling of the vehicle can beadversely affected when driving withchains. Avoid fast or sharp turns as wellas locked wheel braking.
Checking tire inflation pressure
Correct tire inflation pressure helps improve driv- ing stability, save fuel and increase the servicelife of the tires.
WARNING
• Under-inflation is the most common cause of tire failure and may result insevere tire cracking, tread separation, or"blow-out," with unexpected loss of vehi-cle control and increased risk of injury.
• Under-inflated tires reduce the load car-rying capacity of your vehicle.
Cold tiresInflation pressure should be checked when the tires are cold. The tires are considered to be cold when they have the same temperature as the sur-rounding (ambient) air. This temperature is normally reached after the vehicle has been parked for at least 3 hours. After driving a distance of approximately 1 mile (1.6 km), the tires are considered to be hot. If youhave to drive farther than this distance to pumpyour tire(s), check and record the tire pressurefirst and add the appropriate air pressure whenyou get to the pump. When weather temperature changes occur, tire inflation pressures also change. A 10-degree
Page 497 of 546
MAINTENANCE AND SERVICING
* Option/accessory, for more information, see Introduction.495
Positions
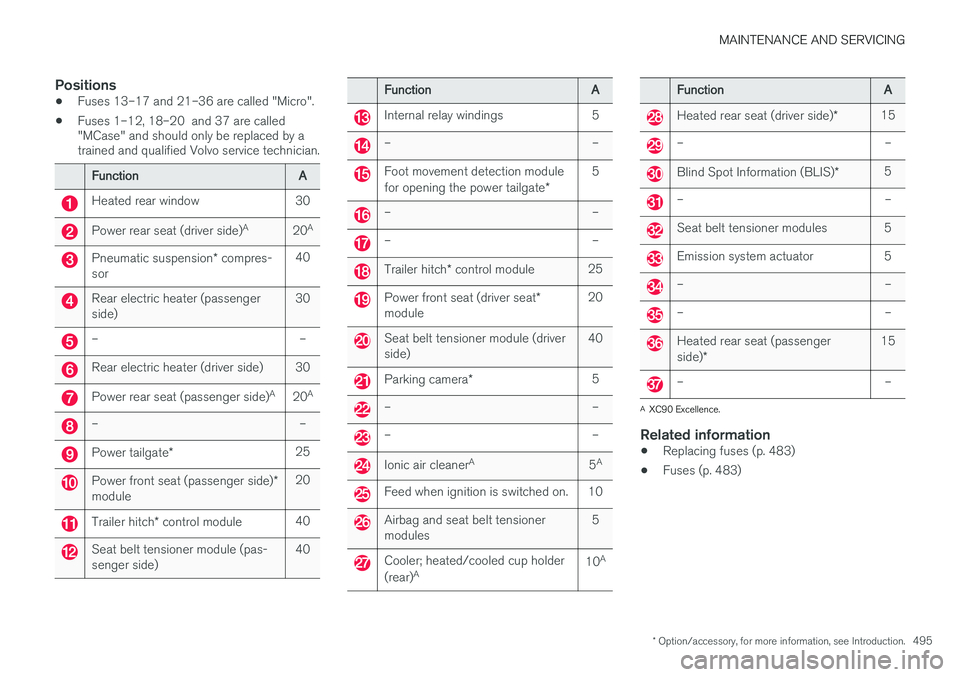
•Fuses 13–17 and 21–36 are called "Micro".
• Fuses 1–12, 18–20 and 37 are called "MCase" and should only be replaced by atrained and qualified Volvo service technician.
FunctionA
Heated rear window30
Power rear seat (driver side) A20A
Pneumatic suspension
* compres-
sor40
Rear electric heater (passenger side)30
––
Rear electric heater (driver side)30
Power rear seat (passenger side) A20A
––
Power tailgate
*25
Power front seat (passenger side) *
module20
Trailer hitch * control module40
Seat belt tensioner module (pas- senger side)40
FunctionA
Internal relay windings5
––
Foot movement detection module for opening the power tailgate *5
––
––
Trailer hitch* control module25
Power front seat (driver seat *
module20
Seat belt tensioner module (driver side)40
Parking camera *5
––
––
Ionic air cleaner A5A
Feed when ignition is switched on.10
Airbag and seat belt tensioner modules5
Cooler; heated/cooled cup holder (rear) A10A
FunctionA
Heated rear seat (driver side)
*15
––
Blind Spot Information (BLIS) *5
––
Seat belt tensioner modules5
Emission system actuator5
––
––
Heated rear seat (passenger side)*15
––
A
XC90 Excellence.
Related information
• Replacing fuses (p. 483)
• Fuses (p. 483)