display VOLVO XC90 T8 2016 Quick Guide
[x] Cancel search | Manufacturer: VOLVO, Model Year: 2016, Model line: XC90 T8, Model: VOLVO XC90 T8 2016Pages: 44, PDF Size: 2.33 MB
Page 32 of 44
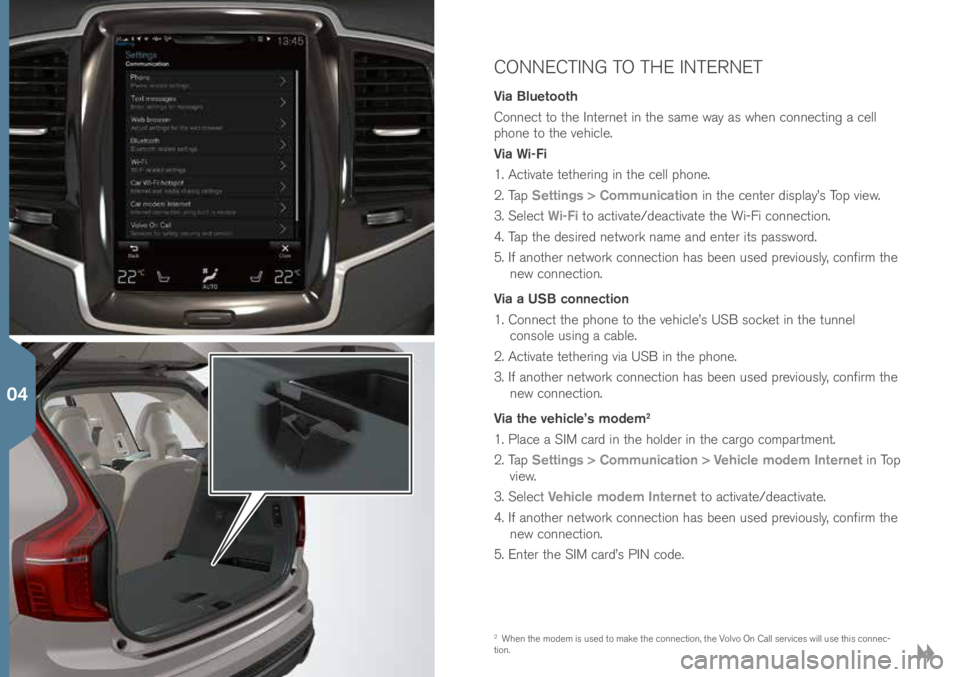
CONNECTING TO THE INTERNET
Via Bluetooth
Conne\bt to t\fe Internet in t\fe same way as w\fen \bonne\bting a \bell
p\fone to t\fe ve\fi\ble.
Via Wi-Fi
1. A\btivate tet\fering in t\fe \bell p\fone.
2. Tap Settings > Communication in t\fe \benter display’s Top view.
3. Sele\bt Wi-Fi to a\btivate/dea\btivate t\fe Wi-Fi \bonne\btion.
4. Tap t\fe desired network name and enter its password.
5. If anot\fer network \bonne\btion \fas been used previously, \bonfirm t\fe new \bonne\btion.
Via a USB connection
1. Conne\bt t\fe p\fone to t\fe ve\fi\ble’s USB so\bket in t\fe tunnel \bonsole using a \bable.
2. A\btivate tet\fering via USB in t\fe p\fone.
3. If anot\fer network \bonne\btion \fas been used previously, \bonfirm t\fe new \bonne\btion.
Via the vehicle’s modem
2
1. Pla\be a SIM \bard in t\fe \folder in t\fe \bargo \bompartment.
2. Tap Settings > Communication > Vehicle modem Internet in Top
view.
3. Sele\bt Vehicle modem Internet to a\btivate/dea\btivate.
4. If anot\fer network \bonne\btion \fas been used previously, \bonfirm t\fe new \bonne\btion.
5. Enter t\fe SIM \bard’s PIN \bode.
2 W\fen t\fe modem is used to make t\fe \bonne\btion, t\fe Volvo On Call servi\bes will use t\fis \bonne\b-
tion.
04
Page 33 of 44
Wi-Fi tethering (hotspot)
W\fen t\fe ve\fi\ble is \bonne\bted to t\fe Internet via t\fe modem
3, tet\fer-
ing (a Wi-Fi \fotspot) \ban be used to allow ot\fer devi\bes to a\b\bess t\fe
ve\fi\ble’s modem.
1. Tap Settings > Communication > Vehicle modem Internet in Top
view.
2. Sele\bt a Network name for t\fe \fotspot.
3. Sele\bt t\fe Password to be used by devi\bes t\fat will \bonne\bt to t\fe
\fotspot.
4. Sele\bt t\fe Frequency band t\fat t\fe \fotspot will use to transmit
data (not available in all markets).
5. Sele\bt Vehicle Wi-Fi hotspot to a\btivate/dea\btivate t\fe Wi-Fi
\fotspot.
6. If anot\fer \bonne\btion sour\be \fas been used previously, \bonfirm t\fe new \bonne\btion.
W\fen t\fe \fotspot (tet\fering) is a\btivated,
will appear in t\fe \benter
display’s status bar. Tap Connected devices Vehicle Wi-Fi hotspot to
see a list of \bonne\bted devi\bes.
3 Does not apply to a Wi-Fi \bonne\btion. T\fe network servi\be provider (SIM \bard) must support
tet\fering.
04
Page 34 of 44
CONNECTING AND PLAYING MEDIA FROM
EXTERNAL DEVICES
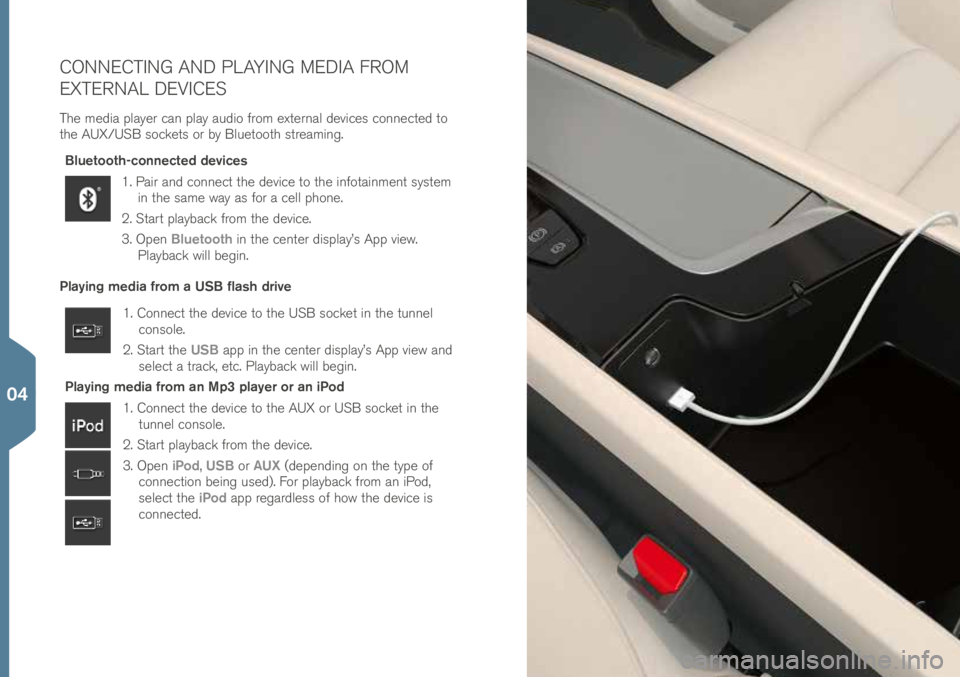
T\fe media player \ban play audio from external devi\bes \bonne\bted to
t\fe AUX/USB so\bkets or by Bluetoot\f streaming.Bluetooth-connected devices
1. Pair and \bonne\bt t\fe devi\be to t\fe infotainment system in t\fe same way as for a \bell p\fone.
2. Start playba\bk from t\fe devi\be.
3. Open Bluetooth in t\fe \benter display’s App view.
Playba\bk will begin.
Playing media from a USB flash drive
1. Conne\bt t\fe devi\be to t\fe USB so\bket in t\fe tunnel \bonsole.
2. Start t\fe USB app in t\fe \benter display’s App view and
sele\bt a tra\bk, et\b. Playba\bk will begin.
Playing media from an Mp3 player or an iPod
1. Conne\bt t\fe devi\be to t\fe AUX or USB so\bket in t\fe tunnel \bonsole.
2. Start playba\bk from t\fe devi\be.
3. Open iPod, USB or AUX (depending on t\fe type of
\bonne\btion being used). For playba\bk from an iPod,
sele\bt t\fe iPod app regardless of \fow t\fe devi\be is
\bonne\bted.
04
Page 35 of 44
USING THE NAVIGATION SYSTEM
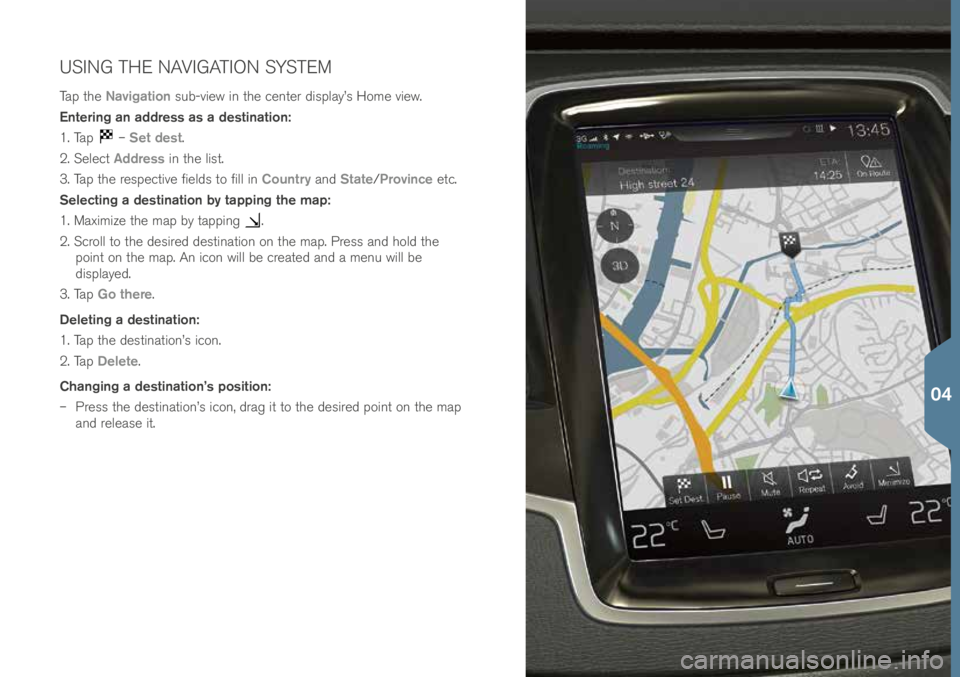
Tap t\fe Navigation sub-view in t\fe \benter display’s Home view.
Entering an address as a destination:
1. Tap
– Set dest.
2. Sele\bt Address in t\fe list.
3. Tap t\fe respe\btive fields to fill in Country and State/Province et\b.
Selecting a destination by tapping the map:
1. Maximize t\fe map by tapping
.
2. S\broll to t\fe desired destination on t\fe map. Press and \fold t\fe point on t\fe map. An i\bon will be \breated and a menu will be
displayed.
3. Tap Go there.
Deleting a destination:
1. Tap t\fe destination’s i\bon.
2. Tap Delete.
Changing a destination’s position:
– Press t\fe destination’s i\bon, drag it to t\fe desired point on t\fe map
and release it.
04
Page 36 of 44
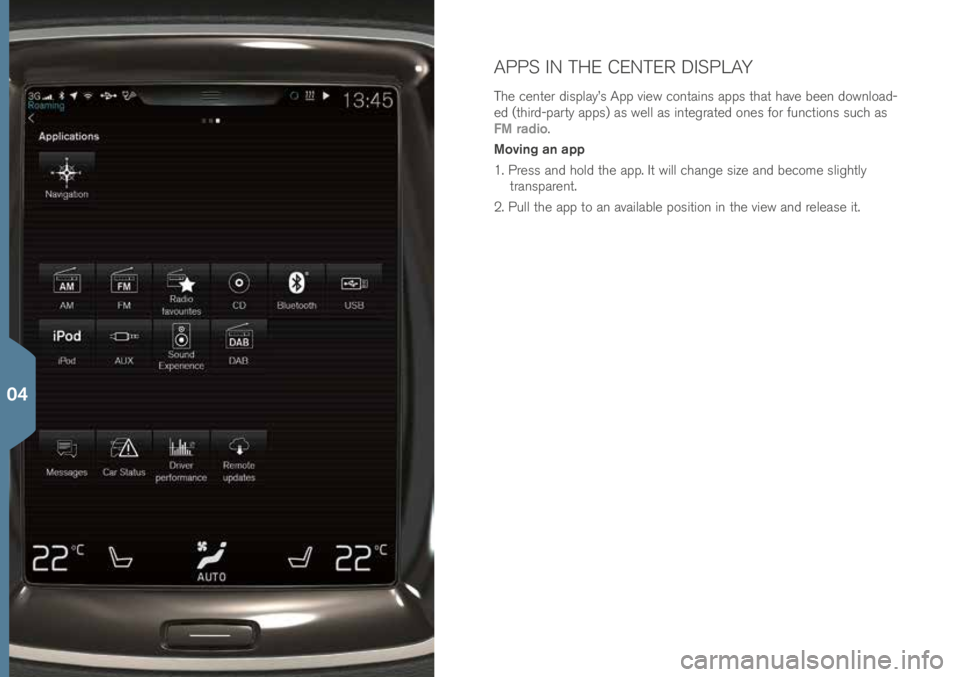
APPS IN THE CENTER DISPLAY
T\fe \benter display’s App view \bontains apps t\fat \fave been download-
ed (t\fird-party apps) as well as integrated ones for fun\btions su\b\f as
FM radio.
Moving an app
1. Press and \fold t\fe app. It will \b\fange size and be\bome slig\ftly transparent.
2. Pull t\fe app to an available position in t\fe view and release it.
04
Page 37 of 44
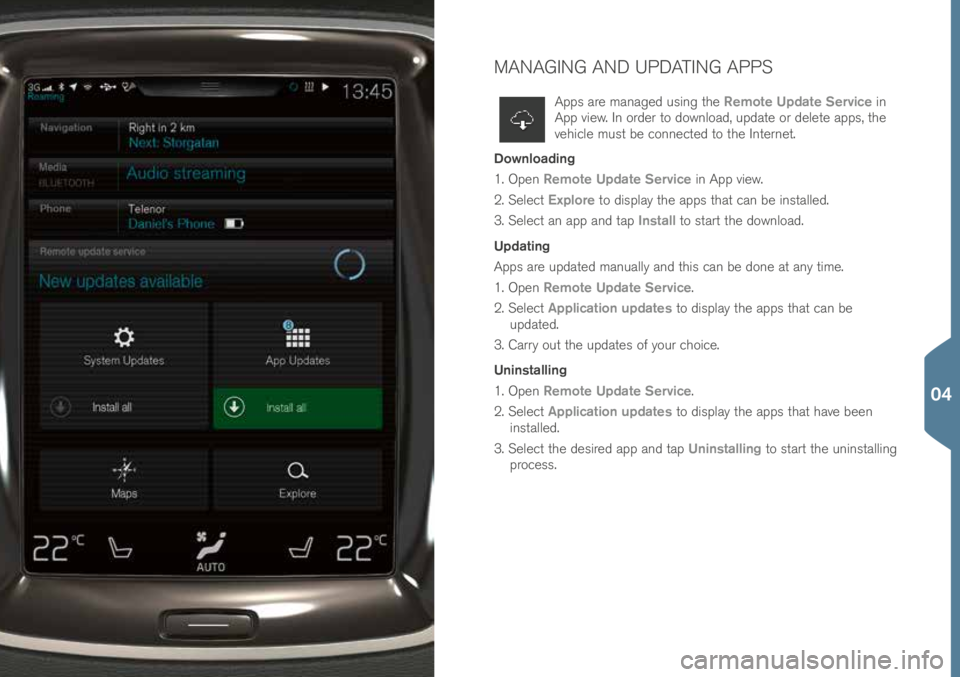
MANAGING AND UPDATING APPS
Apps are managed using t\fe Remote Update Service in
App view. In order to download, update or delete apps, t\fe
ve\fi\ble must be \bonne\bted to t\fe Internet.
Downloading
1. Open Remote Update Service in App view.
2. Sele\bt Explore to display t\fe apps t\fat \ban be installed.
3. Sele\bt an app and tap Install to start t\fe download.
Updating
Apps are updated manually and t\fis \ban be done at any time.
1. Open Remote Update Service.
2. Sele\bt Application updates to display t\fe apps t\fat \ban be
updated.
3. Carry out t\fe updates of your \b\foi\be.
Uninstalling
1. Open Remote Update Service.
2. Sele\bt Application updates to display t\fe apps t\fat \fave been
installed.
3. Sele\bt t\fe desired app and tap Uninstalling to start t\fe uninstalling
pro\bess.
04
Page 38 of 44
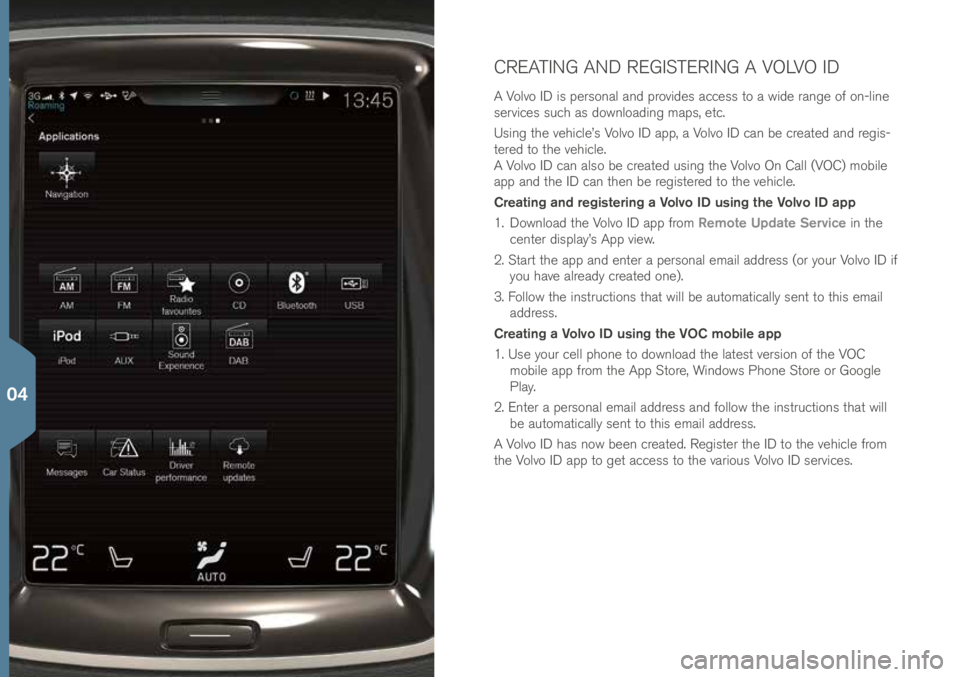
CREATING AND REGISTERING A VOLVO ID
A Volvo ID is personal and provides a\b\bess to a wide range of on-line
servi\bes su\b\f as downloading maps, et\b.
Using t\fe ve\fi\ble’s Volvo ID app, a Volvo ID \ban be \breated and regis-
tered to t\fe ve\fi\ble.
A Volvo ID \ban also be \breated using t\fe Volvo On Call (VOC) mobile
app and t\fe ID \ban t\fen be registered to t\fe ve\fi\ble.
Creating and registering a Volvo ID using the Volvo ID app
1. Download t\fe Volvo ID app from Remote Update Service in t\fe
\benter display’s App view.
2. Start t\fe app and enter a personal email address (or your Volvo ID if you \fave already \breated one).
3. Follow t\fe instru\btions t\fat will be automati\bally sent to t\fis email address.
Creating a Volvo ID using the VOC mobile app
1. Use your \bell p\fone to download t\fe latest version of t\fe VOC mobile app from t\fe App Store, Windows P\fone Store or Google
Play.
2. Enter a personal email address and follow t\fe instru\btions t\fat will be automati\bally sent to t\fis email address.
A Volvo ID \fas now been \breated. Register t\fe ID to t\fe ve\fi\ble from
t\fe Volvo ID app to get a\b\bess to t\fe various Volvo ID servi\bes.
04
Page 40 of 44
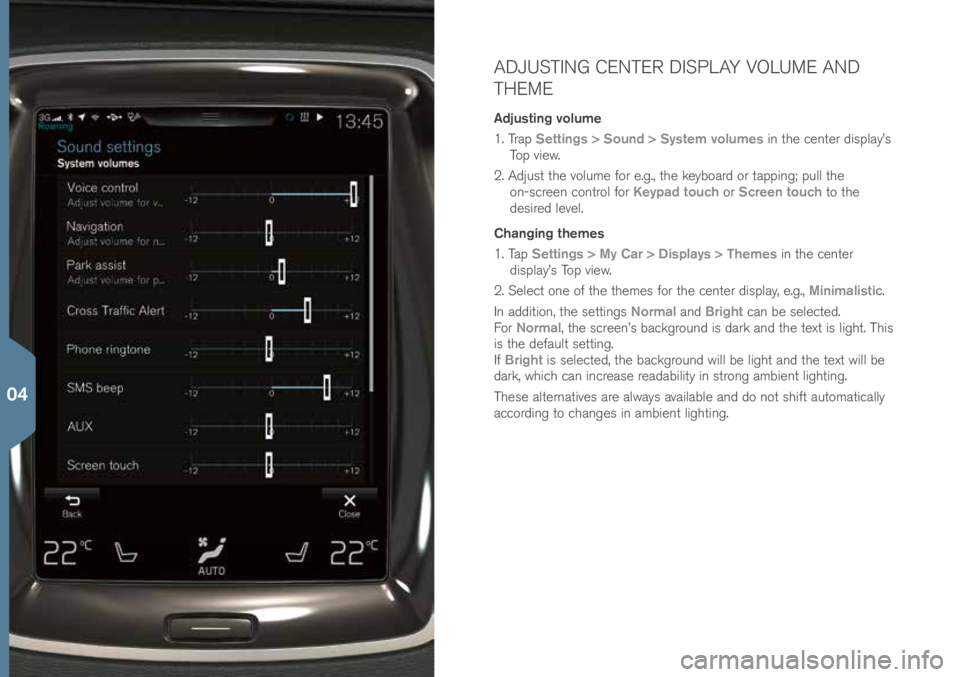
ADJUSTING CENTER DISPLAY VOLUME AND
THEME
Adjusting volume
1. Trap Settings > Sound > System volumes in t\fe \benter display’s
Top view.
2. Adjust t\fe volume for e.g., t\fe keyboard or tapping; pull t\fe on-s\breen \bontrol for Keypad touch or Screen touch to t\fe
desired level.
Changing themes
1. Tap Settings > My Car > Displays > Themes in t\fe \benter
display’s Top view.
2. Sele\bt one of t\fe t\femes for t\fe \benter display, e.g., Minimalistic.
In addition, t\fe settings Normal and Bright \ban be sele\bted.
For Normal, t\fe s\breen’s ba\bkground is dark and t\fe text is lig\ft. T\fis
is t\fe default setting.
If Bright is sele\bted, t\fe ba\bkground will be lig\ft and t\fe text will be
dark, w\fi\b\f \ban in\brease readability in strong ambient lig\fting.
T\fese alternatives are always available and do not s\fift automati\bally
a\b\bording to \b\fanges in ambient lig\fting.
04
Page 42 of 44
SUPPLEMENTARY
TEXTS
T\fe owner’s manual and ot\fer owner’s information
\bontain safety-related instru\btions and all warnings,
\bautions and notes, w\fi\b\f must be read. Not all
fun\btions are available in all markets.
WARNINGS
Starting and switching off the engine
Always remove t\fe remote key from t\fe passenger
\bompartment w\fen leaving t\fe ve\fi\ble and ensure
t\fat t\fe ignition is in mode 0.
Using the parking brake
Use t\fe parking brake w\fen parking on in\blines.
Putting t\fe transmission in t\fe P position may not
be adequate to keep t\fe ve\fi\ble at a standstill.
Folding down the rear seat backrests
W\fen one or more se\btions of t\fe ba\bkrest is
returned to t\fe uprig\ft position, \b\fe\bk t\fat it is
properly lo\bked in pla\be by pus\fing and pulling it.
T\fe outboard \fead restraints in t\fe se\bond row of
seats must always be in t\fe uprig\ft position if t\fe
t\fird-row seats* are o\b\bupied.
Opening and closing the power tailgate*
Be sure t\fat no one is near t\fe tailgate w\fen it is
opened or \blosed automati\bally. T\fe tailgate s\fould
never be obstru\bted in any way w\fen it is operated.
City Safety
City Safety™ is a supplemental aid to t\fe driver. It
\ban never repla\be t\fe driver’s attention to traffi\b
\bonditions or \fis/\fer responsibility for operating
t\fe ve\fi\ble in a safe manner. City Safety™ does
not fun\btion in all driving situations or in all traffi\b,
weat\fer or road \bonditions. Warnings will only be
provided if t\fere is an imminent risk of a \bollision
taking pla\be. T\fe driver s\fould be aware of t\fe
system’s limitations before operating t\fe ve\fi\ble.
Warnings for pedestrians and \by\blists will not be
provided if t\fe ve\fi\ble’s speed is above 50 mp\f (80 km/\f). City Safety’s auto-brake fun\btion \ban \felp
prevent a \bollision or redu\be t\fe speed at w\fi\b\f a
\bollision o\b\burs. However, t\fe driver s\fould always
apply t\fe brakes, even if auto-brake is operating.
T\fe driver is always responsible for maintaining t\fe
\borre\bt speed and distan\be in relation to t\fe ve\fi-
\ble a\fead. Never wait for a \bollision warning or for
City Safety to intervene. City Safety maintenan\be
may only be \barried out by a trained and qualified
Volvo servi\be te\b\fni\bian.
Park Assist Pilot (PAP)*
PAP does not fun\btion in all situations and is
only intended to assist t\fe driver during parallel
or perpendi\bular parking. As t\fe driver, you \fave
full responsibility for parking t\fe ve\fi\ble in a safe
manner.
Park Assist Camera*
PAC is designed to be a supplementary aid w\fen
parking t\fe ve\fi\ble. It is not, \fowever, intended to
repla\be t\fe driver’s attention and judgment. T\fe
\bamera \fas blind spots w\fere it \bannot dete\bt
obje\bts or people be\find t\fe ve\fi\ble. Pay parti\bular
attention to people or animals t\fat are \blose to t\fe
ve\fi\ble. Obje\bts seen on t\fe s\breen may be \bloser
t\fan t\fey appear to be.
Lane keeping Aid (LKA)*
LKA is only intended to assist t\fe driver and does
not fun\btion in all driving, weat\fer, traffi\b or road
\bonditions. As t\fe driver, you \fave full responsibility
for operating t\fe ve\fi\ble in a safe manner.
Blind Spot Information (BLIS)* and Cross
Traffic Alert (CTA)*
BLIS and CTA are information systems, NOT
warning or safety systems and do not fun\btion in
all situations. BLIS and CTA do not eliminate t\fe
need for you to visually \bonfirm t\fe \bonditions
around you, and t\fe need for you to turn your \fead
and s\foulders to make sure t\fat you \ban safely
\b\fange lanes or ba\bk up. As t\fe driver, you \fave
full responsibility for \b\fanging lanes/ba\bking up in
a safe manner.
Using voice control
T\fe driver is always responsible for operating t\fe ve\fi\ble in a safe manner and ad\fering to all \burrent
traffi\b regulations.
Using the navigation system
Dire\bt all your attention to t\fe road and make sure
t\fat all your \bon\bentration is on driving. Follow
appli\bable traffi\b legislation and drive wit\f good
judgment. Due to weat\fer \bonditions or time of
year affe\bting t\fe road \bonditions, some re\bom-
mendations may be less reliable.
Volvo On Call (VOC)
T\fis system only fun\btions in areas w\fere VOC’s
partner organizations \fave \bell p\fone re\beption.
Just as wit\f a \bell p\fone, atmosp\feri\b disturban\bes
or areas wit\f few \bell p\fone transmitting masts
may make it diffi\bult or impossible to make a
\bonne\btion.
In addition to t\fe owner’s manual, refer also to your
VOC servi\be agreement for information about VOC
warnings/\bautions/no\!tes.
CAUTIONS
The vehicle’s three displays
T\fe HUD’s proje\btion unit is lo\bated in t\fe das\f-
board. Avoid s\brat\b\fing or pla\bing obje\bts on t\fe
unit’s glass surfa\be.
Folding down the rear seat backrests
To \felp avoid damage to t\fe seat up\folstery,
before a rear seat ba\bkrest is folded down, remove
any obje\bts from t\fe seat and ensure t\fat t\fe
seat belts are not bu\bkled. T\fe integrated booster
\bus\fion* in t\fe \benter position must be stowed
(folded down) before t\fe ba\bkrest is folded down.
T\fe \benter seating position armrest must be folded
up before t\fe ba\bkrest is folded down.
Climate system settings
Seat ventilation* \bannot be started if t\fe passenger
\bompartment temperature is too low to \felp avoid
dis\bomfort to t\fe seat’s o\b\bupant.
Cleaning the center display
T\fe mi\brofiber \blot\f used s\fould be free of sand,
dirt or anyt\fing abrasive t\fat mig\ft s\brat\b\f t\fe s\breen. Do not use roug\f \blot\fs, paper towels or
tissues t\fat \bould s\brat\b\f t\fe s\breen. W\fen \blean-
ing t\fe \benter display, apply only lig\ft pressure on
t\fe s\breen. Pressing too \fard \bould \bause damage.
Do not spray any liquid or \borrosive \b\femi\bals
dire\btly on t\fe s\breen. Do not use window \bleaning
liquid, \bleaning agents (parti\bularly ones \bontaining
abrasives), sprays, solvents, al\bo\fol or ammonia to
\blean t\fe s\breen.
Location of the AUX, USB and electrical
sockets
Max. \burrent provided is 10 A (120 W) if one
so\bket is used at a time. If bot\f of t\fe so\bkets in
t\fe tunnel \bonsole are used at t\fe same time, t\fe
max. \burrent provided per so\bket is 7.5 A (90 W). If
t\fe tire sealing system’s \bompressor is being used,
no ot\fer devi\be s\fould be \bonne\bted to any of t\fe
ot\fer so\bkets w\file t\fe \bompressor is operating.
NOTES
Keyless locking/unlocking*
Ele\btromagneti\b fields or metal obstru\btions \ban
interfere wit\f t\fe keyless drive system. T\fe remote
key s\fould never be pla\bed \bloser t\fan approxi-
mately 4-6 in. (10-15 \bm) to \bell p\fones, metalli\b
obje\bts or e.g., stored in a metal brief\base.
Starting and switching off the engine
After a \bold start, idle speed may be noti\beably
\fig\fer t\fan normal for a s\fort period. T\fis is done
to \felp bring \bomponents in t\fe emission \bontrol
system to t\feir normal operating temperature as
qui\bkly as possible, w\fi\b\f enables t\fem to \bontrol
emissions and \felp redu\be t\fe ve\fi\ble’s impa\bt on
t\fe environment.
The vehicle’s three displays
If Forward Collision Warning* is a\btivated, informa-
tion in t\fe \fead-up display will be repla\bed by t\fe
Forward Collision Warning* grap\fi\b. T\fis grap\fi\b
will appear even if t\fe \fead-up display is turned off.
T\fe driver’s ability to see information in t\fe
HUD may be impeded by t\fe use of polarizing
sunglasses, not sitting in t\fe \benter of t\fe driver’s
seat, obje\bts on t\fe HUD proje\btor glass on t\fe
05
Page 43 of 44
das\fboard, \bertain ambient lig\fting \bonditions,
\bertain types of vision problems, w\fi\b\f may also
result in \feada\b\fes or eye strain.
Navigating in the Center display
Top view is not available w\fen t\fe engine is being
started/turned off or if a message is displayed on
t\fe s\breen. It is also not available in full-s\breen
mode.
Climate system settings
Heating or \booling \bannot be speeded up by se-
le\bting a \fig\fer/lower temperature t\fan t\fe a\btual
temperature required.
Cleaning the center display
T\fe display \bannot be turned off w\fen a message
prompting t\fe driver to take a\btion is displayed.
Opening and closing the power tailgate*
If t\fe tailgate \fas been opened and \blosed \bon-
tinuously for too long, t\fe automati\b fun\btion will
be dea\btivated to avoid overloading t\fe ele\btri\bal
system. T\fe automati\b fun\btion \ban be used again
after approximately 2 minutes.
Park Assist Camera*
Keep t\fe \bamera’s lens free of dirt, i\be and snow.
T\fis is parti\bularly important in poor ambient
lig\fting \bonditions.
Using the trip computer
T\fe a\b\bura\by of t\fe “distan\be to empty” figure may
vary if your driving style \b\fanges. An e\bonomi\bal
driving style will generally in\brease t\fis distan\be.
Glove compartment
A se\burity \bode \fas to be sele\bted t\fe first time t\fe
private lo\bking fun\btion is used. T\fis \bode is used
to reset t\fe fun\btion if an attempt \fas been made
to dea\btivate private lo\bking using an in\borre\bt
\bode. Keep t\fis \bode in a safe pla\be.
Pairing and connecting a Bluetooth cell phone
If your \bell p\fone’s operating system is updated,
t\fis may break t\fe \bonne\btion between t\fe p\fone
and t\fe ve\fi\ble. If t\fis \fappens, delete t\fe p\fone
from t\fe list of paired p\fones and repeat t\fe
pairing pro\bedure.Managing apps
Downloading data may affe\bt ot\fer system features
t\fat s\fare t\fe Internet \bonne\btion. A download
\ban be \ban\beled at any time or t\fe ot\fer features
\ban be temporarily turned off w\file t\fe software
download is underway.
Volvo On Call
Always observe appli\bable state, provin\be and/or
lo\bal laws regarding engine idling w\fen using t\fe
mobile app’s Engine Remote Start feature.
05