air condition VOLVO XC90 T8 2017 Owner´s Manual
[x] Cancel search | Manufacturer: VOLVO, Model Year: 2017, Model line: XC90 T8, Model: VOLVO XC90 T8 2017Pages: 580, PDF Size: 10.37 MB
Page 208 of 580
||
CLIMATE
* Option/accessory.
206 1.
Tap
Settings in the center display's Top
view and select Climate.
2. Activate/deactivate the respective defroster functions when the engine is started by selecting/deselecting the boxes for
Auto
Front Defroster and Auto Rear Defroster.
The heating function will switch off automatically when the window/mirror is sufficiently warm andthe ice/condensation has disappeared.
Related information
• Climate system controls (p. 197)
• Climate system controls in the center display(p. 197)
• Defrosting windows and mirrors (p. 204)
• Air conditioning (p. 207)
• Turning recirculation on and off (p. 203)
• Adjusting air distribution (p. 211)
• Setting the blower speed (p. 199)
• Automatic climate control (p. 196)
• Turning front seat ventilation
* on and off
(p. 209)
• Turning steering wheel heating
* on and off
(p. 206)
Turning steering wheel heating * on
and off
The steering wheel can be heated electrically for added comfort in cold weather.
Activating/deactivating steering wheel
heating
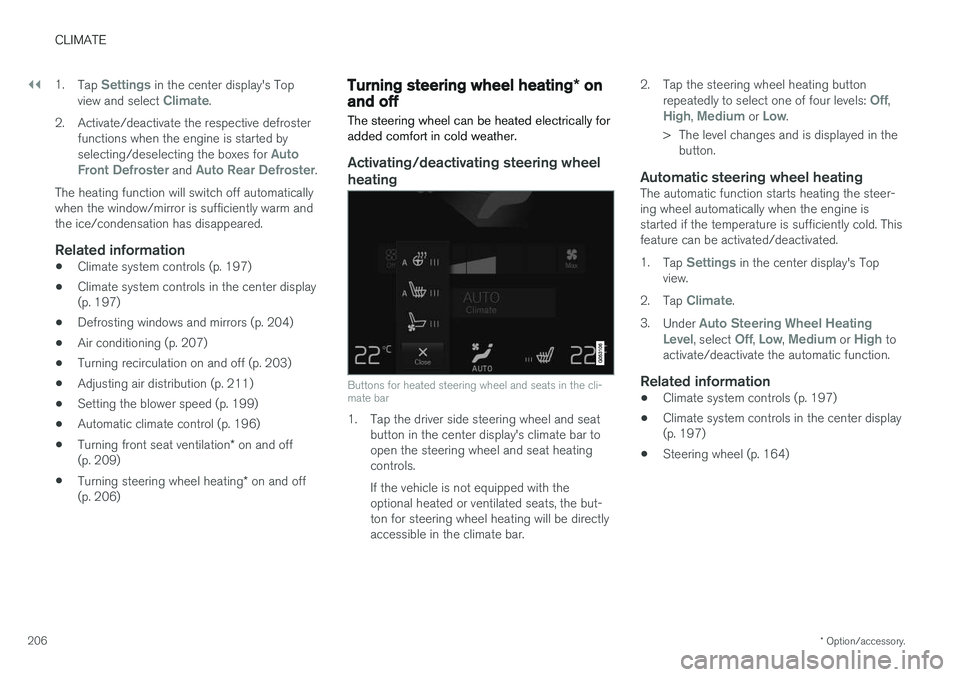
Buttons for heated steering wheel and seats in the cli- mate bar
1. Tap the driver side steering wheel and seat button in the center display's climate bar to open the steering wheel and seat heatingcontrols. If the vehicle is not equipped with the optional heated or ventilated seats, the but-ton for steering wheel heating will be directlyaccessible in the climate bar. 2. Tap the steering wheel heating button
repeatedly to select one of four levels:
Off,High, Medium or Low.
> The level changes and is displayed in the button.
Automatic steering wheel heatingThe automatic function starts heating the steer- ing wheel automatically when the engine isstarted if the temperature is sufficiently cold. Thisfeature can be activated/deactivated. 1. Tap
Settings in the center display's Top
view.
2. Tap
Climate.
3. Under
Auto Steering Wheel Heating
Level, select Off, Low, Medium or High to
activate/deactivate the automatic function.
Related information
• Climate system controls (p. 197)
• Climate system controls in the center display (p. 197)
• Steering wheel (p. 164)
Page 209 of 580
CLIMATE
* Option/accessory.207
Air conditioning
The air conditioning cools and dehumidifies the air in the passenger compartment.
Activating/deactivating the main air conditioning unit
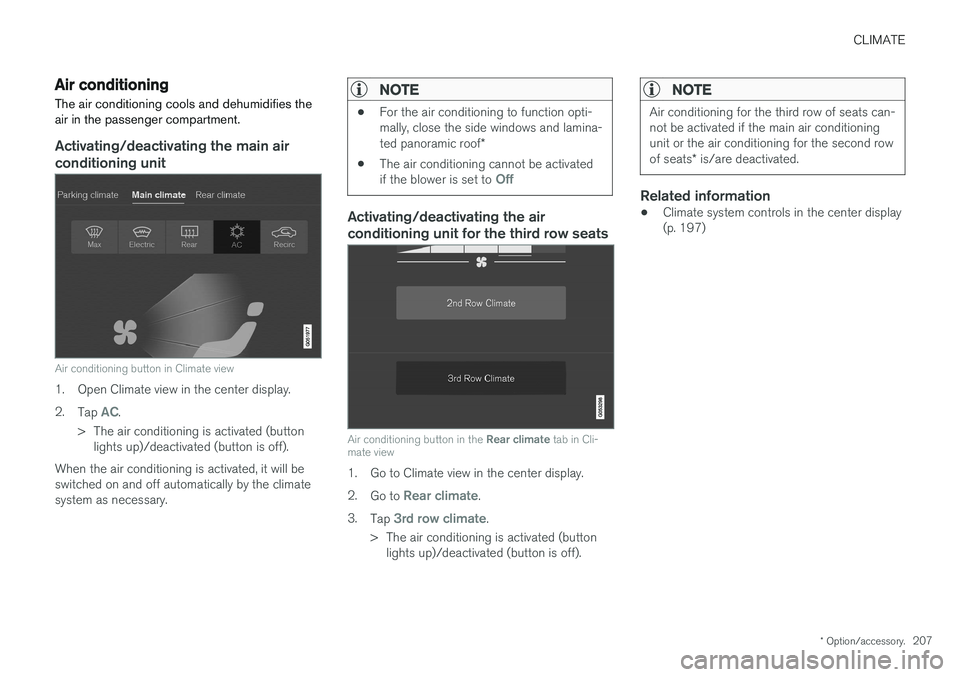
Air conditioning button in Climate view
1. Open Climate view in the center display. 2. Tap
AC.
> The air conditioning is activated (button lights up)/deactivated (button is off).
When the air conditioning is activated, it will be switched on and off automatically by the climatesystem as necessary.
NOTE
• For the air conditioning to function opti- mally, close the side windows and lamina- ted panoramic roof
*
• The air conditioning cannot be activated if the blower is set to
Off
Activating/deactivating the air conditioning unit for the third row seats
Air conditioning button in the
Rear climate tab in Cli-
mate view
1. Go to Climate view in the center display. 2. Go to
Rear climate.
3. Tap
3rd row climate.
> The air conditioning is activated (button lights up)/deactivated (button is off).
NOTE
Air conditioning for the third row of seats can- not be activated if the main air conditioningunit or the air conditioning for the second row of seats * is/are deactivated.
Related information
• Climate system controls in the center display (p. 197)
Page 255 of 580
LOCKS AND ALARM
}}
* Option/accessory.253
Alarm
The alarm system provides a warning if an attempt is made to break into the vehicle.
The following conditions will trigger the alarm:
• a door/hood/tailgate are opened
• the battery is disconnected
• the alarm siren is disconnected
If a problem is detected in the alarm system, this symbol and
Alarm
system failure Service required will
be displayed in the instrument panel.
Do not attempt to repair any of the components in the alarm system yourself; this could affect theinsurance policy on the vehicle. Contact a trainedand qualified Volvo service technician.
NOTE
One of the alarm sensors, which is sensitive to metallic objects, is located under the tunnelconsole cup holders. Avoid leaving coins,keys, etc., in the cup holders because theymay inadvertently trigger the alarm.
Arming the alarm
–Lock the vehicle by pressing the remote key's lock button. On models with theoptional Passive Entry system, the vehiclecan also be locked by pressing the outerindentation for locking on one of the doorhandles or by pressing the tailgate's rubber-ized pressure plate. If the vehicle is equipped with a power tail- gate *, the button on the lower edge of the
tailgate can also be used to lock the vehicle and arm the alarm.
Disarming the alarmThe alarm can be disarmed by: • Unlock the vehicle by pressing the remote key's unlock button
• Pressing the pressure-sensitive area on theinside of one of the door handles on modelswith the optional Passive Entry system.
• Pressing the tailgate's rubberized pressureplate on models with the optional PassiveEntry system.
Turning off a triggered (sounding)
alarm
–Press the remote key's unlock button or put the ignition in mode I by turning the start
knob to START and releasing it.
Alarm signalsThe following occurs if the alarm has been trig- gered:
• A siren will sound for 30 seconds or until thealarm is turned off
• All turn signals flash for 5 minutes or untilthe alarm is turned off
If the door that triggered the alarm is left open,
the alarm cycle will be repeated 10 times.
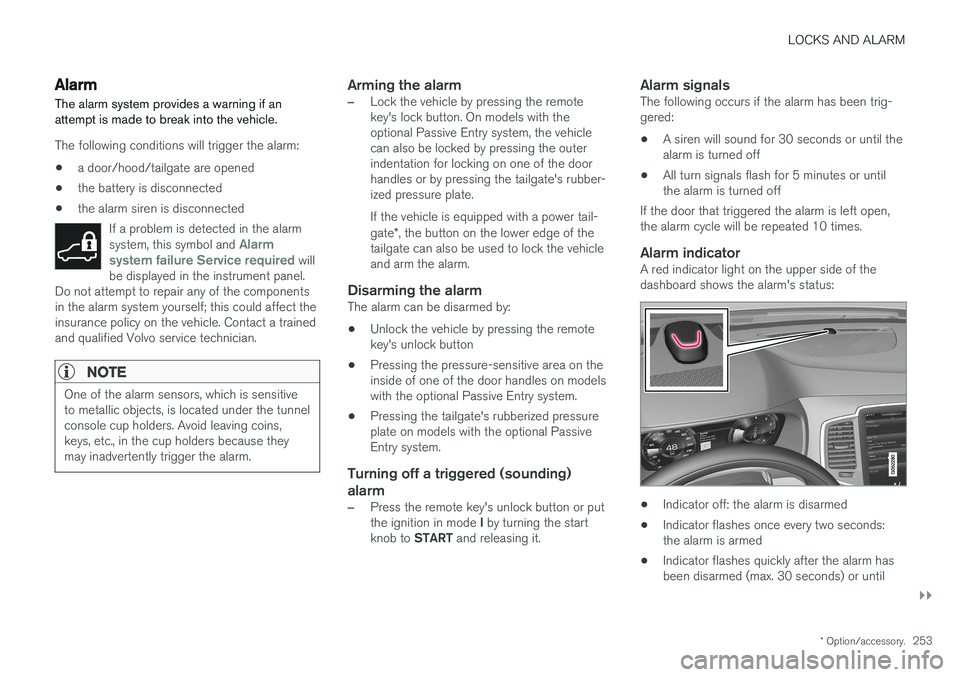
Alarm indicatorA red indicator light on the upper side of thedashboard shows the alarm's status:
• Indicator off: the alarm is disarmed
• Indicator flashes once every two seconds: the alarm is armed
• Indicator flashes quickly after the alarm hasbeen disarmed (max. 30 seconds) or until
Page 297 of 580
DRIVER SUPPORT
}}}}
295
Prerequisites
The prerequisites for activating Pilot Assist are:• The driver's seat belt must be buckled and the driver's door must be closed.
• There must be a vehicle ahead (a target vehi-cle) within a reasonable distance or yourvehicle's current speed must be at least9 mph (15 km/h).
With ACC in standby mode: 1. Tap
▶ (6).
> The symbol
will change to Pilot
Assist in standby mode (8).
2. Press the
button (2) on the left-side
steering wheel keypad.
> Pilot Assist will go into active mode and the current speed will be stored and dis- played in the center of the speedometer. or
If Adaptive Cruise Control has been started:
–Tap ▶ (6).
> Pilot Assist will start.
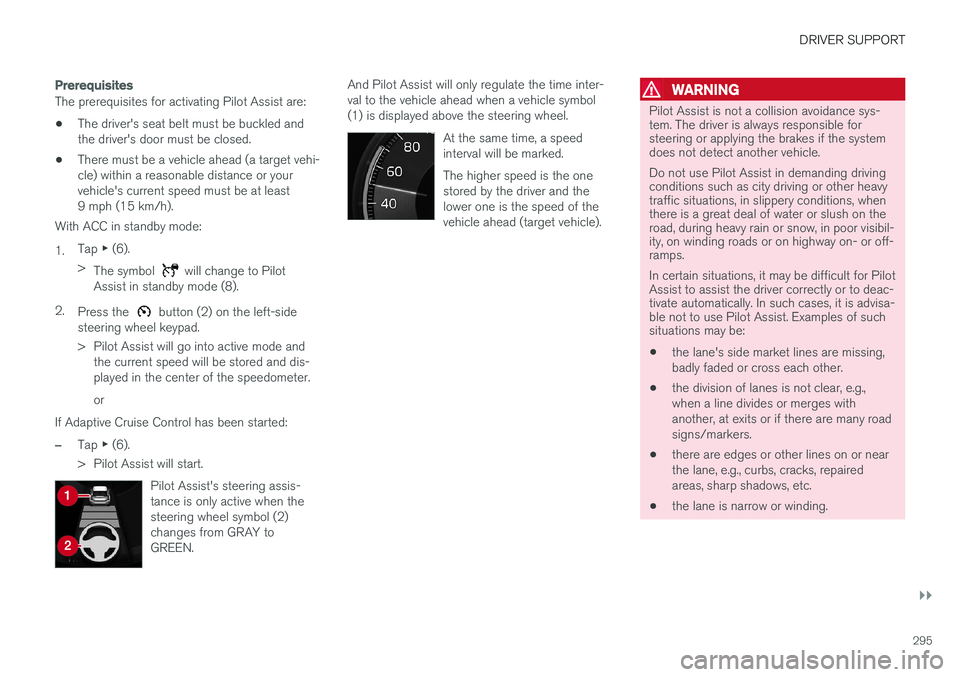
Pilot Assist's steering assis- tance is only active when thesteering wheel symbol (2)changes from GRAY toGREEN.
And Pilot Assist will only regulate the time inter- val to the vehicle ahead when a vehicle symbol(1) is displayed above the steering wheel. At the same time, a speedinterval will be marked. The higher speed is the one stored by the driver and thelower one is the speed of thevehicle ahead (target vehicle).WARNING
Pilot Assist is not a collision avoidance sys- tem. The driver is always responsible forsteering or applying the brakes if the systemdoes not detect another vehicle. Do not use Pilot Assist in demanding driving conditions such as city driving or other heavytraffic situations, in slippery conditions, whenthere is a great deal of water or slush on theroad, during heavy rain or snow, in poor visibil-ity, on winding roads or on highway on- or off-ramps. In certain situations, it may be difficult for Pilot Assist to assist the driver correctly or to deac-tivate automatically. In such cases, it is advisa-ble not to use Pilot Assist. Examples of suchsituations may be:
• the lane's side market lines are missing, badly faded or cross each other.
• the division of lanes is not clear, e.g.,when a line divides or merges withanother, at exits or if there are many roadsigns/markers.
• there are edges or other lines on or nearthe lane, e.g., curbs, cracks, repairedareas, sharp shadows, etc.
• the lane is narrow or winding.
Page 304 of 580
||
DRIVER SUPPORT
* Option/accessory.
302
WARNING
Pilot Assist is not a collision avoidance sys- tem. The driver is always responsible forsteering or applying the brakes if the systemdoes not detect another vehicle. Do not use Pilot Assist in demanding driving conditions such as city driving or other heavytraffic situations, in slippery conditions, whenthere is a great deal of water or slush on theroad, during heavy rain or snow, in poor visibil-ity, on winding roads or on highway on- or off-ramps. In certain situations, it may be difficult for Pilot Assist to assist the driver correctly or to deac-tivate automatically. In such cases, it is advisa-ble not to use Pilot Assist. Examples of suchsituations may be:
• the lane's side market lines are missing, badly faded or cross each other.
• the division of lanes is not clear, e.g.,when a line divides or merges withanother, at exits or if there are many roadsigns/markers.
• there are edges or other lines on or nearthe lane, e.g., curbs, cracks, repairedareas, sharp shadows, etc.
• the lane is narrow or winding.
• the lane is at the top of a hill, on anuneven road surface or over a bump.
•bad weather conditions (rain, snow, fog, slush, poor visibility, backlighting, etc).
The driver should also be aware that Pilot Assist has the following limitations: • High curbs, barriers and temporary obsta- cles (cones, barriers etc) may not bedetected or could be detected incorrectlyas side marker lines, which may create arisk of collision. The driver must ensure asafe distance to these obstacles.
• The camera or radar sensor may not beable to detect objects if there are pot-holes or if there are stationary objectspartially or completely blocking the road.
• Pilot Assist does not "see" pedestrians,animals, etc.
• Pilot Assist's steering capacity is limitedand may not always be able to help thedriver keep the vehicle in the lane.
The driver can always take action to override PilotAssist.
Steep roads and/or heavy loadsPilot Assist is primarily intended for use on rela-tively level roads. The function may not be able tomaintain the correct time interval to the vehicleahead on when driving down steep hills. Thedriver should be attentive and prepared to applythe brakes in these situations. Do not use Pilot Assist when the vehicle is trans-porting a heavy load or if it is towing a trailer.
Additional information
•
The Off Road drive mode cannot be
selected if Pilot Assist is activated.
• Pilot Assist uses the vehicle's camera and radar sensor, which have certain general limi-tations. See the articles "Camera limitations"and "Radar sensor limitations" for additionalinformation.
Related information
•
Pilot Assist
* (p. 291)
• Starting and activating Pilot Assist (p. 294)
• Changing Pilot Assist speed (p. 296)
• Setting a Pilot Assist time interval (p. 297)
• Changing target vehicles and automaticbraking with Pilot Assist (p. 300)
• Deactivating/resuming Pilot Assist (p. 298)
• Passing Assistance with Adaptive CruiseControl or Pilot Assist (p. 285)
• Pilot Assist symbols and messages (p. 303)
• Radar sensor limitations (p. 305)
• Camera limitations (p. 309)
Page 311 of 580
DRIVER SUPPORT
}}
309
Camera limitations
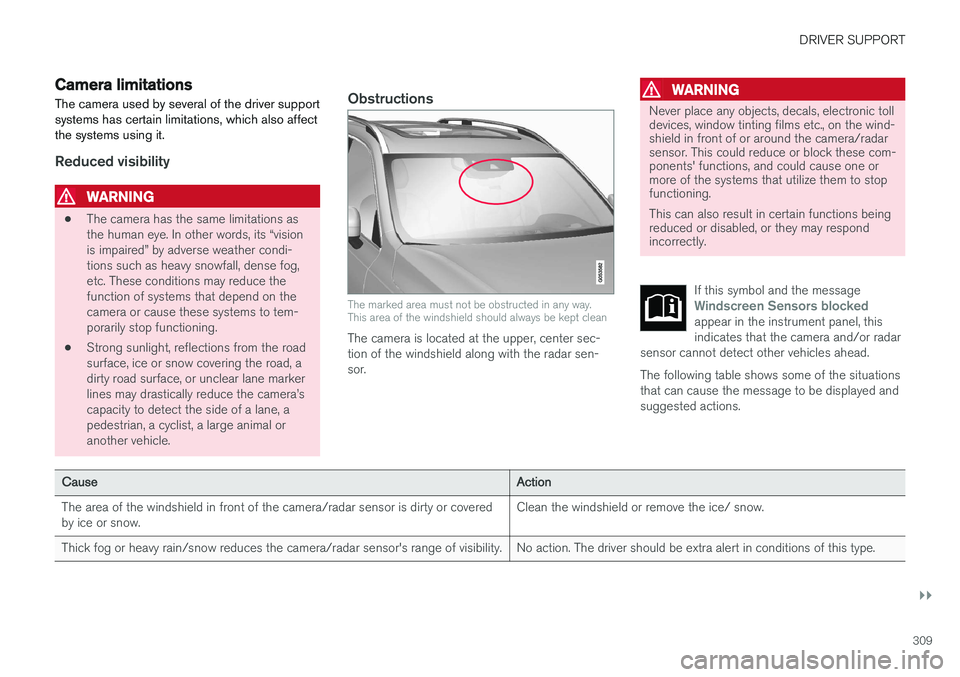
The camera used by several of the driver support systems has certain limitations, which also affectthe systems using it.
Reduced visibility
WARNING
• The camera has the same limitations as the human eye. In other words, its “visionis impaired” by adverse weather condi-tions such as heavy snowfall, dense fog,etc. These conditions may reduce thefunction of systems that depend on thecamera or cause these systems to tem-porarily stop functioning.
• Strong sunlight, reflections from the roadsurface, ice or snow covering the road, adirty road surface, or unclear lane markerlines may drastically reduce the camera
Page 312 of 580
||
DRIVER SUPPORT
310
CauseAction
Water or snow on the surface of the road swirl up and block radar signals or the camera's view. No action. The driver should be extra alert in conditions of this type.
There is dirt between the inside of the windshield and the camera/radar sensor. Have the area of the windshield cleaned by a trained and qualified Volvo service technician.
Strong backlighting No action required. The came will reset automatically when lightingconditions improve.
High temperaturesIf the temperature in the passenger compartment is very high, the camera and radar sensor may betemporarily turned off for approx. 15 minutesafter the engine has been started to protect theirelectronic components. When the temperaturehas cooled sufficiently, the camera and radarsensor will restart automatically.
Damaged windshield
CAUTION
•Service and maintenance on City Safety may only be carried out by a trained andqualified Volvo service technician.
• If a crack, scratch or stone chip shouldoccur in the section of the windshield infront the camera/radar sensor, contact atrained and qualified Volvo service techni-cian to repair or replace the windshield.Failing to do so may result in reducedCity Safety functionality.
• This can also result in certain functionsbeing reduced or disabled, or they mayrespond incorrectly.
To help avoid the risk of incorrect, reduced ordisabled functionality for driver support sys-tems using the camera or radar sensors:
• Volvo recommends that cracks, scratchesor stone chips on the windshield in front of the camera/radar sensor should
not
be repaired; in such cases, the entire windshield should be replaced.
• Before the windshield is replaced, con-tact a Volvo retailer to ensure that thecorrect windshield is ordered and instal-led. If the wrong type of windshield isused, this may cause City Safety to func-tion improperly or not at all.
• Volvo recommends the use of only Genu-ine Volvo Replacement Windshields.
• When replacing windshield wipers, usethe same type or ones approved by Volvo.
After the windshield has been replaced, thecamera/radar sensor will have to be recalibra-ted by a trained and qualified Volvo servicetechnician to help ensure proper function ofall of the vehicle's camera-/radar-based sys-tems.
Page 375 of 580
STARTING AND DRIVING
}}
373
Preconditioning
•If possible, precondition the vehicle with the charging cable before driving.
• Avoid parking the vehicle so that the passen-ger compartment becomes too hot or cold.Park, if possible, in a climate controlled park-ing garage.
• For short drives after using the precondition-ing function, turn off the climate systemblower if possible.
• If preconditioning is not possible in coldweather, use the seat and steering wheelheating primarily. Avoid heating the entirepassenger compartment, which reduces thehybrid battery's charge level.
Driving
•
Choose the Pure drive mode to help mini-
mize electric power consumption.
• Maintain a constant speed and an adequate distance to the vehicle ahead to minimizeuse of the brakes.
• Balance energy requirements using theaccelerator pedal and utilize the gauge onthe instrument panel to see the amount ofpower available from the electric motor. Thishelps avoid starting the gasoline engineunnecessarily. The electric motor is moreenergy-efficient than the gasoline engine,especially at lower speeds. See also the arti-cle "Hybrid-related symbols and messages". •
Brake as gently as possible; doing socharges the hybrid battery. There is a regen-erative function in the brake pedal which canbe augmented by the electric motor's brakingcapacity when the gear selector is in mode B
.
• Higher speeds increase energy consumption and the vehicle's wind resistance increasesalong with speed. Do not exceed postedspeed limits.
• In hilly terrain, put the gear selector in mode B
to utilize the electric motor's braking func-
tion when the accelerator pedal is released. This helps charge the hybrid battery.
• Use the
Hold function at highway speeds
when traveling farther than is possible using the hybrid battery's capacity.
• Whenever possible, avoid using the
Chargefunction to charge the hybrid battery. Charg- ing the battery using the gasoline engineincreases fuel consumption and carbon diox-ide emissions.
• Avoid carrying unnecessary items (extra load)in the vehicle.
• Maintain correct tire pressure. Check tirepressure regularly (when the tires are cold).
• Use tires recommended by Volvo for yourvehicle.
• Remove snow tires when threat of snow orice has ended. •
Note that roof racks, ski racks, etc, increaseair resistance and also energy consumption.
• Avoid driving with open windows.
Handling and roadholding
• Vehicle load, tire design and inflation pres-sure all affect vehicle handling. Therefore,check that the tires are inflated to the rec-ommended pressure according to the vehicleload. Loads should be distributed so thatcapacity weight or maximum permissible axleloads are not exceeded.
• At the specified curb weight your vehicle hasa tendency to understeer, which means thatthe steering wheel has to be turned morethan might seem appropriate for the curva-ture of a bend. This ensures good stabilityand reduces the risk of rear wheel skid.Remember that these properties can alterwith the vehicle load. The heavier the load inthe cargo compartment, the less the ten-dency to understeer.
Related information
•Hybrid-related information in the instrumentpanel (p. 133)
• Parking climate (preconditioning) (p. 187)
• Tire inflation pressure table (p. 563)
• Volvo and the environment (p. 20)
• Hybrid-related symbols and messages(p. 397)
Page 377 of 580
STARTING AND DRIVING
375
Related information
•Towing recommendations (p. 377)
Overheating the engine and transmission
In demanding driving conditions, such as when transporting heavy loads, driving in mountainousareas or in very hot weather there is a risk ofoverheating the engine or transmission.
• The engine's output may be slightly limited if there is a risk of overheating.
• Remove e.g., auxiliary lights mounted in frontof the grille in hot weather.
• If the temperature of the engine coolantbecomes too high, the warning symbol will illuminate and the message
Engine
temperature/Stop safely will be displayed.
Stop the vehicle as soon as possible in a safe place and let the engine idle for severalminutes.
• If the message
Engine temperature/High
temperature Turn off engine or Engine
coolant/Stop safely is displayed, stop
safely and turn off the engine.
• If the transmission begins to overheat, an alternative gear shifting program will beselected. An integrated protective functionwill also by activated, the warning symbol will illuminate and the message
Transmission
warmHigh temperature Reduce speed
or Transmission warmStop safely, wait
for cooling will be displayed in the instru-
ment panel. •
The air conditioning may be switched off temporarily.
• After a prolonged period of driving, do notturn off the engine immediately after stop-ping.
• The engine cooling fan commonly continuesto run for several minutes after the enginehas been turned off.
WARNING
The cooling fan (located at the front of the engine compartment, behind the radiator) maystart or continue to operate (for up to6 minutes) after the engine has beenswitched off.
Related information
•
Driving with a trailer (p. 384)
• Before a long distance trip (p. 372)
Page 386 of 580
||
STARTING AND DRIVING
384
•Never expose the battery to open flame or electric spark.
• Do not smoke near the battery.
• Failure to follow the instructions for jumpstarting can lead to injury.
Related information
•
Ignition modes (p. 389)
• Starting the engine (p. 390)
• Turning the engine off (p. 393)
• Start battery (p. 506)
• Opening and closing the hood (p. 533)
• Charging the hybrid battery (p. 403)
Driving with a trailer
When towing a trailer, always observe the legal requirements of the state/province.
• All Volvo models are equipped with energy- absorbing shock-mounted bumpers. Trailerhitch installation should not interfere with theproper operation of this bumper system.
Trailer towing does not normally present any par-ticular problems, but take into consideration:
• Increase tire pressure to recommended fullpressure.
• When your vehicle is new, avoid towing heavytrailers during the first 620 miles (1,000 km).
• Maximum speed when towing a trailer:50 mph (80 km/h).
• Engine and transmission are subject toincreased loads. Therefore, engine coolanttemperature should be closely watched whendriving in hot climates or hilly terrain. Use alower gear and turn off the air conditioner ifthe temperature gauge needle enters the redrange.
• If the automatic transmission begins to over-heat, a message will be displayed in the textwindow.
• Avoid overload and other abusive operation.
• Hauling a trailer affects handling, durability,and economy. •
It is necessary to balance trailer brakes withthe towing vehicle brakes to provide a safestop (check and observe state/local regula-tions).
• Do not connect the trailer's brake systemdirectly to the vehicle's brake system.
• More frequent vehicle maintenance isrequired.
• Remove the ball holder when the hitch is notbeing used.