check engine VOLVO XC90 T8 2017 Owner´s Manual
[x] Cancel search | Manufacturer: VOLVO, Model Year: 2017, Model line: XC90 T8, Model: VOLVO XC90 T8 2017Pages: 580, PDF Size: 10.37 MB
Page 386 of 580
||
STARTING AND DRIVING
384
•Never expose the battery to open flame or electric spark.
• Do not smoke near the battery.
• Failure to follow the instructions for jumpstarting can lead to injury.
Related information
•
Ignition modes (p. 389)
• Starting the engine (p. 390)
• Turning the engine off (p. 393)
• Start battery (p. 506)
• Opening and closing the hood (p. 533)
• Charging the hybrid battery (p. 403)
Driving with a trailer
When towing a trailer, always observe the legal requirements of the state/province.
• All Volvo models are equipped with energy- absorbing shock-mounted bumpers. Trailerhitch installation should not interfere with theproper operation of this bumper system.
Trailer towing does not normally present any par-ticular problems, but take into consideration:
• Increase tire pressure to recommended fullpressure.
• When your vehicle is new, avoid towing heavytrailers during the first 620 miles (1,000 km).
• Maximum speed when towing a trailer:50 mph (80 km/h).
• Engine and transmission are subject toincreased loads. Therefore, engine coolanttemperature should be closely watched whendriving in hot climates or hilly terrain. Use alower gear and turn off the air conditioner ifthe temperature gauge needle enters the redrange.
• If the automatic transmission begins to over-heat, a message will be displayed in the textwindow.
• Avoid overload and other abusive operation.
• Hauling a trailer affects handling, durability,and economy. •
It is necessary to balance trailer brakes withthe towing vehicle brakes to provide a safestop (check and observe state/local regula-tions).
• Do not connect the trailer's brake systemdirectly to the vehicle's brake system.
• More frequent vehicle maintenance isrequired.
• Remove the ball holder when the hitch is notbeing used.
Page 387 of 580
STARTING AND DRIVING
}}
385
NOTE
•When parking the vehicle with a trailer on a hill, apply the parking brake before put- ting the gear selector in
P. Always follow
the trailer manufacturer's recommenda- tions for wheel chocking.
• When starting on a hill, put the gear selector in
D before releasing the parking
brake.
• If you use the manual (Geartronic) shift positions while towing a trailer, make surethe gear you select does not put toomuch strain on the engine (using toohigh a gear).
• The drawbar assembly/trailer hitch maybe rated for trailers heavier than the vehi-cle is designed to tow. Please adhere toVolvo's recommended trailer weights.
• Avoid driving with a trailer on inclines ofmore than 15%.
CAUTION
The maximum trailer weights listed are only applicable for altitudes up to 3,280 ft(1000 m) above sea level. With increasingaltitude the engine power and therefore thecar's climbing ability are impaired because ofthe reduced air density, so the maximumtrailer weight has to be reduced accordingly.The weight of the vehicle and trailer must bereduced by 10% for every further 3,280 ft(1,000 m) (or part thereof). When towing5,000 lbs (2,250 kg) hill inclination is restric-ted to 14%.
WARNING
• Bumper-attached trailer hitches must not be used on Volvos, nor should safetychains be attached to the bumper.
• Trailer hitches attaching to the vehiclerear axle must not be used.
• Never connect a trailer's hydraulic brakesystem directly to the vehicle brake sys-tem, nor a trailer's lighting system directlyto the vehicle lighting system. Consultyour nearest authorized Volvo retailer forcorrect installation.
• When towing a trailer, the trailer's safetychains or wire must be correctly fastenedto the attachment points provided in thetrailer hitch on the vehicle. The safetychain or wire must never be fastened toor wound around the towing ball.
Trailer turn signals and brake lightsIf one (or more) of the bulbs on a trailer is defec-tive, a symbol and a message will be displayed inthe instrument panel. The other lights on the trailer must be checked manually by the driver before the vehicle is driven.See the subsection "Manual check" in the follow-ing section "Trailer lamp check".
Page 388 of 580
||
STARTING AND DRIVING
* Option/accessory.
386
Symbol Message
•Trailer turn indicator Right
turn indicator malfunction
•Trailer turn indicator Left
turn indicator malfunction
•Trailer brake light Malfunc-
tion
If one of the trailer's turn signal bulbs is defective, the turn signal symbol in the instrument panel forthe respective sides of the vehicle will also flashfaster than normal.
Trailer lamp check *
Automatic check
When the trailer has been connected to the vehi- cle's electrical system, its lamps can be checkedby automatically activating them. This helps thedriver to ensure that the trailer's lamps are func-tioning correctly before starting to drive. In order to perform this check, the engine must not be running.
1. When a trailer is connected to a trailer hitch
or towbar,
Automatic Trailer Lamp Checkwill appear in the instrument panel. 2.
Confirm this message by pressing the O but-
ton on the right-side steering wheel keypad.
> The lamp check will begin.
3. Leave the vehicle to perform the trailer lamp check.
> All of the trailer's lamps will begin to flashand then each lamp will illuminate one at a time.
4. Visually check that all of the trailer's lamps are functioning correctly.
5. After a short time, all of the trailer's lamps will begin to flash again.
> The lamp check is completed.
Disabling the automatic check
The automatic lamp check function can be disa- bled in the center display. 1.Tap
Settings in Top view.
2. Tap
My CarLights and Lighting.
3. Deselect
Automatic Trailer Lamp Check.
Manual check
If the automatic lamp check has been disabled, the function can be started manually. 1.Tap
Settings in Top view.
2. Tap
My CarLights and Lighting. 3.
Select
Manual Trailer Lamp Check.
> The lamp check will begin. Leave the vehi- cle to perform the trailer lamp check as described in the section "Automaticcheck" above.
Self-leveling suspension *The self-leveling system attempts to keep thevehicle at a constant level, regardless of the load(up to the max. permissible load). When theengine is not running, the rear of the vehiclesinks down slightly, which is normal.
Related information
•Detachable trailer hitch
* (p. 387)
• Trailer Stability Assist (TSA) (p. 388)
• Weights (p. 557)
Page 392 of 580
||
STARTING AND DRIVING
390
NOTE
To access ignition modes I or II without star-
ting the engine, the brake pedal must not be
depressed when these modes are selected.
• Ignition mode I
: Turn the start knob to
START and release it. The knob will return
automatically to its original position.
• Ignition mode II
: Turn the start knob to
START and hold it there for approx.
4 seconds. Release the knob.
• Returning to ignition mode 0
: To return to
mode 0 from mode II or I, turn the start knob
to STOP and release it.
Related information
•Starting the engine (p. 390)
• Turning the engine off (p. 393)
Battery drain Your vehicle's electrical functions drain the bat- tery to varying extents.
Avoid using ignition mode
II as much as posssi-
ble, or electrical functions that require a great deal of electrical current when the engine is notrunning. Using ignition mode I whenever possible con-
sumes less electrical current. Functions that require a great deal of electrical current include:
• the climate system blower
• headlights
• wipers
• infotainment system (especially at high vol-ume).
If the battery's charge level is low, a text messagewill appear in the instrument panel. The vehicle'senergy-saving function will then turn off orreduce certain functions that are currently con-suming electrical current. If the battery needs to be recharged, start the engine and let it idle for at least 15 minutes ordrive the vehicle (driving charges the batteryfaster than letting the engine idle).
Related information
• Ignition modes (p. 389)
Starting the engine
The engine can be started using the start knob on the tunnel console if there is a remote key inthe passenger compartment.
Start knob in the tunnel console between the front seats (generic illustration)
WARNING
Before starting the engine:
• Fasten the seat belt.
• Check that the seat, steering wheel and mirrors are adjusted properly.
• Make sure the brake pedal can bedepressed completely. Adjust the seat ifnecessary.
Page 393 of 580
STARTING AND DRIVING
}}
391
To start the engine.
1. A remote key must be in the passenger com-
partment. On models with the standard Passive Start, the key has to be in the frontsection of the passenger compartment. If thevehicle is equipped the optional PassiveEntry system (keyless locking/unlocking) thekey can be anywhere in the vehicle.
2. Press firmly on the brake pedal 2
.
3. Turn the start knob toward START and
release it to start the engine.
> The starter motor will crank until the engine starts or its overheating protection is triggered.
WARNING
• Never use more than one floor mat at a time on the driver's floor. Before driving,remove the original mat from the driver'sseat floor before using any other type offloor mat. Any mat used in this positionshould be securely and properly anchoredin the attaching pins. An extra mat on thedriver's floor can cause the acceleratorand/or brake pedal to catch. Check thatthe movement of these pedals is notimpeded.
• Volvo's floor mats are specially manufac-tured for your car. They must be firmlysecured in the clips on the floor so thatthey cannot slide and become trappedunder the pedals on the driver's side.
During normal starts, the electric motor is priori-tized and the gasoline engine will not start. Thismeans that when the start knob has been turned toward START and released, the electric motor is
activated ("started") and the vehicle is ready to be driven. The warning and information symbolsin the instrument panel will go out and thechosen theme will be displayed to indicate thatthe electric motor has been activated. However, in certain situations, such as in coldweather or if the hybrid battery is not sufficientlycharged, the gasoline engine will start instead. The vehicle should not be started if the charging cable is connected.
However, if the
cable cannot be disconnected or if the vehicleincorrectly detects a cable that is not connected,the vehicle can be started using an override pro-cedure:
1. Press the brake pedal and turn the start
knob to START.
2.
Remove charge cable to start will appear
in the instrument panel.
3. Turn the start knob to START again.
4.
Charge cable removed? Press start button 7s to start will be displayed. Turn
the start knob to START again and hold it for
7 seconds to start the vehicle.
NOTE
The vehicle cannot be started if the hybrid battery is discharged.
2 If the vehicle is moving, it is only necessary to turn the start knob toward START to start the engine.
Page 394 of 580
||
STARTING AND DRIVING
392
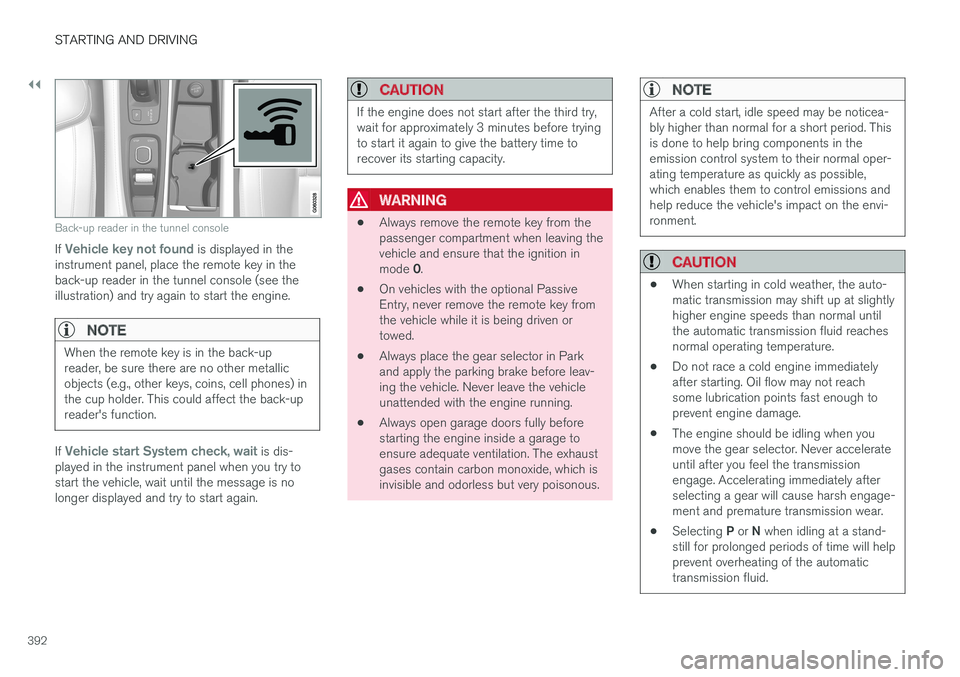
Back-up reader in the tunnel console
If Vehicle key not found is displayed in the
instrument panel, place the remote key in the back-up reader in the tunnel console (see theillustration) and try again to start the engine.
NOTE
When the remote key is in the back-up reader, be sure there are no other metallicobjects (e.g., other keys, coins, cell phones) inthe cup holder. This could affect the back-upreader's function.
If Vehicle start System check, wait is dis-
played in the instrument panel when you try to start the vehicle, wait until the message is nolonger displayed and try to start again.
CAUTION
If the engine does not start after the third try, wait for approximately 3 minutes before tryingto start it again to give the battery time torecover its starting capacity.
WARNING
• Always remove the remote key from the passenger compartment when leaving thevehicle and ensure that the ignition in mode
0.
• On vehicles with the optional Passive Entry, never remove the remote key fromthe vehicle while it is being driven ortowed.
• Always place the gear selector in Parkand apply the parking brake before leav-ing the vehicle. Never leave the vehicleunattended with the engine running.
• Always open garage doors fully beforestarting the engine inside a garage toensure adequate ventilation. The exhaustgases contain carbon monoxide, which isinvisible and odorless but very poisonous.
NOTE
After a cold start, idle speed may be noticea- bly higher than normal for a short period. Thisis done to help bring components in theemission control system to their normal oper-ating temperature as quickly as possible,which enables them to control emissions andhelp reduce the vehicle's impact on the envi-ronment.
CAUTION
•
When starting in cold weather, the auto- matic transmission may shift up at slightlyhigher engine speeds than normal untilthe automatic transmission fluid reachesnormal operating temperature.
• Do not race a cold engine immediatelyafter starting. Oil flow may not reachsome lubrication points fast enough toprevent engine damage.
• The engine should be idling when youmove the gear selector. Never accelerateuntil after you feel the transmissionengage. Accelerating immediately afterselecting a gear will cause harsh engage-ment and premature transmission wear.
• Selecting
P or N when idling at a stand-
still for prolonged periods of time will helpprevent overheating of the automatictransmission fluid.
Page 399 of 580
STARTING AND DRIVING
}}
397
Hybrid-related symbols and messages
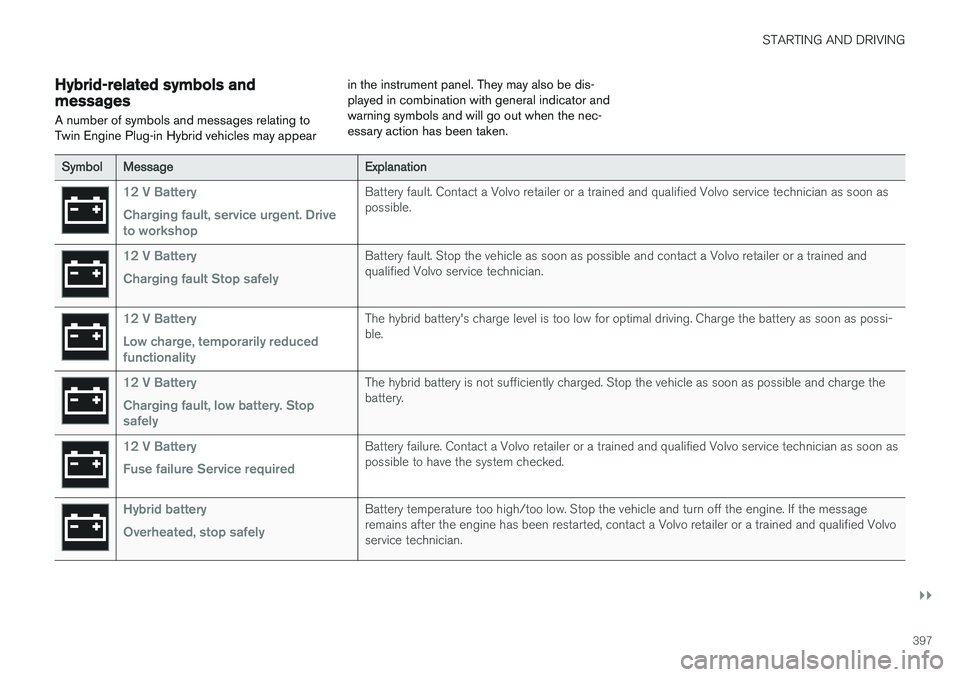
A number of symbols and messages relating to Twin Engine Plug-in Hybrid vehicles may appear in the instrument panel. They may also be dis-played in combination with general indicator andwarning symbols and will go out when the nec-essary action has been taken.
Symbol
Message Explanation
12 V Battery Charging fault, service urgent. Drive to workshopBattery fault. Contact a Volvo retailer or a trained and qualified Volvo service technician as soon as possible.
12 V Battery Charging fault Stop safelyBattery fault. Stop the vehicle as soon as possible and contact a Volvo retailer or a trained and qualified Volvo service technician.
12 V Battery Low charge, temporarily reduced functionalityThe hybrid battery's charge level is too low for optimal driving. Charge the battery as soon as possi- ble.
12 V Battery Charging fault, low battery. Stop safelyThe hybrid battery is not sufficiently charged. Stop the vehicle as soon as possible and charge the battery.
12 V Battery Fuse failure Service requiredBattery failure. Contact a Volvo retailer or a trained and qualified Volvo service technician as soon as possible to have the system checked.
Hybrid battery Overheated, stop safelyBattery temperature too high/too low. Stop the vehicle and turn off the engine. If the message remains after the engine has been restarted, contact a Volvo retailer or a trained and qualified Volvoservice technician.
Page 400 of 580
||
STARTING AND DRIVING
398
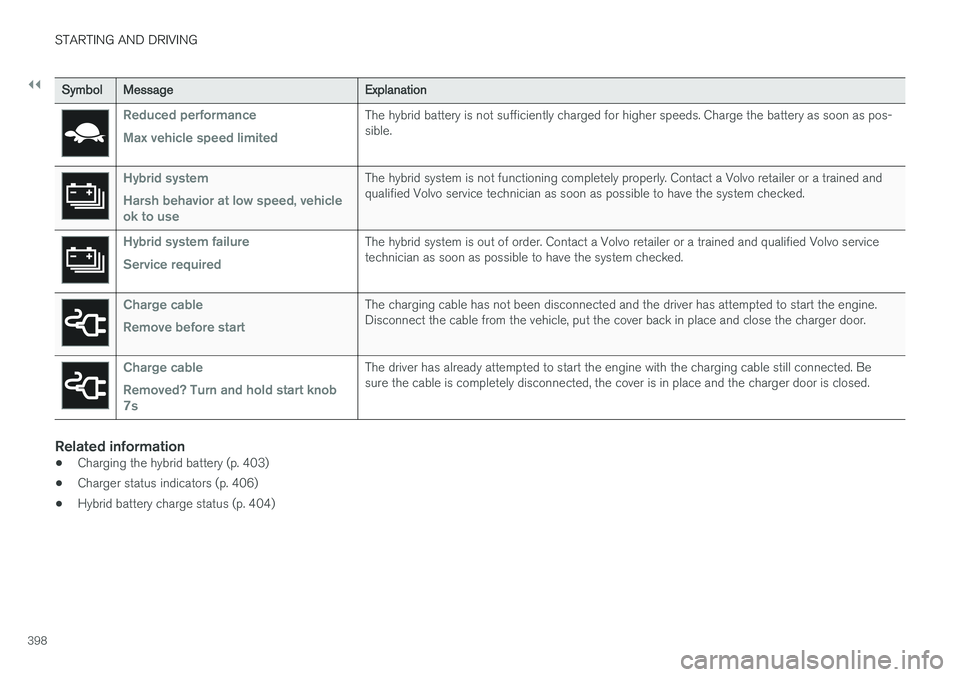
SymbolMessage Explanation
Reduced performance Max vehicle speed limitedThe hybrid battery is not sufficiently charged for higher speeds. Charge the battery as soon as pos- sible.
Hybrid system Harsh behavior at low speed, vehicle ok to useThe hybrid system is not functioning completely properly. Contact a Volvo retailer or a trained and qualified Volvo service technician as soon as possible to have the system checked.
Hybrid system failure Service requiredThe hybrid system is out of order. Contact a Volvo retailer or a trained and qualified Volvo service technician as soon as possible to have the system checked.
Charge cable Remove before startThe charging cable has not been disconnected and the driver has attempted to start the engine. Disconnect the cable from the vehicle, put the cover back in place and close the charger door.
Charge cable Removed? Turn and hold start knob 7sThe driver has already attempted to start the engine with the charging cable still connected. Be sure the cable is completely disconnected, the cover is in place and the charger door is closed.
Related information
•Charging the hybrid battery (p. 403)
• Charger status indicators (p. 406)
• Hybrid battery charge status (p. 404)
Page 405 of 580
STARTING AND DRIVING
}}
403
CAUTION
Never disconnect the charging cable from the 120-/240-volt socket while charging is inprogress. This could damage the socket. Always stop the charging process (by unlock- ing the vehicle) and disconnect the chargingcable from the vehicle's charging socket before disconnecting the other end from the
120-/240-volt socket being used.
During the charging process, condensation may form under the vehicle, which is normal and iscaused by cooling the hybrid battery.
Related information
• Hybrid battery charge status (p. 404)
• Charging the hybrid battery (p. 403)
• Hybrid battery charging cable (p. 394)
• Stopping hybrid battery charging (p. 400)
Charging the hybrid battery In addition to the conventional fuel tank, Twin Engine Plug-in Hybrid vehicles are also equip-ped with a rechargeable lithium-ion hybrid bat-tery.
The hybrid battery is recharged using a charging cable located in a storage compartment underthe floor of the cargo area. See also the article"Charging cable."
WARNING
The hybrid electrical system in your vehicle uses high voltage electrical current. Any dam-age to this system or to the hybrid batterymay result in the danger of overheating, fire,or serious injury. If the vehicle is involved in acollision or is subjected to flooding, fires, etc.,have it inspected by a trained and qualifiedVolvo service technician. Prior to this inspec-tion, the vehicle should be parked outdoors ata safe distance from any building or poten-tially flammable materials.
The hybrid battery's charging time depends on the charging current used.
NOTE
The capacity of the hybrid battery diminishes somewhat with age and use, which couldresult in increased use of the gasoline engineand consequently, slightly higher fuel con-sumption.
Charging is indicated in three ways: • Charge module (the unit that is plugged into the wall socket): The blue indicator light onthe cable's charge module will flash red sev-eral times when the unit is plugged into awall socket while a safety check is being per-formed and will then glow steadily blue toindicate that the charger is ready to use.
• A green indicator light in the vehicle's charg-ing socket will flash green while the batteryis charging and will glow steadily green whenthe hybrid battery is fully charged. The blueindicator light in the charge module will alsoflash while charging is underway and willglow steadily blue when charging is comple-ted.
• A gauge in the instrument panel will alsoindicate the battery's charge level.
The hybrid battery charging process also chargesthe vehicle's start battery. If the hybrid battery's temperature is below – 13 ºF (–10 ºC) or above +104 ºF (+40 ºC), some
of the vehicle's functions may be reduced or not
Page 491 of 580
WHEELS AND TIRES
489
Calibrating the Tire Pressure Monitoring System (TPMS)In order for the Tire Pressure Monitoring System to work properly, tire pressure reference valuesmust be set correctly. This must be done eachtime wheels are changed or tire pressures aremodified.
Calibrating TPMSTo calibrate the system:
1. Switch off the engine.
2. Re-inflate the tire(s) to the correct pressure. Consult the tire pressure decal located on the driver's side B-pillar (the structural mem-ber at the side of the vehicle, at the rear ofthe driver's door opening) or the inflationpressure table in your printed owner's man-ual supplement.
3. Start the engine. 4. Open the
Car status app in the center dis-
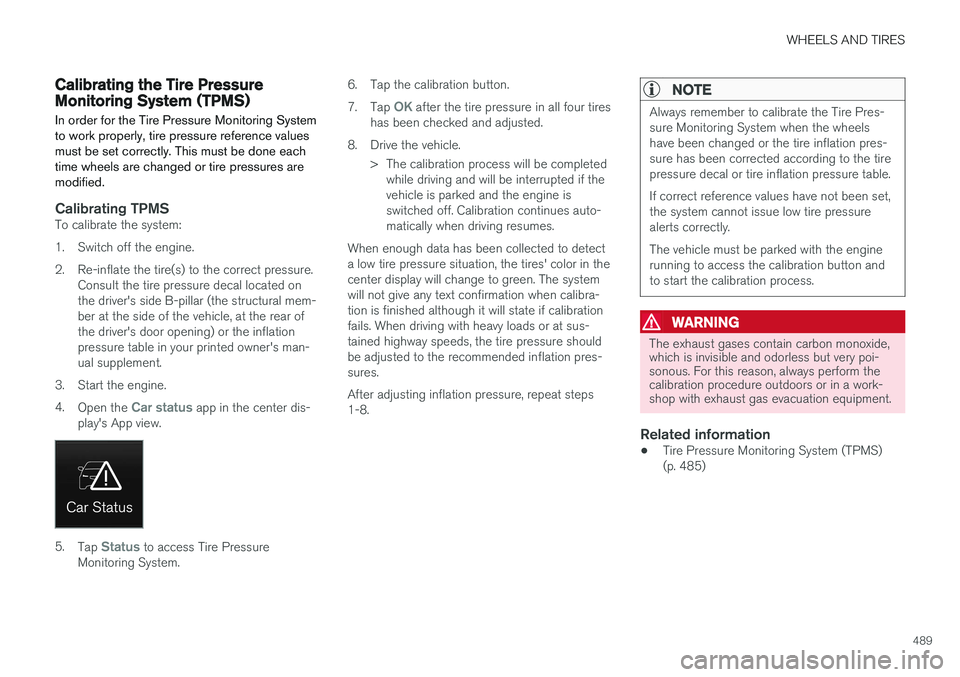
play's App view.
5. Tap Status to access Tire Pressure
Monitoring System. 6. Tap the calibration button. 7.
Tap
OK after the tire pressure in all four tires
has been checked and adjusted.
8. Drive the vehicle. > The calibration process will be completedwhile driving and will be interrupted if the vehicle is parked and the engine isswitched off. Calibration continues auto-matically when driving resumes.
When enough data has been collected to detecta low tire pressure situation, the tires' color in thecenter display will change to green. The systemwill not give any text confirmation when calibra-tion is finished although it will state if calibrationfails. When driving with heavy loads or at sus-tained highway speeds, the tire pressure shouldbe adjusted to the recommended inflation pres-sures. After adjusting inflation pressure, repeat steps 1-8.
NOTE
Always remember to calibrate the Tire Pres- sure Monitoring System when the wheelshave been changed or the tire inflation pres-sure has been corrected according to the tirepressure decal or tire inflation pressure table. If correct reference values have not been set, the system cannot issue low tire pressurealerts correctly. The vehicle must be parked with the engine running to access the calibration button andto start the calibration process.
WARNING
The exhaust gases contain carbon monoxide, which is invisible and odorless but very poi-sonous. For this reason, always perform thecalibration procedure outdoors or in a work-shop with exhaust gas evacuation equipment.
Related information
• Tire Pressure Monitoring System (TPMS) (p. 485)