door lock VOLVO XC90 T8 2018 Owner´s Manual
[x] Cancel search | Manufacturer: VOLVO, Model Year: 2018, Model line: XC90 T8, Model: VOLVO XC90 T8 2018Pages: 686, PDF Size: 11.51 MB
Page 271 of 686
KEY, LOCKS AND ALARM
}}
* Option/accessory.269
In the event of alarm system failureIf a problem is detected in the alarm system, a symbol and the message
Alarm system failure Service
required will appear in the instrument
panel. Contact a workshop - an authorized Volvo workshop is recommended.
NOTE
Do not attempt to repair or alter any of the components in the alarm system yourself. Anysuch attempt could affect the terms and con-ditions of your insurance policy.
Related information
• Arming and disarming the alarm (p. 269)
Arming and disarming the alarm
The alarm is armed when the vehicle is locked.
Arming the alarmLock and arm the vehicle by:
• pressing the lock button on the remote key
• touch the marked surface on the outside of the door handle or the rubberized pressure plate on the tailgate 21
.
If the vehicle is equipped with both keyless lock- ing/unlocking * and power tailgate *, the button
on the lower edge of the tailgate can also
be used to lock and arm the vehicle.
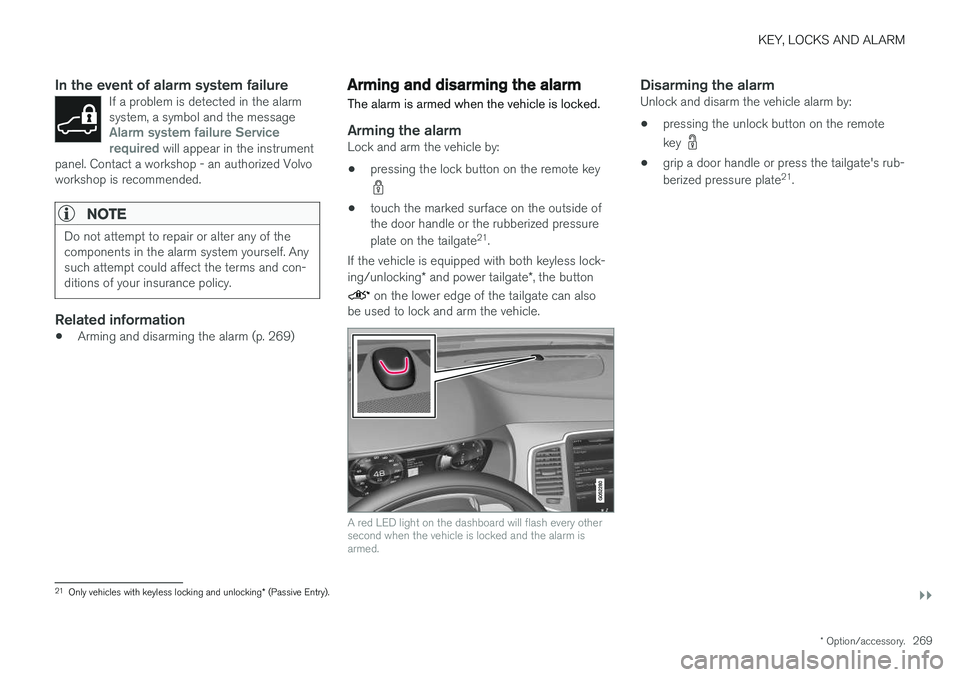
A red LED light on the dashboard will flash every other second when the vehicle is locked and the alarm isarmed.
Disarming the alarmUnlock and disarm the vehicle alarm by:
• pressing the unlock button on the remote key
•
grip a door handle or press the tailgate's rub- berized pressure plate 21
.
21 Only vehicles with keyless locking and unlocking * (Passive Entry).
Page 272 of 686
||
KEY, LOCKS AND ALARM
* Option/accessory.
270
Disarming the alarm without a functioning
remote key
The vehicle can be unlocked and disarmed even if the remote key is not functioning, e.g. if thebattery is discharged.
1. Open the driver's door using the detachable
key blade.
> This will trigger the alarm.
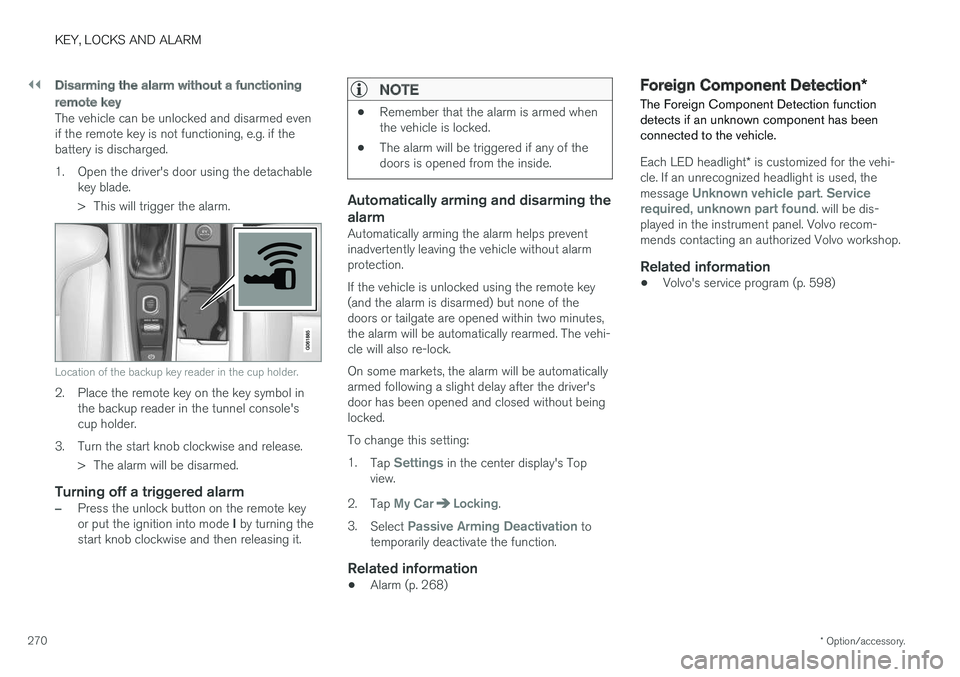
Location of the backup key reader in the cup holder.
2. Place the remote key on the key symbol inthe backup reader in the tunnel console's cup holder.
3. Turn the start knob clockwise and release. > The alarm will be disarmed.
Turning off a triggered alarm
–Press the unlock button on the remote key or put the ignition into mode I by turning the
start knob clockwise and then releasing it.
NOTE
• Remember that the alarm is armed when the vehicle is locked.
• The alarm will be triggered if any of thedoors is opened from the inside.
Automatically arming and disarming the alarm
Automatically arming the alarm helps prevent inadvertently leaving the vehicle without alarmprotection. If the vehicle is unlocked using the remote key (and the alarm is disarmed) but none of thedoors or tailgate are opened within two minutes,the alarm will be automatically rearmed. The vehi-cle will also re-lock. On some markets, the alarm will be automatically armed following a slight delay after the driver'sdoor has been opened and closed without beinglocked. To change this setting:1.
Tap
Settings in the center display's Top
view.
2. Tap
My CarLocking.
3. Select
Passive Arming Deactivation to
temporarily deactivate the function.
Related information
• Alarm (p. 268)
Foreign Component Detection
*
The Foreign Component Detection function detects if an unknown component has beenconnected to the vehicle.
Each LED headlight * is customized for the vehi-
cle. If an unrecognized headlight is used, the message
Unknown vehicle part. Service
required, unknown part found. will be dis-
played in the instrument panel. Volvo recom- mends contacting an authorized Volvo workshop.
Related information
• Volvo's service program (p. 598)
Page 305 of 686
DRIVER SUPPORT
}}
303
To temporarily deactivate Adaptive Cruise Control and put it in standby mode:
–Press the button on the steering wheel
(2). > The
symbol in the instrument panel
changes color from WHITE to GRAY and the set speed in the center of the speed-ometer will change from BEIGE to GRAY.
WARNING
• If Adaptive Cruise Control is in standby mode, the driver must intervene and regu-late both speed and distance to the vehicleahead.
• If the vehicle comes too close to a vehicleahead when Adaptive Cruise Control is instandby mode, the driver is instead warnedof the short distance by the Distance Alertfunction.
Standby mode due to action by the driver
Adaptive Cruise Control will be temporarily deac- tivated and put in standby mode if:
• the brakes are applied.
• the gear selector is moved to
N
• the vehicle is driven faster than the setspeed for more than 1 minute Temporarily increasing speed using the accelera-
tor pedal, e.g. when passing another vehicle, willnot affect the setting. The vehicle will return tothe set speed when the accelerator pedal isreleased.
Automatic standby mode
Adaptive Cruise Control is dependent on other systems, such as Electronic Stability Control (ESC 50
). If any of these other systems stops
working, Adaptive Cruise Control will automati- cally switch off.
WARNING
With automatic standby mode, the driver is warned by an acoustic signal and a messageon the instrument panel. • The driver must then regulate vehicle speed, apply the brakes if necessary, andmaintain a safe distance to other vehicles.
Adaptive Cruise Control may go into standbymode if: • your vehicle's speed goes below 5 km/h(3 mph) and ACC cannot determine if thevehicle ahead is stationary or if it is anotherobject, e.g. a speed bump.
• your vehicle's speed goes under 5 km/h(3 mph) and the vehicle ahead turns so thatACC no longer has a vehicle to follow. •
the driver opens the door.
• the driver unbuckles the seat belt.
• the engine speed (rpm) is too low/high.
• one or more of the wheels lose traction.
• the brake temperature is high.
• the parking brake is applied.
• the camera/radar sensor is covered by snowor heavy rain (the camera lens/radar wavesare blocked)
Reactivating Adaptive Cruise Control
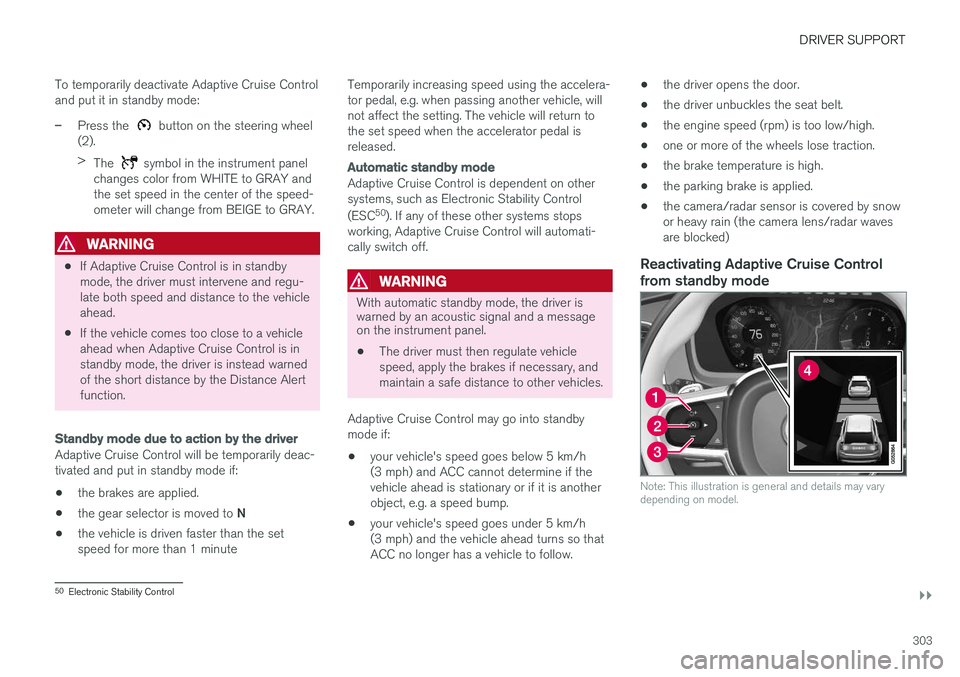
from standby mode
Note: This illustration is general and details may vary depending on model.
50 Electronic Stability Control
Page 322 of 686
||
DRIVER SUPPORT
320
Automatic standby mode
Pilot Assist is dependent on other systems, such as Electronic Stability Control (ESC66
). If any of
these other systems stops working, Pilot Assist will automatically switch off.
WARNING
With automatic standby mode, the driver is warned by an acoustic signal and a messageon the instrument panel. • The driver must then regulate vehicle speed, apply the brakes if necessary, andmaintain a safe distance to other vehicles.
Adaptive Cruise Control may go into standbymode if, e.g.: • the driver opens the door.
• the brake temperature is high.
• the driver's hands are not on the steering wheel.
• the parking brake is applied.
• the engine speed (rpm) is too low/high.
• the driver unbuckles the seat belt.
• one or more of the wheels lose traction.
• the camera/radar sensor is covered by snowor heavy rain (the camera lens/radar wavesare blocked) •
your vehicle's speed goes below 5 km/h(3 mph) and Pilot Assist cannot determine ifthe vehicle ahead is stationary or if it isanother object, e.g. a speed bump.
• your vehicle's speed goes under 5 km/h(3 mph) and the vehicle ahead turns so thatPilot Assist no longer has a vehicle to follow.Reactivating Pilot Assist from standby
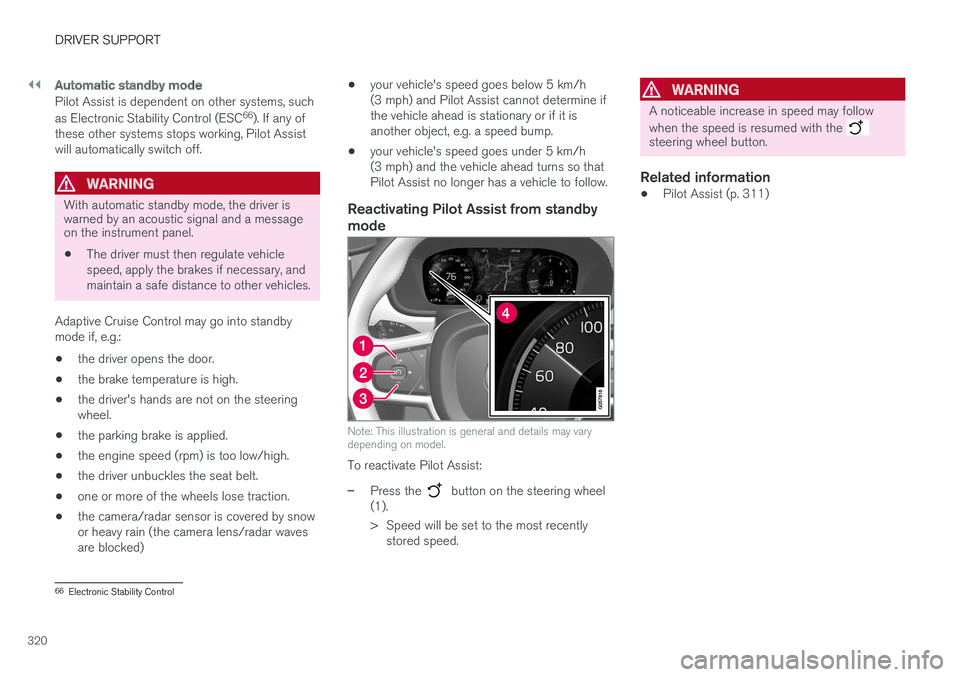
mode
Note: This illustration is general and details may vary depending on model.
To reactivate Pilot Assist:
–Press the button on the steering wheel
(1).
> Speed will be set to the most recently stored speed.
WARNING
A noticeable increase in speed may follow when the speed is resumed with the
steering wheel button.
Related information
• Pilot Assist (p. 311)
66
Electronic Stability Control
Page 413 of 686
HYBRID INFORMATION
}}
411
WARNING
•The charging cable's residual current breaker helps protect the vehicle's charg-ing system but cannot ensure that an cur-rent overload will never occur.
• Never use visibly worn or damaged elec-trical sockets. Doing so could lead to firesor serious injury.
• Never connect the charging cable to anextension cord.
• Maintenance or replacement of the hybridbattery may only be performed by atrained and qualified Volvo service techni-cian.
Related information
• Charge cable (p. 409)
• Charging status in the charging cable'scharging module (p. 415)
Charging cable temperaturemonitoring
To help ensure the vehicle's hybrid battery is reli- ably charged each time it is connected, chargingis stopped if the temperature in the chargingcable becomes too high and reaches a criticallimit.
CAUTION
If charging is often inadvertently interrupted, have the charging cable and the vehicle'scharging system inspected by a trained andqualified Volvo service technician.
Related information
• Charge cable (p. 409)
Opening and closing the chargingsocket cover
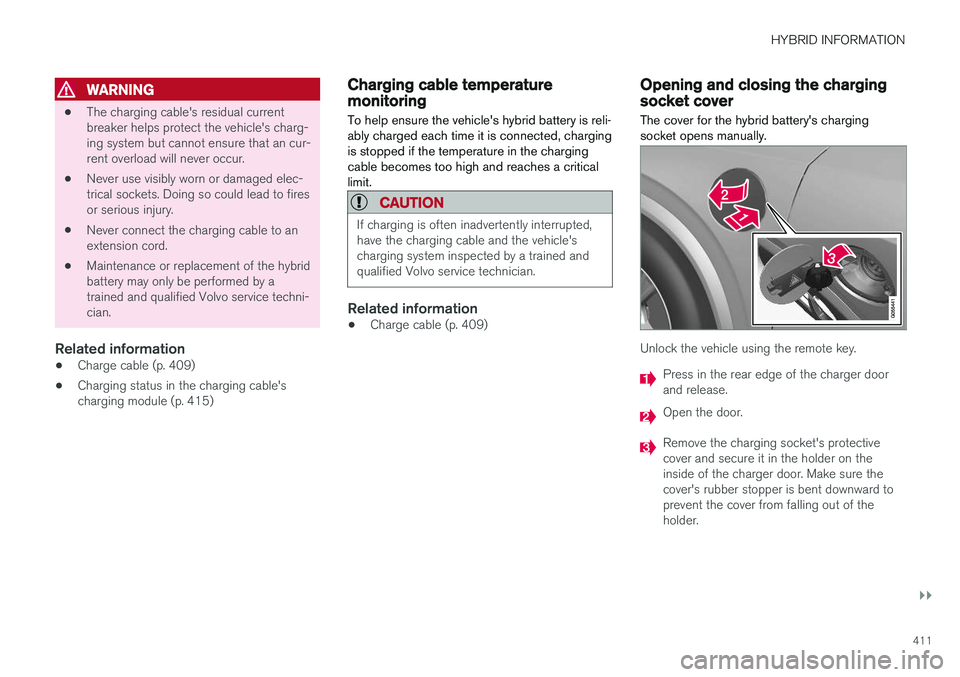
The cover for the hybrid battery's charging socket opens manually.
Unlock the vehicle using the remote key.
Press in the rear edge of the charger door and release.
Open the door.
Remove the charging socket's protective cover and secure it in the holder on theinside of the charger door. Make sure thecover's rubber stopper is bent downward toprevent the cover from falling out of theholder.
Page 414 of 686
||
HYBRID INFORMATION
412
CAUTION
Make sure the charging socket's protective cover is positioned so it does not damage thepaint (in e.g., windy conditions).
Perform the following steps in reverse to close the charger door.
NOTE
Since the hatch is locked during driving, the vehicle must be unlocked again to be able toopen the hatch.
Related information
•Initiating hybrid battery charging (p. 412)
• Stopping hybrid battery charging (p. 418)
• Charging the hybrid battery (p. 407)
Initiating hybrid battery charging
The hybrid battery is charged by connecting a charging cable between the vehicle and a120/240 V outlet (alternating current). Only use the charging cable supplied with the car or a replacement cable recommended byVolvo.
CAUTION
Never connect the charging cable if there is a risk of a thunderstorm or there is lightning.
WARNING
• The charging cable must be grounded when in use. It is equipped with a cordwith a grounding conductor and agrounding plug. The plug must beinserted into an appropriate outlet that isproperly installed and grounded inaccordance with all local codes and ordi-nances and is not damaged in any way.
• Children should be supervised when inthe vicinity of the charging cable when itis plugged in.
• High voltage is present in your electricmeter housing and power distributionservice panel. Contact with high voltagecan cause death or serious personalinjury.
• Do not use the charging cable if it isdamaged in any way. A damaged or mal-functioning charging cable may only berepaired by a workshop – a authorizedVolvo workshop is recommended.
• Always position the charging cable sothat it will not be driven over, stepped on,tripped over or otherwise damaged, orcause personal injury.
Page 415 of 686
HYBRID INFORMATION
}}
413
•Disconnect the charger from the wall out- let before cleaning it.
• Never connect the charging cable to anextension cord or a multiple plug socket.
Also, refer to the manufacturer's instructions for using the charging cable and its compo-nents.
CAUTION
Make sure that the 120/240 V outlet (AC, alternating current) has a power capacity suf-ficient for charging electric vehicles. If you areuncertain of the capacity, have the outletchecked by a licensed electrician.
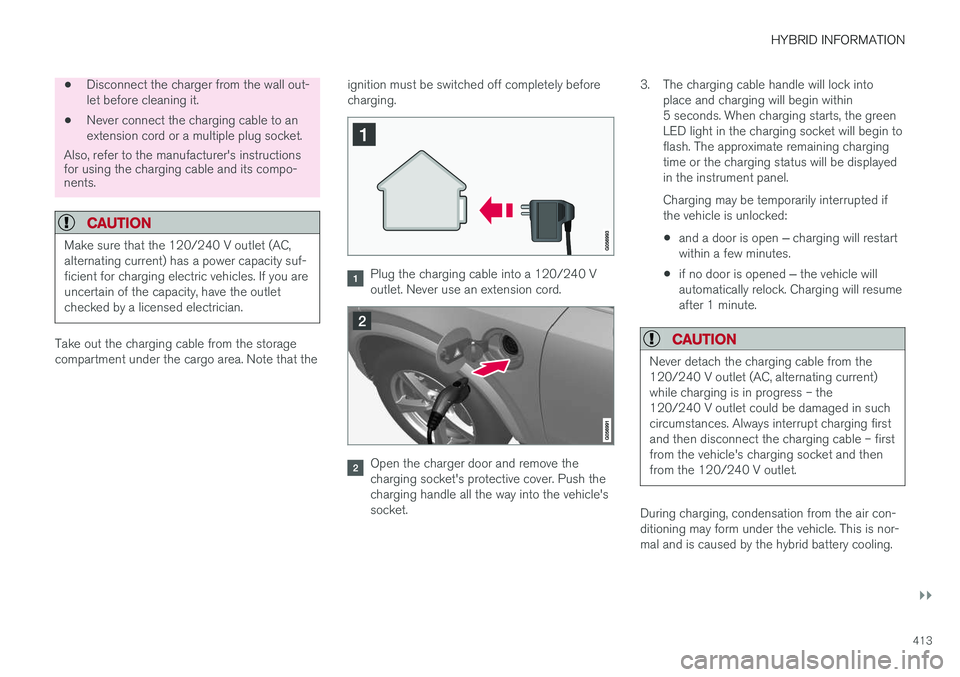
Take out the charging cable from the storage compartment under the cargo area. Note that the ignition must be switched off completely beforecharging.
Plug the charging cable into a 120/240 V outlet. Never use an extension cord.
Open the charger door and remove the charging socket's protective cover. Push thecharging handle all the way into the vehicle'ssocket.3. The charging cable handle will lock into
place and charging will begin within5 seconds. When charging starts, the greenLED light in the charging socket will begin toflash. The approximate remaining chargingtime or the charging status will be displayedin the instrument panel. Charging may be temporarily interrupted if the vehicle is unlocked:
• and a door is open
‒ charging will restart
within a few minutes.
• if no door is opened
‒ the vehicle will
automatically relock. Charging will resumeafter 1 minute.
CAUTION
Never detach the charging cable from the 120/240 V outlet (AC, alternating current)while charging is in progress – the120/240 V outlet could be damaged in suchcircumstances. Always interrupt charging firstand then disconnect the charging cable – firstfrom the vehicle's charging socket and thenfrom the 120/240 V outlet.
During charging, condensation from the air con- ditioning may form under the vehicle. This is nor-mal and is caused by the hybrid battery cooling.
Page 416 of 686
||
HYBRID INFORMATION
414
Related information
•Charging the hybrid battery (p. 407)
• Opening and closing the charging socket cover (p. 411)
• Charging status in the vehicle's chargingsocket (p. 414)
• Charging status in the instrument panel(p. 416)
• Charging status in the charging cable'scharging module (p. 415)
• Stopping hybrid battery charging (p. 418)
Charging status in the vehicle'scharging socket
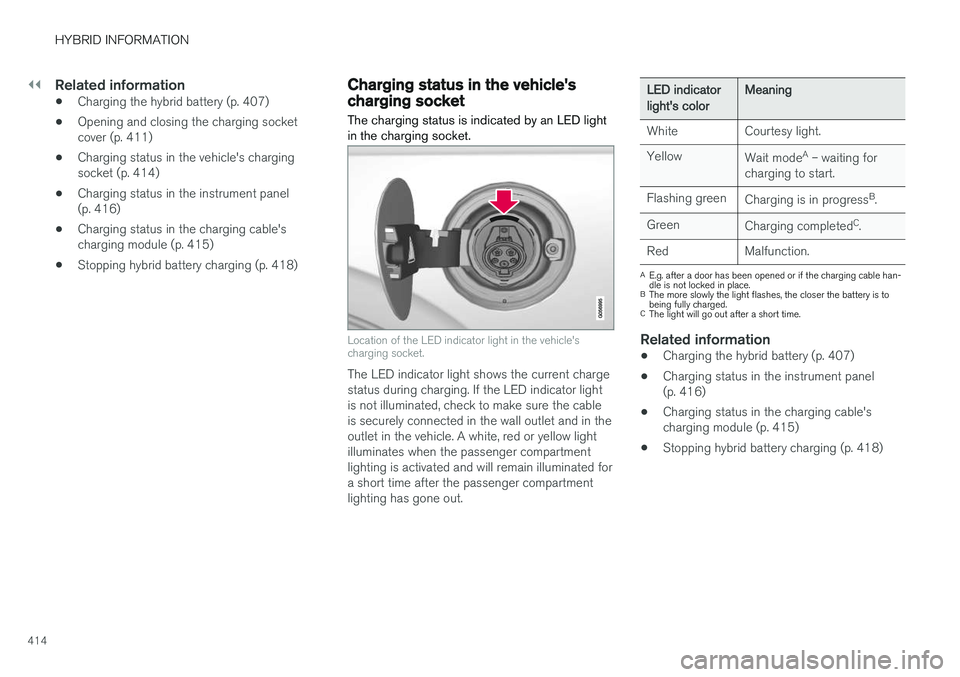
The charging status is indicated by an LED light in the charging socket.
Location of the LED indicator light in the vehicle's charging socket.
The LED indicator light shows the current charge status during charging. If the LED indicator lightis not illuminated, check to make sure the cableis securely connected in the wall outlet and in theoutlet in the vehicle. A white, red or yellow lightilluminates when the passenger compartmentlighting is activated and will remain illuminated fora short time after the passenger compartmentlighting has gone out.
LED indicatorlight's colorMeaning
White Courtesy light. Yellow Wait modeA
– waiting for
charging to start.
Flashing green Charging is in progress B
.
Green Charging completed C
.
Red Malfunction.
A E.g. after a door has been opened or if the charging cable han- dle is not locked in place.
B The more slowly the light flashes, the closer the battery is tobeing fully charged.
C The light will go out after a short time.
Related information
• Charging the hybrid battery (p. 407)
• Charging status in the instrument panel (p. 416)
• Charging status in the charging cable'scharging module (p. 415)
• Stopping hybrid battery charging (p. 418)
Page 419 of 686
HYBRID INFORMATION
417
NOTE
If the instrument panel is not used, it will go dark after a period of time. To reactivate thedisplay: •depress the brake pedal,
• open one of the doors, or
• put the ignition in mode
I by turning the
START knob clockwise and then releas-
ing.
Related information
• Charging the hybrid battery (p. 407)
• Twin Engine symbols and messages in the instrument panel (p. 419)
• Charging status in the vehicle's chargingsocket (p. 414)
• Charging status in the charging cable'scharging module (p. 415)
• Stopping hybrid battery charging (p. 418)
Page 420 of 686
HYBRID INFORMATION
* Option/accessory.
418
Stopping hybrid battery charging
To stop charging of the hybrid battery, unlock the vehicle, unplug the charging cable from thevehicle's charging socket and then unplug thecable from the 120/240 V outlet (alternatingcurrent).
NOTE
Always unlock the vehicle so that charging is cut off before the connection to the120/240 V outlet (AC, alternating current) isdisconnected. Note that the charging cablemust be disconnected from the vehicle'scharging socket before it is disconnectedfrom the 120/240 V outlet, partly to preventdamage to the system and party to preventunintentional interruption of charging.
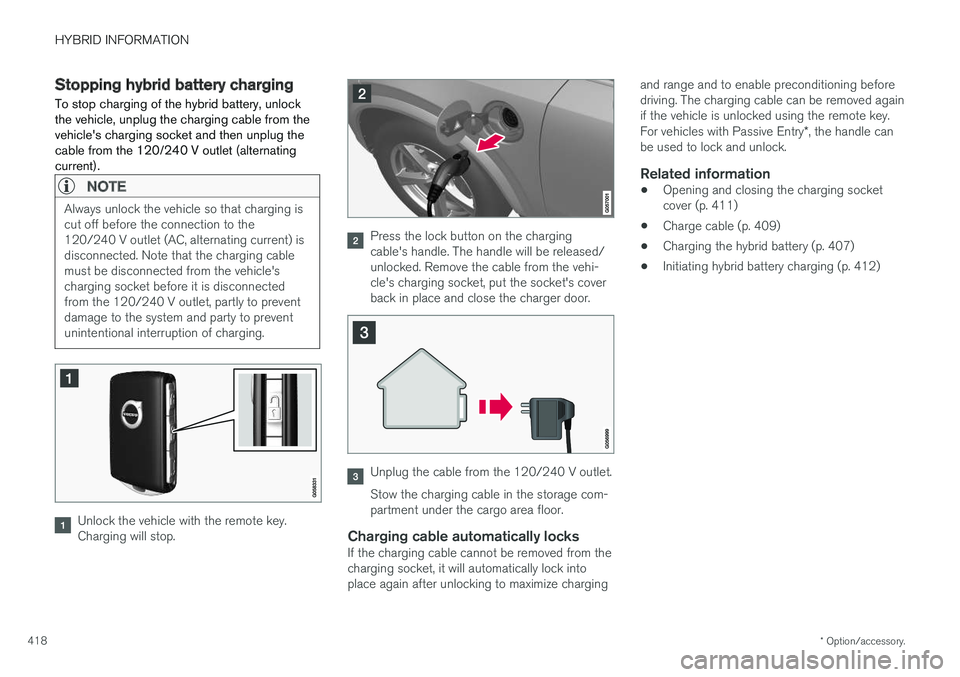
Unlock the vehicle with the remote key. Charging will stop.
Press the lock button on the charging cable's handle. The handle will be released/unlocked. Remove the cable from the vehi-cle's charging socket, put the socket's coverback in place and close the charger door.
Unplug the cable from the 120/240 V outlet. Stow the charging cable in the storage com- partment under the cargo area floor.
Charging cable automatically locksIf the charging cable cannot be removed from thecharging socket, it will automatically lock intoplace again after unlocking to maximize charging and range and to enable preconditioning beforedriving. The charging cable can be removed againif the vehicle is unlocked using the remote key. For vehicles with Passive Entry
*, the handle can
be used to lock and unlock.
Related information
• Opening and closing the charging socket cover (p. 411)
• Charge cable (p. 409)
• Charging the hybrid battery (p. 407)
• Initiating hybrid battery charging (p. 412)