four wheel drive VOLVO XC90 T8 2018 Owner´s Manual
[x] Cancel search | Manufacturer: VOLVO, Model Year: 2018, Model line: XC90 T8, Model: VOLVO XC90 T8 2018Pages: 686, PDF Size: 11.51 MB
Page 93 of 686
DISPLAYS AND VOICE CONTROL
91
1. Open the app menu in the instrument panel
by pressing (1). (The App menu cannot be opened while there is an unacknowledged message in theinstrument panel. The message must be con-firmed before the App menu can be opened.)
2. Navigate to the trip computer app by moving left or right using (2).
> The top four menu rows show measuredvalues for trip odometer TM. The next four menu rows show measured values for tripodometer TA. Scroll up or down in the listusing (3).
3. Scroll down to the option buttons to choose which information to show in the instrumentpanel:
• Distance to empty tank
• Odometer
• Mileage for trip odometer TM, TA or nodisplay of mileage
• Current fuel consumption, average fuelconsumption for TM or TA, or no displayof fuel consumption
• Tourist (alternative speedometer).
• Distance to discharged battery
Select or clear a selection using the O but-
ton (4). The change will apply immediately.
Related information
• Trip computer (p. 89)
• Resetting the trip odometer (p. 91)
Resetting the trip odometer
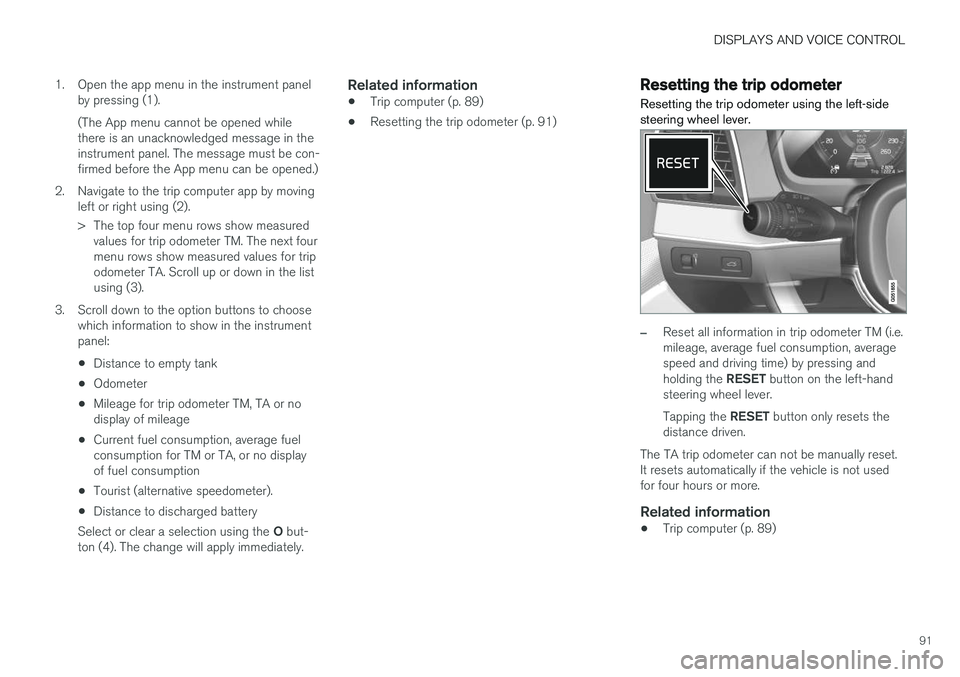
Resetting the trip odometer using the left-side steering wheel lever.
–Reset all information in trip odometer TM (i.e. mileage, average fuel consumption, averagespeed and driving time) by pressing and holding the RESET button on the left-hand
steering wheel lever. Tapping the RESET button only resets the
distance driven.
The TA trip odometer can not be manually reset. It resets automatically if the vehicle is not usedfor four hours or more.
Related information
• Trip computer (p. 89)
Page 193 of 686
SEATS AND STEERING WHEEL
}}
* Option/accessory.191
2.
Select
Lumbar in the seat settings view.
• Press the four-way button (the round but- ton) up/down to move the lumbar supportupward/downward.
• Press the front part of the four-way buttonto increase lumbar support.
• Press the rear part of the four-way buttonto decrease lumbar support.
Related information
•
Manual front seats (p. 184)
• Power front seats
* (p. 185)
• Adjusting the power front seats
* (p. 185)
• Storing memory settings in power front seats
* (p. 186)
• Using stored memory in a powered front seat (p. 187)
• Adjusting front seat massage settings
*
(p. 188)
• Adjusting front seat cushion length (p. 189)
• Front seat massage settings
* (p. 188)
• Adjusting front seat side bolster settings
*
(p. 190)
• Adjusting the passenger seat from the driv- er's seat
* (p. 191)
Adjusting the passenger seat from
the driver's seat *
The front passenger seat can be adjusted from the driver's seat.
Activating the functionThe function is activated via the function view in the center display:
Tap the
Adjust Passenger
Seat button to activate.
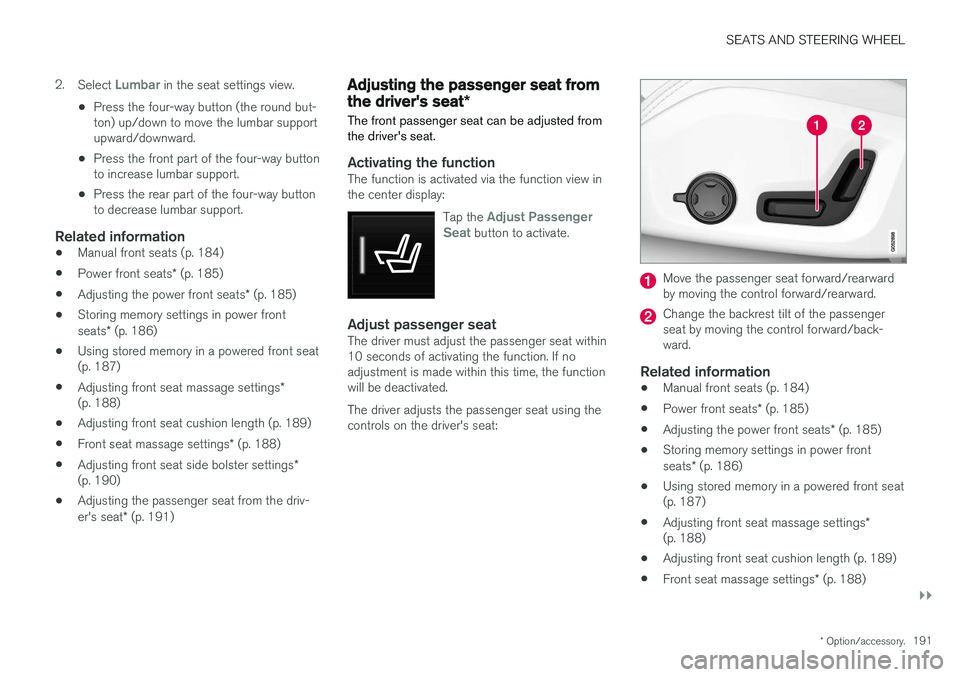
Adjust passenger seatThe driver must adjust the passenger seat within 10 seconds of activating the function. If noadjustment is made within this time, the functionwill be deactivated. The driver adjusts the passenger seat using the controls on the driver's seat:
Move the passenger seat forward/rearward by moving the control forward/rearward.
Change the backrest tilt of the passenger seat by moving the control forward/back-ward.
Related information
• Manual front seats (p. 184)
• Power front seats
* (p. 185)
• Adjusting the power front seats
* (p. 185)
• Storing memory settings in power front seats
* (p. 186)
• Using stored memory in a powered front seat (p. 187)
• Adjusting front seat massage settings
*
(p. 188)
• Adjusting front seat cushion length (p. 189)
• Front seat massage settings
* (p. 188)
Page 217 of 686
CLIMATE CONTROL
}}
* Option/accessory.215
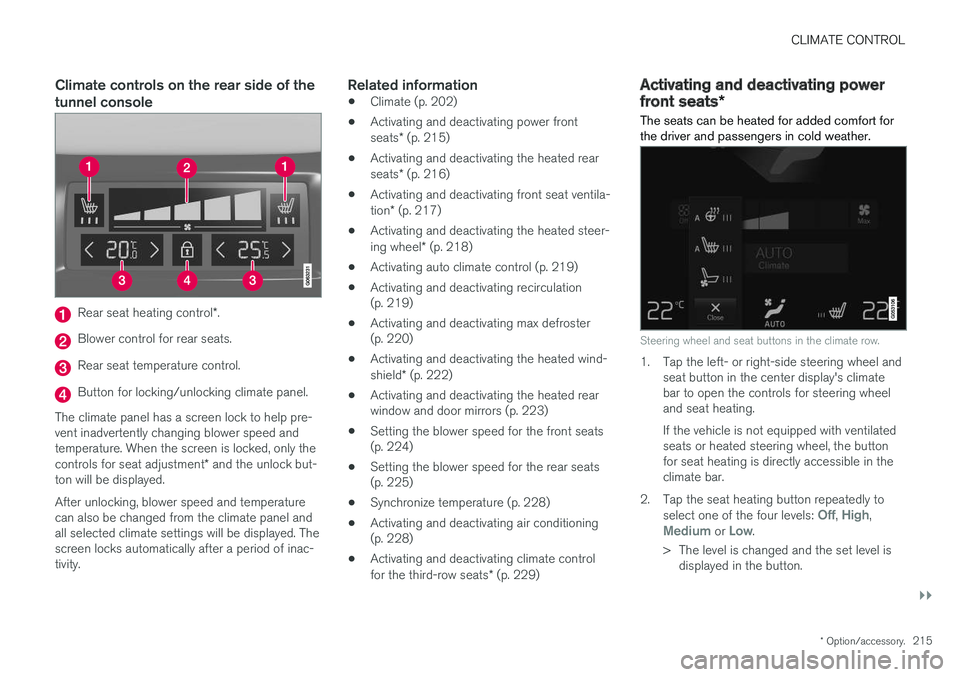
Climate controls on the rear side of the tunnel console
Rear seat heating control *.
Blower control for rear seats.
Rear seat temperature control.
Button for locking/unlocking climate panel.
The climate panel has a screen lock to help pre- vent inadvertently changing blower speed andtemperature. When the screen is locked, only the controls for seat adjustment * and the unlock but-
ton will be displayed. After unlocking, blower speed and temperature can also be changed from the climate panel andall selected climate settings will be displayed. Thescreen locks automatically after a period of inac-tivity.
Related information
• Climate (p. 202)
• Activating and deactivating power front seats
* (p. 215)
• Activating and deactivating the heated rearseats
* (p. 216)
• Activating and deactivating front seat ventila-tion
* (p. 217)
• Activating and deactivating the heated steer-ing wheel
* (p. 218)
• Activating auto climate control (p. 219)
• Activating and deactivating recirculation (p. 219)
• Activating and deactivating max defroster(p. 220)
• Activating and deactivating the heated wind- shield
* (p. 222)
• Activating and deactivating the heated rear window and door mirrors (p. 223)
• Setting the blower speed for the front seats(p. 224)
• Setting the blower speed for the rear seats(p. 225)
• Synchronize temperature (p. 228)
• Activating and deactivating air conditioning(p. 228)
• Activating and deactivating climate control for the third-row seats
* (p. 229)
Activating and deactivating power
front seats *
The seats can be heated for added comfort for the driver and passengers in cold weather.
Steering wheel and seat buttons in the climate row.
1. Tap the left- or right-side steering wheel and seat button in the center display's climate bar to open the controls for steering wheeland seat heating. If the vehicle is not equipped with ventilated seats or heated steering wheel, the buttonfor seat heating is directly accessible in theclimate bar.
2. Tap the seat heating button repeatedly to select one of the four levels:
Off, High,Medium or Low.
> The level is changed and the set level is displayed in the button.
Page 220 of 686
CLIMATE CONTROL
* Option/accessory.
218
Activating and deactivating the
heated steering wheel *
The steering wheel can be heated for added comfort in cold weather.
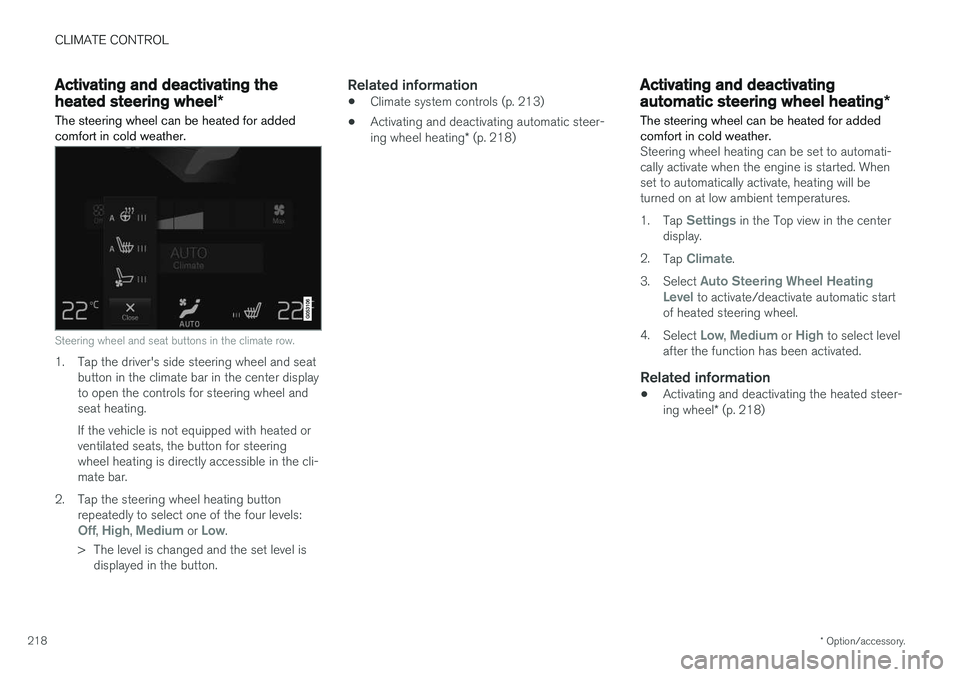
Steering wheel and seat buttons in the climate row.
1. Tap the driver's side steering wheel and seat button in the climate bar in the center display to open the controls for steering wheel andseat heating. If the vehicle is not equipped with heated or ventilated seats, the button for steeringwheel heating is directly accessible in the cli-mate bar.
2. Tap the steering wheel heating button repeatedly to select one of the four levels:
Off, High, Medium or Low.
> The level is changed and the set level is displayed in the button.
Related information
• Climate system controls (p. 213)
• Activating and deactivating automatic steer- ing wheel heating
* (p. 218)
Activating and deactivating
automatic steering wheel heating *
The steering wheel can be heated for added comfort in cold weather.
Steering wheel heating can be set to automati- cally activate when the engine is started. Whenset to automatically activate, heating will beturned on at low ambient temperatures. 1. Tap
Settings in the Top view in the center
display.
2. Tap
Climate.
3. Select
Auto Steering Wheel Heating
Level to activate/deactivate automatic start
of heated steering wheel.
4. Select
Low, Medium or High to select level
after the function has been activated.
Related information
• Activating and deactivating the heated steer- ing wheel
* (p. 218)
Page 445 of 686
STARTING AND DRIVING
}}
443
All Wheel Drive (AWD)All-wheel drive, All Wheel Drive (AWD), also called four-wheel drive, means that power is dis-tributed to all four wheels, which improves trac-tion.
The electric motor that powers the rear wheels enables electronic all-wheel drive functionality. To achieve the best traction, power is automati- cally directed to the wheels that have the bestgrip. The system continuously calculates theneed for torque to the rear wheels, and canimmediately redistribute up to half of the engine'storque to the rear wheels. All-wheel drive also has a stabilizing effect at higher speeds. In normal driving conditions, mostof the engine's power is directed to the frontwheels. When the vehicle is stationary, all-wheeldrive is always activated in preparation for maxi-mum traction during acceleration. All-wheel drive reacts differently depending on which drive mode is selected.
Related information
• Drive modes (p. 445)
• Low Speed Control (p. 453)
• Transmission (p. 438)
Drive systems
Volvo Twin Engine combines a combustion engine for the front wheels and an electric motorfor the rear wheels.
Two drive systemsDepending on the selected drive mode and power available in the electric motor, the drivesystems can either be used separately or in tan-dem. The electric motor gets its energy from a hybrid battery located under the tunnel console. Thehybrid can be charged from a wall outlet or in a special charging station. The combustion engine can also charge the hybrid battery using a special high-voltage generator. Both the combustion engine and the electric motor can generate power directly to the wheels.An advanced control system coordinates both thedrive systems to help optimize driving economy.
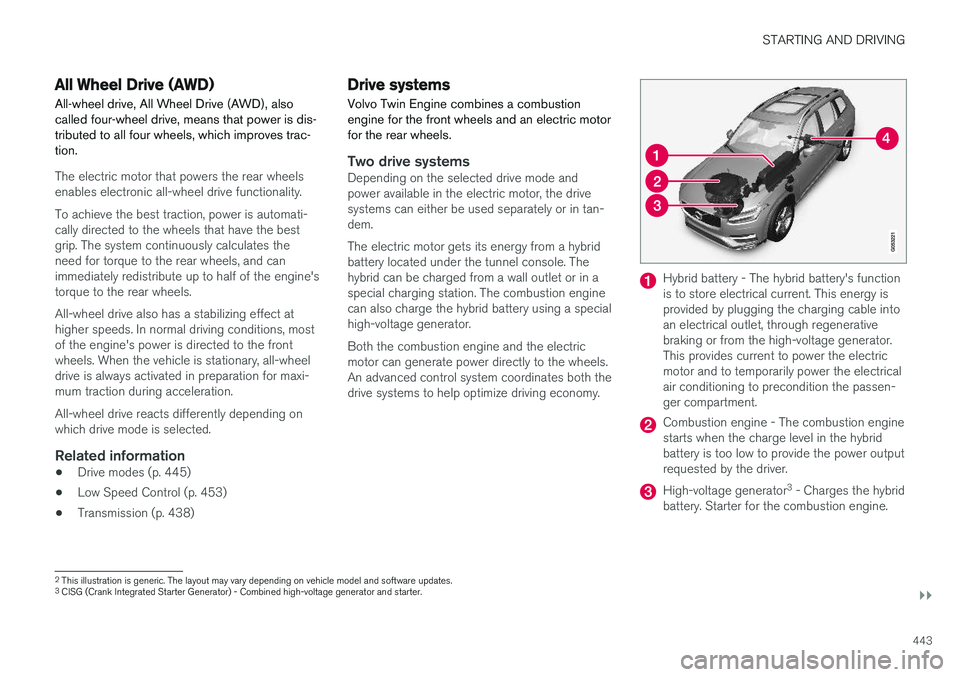
Hybrid battery - The hybrid battery's function is to store electrical current. This energy isprovided by plugging the charging cable intoan electrical outlet, through regenerativebraking or from the high-voltage generator.This provides current to power the electricmotor and to temporarily power the electricalair conditioning to precondition the passen-ger compartment.
Combustion engine - The combustion engine starts when the charge level in the hybridbattery is too low to provide the power outputrequested by the driver.
High-voltage generator 3
- Charges the hybrid
battery. Starter for the combustion engine.
2 This illustration is generic. The layout may vary depending on vehicle model and software updates.
3 CISG (Crank Integrated Starter Generator) - Combined high-voltage generator and starter.
Page 478 of 686
STARTING AND DRIVING
476
Towing using a towlineThis section refers to one vehicle being towed behind another using a towline.
Twin Engine vehicles may not be towed behind another vehicle due to the risk of damage to theelectric motor. If the vehicle cannot be driven andneeds to be moved, it must be transported on atow truck with all four wheels on the bed of thetruck.
Towing another vehicleTowing another vehicle requires a lot of power - use the AWD drive mode. This helps charge the
hybrid battery and improve the vehicle's driving and roadholding characteristics. Before towing another vehicle, check applicable speed limit regulations.
Jump startingDo not tow the vehicle to start the engine. Use anauxiliary battery if the start battery's charge levelis so low that the engine cannot be started.
CAUTION
Attempts to tow-start the vehicle could cause damage to the electrical drive motor andthree-way catalytic converter.
Related information
• Attaching and removing the towing eyelet (p. 476)
• Hazard warning flashers (p. 161)
• Recovery (p. 477)
• Jump starting using another battery (p. 469)
• Selecting ignition mode (p. 428)
Attaching and removing the towingeyelet
Use the towing eyelet to tow another vehicle. Screw the towing eyelet securely into place inthe threaded outlet behind the cover on theright-hand side of the rear bumper.
NOTE
If the vehicle is equipped with a towbar, there is no rear attachment for the towing eye.
Attaching the towing eyelet
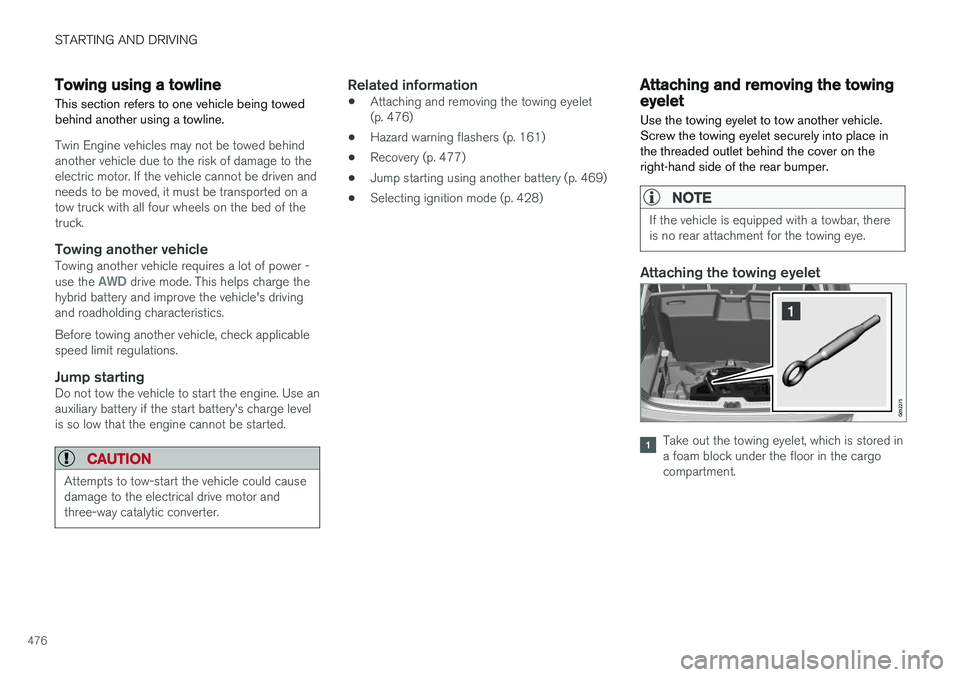
Take out the towing eyelet, which is stored in a foam block under the floor in the cargocompartment.
Page 552 of 686
WHEELS AND TIRES
550
Tires
The function of the tires is to carry loads, provide traction on road surfaces, reduce vibrations andprotect the wheels from wear.
The tires significantly influence the vehicle's driv- ing characteristics. The type, dimensions, tirepressure and speed rating have a considerableimpact on how the vehicle performs. Your vehicle is equipped with tires according to the vehicle's tire information placard on the B-pil-lar (the structural member at the side of the vehi-cle, at the rear of the driver's door opening).
WARNING
A damaged tire could cause the driver to lose control of the vehicle.
CAUTION
Some Volvo models are equipped with an Ultra High Performance tire and wheel com-bination designed to provide maximum drypavement performance with consideration forhydroplaning resistance. They may be moresusceptible to road hazard damage and,depending on driving conditions, may achievea tread life of less than 30,000 km (20,000miles). Even if this vehicle is equipped withVolvo's advanced AWD or stability system,these tires are not designed for winter driving,and should be replaced with winter tires whenweather conditions dictate.
The tires have good road holding characteristics and offer good handling on dry and wet surfaces.It should be noted however that the tires havebeen developed to give these features on snow/ice-free surfaces. Most models are equipped with "all-season" tires, which provide a somewhat higher degree of road-holding on slippery road surfaces than tires with-out the "all-season" rating. However, for optimalroadholding on icy or snow-covered roads, werecommend snow tires on all four wheels. When replacing tires, be sure that the new tires are the same size designation, type (radial) andpreferably from the same manufacturer, on all four wheels. Otherwise there is a risk of alteringthe vehicle's roadholding and handling characte-ristics.
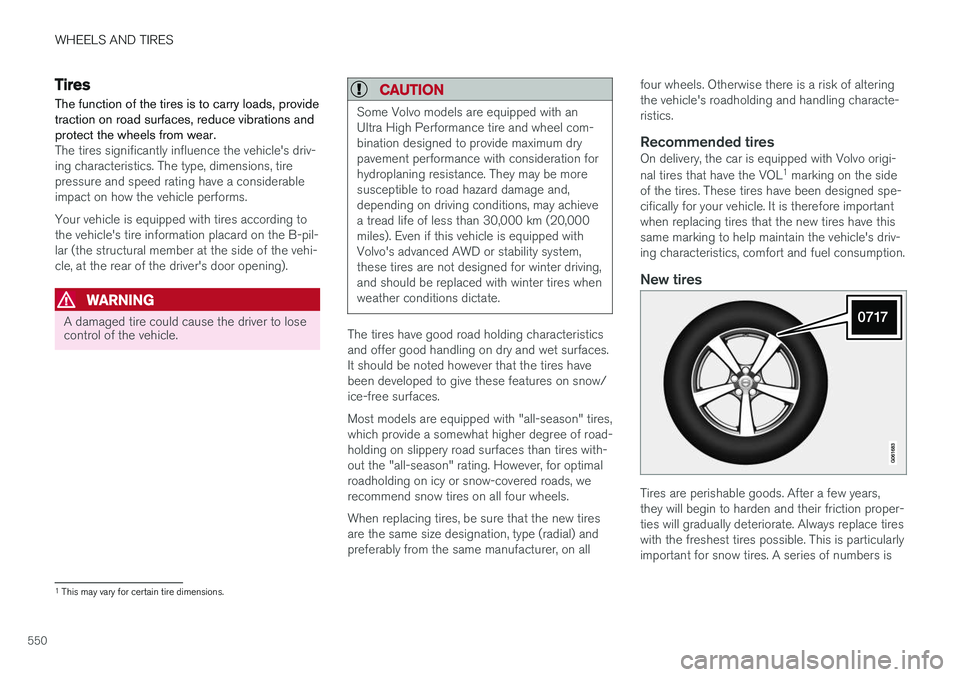
Recommended tiresOn delivery, the car is equipped with Volvo origi- nal tires that have the VOL
1
marking on the side
of the tires. These tires have been designed spe- cifically for your vehicle. It is therefore importantwhen replacing tires that the new tires have thissame marking to help maintain the vehicle's driv-ing characteristics, comfort and fuel consumption.
New tires
Tires are perishable goods. After a few years, they will begin to harden and their friction proper-ties will gradually deteriorate. Always replace tireswith the freshest tires possible. This is particularlyimportant for snow tires. A series of numbers is
1 This may vary for certain tire dimensions.
Page 557 of 686
WHEELS AND TIRES
555
NOTE
The tire's load index and speed rating may not appear on the sidewall because they arenot required by law.
7.M+S or M/S = Mud and Snow, AT = All Ter-
rain, AS = All Season
8. U.S. DOT Tire Identification Number (TIN) : This begins with the letters "DOT" and
indicates that the tire meets all federalstandards. The next two numbers are thefactory code where the tire was manufac-tured, the next two are the tire size code andthe last four numbers represent the weekand year the tire was made. For example,0717 means that the tire was manufacturedduring week 7 of 2017. The numbers inbetween are marketing codes used at themanufacturer's discretion. This informationhelps a tire manufacturer identify a tire forsafety recall purposes.
9. Tire Ply Composition and Material Used :
Indicates the number of plies indicates or thenumber of layers of rubber-coated fabric inthe tire tread and sidewall. Tire manufactur-ers also must indicate the ply materials in thetire and the sidewall, which include steel,nylon, polyester, and others.
10. Maximum Load : Indicates the maximum
load in pounds and kilograms that can becarried by the tire. Refer to the vehicle's tire information placard located on the B-Pillarfor the correct tire pressure for your vehicle.
11. Treadwear, Traction, and Temperaturegrades .
12. Maximum permissible inflation pressure: the greatest amount of air pressure that should ever be put in the tire. This limit is setby the tire manufacturer.
Speed SymbolA tire's Speed Symbol (SS) indicates the maxi-mum speed for which the tire has been certifiedand should be at least equivalent to the vehicle'stop speed. Winter tires, with or without studs, are exceptions and may use a lower SS. When winter tires areinstalled, the vehicle may not be driven fasterthan the tires' SS. The vehicle's speed should always be determined by the posted speed limit and traffic and roadconditions, not the tire's SS. The following table indicates the maximum per- missible speed for each SS.
M 130 km/h (81 mph)
Q 160 km/h (100 mph)
T 190 km/h (118 mph)
H 210 km/h (130 mph)
V 240 km/h (149 mph)
W 270 km/h (168 mph)
Y 300 km/h (186 mph)
WARNING
• The wheel and tire sizes for your Volvo are specified to meet stringent stabilityand handling requirements. Unapprovedwheel/tire size combinations can nega-tively affect your vehicle's stability andhandling.
• Any damage caused by installation ofunapproved wheel/tire size combinationswill not be covered by your new vehiclewarranty. Volvo assumes no responsibilityfor death, injury, or expenses that mayresult from such installations.
Related information
•
Tires (p. 550)
Page 563 of 686
WHEELS AND TIRES
}}
* Option/accessory.561
Calibrating the tire pressure
monitoring system *
In order for the tire pressure monitoring system, Tyre Pressure Monitoring System (TPMS), tofunction correctly, tire pressure reference valuesmust be set correctly. This must be done eachtime the tires are changed or the tire pressure isadjusted.
For example, when driving with a heavy load or at high speeds (over 160 km/h (100 mph)), tirepressure should be adjusted to the Volvo-recom-mended tire pressure values. The system shouldthen be recalibrated.
1. Switch off the ignition.
2. Inflate the tires to the pressure indicated on the tire pressure placard on the driver's side B pillar.
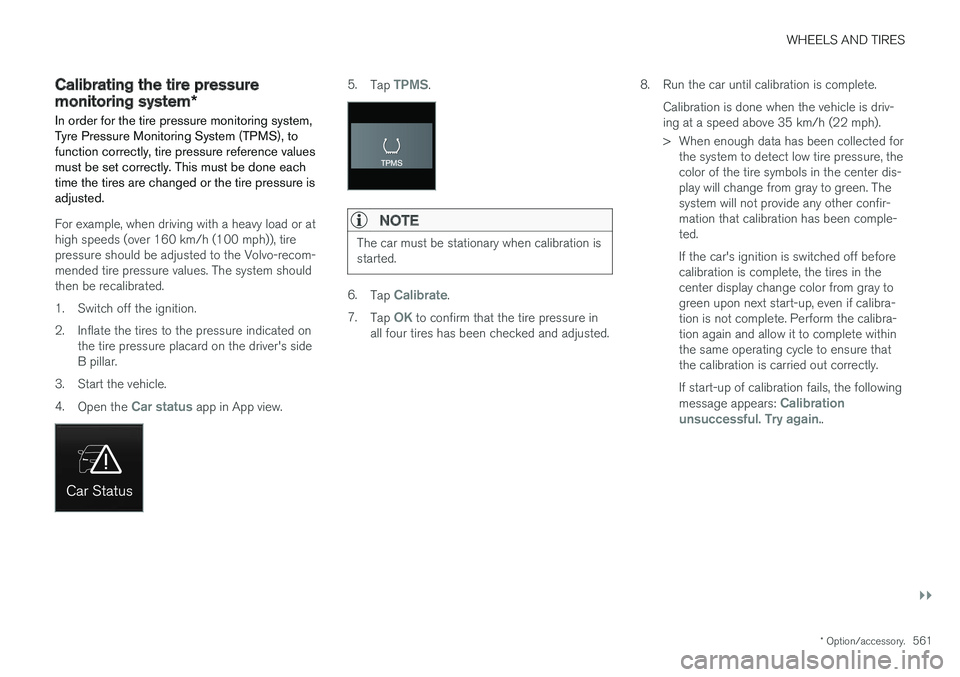
3. Start the vehicle. 4. Open the
Car status app in App view.
5.Tap TPMS.
NOTE
The car must be stationary when calibration is started.
6.Tap Calibrate.
7. Tap
OK to confirm that the tire pressure in
all four tires has been checked and adjusted. 8. Run the car until calibration is complete.
Calibration is done when the vehicle is driv- ing at a speed above 35 km/h (22 mph).
> When enough data has been collected forthe system to detect low tire pressure, the color of the tire symbols in the center dis-play will change from gray to green. Thesystem will not provide any other confir-mation that calibration has been comple-ted. If the car's ignition is switched off before calibration is complete, the tires in thecenter display change color from gray togreen upon next start-up, even if calibra-tion is not complete. Perform the calibra-tion again and allow it to complete withinthe same operating cycle to ensure thatthe calibration is carried out correctly. If start-up of calibration fails, the following message appears:
Calibration
unsuccessful. Try again..
Page 565 of 686
WHEELS AND TIRES
}}
* Option/accessory.563
The vehicle may need to be driven for a few minutes at a speed above 35 km/h (22 mph) toactivate the system. All tires gray and a message: •
Tire pressure system Temporarily
unavailable. The indicator symbol will flash
for about 1 minute and then glow steadily. The system is temporarily unavailable and willbe activated momentarily.
•
Tire pressure system Service required.
The indicator symbol will flash for about 1 minute and then glow steadily. If the system is not working properly, contact a workshop 9
.
Related information
• Calibrating the tire pressure monitoring sys- tem
* (p. 561)
• Action when warned of low tire pressure (p. 563)
• Tire pressure monitoring system
* (p. 559)
• Vehicle status (p. 602)
Action when warned of low tirepressure
When the tire pressure monitoring system, Tyre Pressure Monitoring System (TPMS), detectslow pressure in one or more of the vehicle'stires, the driver will be alerted that action is nee-ded.
If the system's indicator symbol illumi- nates and the message Tire pressure
low is displayed, check the tire pres-
sure and inflate if necessary.
1. Switch off the ignition.
2. Check the inflation pressure on all four tires using a tire pressure gauge.
3. Inflate the tire to the correct pressure (see the tire pressure decal on the driver's side door pillar).
4. Through calibration of the system via the center display after the tire pressure hasbeen adjusted. Please be aware that the indicator symbol will not go out until the low tire pressure hasbeen corrected and the system has beenrecalibrated.
NOTE
To help prevent incorrect inflation pressure, pressure should be checked when the tiresare cold. The tires are considered to be coldwhen they have reached the same tempera-ture as the ambient temperature (about 3hours after the vehicle was last driven). Afterdriving for a few kilometers, the tires will warmup and the pressure will increase.
NOTE
• After inflating a tire, always replace the valve cap to help prevent valve damagecaused by gravel, dirt, etc.
• Use plastic valve caps only. Metal capscould corrode and become difficult toremove.
WARNING
•Incorrect inflation pressure could lead to tire failure, which could cause the driverto lose control of the vehicle.
• The system cannot predict sudden tiredamage.
9
An authorized Volvo workshop is recommended.