ECO mode VOLVO XC90 TWIN ENGINE 2019 Owners Manual
[x] Cancel search | Manufacturer: VOLVO, Model Year: 2019, Model line: XC90 TWIN ENGINE, Model: VOLVO XC90 TWIN ENGINE 2019Pages: 697, PDF Size: 10.33 MB
Page 583 of 697
WHEELS AND TIRES
}}
581
Snow tires
Snow tires are designed for winter driving.
Volvo recommends snow tires with specific
dimensions. The tire dimensions vary depending
on engine type. When driving with snow tires, the
correct type of tires must be mounted on all four
wheels.
NOTE Contact a Volvo dealer for advice on the best
choice of rims and tires.
Tips for changing snow tiresWhen switching between regular tires and snow
tires, mark the tires according to which side they
were mounted on, e.g. L for left and R for right.
Studded tiresStudded tires should be broken in by driving
500–1000 km (300–600 miles) slowly and gen-
tly to help the studs settle properly in the tires.
This gives the tire, and especially the studs, a
longer service life.
NOTE
Regulations regarding the use of studded
tires vary from country to country.
Tread depthRoad conditions with ice, slush and low tempera-
tures place considerably higher demands on tires
than summer conditions. Volvo therefore recom-
mends not driving on snow tires that have a tread
depth of less than 4 mm (0.15 inch).
Related information
When changing wheels (p. 574)
Winter driving (p. 472)
Tread wear indicator (p. 563) Snow chains
Using snow chains and/or snow tires can help
improve traction in winter driving conditions.
WARNING Use Volvo genuine snow chains or equivalent
snow chains that are suitable for the vehicle
model and the tire and wheel sizes. Only one-
sided snow chains are permitted.
If uncertain about snow chains, Volvo recom-
mends contacting an authorized Volvo work-
shop. Use of the wrong snow chains could
cause serious damage to the vehicle and
result in an accident.
16
The backrest in the third row of seats* must be folded down.
Page 584 of 697
||WHEELS AND TIRES
582
CAUTION
Snow chains can be used on the vehicle, with
the following restrictions:
Volvo recommends not using snow
chains on wheel dimensions larger than
19 inches.
Always follow the manufacturer's installa-
tion instructions carefully. Install chains
as tightly as possible and retighten peri-
odically.
Only put snow chains on the front wheels
(also applies to all-wheel drive vehicles).
If accessory, aftermarket or "custom"
tires and wheels with different dimen-
sions than the original tires and wheels
are used, snow chains in some cases
may NOT be used. Sufficient distance
between the chains and brakes, suspen-
sion and body components must be
maintained.
Check local regulations regarding the use
of snow chains before installing.
Never exceed the snow chain manufac-
turer's specified maximum speed limit.
Under no circumstances should you
exceed 50 km/h (30 mph).
Avoid bumps, holes or sharp turns when
driving with snow chains.
Avoid driving on surfaces without snow as
this wears out both the snow chains and
the tires.
The handling of the vehicle can be
adversely affected when driving with
chains. Avoid fast or sharp turns as well
as locked wheel braking.
Some types of strap-on chains affect
brake components and therefore must
NOT be used. Consult a Volvo retailer for more information
about snow chains.
Related information
Winter driving (p. 472) Tire sealing system
17
The temporary tire sealing system can be used
to seal a puncture in a tire or to check and
adjust the pressure in the tire.
Models equipped with a spare wheel 18
do not
have the tire sealing system.
WARNING California Proposition 65
Operating, servicing and maintaining a pas-
senger vehicle can expose you to chemicals
including engine exhaust, carbon monoxide,
phthalates, and lead, which are known to the
State of California to cause cancer and birth
defects or other reproductive harm. To mini-
mize exposure, avoid breathing exhaust, do
not idle the engine except as necessary, serv-
ice your vehicle in a well ventilated area and
wear gloves or wash your hands frequently
when servicing your vehicle. For more infor-
mation go to www.P65Warnings.ca.gov/
passenger-vehicle.
The tire sealing system consists of a compressor
and a bottle containing sealing compound. The
sealing functions as a temporary repair.
Page 598 of 697

LOADING, STORAGE AND PASSENGER COMPARTMENT
* Option/accessory.
596 Using the electrical outlets
The 12 V outlet can be used for devices
intended for this such as MP3 players, coolers
and cellular phones.
The high-voltage outlet* can be used for devices
intended for this, such as chargers, laptops, etc.
The ignition must be in at least mode I for the
outlets to supply current. The outlets will then be
active as long as there is sufficient charge in the
start battery.
If the engine is turned off and the vehicle is
locked, the outlets will be deactivated. If the
engine is turned off and the vehicle remains
unlocked, the sockets will remain active for up to
7 minutes.
NOTE Bear in mind that using the electrical outlets
when the engine is off could cause the starter
battery to have too low of a charge level,
which could limit other functionality.
Accessories connected to the electrical out-
lets can be activated even when the vehicle
electrical system is off or if preconditioning is
used. For this reason, disconnect plugs when
they are not in use to prevent the starter bat-
tery from becoming discharged.
WARNING
Do not use accessories with large or
heavy plugs – they could damage the out-
let or come loose while you are driving.
Do not use accessories that could cause
disruptions to e.g. the vehicle's radio
receiver or electrical system.
Position the accessory so that there is no
risk of it injuring the driver or passengers
in the event of heavy braking or a colli-
sion.
Pay attention to connected accessories
as they can generate heat that could burn
passengers or the interior.
Using 12 V outlets1. Remove the stopper (tunnel console) or fold
down the cover (trunk/cargo compartment)
over the socket and plug in the device.
2. Unplug the device and put the stopper back in (tunnel console) or fold up the cover
(trunk/cargo compartment) when the socket
is not in use or left unattended.
CAUTION The maximum power is 120 W (10 A) per
outlet.
Using high-voltage outletsThe ignition must be in at least mode I for outlets
to supply current. The outlets will then be active
as long as there is sufficient charge in the start
battery.
1. Slide down the cover over the outlet and plug
in the device.
>
The LED 2
light on the outlet will indicate
its status.
2. The outlet is supplying electrical current when the light is glowing steadily green.
3. Disconnect the device by pulling out the plug (do not pull on the cord).
Pull up the cover when the outlet is not in
use or is left unattended.
CAUTION The maximum power is 150 W.
WARNING
Do not attempt to alter or repair the high-volt-
age outlet on your own. Volvo recommends
contacting an authorized Volvo workshop.
2
LED (Light Emitting Diode)
Page 604 of 697

||LOADING, STORAGE AND PASSENGER COMPARTMENT
* Option/accessory.
602 Push the end piece down on both sides, one
at a time.
>
When a click is heard and the red marks
on each end piece are no longer visible,
the cover is in place. Check that it is
secure.
Removing the cargo compartment
cover
In retracted position:
1. Press the button on one of the cover's ends and lift out that end.
For 7-seat models - remove the third row
seat belt latches from the hooks above the
side panels.
2. Carefully lift the cover up and out. > The other end will release automaticallyand the cover can then be lifted out of the
cargo compartment.
Related information
Operating the cargo compartment cover*
(p. 602)
Loading recommendations (p. 598) Operating the cargo compartment
cover*
The cover can be used in two positions: fully
open to completely cover the cargo compart-
ment or partially retracted to make it easier to
reach further into the cargo compartment.
Fully open
7-seat models
1. Hang the third-row seat belt latches in the
hooks provided in the side panels. Grasp the handle and pull the cover out and
above the side panels in the cargo compart-
ment. Pull the cover to its end position.
With the cover completely open (covering the
cargo compartment), press the attaching
pins at the end of the cover into the grooves
on the side panels and release the cover
slightly while pressing the handle lightly
downward to hook the pins into the grooves.
>
The cover will be secured in the fully open
position.
5-seat models
Page 620 of 697
MAINTENANCE AND SERVICE
* Option/accessory.
618 Hoisting the vehicle
When hoisting the vehicle, it is important to
ensure the jack/vehicle hoist is correctly
engaged in the designated attachment points
under the vehicle.
For vehicles with self-leveling*, pneumatic sus-
pension (if installed) must be turned off before
the vehicle is lifted. Turning off the function in the
center display.
WARNING If the vehicle is lifted on a garage jack, the
jack must be placed under one of the four lift-
ing points. Make sure that the vehicle is cor-
rectly positioned on the jack and that it can-
not slide off. Make sure the jack plate has a
rubber pad to help keep the vehicle stable
and prevent damage. Always use axle stands
or similar.
NOTE Volvo recommends only using the jack
intended for your specific vehicle model. If a
jack other than that recommended by Volvo is
used, follow the instructions included with the
equipment.
The vehicle's ordinary jack is only intended to
be used in temporary situations for short peri-
ods of time, such as when changing wheels in
the event of a flat tire. If the vehicle needs to
be lifted more frequently, or for a longer
period of time than for a wheel change, a
garage jack or hoist is recommended. Always
follow the instructions for use provided with
the equipment.
Page 623 of 697
MAINTENANCE AND SERVICE
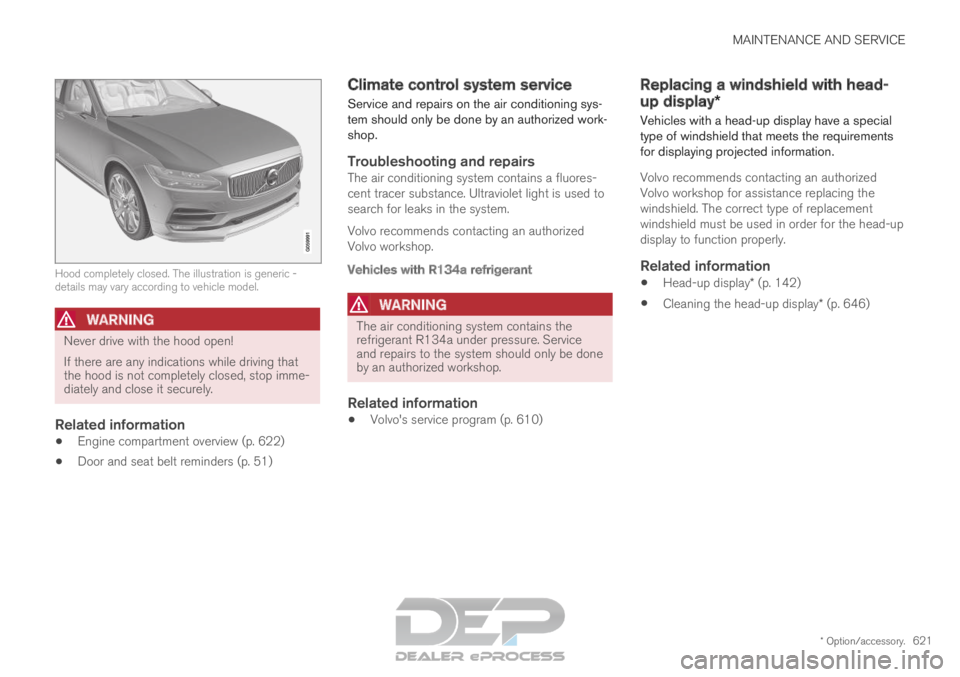
* Option/accessory.621Hood completely closed. The illustration is generic -
details may vary according to vehicle model.
WARNING
Never drive with the hood open!
If there are any indications while driving that
the hood is not completely closed, stop imme-
diately and close it securely.
Related information
Engine compartment overview (p. 622)
Door and seat belt reminders (p. 51) Climate control system service
Service and repairs on the air conditioning sys-
tem should only be done by an authorized work-
shop.
Troubleshooting and repairsThe air conditioning system contains a fluores-
cent tracer substance. Ultraviolet light is used to
search for leaks in the system.
Volvo recommends contacting an authorized
Volvo workshop.
Vehicles with R134a refrigerant
WARNING
The air conditioning system contains the
refrigerant R134a under pressure. Service
and repairs to the system should only be done
by an authorized workshop.
Related information
Volvo's service program (p. 610) Replacing a windshield with head-
up display*
Vehicles with a head-up display have a special
type of windshield that meets the requirements
for displaying projected information.
Volvo recommends contacting an authorized
Volvo workshop for assistance replacing the
windshield. The correct type of replacement
windshield must be used in order for the head-up
display to function properly.
Related information
Head-up display* (p. 142)
Cleaning the head-up display* (p. 646)
Page 624 of 697
MAINTENANCE AND SERVICE
622Engine compartment overview
This overview shows some service-related com-
ponents.
Some of the components included in the vehi-
cle's electric drive system are located in the
engine compartment. Exercise caution when
accessing the engine compartment and only
touch what is required for normal maintenance.
WARNING Orange wiring may only be handled by quali-
fied personnel.
WARNING
Several components in the vehicle work with
high voltage that can be hazardous in case of
an incorrect procedure.
Do not touch anything that is not clearly
described in this Owner's Manual.
Be careful when checking/filling fluids in
the engine compartment. The layout of the engine compartment may vary depend-
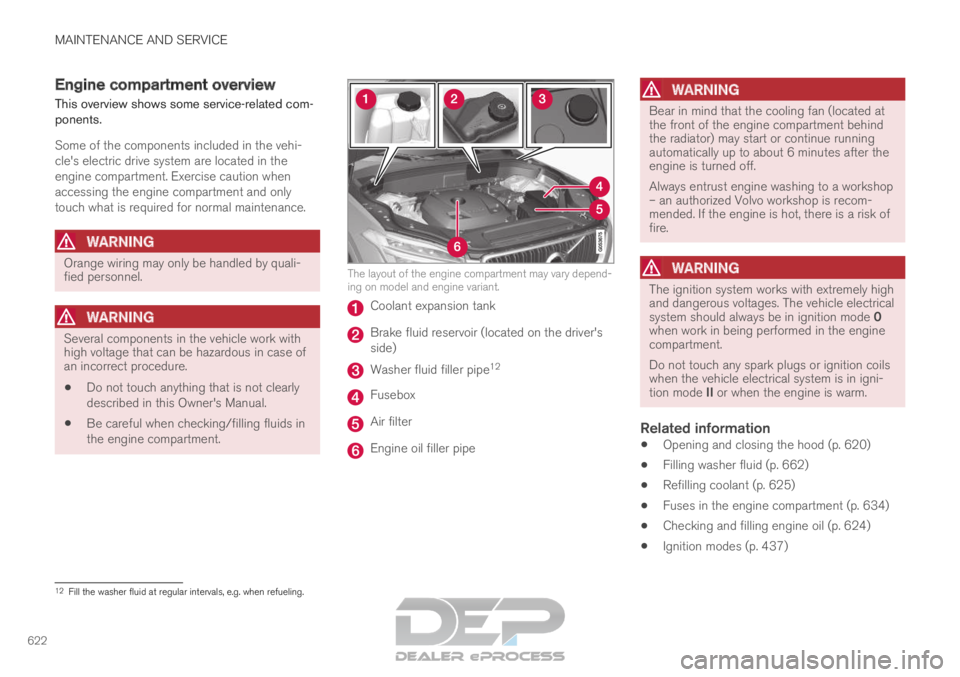
ing on model and engine variant.
Coolant expansion tank
Brake fluid reservoir (located on the driver's
side)
Washer fluid filler pipe
12 Fusebox
Air filter
Engine oil filler pipe
WARNING Bear in mind that the cooling fan (located at
the front of the engine compartment behind
the radiator) may start or continue running
automatically up to about 6 minutes after the
engine is turned off.
Always entrust engine washing to a workshop
– an authorized Volvo workshop is recom-
mended. If the engine is hot, there is a risk of
fire.
WARNING
The ignition system works with extremely high
and dangerous voltages. The vehicle electrical
system should always be in ignition mode 0
when work in being performed in the engine
compartment.
Do not touch any spark plugs or ignition coils
when the vehicle electrical system is in igni-
tion mode II or when the engine is warm.
Related information
Opening and closing the hood (p. 620)
Filling washer fluid (p. 662)
Refilling coolant (p. 625)
Fuses in the engine compartment (p. 634)
Checking and filling engine oil (p. 624)
Ignition modes (p. 437) 12
Fill the washer fluid at regular intervals, e.g. when refueling.
Page 630 of 697
||MAINTENANCE AND SERVICE
628
CAUTION
Only a modern battery charger with controlled
charge voltage should be used to charge the
starter battery. The rapid charging function
should not be used as this could damage the
battery.
NOTE
If both the starter battery and the hybrid bat-
tery are discharged, both batteries must be
charged. In such cases, it is not possible to
charge only the hybrid battery first.
The starter battery must have a certain level
of charge for it to be possible to charge the
hybrid battery.
CAUTION Failure to observe the following could cause
the infotainment energy save mode to tempo-
rarily stop working and/or a message in the
driver's display regarding the state of charge
of the starter battery may be temporarily
incorrect after an external starter battery or
battery charger has been connected:
The negative battery terminal of the vehi-
cle's starter battery must never be used
to connect an external starter battery or
battery charger – only the vehicle's neg-
ative charging point should be used as
a grounding point.NOTE If the starter battery becomes discharged too
many times, it will shorten its service life.
The service life of the starter battery is affec-
ted by several factors, such as driving condi-
tions and climate. The starting capacity of the
battery reduces gradually over time. The bat-
tery must therefore be recharged if the vehi-
cle is not used or a long period of time or if it
is only driven short distances. Severe cold fur-
ther limits the starting capacity.
To keep the starter battery in a good condi-
tion, the vehicle should be driven at least
15 minutes per week or the battery should be
connected to a battery charger with automatic
trickle charging.
A starter battery that is always kept fully
charged has the maximum service life.
Page 631 of 697
MAINTENANCE AND SERVICE
}}
629
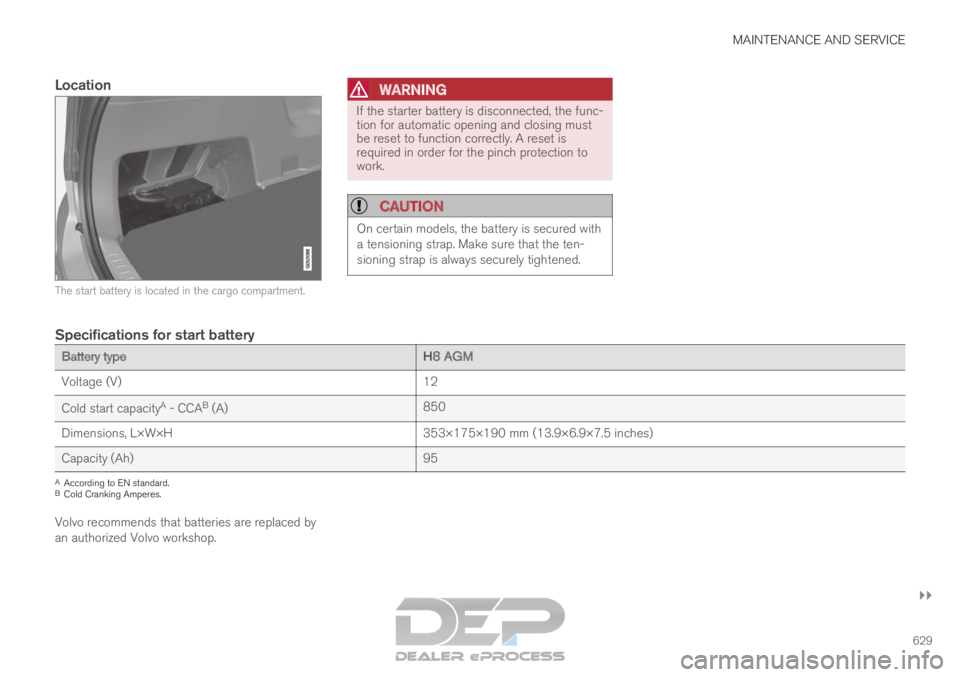
Location The start battery is located in the cargo compartment.WARNING If the starter battery is disconnected, the func-
tion for automatic opening and closing must
be reset to function correctly. A reset is
required in order for the pinch protection to
work.
CAUTION
On certain models, the battery is secured with
a tensioning strap. Make sure that the ten-
sioning strap is always securely tightened.
Specifications for start battery
Battery type
H8 AGM
Voltage (V) 12
Cold start capacity A
- CCA B
(A) 850
Dimensions, L×W×H 353×175×190 mm (13.9×6.9×7.5 inches)
Capacity (Ah) 95A
According to EN standard.
B Cold Cranking Amperes.
Volvo recommends that batteries are replaced by
an authorized Volvo workshop.
Page 655 of 697
MAINTENANCE AND SERVICE
653
Automatic car washes
The vehicle should be washed as soon as it
becomes dirty. This makes the vehicle easier to
clean because dirt does not attach as strongly. It
also reduces the risk of scratches and keeps the
vehicle looking new.
An automatic car wash is a fast and easy way to
keep your vehicle clean, but it does not reach all
areas of the vehicle. For best results, Volvo rec-
ommends hand washing your vehicle or supple-
menting automatic car washes with a hand wash.
NOTE
Volvo recommends not washing the vehicle in
an automatic car wash during the first few
months; the paintwork on new vehicles takes
some time to fully harden.
CAUTION
Before driving the vehicle into a car wash,
deactivate the Automatic Braking when Sta-
tionary and Automatic Parking Brake Applica-
tion functions. If the functions are not deacti-
vated, the brake system will seize when the
vehicle is stationary and the vehicle will not be
able to roll.
CAUTION For automatic car washes in which the vehicle
is pulled forward on rolling wheels:
1.
Before washing the vehicle, make sure
that the automatic rain sensor is deacti-
vated. If it is not deactivated and inadver-
tently starts, the wiper arms could be
damaged.
2. To help prevent damage from the auto- matic car wash machinery, make sure
that the door mirrors are folded in, anten-
nas retracted or removed, and any auxili-
ary lights secured.
3. Drive into the automatic car wash.
4. Turn off the "Automatic Braking when Stationary" function using the button
in the tunnel console.
5.
Turn off the "Automatic Parking Brake
Application" function in the center dis-
play's Top view.
6. Turn off the engine by turning the start knob in the tunnel console clockwise.
Hold the knob in position for at least
2 seconds.
The vehicle is now ready for the automatic car
wash.
CAUTION The system will automatically change to P
mode if the above steps are not followed. In P
mode, the wheels are locked, which they
should not be when the vehicle is being
washed in a car wash.
Related information
Cleaning the exterior (p. 650)
Polishing and waxing (p. 651)
Hand washing (p. 651)
High-pressure washing (p. 654)
Cleaning the wiper blades (p. 654)
Cleaning exterior plastic, rubber and trim
components (p. 655)
Cleaning rims (p. 656)
Corrosion protection (p. 656)