weight VOLVO XC90 TWIN ENGINE 2020 Owner's Manual
[x] Cancel search | Manufacturer: VOLVO, Model Year: 2020, Model line: XC90 TWIN ENGINE, Model: VOLVO XC90 TWIN ENGINE 2020Pages: 693, PDF Size: 13.34 MB
Page 468 of 693
||
STARTING AND DRIVING
* Option/accessory.
466
NOTE
Extreme weather conditions, towing a trailer, high altitude and lower fuel gradethan recommended are factors that cansignificantly increase the vehicle's fuel con-sumption.
Trailer weights
WARNING
Please adhere to the recommendations provided for trailer weight. If the recom-mendations are not followed, the vehicleand trailer may be difficult to control duringevasive maneuvers and braking.
NOTE
The specified maximum trailer weights are those permitted by Volvo. National vehicleregulations may set additional restrictionson trailer weight and speed. The trailerhitches may be certified for higher towingweights than the vehicle is permitted totow.
Self-leveling suspension *The vehicle's self-leveling system attempts to keep the vehicle at a constant level, regardlessof load (up to the maximum permitted weight).When the vehicle is stationary, the rear end of the vehicle will be slightly lowered, which isnormal.
Driving in hilly terrain or hot weatherIn certain conditions, there is a risk of over-heating when driving with a trailer. If overheat-ing of the engine and drive system is detected,a warning symbol will illuminate in the instru-ment panel and a message will appear. The automatic transmission selects the opti- mal gear for the current load and enginespeed.
Steep inclines
Do not lock the automatic transmission into a higher gear than what the engine can handle
‒
it is not always preferable to drive in highgears at low rpm.
Parking on a hill
1. Depress the brake pedal.
2. Apply the parking brake.
3. Put the gear selector in P.
4. Release the brake pedal.Put chocks behind the wheels when the vehi- cle is parked on a hill with a trailer attached.
Starting on a hill
1. Depress the brake pedal.
2. Put the gear selector in D.
3. Release the parking brake.
4. Release the brake pedal and start driving.
Related information
Trailer Stability Assist
* (p. 467)
Checking trailer lights (p. 468)
Towing capacity and tongue weight (p. 667)
Overheating of engine and transmission(p. 458)
Retractable hitch
* (p. 461)
Page 551 of 693
WHEELS AND TIRES
}}
549
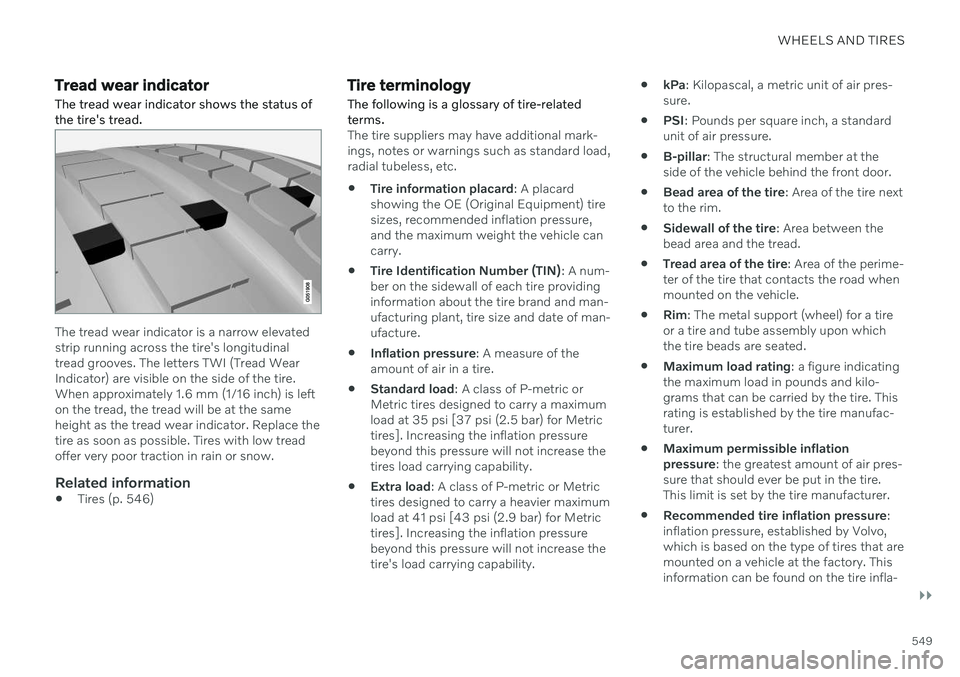
Tread wear indicatorThe tread wear indicator shows the status of the tire's tread.
The tread wear indicator is a narrow elevated strip running across the tire's longitudinaltread grooves. The letters TWI (Tread WearIndicator) are visible on the side of the tire.When approximately 1.6 mm (1/16 inch) is lefton the tread, the tread will be at the sameheight as the tread wear indicator. Replace thetire as soon as possible. Tires with low treadoffer very poor traction in rain or snow.
Related information
Tires (p. 546)
Tire terminology
The following is a glossary of tire-related terms.
The tire suppliers may have additional mark- ings, notes or warnings such as standard load,radial tubeless, etc.
Tire information placard
: A placard
showing the OE (Original Equipment) tiresizes, recommended inflation pressure,and the maximum weight the vehicle cancarry.
Tire Identification Number (TIN)
: A num-
ber on the sidewall of each tire providinginformation about the tire brand and man-ufacturing plant, tire size and date of man-ufacture.
Inflation pressure
: A measure of the
amount of air in a tire.
Standard load
: A class of P-metric or
Metric tires designed to carry a maximumload at 35 psi [37 psi (2.5 bar) for Metrictires]. Increasing the inflation pressurebeyond this pressure will not increase thetires load carrying capability.
Extra load
: A class of P-metric or Metric
tires designed to carry a heavier maximumload at 41 psi [43 psi (2.9 bar) for Metrictires]. Increasing the inflation pressurebeyond this pressure will not increase thetire's load carrying capability.
kPa
: Kilopascal, a metric unit of air pres-
sure.
PSI
: Pounds per square inch, a standard
unit of air pressure.
B-pillar
: The structural member at the
side of the vehicle behind the front door.
Bead area of the tire
: Area of the tire next
to the rim.
Sidewall of the tire
: Area between the
bead area and the tread.
Tread area of the tire
: Area of the perime-
ter of the tire that contacts the road whenmounted on the vehicle.
Rim
: The metal support (wheel) for a tire
or a tire and tube assembly upon whichthe tire beads are seated.
Maximum load rating
: a figure indicating
the maximum load in pounds and kilo-grams that can be carried by the tire. Thisrating is established by the tire manufac-turer.
Maximum permissible inflationpressure
: the greatest amount of air pres-
sure that should ever be put in the tire.This limit is set by the tire manufacturer.
Recommended tire inflation pressure
:
inflation pressure, established by Volvo,which is based on the type of tires that aremounted on a vehicle at the factory. Thisinformation can be found on the tire infla-
Page 576 of 693
||
WHEELS AND TIRES
574
Related information
Recommended tire pressure (p. 555)
Using the tire sealing system (p. 569)
Tire sealing system (p. 568)
Determining the vehicle's permitted weight
Properly loading your vehicle will provide maximum return of vehicle design perform-ance.
Weight designationsBefore loading your vehicle, familiarize your- self with the following terms for determiningyour vehicle's weight ratings, with or without atrailer, from the vehicle's Federal/CanadianMotor Vehicle Safety Standards (FMVSS/CMVSS) label, and the vehicle's tire informa-tion placard:
Curb weight
The weight of the vehicle including a full tank of fuel and all standard equipment. It does notinclude passengers, cargo, or optional equip-ment.
Capacity weight
All weight added to the curb weight, including cargo and optional equipment. When towing,towbar weight is also part of cargo weight.
Permissible axle weight
The maximum allowable weight that can be carried by a single axle (front or rear). Thesenumbers are shown on the Federal/CanadianMotor Vehicle Safety Standards (FMVSS/CMVSS) label. The total load on each axlemust never exceed its maximum permissibleweight.
Gross vehicle weight (GVW)
The vehicle's curb weight + cargo + passen- gers.
Steps for Determining Correct Load
Limit
1. Locate the statement "the combined weight of occupants and cargo shouldnever exceed XXX kg or XXX lbs." on yourvehicle's placard.
2. Determine the combined weight of the driver and passengers that will be riding inyour vehicle.
3. Subtract the combined weight of the driver and passengers from XXX kg or XXXlbs.
4. The resulting figure equals the available amount of cargo and luggage loadcapacity. For example, if the "XXX"amount equals 1400 lbs. and there will befive 150 lb. passengers in your vehicle, theamount of available cargo and luggageload capacity is 650 lbs. (1400 - 750 (5 ×150) = 650 lbs.)
5. Determine the combined weight of lug- gage and cargo being loaded on the vehi-cle. That weight may not safely exceed theavailable cargo and luggage load capacitycalculated in Step 4.
Page 577 of 693

WHEELS AND TIRES
575
6. If your vehicle will be towing a trailer, load
from your trailer will be transferred to your vehicle. Consult this manual to determinehow this reduces the available cargo andluggage load capacity of your vehicle.
WARNING
Exceeding the permissible axle weight, gross vehicle weight, or any otherweight rating limits can cause tire over-heating resulting in permanent defor-mation or catastrophic failure.
Do not use replacement tires withlower load carrying capacities than thetires that were original equipment onthe vehicle because this will lower thevehicle's GVW rating. Use only tireswith the correct load carrying capacity.Consult your Volvo retailer for informa-tion.
Related information
Loading recommendations (p. 585)
Page 587 of 693
LOADING, STORAGE AND PASSENGER COMPARTMENT
}}
* Option/accessory.585
Loading recommendations
There are a number of things that are impor- tant to consider when carrying loads in or onthe vehicle.
Load-carrying capacity is determined by the vehicle's curb weight. The total weight of allpassengers and any installed accessoriesreduces the vehicle's load-carrying capacity bythe corresponding amount.
WARNING
The vehicle's driving characteristics change depending on the weight and position ofthe load.
Loading the cargo compartment/trunkKeep the following in mind when loading:
Position objects so they are pressing against the rear seat backrests.
Heavy objects should be positioned as lowas possible. Avoid placing heavy objectson folded-down seat backrests.
Cover sharp corners with a soft cloth orsimilar to help prevent damage to theupholstery.
Use the load anchoring eyelets and ten-sioning straps or similar to secure allobjects.
WARNING
In a head-on collision at a speed of 50 km/h (30 mph), an unsecured objectweighing 20 kg (44 pounds) can reach aprojectile weight equivalent to 1000 kg(2200 pounds).
WARNING
If objects are loaded higher than the upper edge of the side windows, leave a 10 cm(4 in.) space between the objects and thewindow. Objects placed closer to thiscould impede the function of the inflatablecurtain concealed inside the headlining.
WARNING
Always secure the load. Otherwise, it may shift during heavy braking and injure peo-ple in the vehicle. Cover sharp edges and sharp corners with something soft. Turn off the engine and apply the parking brake when loading/unloading longobjects. Otherwise, it is possible for theload to reach the gear lever or gear selectorand move it to a drive position – whichcould cause the vehicle to begin rolling.
Extra cargo space
The rear seat backrests can be folded down to increase cargo space in the cargo compart- ment/trunk and simplify loading. If the rearseat backrests are folded down, make surethat no objects loaded into the vehicle preventthe WHIPS system for the front seats fromfunctioning correctly.
Raising/lowering the rear end of the
vehicle *
The rear end of the vehicle can be lowered orraised for easier loading into the cargo com-partment/trunk or to facilitate attaching a trailer*.
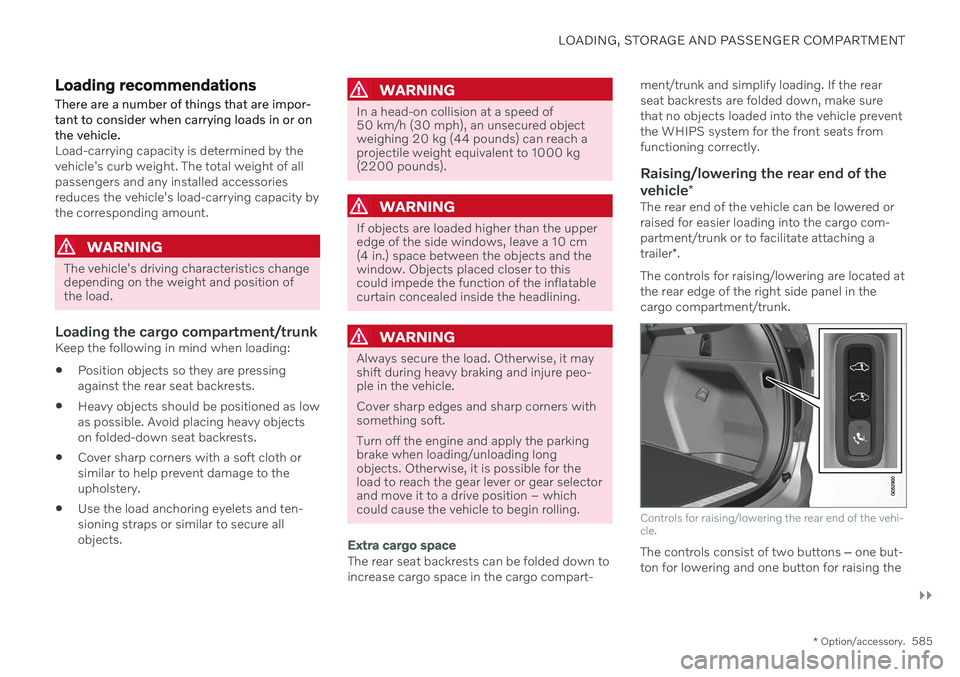
The controls for raising/lowering are located at the rear edge of the right side panel in thecargo compartment/trunk.
Controls for raising/lowering the rear end of the vehi- cle.
The controls consist of two buttons ‒
one but-
ton for lowering and one button for raising the
Page 588 of 693

||
LOADING, STORAGE AND PASSENGER COMPARTMENT
* Option/accessory.
586 rear end. Press and hold the relevant button until the desired height is reached. The rear end of the vehicle cannot be raised higher than its normal height. The rear end will return to the normal height when the vehicle begins driving.
NOTE
It is not possible to adjust the height of the vehicle's rear when one or more of thedoors or the hood is open. This does notapply to the tailgate.
WARNING
Make sure that no people, animals or objects are found under the vehicle when itis lowered. This could endanger life andcause damage to the vehicle or objects.
Related information
Load anchoring eyelets (p. 587)
Folding the second row backrests (p. 198)
Roof loads and load carriers (p. 586)
Leveling control
* and suspension (p. 440)
Weights (p. 665)
Roof loads and load carriers
Volvo-developed load carriers are recom- mended for carrying loads on the roof of thevehicle.
Volvo load carriers are specially designed to help prevent damage to your vehicle and helpensure maximum safety while driving. Volvoload carriers are available from authorizedVolvo retailers. Carefully follow the installation instructions provided with the load carriers. Distribute the load evenly throughout the load carriers. Place heavier cargo at thebottom of the load.
Check periodically to ensure that the loadcarriers and load are properly secured.Secure the load firmly using tie straps orsimilar.
If the load is longer than the vehicle, suchas a canoe or kayak, attach the towingeyelet in its front outlet and secure the tiestraps in it.
The vehicle's wind resistance and fuelconsumption increase with the size of theload.
Drive smoothly. Avoid rapid acceleration,hard braking and fast cornering.
WARNING
The vehicle's center of gravity and driving characteristics are altered by roof loads. Follow the vehicle's specifications regar- ding weights and maximum permittedload.
Related information
Loading recommendations (p. 585)
Weights (p. 665)
Page 589 of 693

LOADING, STORAGE AND PASSENGER COMPARTMENT
* Option/accessory.587
Grocery bag holders Grocery bag holders (hooks) help keep shop- ping bags in place and prevent them fromfalling over and spilling their contents in thecargo compartment.
On the sides of the cargo compartment
There are two fold-out holders in the side pan- els, one on each side of the cargo compart-ment.
CAUTION
The grocery bag holders are only intended to hold weights up to 5 kg (11 lbs).
Related information
Loading recommendations (p. 585)
Using the glove compartment (p. 583)
Installing and removing the cargo net
*
(p. 592)
Installing and removing the cargo com- partment cover
* (p. 588)
Installing and removing the steel cargogrid
* (p. 591)
Load anchoring eyelets The load anchoring eyelets in the cargo com- partment can be used to secure objects withstraps, a net, etc.
WARNING
Hard, sharp and/or heavy objects in or pro- truding from the vehicle can cause injury inthe event of hard braking. Always secure large and heavy objects with a seat belt or cargo retaining straps.
Related information
Loading recommendations (p. 585)
Weights (p. 665)
Page 608 of 693
||
MAINTENANCE AND SERVICE
606
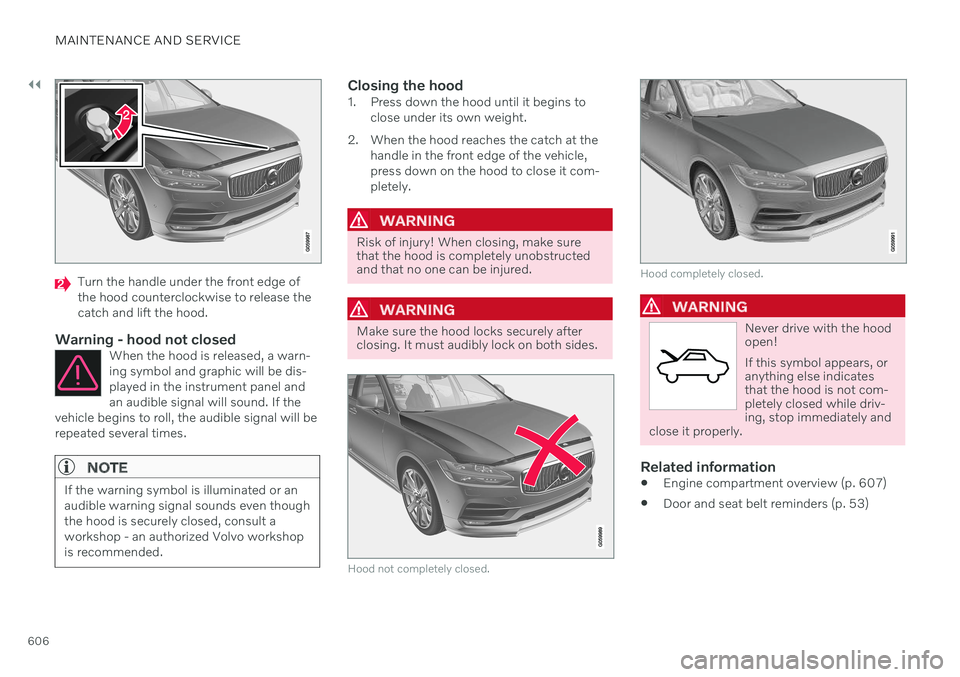
Turn the handle under the front edge of the hood counterclockwise to release thecatch and lift the hood.
Warning - hood not closedWhen the hood is released, a warn-ing symbol and graphic will be dis-played in the instrument panel andan audible signal will sound. If the
vehicle begins to roll, the audible signal will berepeated several times.
NOTE
If the warning symbol is illuminated or an audible warning signal sounds even thoughthe hood is securely closed, consult aworkshop - an authorized Volvo workshopis recommended.
Closing the hood1. Press down the hood until it begins to close under its own weight.
2. When the hood reaches the catch at the handle in the front edge of the vehicle, press down on the hood to close it com-pletely.
WARNING
Risk of injury! When closing, make sure that the hood is completely unobstructedand that no one can be injured.
WARNING
Make sure the hood locks securely after closing. It must audibly lock on both sides.
Hood not completely closed.
Hood completely closed.
WARNING
Never drive with the hood open! If this symbol appears, or anything else indicatesthat the hood is not com-pletely closed while driv-ing, stop immediately and
close it properly.
Related information
Engine compartment overview (p. 607)
Door and seat belt reminders (p. 53)
Page 627 of 693

MAINTENANCE AND SERVICE
}}
625
FunctionAmpere Type
Fed when ignition is on: Engine control module; transmission components, electrical power steering, central electrical module 5 Micro
Exterior vehicle sound (certain markets)
5 Micro
Passenger-side headlight, LED15 Micro
– – Micro
–– Micro
–– Micro
Airbags; Passenger weight sensor 5 Micro
Driver-side headlight, LED15 Micro
Accelerator pedal sensor 5 Micro
Transmission control module; gear selector control module15 Micro
Engine control module 5 Micro
–– Micro
–– Micro
–– Micro
–– Micro
Engine control module; actuator; throttle unit; turbo-charger valve20 Micro
Page 666 of 693
||
SPECIFICATIONS
664
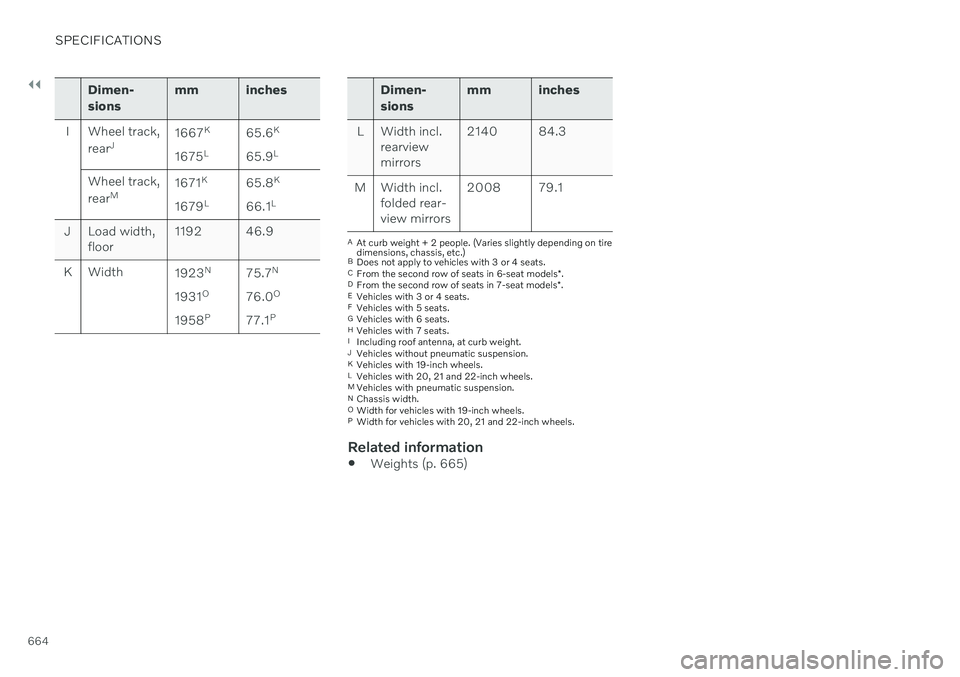
Dimen- sionsmm inches
I Wheel track, rearJ 1667
K
1675 L 65.6
K
65.9 L
Wheel track, rear M 1671
K
1679 L 65.8
K
66.1 L
J Load width, floor 1192 46.9
K Width 1923N
1931 O
1958 P 75.7
N
76.0 O
77.1 PDimen- sions mm inches
L Width incl. rearview mirrors 2140 84.3
M Width incl. folded rear-view mirrors 2008 79.1
A
At curb weight + 2 people. (Varies slightly depending on tire dimensions, chassis, etc.)
B Does not apply to vehicles with 3 or 4 seats.
C From the second row of seats in 6-seat models *.
D From the second row of seats in 7-seat models *.
E Vehicles with 3 or 4 seats.
F Vehicles with 5 seats.
G Vehicles with 6 seats.
H Vehicles with 7 seats.
I Including roof antenna, at curb weight.
J Vehicles without pneumatic suspension.
K Vehicles with 19-inch wheels.
L Vehicles with 20, 21 and 22-inch wheels.
M Vehicles with pneumatic suspension.
N Chassis width.
O Width for vehicles with 19-inch wheels.
P Width for vehicles with 20, 21 and 22-inch wheels.
Related information
Weights (p. 665)