radio VOLVO XC90 TWIN ENGINE HYBRID 2017 Owners Manual
[x] Cancel search | Manufacturer: VOLVO, Model Year: 2017, Model line: XC90 TWIN ENGINE HYBRID, Model: VOLVO XC90 TWIN ENGINE HYBRID 2017Pages: 584, PDF Size: 14.2 MB
Page 5 of 584
3
Top tether anchors92
Integrated booster cushion*93
Raising the integrated booster cushion*94
Stowing the integrated booster cushion*96
INSTRUMENTS AND CONTROLS
Instruments and controls100
Trip computer101
Displaying trip computer information102
Displaying trip statistics104
HomeLink® Wireless Control System*104
Programming the HomeLink® Wire-less Control System*105
Adjusting the power door mirrors108
Laminated panoramic roof*110
Operating the laminated panoramic roof*111
Power windows113
Operating the power windows113
Rearview mirror114
Using sun shades115
Settings view115
Categories in Settings view116
Changing system settings in Set-tings view118
Changing settings in apps119
Resetting the settings view119
Resetting user data when the vehiclechanges owners120
Ambient temperature sensor120
Clock121
Head-up display (HUD)*122
Voice control125
Using voice commands125
Voice control for cell phones126
Voice control for radio and media127
Climate system voice commands128
Navigation system voice commands129
Voice control settings130
Indicator symbols in the instrument panel130
Instrument panel132
Hybrid-related information in theinstrument panel134
Instrument panel licenses136
Warning symbols in the instrument panel141
Compass142
Calibrating the compass143
Lighting panel and controls144
Parking lights146
Daytime Running Lights (DRL)146
Low beam headlights147
High and low beam headlights148
Active Bending Lights*149
Rear fog lights (certain models only)150
Brake lights151
Hazard warning flashers151
Using turn signals151
Page 11 of 584
9
INFOTAINMENT
The infotainment system432
Apps (applications)432
Sound settings433
Radio434
Radio settings434
RBDS radio434
Changing and searching for radiostations435
HD Radio™reception436
Switching HD Radio on and off437
HD Radio sub-channels438
HD Radio limitations439
SiriusXM® Satellite radio*439
Using SiriusXM® Satellite radio radio*440
SiriusXM® Satellite radio* settings442
SiriusXM Travel Link*443
SiriusXM Travel Link - Weather444
SiriusXM Travel Link - Alerts446
SiriusXM Travel Link - Fuel446
SiriusXM Travel Link - Sports448
Phone448
Pairing a cell phone449
Connecting/disconnecting a cell phone451
Handling phone calls452
Handling text messages453
Phone settings454
Text message settings454
Connecting a Bluetooth® device455
Connecting a device via theAUX/USB socket455
Media player455
Apple CarPlay456
Apple CarPlay settings458
CD (media) player*459
Playing media459
Media searches461
Playing media through theAUX/USB sockets462
Streaming media through a Blue-tooth connection462
Media sound settings463
Gracenote463
Video464
Media player technical data464
Internet connected vehicle466
Connecting to the Internet466
Bluetooth settings468
Downloading, updating and uninstal-ling apps468
Internet connection troubleshooting469
Tethering (Wi-Fi sharing)470
Deleting Wi-Fi networks471
Wi-Fi technology and security471
Vehicle modem settings471
Infotainment system license information472
Terms, conditions and confidentiality476
Page 31 of 584
INTRODUCTION
}}
29
Driver distraction
Please keep the following warnings in mindwhen operating/servicing your vehicle.
A driver has a responsibility to do everything pos-sible to ensure his or her own safety and thesafety of passengers in the vehicle and otherssharing the roadway. Avoiding distractions is partof that responsibility.
Driver distraction results from driver activities thatare not directly related to controlling the vehiclein the driving environment. Your new Volvo is, orcan be, equipped with many feature-rich enter-tainment and communication systems. Theseinclude hands-free cellular telephones, navigationsystems, and multipurpose audio systems. Youmay also own other portable electronic devicesfor your own convenience. When used properlyand safely, they enrich the driving experience.Improperly used, any of these could cause a dis-traction.
For all of these systems, we want to provide thefollowing warning that reflects the strong Volvoconcern for your safety. Never use these devicesor any feature of your vehicle in a way that dis-tracts you from the task of driving safely. Distrac-tion can lead to a serious accident. In addition tothis general warning, we offer the following guid-ance regarding specific newer features that maybe found in your vehicle:
WARNING
•Never use a hand-held cellular telephonewhile driving. Some jurisdictions prohibitcellular telephone use by a driver whilethe vehicle is moving.
•If your vehicle is equipped with a naviga-tion system, set and make changes toyour travel itinerary only with the vehicleparked.
•Never program your audio system whilethe vehicle is moving. Program radio pre-sets with the vehicle parked, and use yourprogrammed presets to make radio usequicker and simpler.
•Never use portable computers or per-sonal digital assistants while the vehicleis moving.
Accessory installation
•We strongly recommend that Volvo ownersinstall only genuine, Volvo-approved acces-sories, and that accessory installations beperformed only by a trained and qualifiedVolvo service technician.
•Genuine Volvo accessories are tested toensure compatibility with the performance,safety, and emission systems in your vehicle.Additionally, a trained and qualified Volvoservice technician knows where accessoriesmay and may not be safely installed in yourVolvo. In all cases, please consult a trained
and qualified Volvo service technician beforeinstalling any accessory in or on your vehicle.
•Accessories that have not been approved byVolvo may or may not be specifically testedfor compatibility with your vehicle. Addition-ally, an inexperienced installer may not befamiliar with some of your car's systems.
•Any of your car's performance and safetysystems could be adversely affected if youinstall accessories that Volvo has not tested,or if you allow accessories to be installed bysomeone unfamiliar with your vehicle.
•Damage caused by unapproved or improperlyinstalled accessories may not be covered byyour new vehicle warranty. See your Warrantyand Service Records Information booklet formore warranty information. Volvo assumes noresponsibility for death, injury, or expensesthat may result from the installation of non-genuine accessories.
Page 36 of 584
||
INTRODUCTION
* Option/accessory, for more information, see Introduction.34
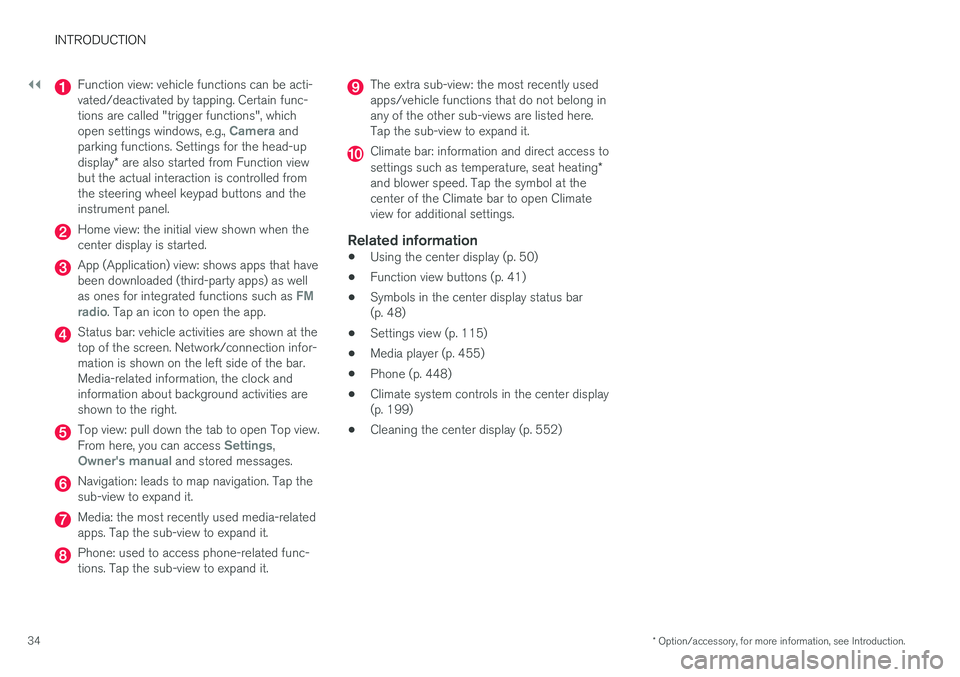
Function view: vehicle functions can be acti-vated/deactivated by tapping. Certain func-tions are called "trigger functions", whichopen settings windows, e.g., Camera andparking functions. Settings for the head-updisplay* are also started from Function viewbut the actual interaction is controlled fromthe steering wheel keypad buttons and theinstrument panel.
Home view: the initial view shown when thecenter display is started.
App (Application) view: shows apps that havebeen downloaded (third-party apps) as wellas ones for integrated functions such as FMradio. Tap an icon to open the app.
Status bar: vehicle activities are shown at thetop of the screen. Network/connection infor-mation is shown on the left side of the bar.Media-related information, the clock andinformation about background activities areshown to the right.
Top view: pull down the tab to open Top view.From here, you can access Settings,Owner's manual and stored messages.
Navigation: leads to map navigation. Tap thesub-view to expand it.
Media: the most recently used media-relatedapps. Tap the sub-view to expand it.
Phone: used to access phone-related func-tions. Tap the sub-view to expand it.
The extra sub-view: the most recently usedapps/vehicle functions that do not belong inany of the other sub-views are listed here.Tap the sub-view to expand it.
Climate bar: information and direct access tosettings such as temperature, seat heating*and blower speed. Tap the symbol at thecenter of the Climate bar to open Climateview for additional settings.
Related information
•Using the center display (p. 50)
•Function view buttons (p. 41)
•Symbols in the center display status bar(p. 48)
•Settings view (p. 115)
•Media player (p. 455)
•Phone (p. 448)
•Climate system controls in the center display(p. 199)
•Cleaning the center display (p. 552)
Page 48 of 584
||
INTRODUCTION
46
ignition is being started/switched off or when amessage is displayed on the screen.
Going to Top view from an app
To pull down Top view when an app is running(e.g., FM radio):
•Tap FM Radio Settings to display thesesettings.
•Tap Owner's manual to open an articlerelated to the specific app.
This applies only to your vehicle's factory-installed apps. This is not possible for third-party apps that have been downloaded.
Climate view
The climate bar, where the most common climatesystem settings can be made, is located at thebottom of the screen and is always visible.
Tap the symbol at the center of the cli-mate bar to open Climate view foraccess to additional climate systemsettings.
Tap the symbol to close Climate viewand return to a previous view.
App view
App view (generic illustration)
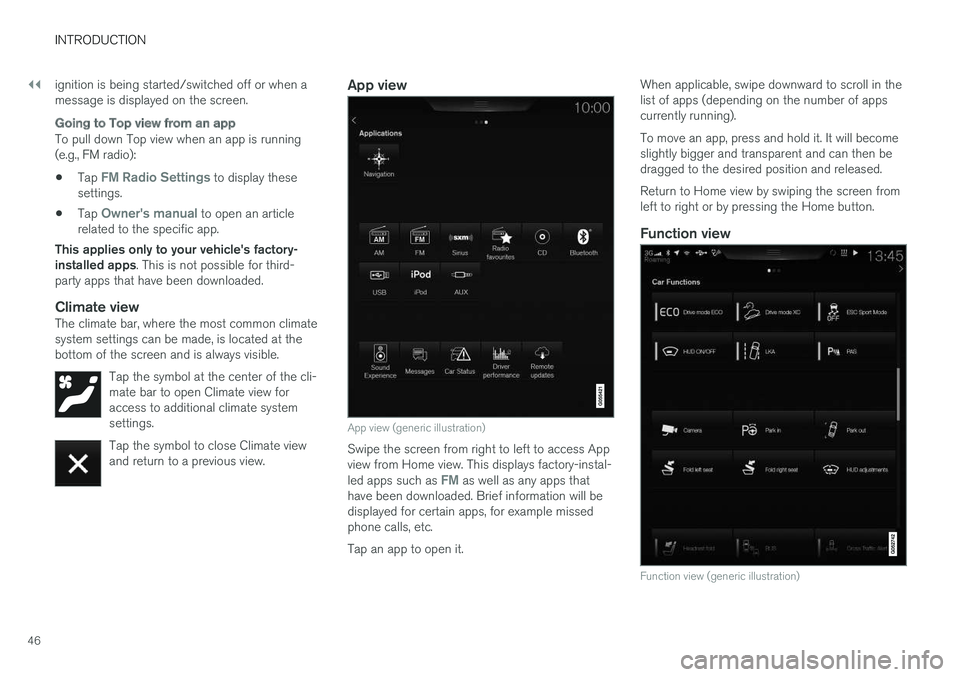
Swipe the screen from right to left to access Appview from Home view. This displays factory-instal-led apps such as FM as well as any apps thathave been downloaded. Brief information will bedisplayed for certain apps, for example missedphone calls, etc.
Tap an app to open it.
When applicable, swipe downward to scroll in thelist of apps (depending on the number of appscurrently running).
To move an app, press and hold it. It will becomeslightly bigger and transparent and can then bedragged to the desired position and released.
Return to Home view by swiping the screen fromleft to right or by pressing the Home button.
Function view
Function view (generic illustration)
Page 50 of 584
INTRODUCTION
48
Symbols in the center display statusbar
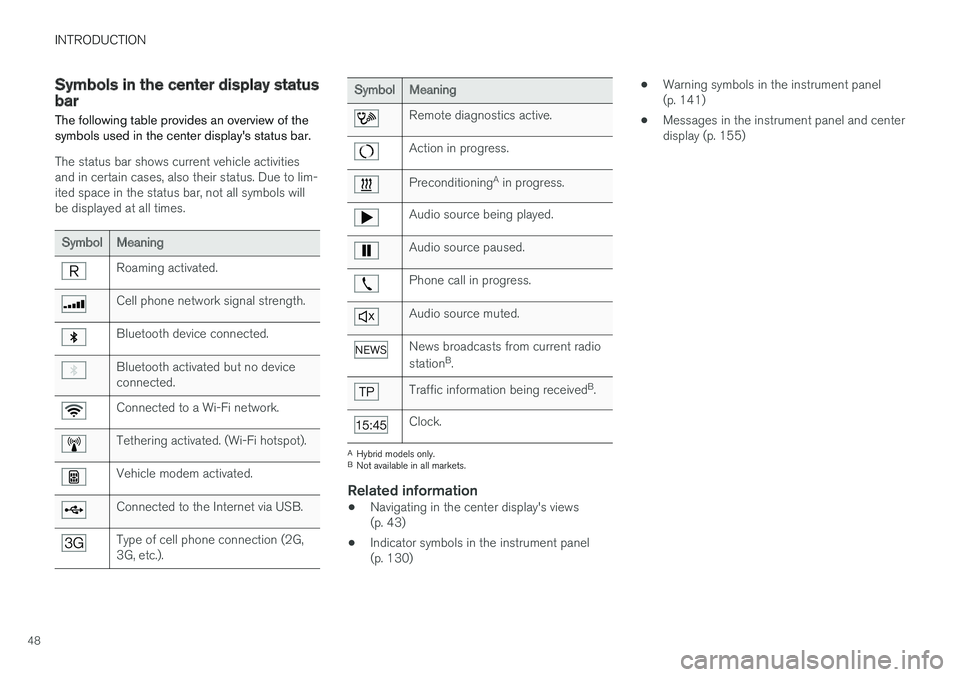
The following table provides an overview of thesymbols used in the center display's status bar.
The status bar shows current vehicle activitiesand in certain cases, also their status. Due to lim-ited space in the status bar, not all symbols willbe displayed at all times.
SymbolMeaning
Roaming activated.
Cell phone network signal strength.
Bluetooth device connected.
Bluetooth activated but no deviceconnected.
Connected to a Wi-Fi network.
Tethering activated. (Wi-Fi hotspot).
Vehicle modem activated.
Connected to the Internet via USB.
Type of cell phone connection (2G,3G, etc.).
SymbolMeaning
Remote diagnostics active.
Action in progress.
PreconditioningA in progress.
Audio source being played.
Audio source paused.
Phone call in progress.
Audio source muted.
News broadcasts from current radio
stationB.
Traffic information being receivedB.
Clock.
AHybrid models only.BNot available in all markets.
Related information
•Navigating in the center display's views(p. 43)
•Indicator symbols in the instrument panel(p. 130)
•Warning symbols in the instrument panel(p. 141)
•Messages in the instrument panel and centerdisplay (p. 155)
Page 51 of 584
INTRODUCTION
49
Changing settings in different typesof apps
App view, which is one of the center display'sbasic views, contains all of the vehicle's apps(applications/programs). Access this view byswiping the screen from right to left.
Basic apps
A number of apps are standard and are part ofVolvo Sensus, such as FM Radio, USB and CD.
To change settings in a basic app:
1.Open the app, for example Phone, either onthe home screen or full-screen from Appview.
2.Pull down Top view.
3.Tap Phone settings.
4.Change the desired settings and confirm.
5. Press the Home button, tap the screen out-side of Top view or pull Top view up.
Third-party apps
Third party apps have to be selected and down-loaded. In these apps, setting are made fromwithin the app, not from Top view.
Page 106 of 584
INSTRUMENTS AND CONTROLS
* Option/accessory, for more information, see Introduction.104
Displaying trip statistics
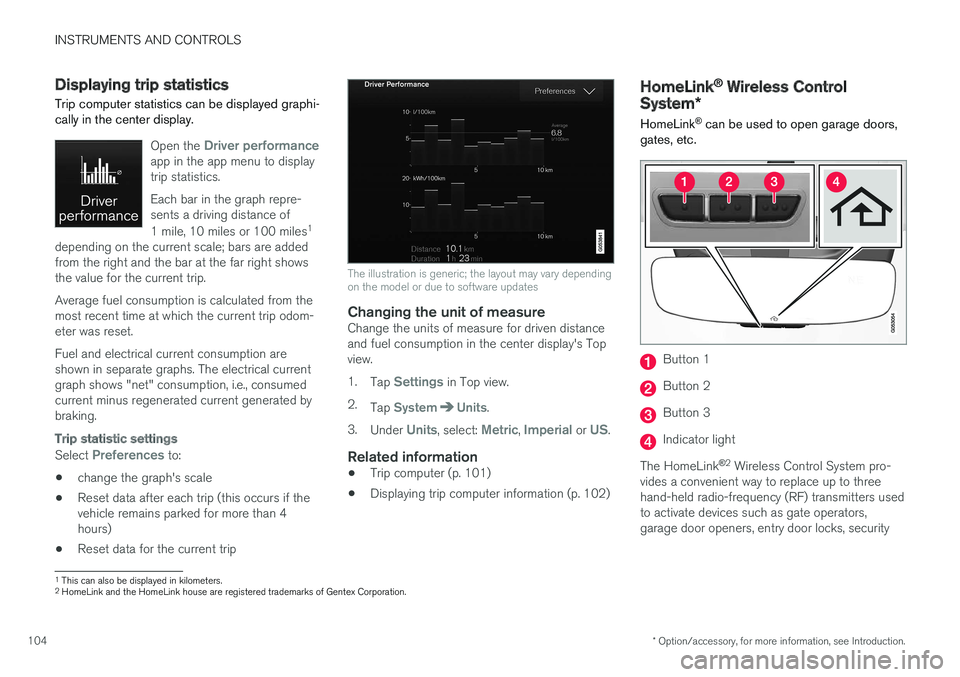
Trip computer statistics can be displayed graphi-cally in the center display.
Open the Driver performanceapp in the app menu to displaytrip statistics.
Each bar in the graph repre-sents a driving distance of
1 mile, 10 miles or 100 miles1
depending on the current scale; bars are addedfrom the right and the bar at the far right showsthe value for the current trip.
Average fuel consumption is calculated from themost recent time at which the current trip odom-eter was reset.
Fuel and electrical current consumption areshown in separate graphs. The electrical currentgraph shows "net" consumption, i.e., consumedcurrent minus regenerated current generated bybraking.
Trip statistic settings
Select Preferences to:
•change the graph's scale
•Reset data after each trip (this occurs if thevehicle remains parked for more than 4hours)
•Reset data for the current trip
The illustration is generic; the layout may vary dependingon the model or due to software updates
Changing the unit of measure
Change the units of measure for driven distanceand fuel consumption in the center display's Topview.
1.Tap Settings in Top view.
2.Tap SystemUnits.
3.Under Units, select: Metric, Imperial or US.
Related information
•Trip computer (p. 101)
•Displaying trip computer information (p. 102)
HomeLink® Wireless Control
System*
HomeLink® can be used to open garage doors,gates, etc.
Button 1
Button 2
Button 3
Indicator light
The HomeLink®2 Wireless Control System pro-vides a convenient way to replace up to threehand-held radio-frequency (RF) transmitters usedto activate devices such as gate operators,garage door openers, entry door locks, security
1This can also be displayed in kilometers.2HomeLink and the HomeLink house are registered trademarks of Gentex Corporation.
Page 107 of 584
INSTRUMENTS AND CONTROLS
}}
* Option/accessory, for more information, see Introduction.105
systems, even home lighting. Additional informa-tion can be found on the Internet at,www.homelink.com/www.youtube.com/HomeLinkGentex or by phoning the hotline at 1–800–355–3515.
WARNING
•If you use HomeLink® to open a garagedoor or gate, be sure no one is near thegate or door while it is in motion.
•When programming a garage dooropener, it is advised to park outside of thegarage.
•Do not use HomeLink® with any garagedoor opener that lacks safety stop andreverse features as required by U.S. fed-eral safety standards (this includes anygarage door opener model manufacturedbefore April 1, 1982). A garage door thatcannot detect an object - signaling thedoor to stop and reverse - does not meetcurrent U.S. federal safety standards. Formore information, contact HomeLink at:www.homelink.com.
Retain the original transmitter of the RF deviceyou are programming for use in other vehicles aswell as for future HomeLink programming. It isalso suggested that upon the sale of the vehicle,the programmed HomeLink buttons be erasedfor security purposes. See the article "Program-ming HomeLink."
Related information
•Programming the HomeLink® Wireless Con-trol System* (p. 105)
Programming the HomeLink®
Wireless Control System*
NOTE
Some vehicles may require the ignition to beswitched on or be in the “accessories” posi-tion for programming and/or operation ofHomeLink. It is also recommended that a newbattery be placed in the hand-held transmitterof the device being programmed to Home-Link for quicker training and accurate trans-mission of the radio-frequency signal. TheHomeLink buttons must be reset first. Whenthis has been completed, Homelink is inlearning mode so that you can perform pro-gramming.
To program HomeLink®
1.Press the HomeLink® button to be pro-
grammed. The HomeLink® indicator willbegin flashing yellow once a second. You donot need to continue holding the button.
2.Point the hand-held transmitter toward the
HomeLink® button to be programmed andhold it approx. 6–12 inches (15–30 cm)
away from the HomeLink® button. Do not
obstruct the HomeLink® indicator light.
Page 109 of 584
INSTRUMENTS AND CONTROLS
}}
107
Gate Operator/Canadian Programming
Canadian radio-frequency laws require transmit-ter signals to “time-out” (or quit) after severalseconds of transmission – which may not be longenough for HomeLink to pick up the signal dur-ing programming. Similar to this Canadian law,some U.S. gate operators are designed to “time-out” in the same manner.
If you live in Canada or you are having difficultiesprogramming a gate operator or garage dooropener by using the “Programming” procedures,replace “Programming HomeLink” step 3with the following:
•Continue to press and hold the HomeLinkbutton while you press and release - everytwo seconds (“cycle”) your hand-held trans-mitter until the HomeLink indicator lightchanges from a slow to a rapidly blinkinglight. Now you may release both the Home-Link and hand-held transmitter buttons.
Proceed with “Programming” step 4 to complete.
Using HomeLink ®
When programming has been completed,
HomeLink® can be used instead of the originalremote controls.
To operate, press and hold the programmed
HomeLink® button until the trained device begins
to operate3 (this may take several seconds). The
indicator light will glow steadily or flash when thebutton has been pressed. Activation will nowoccur for the trained device (i.e., garage dooropener, gate operator, security system, entry doorlock, home/office lighting, etc.).
NOTE
If the ignition is switched off, HomeLink willfunction for 30 minutes after the driver's doorhas been opened.
For convenience, the hand-held transmitter of thedevice may also be used at any time.
In the event that there are still programming diffi-culties or questions, contact HomeLink at:www.HomeLink.com, www.youtube.com/HomeLinkGentex or by phoning the hotline at 1–800–355–3515.
Resetting HomeLink ®
buttons
Use the following procedure to reset (erase pro-
gramming) from the three HomeLink® buttons(individual buttons cannot be reset but can be“reprogrammed” as outlined in the following sec-tion):
1.Press and hold HomeLink® buttons 1 and 3for approx. 10 seconds until the indicatorlight begins to flash green.
2. Release both buttons.
>HomeLink® is now in the training (orlearning) mode and can be programmedat any time beginning with “To program
HomeLink®" above.
Reprogramming a single HomeLink ®
button
To reprogram an individual HomeLink® button:
1.Press and hold the desired HomeLink® but-ton. DO NOT release the button.
2. The yellow indicator light will begin to flashafter 20 seconds. Without releasing theHomeLink button, proceed with “To program
HomeLink®" step 1 above.
For questions or comments, contact HomeLinkat: www.HomeLink.com, www.youtube.com/HomeLinkGentex or by phoning the hotline at 1–800–355–3515.
FCC (USA) and IC (Canada)
This device complies with FCC rules part 15 andIndustry Canada RSS-210. Operation is subjectto the following two conditions: (1) This devicemay not cause harmful interference, and (2) Thisdevice must accept any interference that may bereceived including interference that may causeundesired operation. WARNING: The transmitterhas been tested and complies with FCC and IC
3Do not hold the button for more than 20 seconds as this will clear the programming of the button.