brakes YAMAHA AEROX50 2004 Owners Manual
[x] Cancel search | Manufacturer: YAMAHA, Model Year: 2004, Model line: AEROX50, Model: YAMAHA AEROX50 2004Pages: 84, PDF Size: 0.96 MB
Page 12 of 84
GIVE SAFETY THE RIGHT OF WAY
1
EAU03099
Further safe-riding points
•Be sure to signal clearly when making turns.
•Braking can be extremely difficult on a wet road. Avoid hard braking, because the scooter could slide.
Apply the brakes slowly when stopping on a wet surface.
•Slow down as you approach a corner or turn. Once you have completed a turn, accelerate slowly.
•Be careful when passing parked cars. A driver might not see you and open a door in your path.
•Railroad crossings, streetcar rails, iron plates on road construction sites, and manhole covers become
extremely slippery when wet. Slow down and cross them with caution. Keep the scooter upright, otherwise
it could slide out from under you.
•The brake pads could get wet when you wash the scooter. After washing the scooter, check the brakes
before riding.
•Always wear a helmet, gloves, trousers (tapered around the cuff and ankle so they do not flap), and a
bright colored jacket.
•Do not carry too much luggage on the scooter. An overloaded scooter is unstable.
1-2
Page 39 of 84
OPERATION AND IMPORTANT RIDING POINTS
5
EAU00435
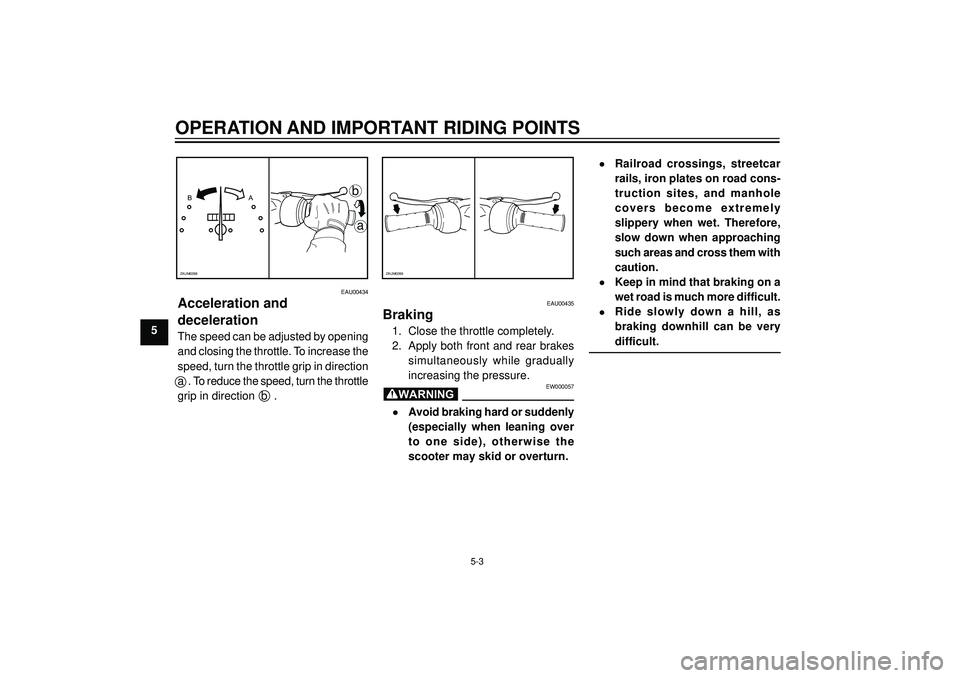
Braking
1. Close the throttle completely.
2. Apply both front and rear brakes
simultaneously while gradually
increasing the pressure.
EW000057
•Avoid braking hard or suddenly
(especially when leaning over
to one side), otherwise the
scooter may skid or overturn.
•Railroad crossings, streetcar
rails, iron plates on road cons-
truction sites, and manhole
covers become extremely
slippery when wet. Therefore,
slow down when approaching
such areas and cross them with
caution.
•Keep in mind that braking on a
wet road is much more difficult.
•Ride slowly down a hill, as
braking downhill can be very
difficult.
ZAUM0269
WARNING
5-3
EAU00434
Acceleration and
deceleration
The speed can be adjusted by opening
and closing the throttle. To increase the
speed, turn the throttle grip in direction
a . To reduce the speed, turn the throttle
grip in direction b .
B
A
a b
ZAUM0268
Page 42 of 84
EAU00462
PERIODIC MAINTENANCE AND MINOR REPAIR
Periodic maintenance and lubrication chart ............ 6-2
Removing and installing cowling and panel ............ 6-5
Cowling A ................................................................ 6-5
Panel A .................................................................... 6-5
Checking the spark plug ......................................... 6-6
Final transmission oil .............................................. 6-7
Coolant .................................................................... 6-8
Cleaning the air filter element ................................. 6-9
Adjusting the carburetor ........................................ 6-10
Adjusting the throttle cable free play ..................... 6-11
Tires ...................................................................... 6-11
Wheels .................................................................. 6-13
Adjusting the front and rear brake lever
free play ................................................................ 6-13
Checking the front and rear brake pads ................ 6-14
Checking the brake fluid level ............................... 6-14
6 Changing the brake fluid ....................................... 6-15
Adjusting the autolube pump ................................ 6-15
Checking and lubricating the cables ..................... 6-16
Lubricating the front and rear brakes levers .......... 6-16
Checking and lubricating the centerstand ............. 6-16
Checking the front fork .......................................... 6-17
Checking the steering ........................................... 6-17
Checking the wheel bearings ................................ 6-18
Battery ................................................................... 6-18
Replacing the fuse ................................................ 6-20
Replacing a headlight bulb .................................... 6-20
Replacing tail/brake light bulb ............................... 6-21
Replacing a turn signal light bulb .......................... 6-22
Troubleshooting ..................................................... 6-22
Troubleshooting chart ............................................ 6-23
Engine overheating ............................................... 6-24
Page 70 of 84
SCOOTER CARE AND STORAGE
7
•Do not use any harsh chemical
products on plastic parts. Be
sure to avoid using cloths or
sponges which have been in
contact with strong or abrasive
cleaning products, solvent or
thinner, fuel (gasoline), rust
removers or inhibitors, brake
fluid, antifreeze or electrolyte.
•Do not use high-pressure
washers or steam-jet cleaners
since they cause water
seepage and deterioration in
the following areas: seals (of
wheel and swingarm bearings,
fork and brakes), electric
components (couplers,
connectors, instruments,
switches and lights), breather
hoses and vents.
•For scooters equipped with a
windshield: Do not use strong
cleaners or hard sponges as
they will cause dulling or
scratching. Some cleaning
compounds for plastic may
leave scratches on the
windshield. Test the product on
a small hidden part of the
windshield to make sure that it
does not leave any marks. If the
windshield is scratched, use a
quality plastic polishing
compound after washing.
After normal use
Remove dirt with warm water, a mild
detergent, and a soft, clean sponge,
and then rinse thoroughly with clean
water. Use a toothbrush or bottlebrush
for hard-to-reach areas. Stubborn dirt
and insects will come off more easily if
the area is covered with a wet cloth for
a few minutes before cleaning.
After riding in the rain, near the sea
or on salt-sprayed roads
Since sea salt or salt sprayed on the
roads during winter are extremely cor-
rosive in combination with water, carry
out the following steps after each ride
in the rain, near the sea or on salt-
sprayed roads.
NOTE :
Salt sprayed on roads in the winter may
remain well into spring.
1. Clean the scooter with cold water
and a mild detergent after the
engine has cooled down.
ECA00012
Do not use warm water since it
increases the corrosive action of the
salt.
2. Apply a corrosion protection spray
on all metal, including chrome-
and nickel-plated, surfaces to
prevent corrosion.
CAUTION:
7-2
Page 71 of 84
SCOOTER CARE AND STORAGE
7After cleaning
1. Dry the scooter with a chamois or
an absorbing cloth.
2. Use a chrome polish to shine
chrome, aluminum and stainless-
steel parts, including the exhaust
system. (Even the thermally
induced discoloring of stainless-
steel exhaust systems can be
removed through polishing.)
3. To prevent corrosion, it is
recommended to apply a corro-
sion protection spray on all metal,
including chrome- and nickel-
plated, surfaces.
4. Use spray oil as a universal
cleaner to remove any remaining
dirt.
5. Touch up minor paint damage
caused by stones, etc.
6. Wax all painted surfaces.
7. Let the scooter dry completely
before storing or covering it.
EWA00002
•Make sure that there is no oil or
wax on the brakes or tires. If
necessary, clean the brake discs
and brake linings with a regular
brake disc cleaner or acetone,
and wash the tires with warm
water and a mild detergent.
•Before operating the scooter
test its braking performance and
cornering behavior.
ECA00013
•Apply spray oil and wax sparingly
and make sure to wipe off any
excess.
•Never apply oil or wax to any
rubber and plastic parts, but treat
them with a suitable care product.
•Avoid using abrasive polishing
compounds as they will wear
away the paint.
NOTE :
Consult a Yamaha dealer for advice on
what products to use.
Storage
Short-term
Always store your scooter in a cool, dry
place and, if necessary, protect it
against dust with a porous cover.
ECA00015
•Storing the scooter in a poorly
ventilated room or covering it
with a tarp, while it is still wet,
will allow water and humidity to
seep in and cause rust.
•To prevent corrosion, avoid
damp cellars, stables (because
of the presence of ammonia)
and areas where strong
chemicals are stored.
WARNING
CAUTION:
CAUTION:
7-3
Page 76 of 84
SPECIFICATIONS
8
Chassis:
Frame type Steel tube underbone
Caster angle 27°
Trail 89.4 mm
Tires:
Front:
Type Tubeless
Size 130/60-13 53L TL
Manufacturer/ Model PIRELLI / SL36
PIRELLI / EVO 21
MICHELIN / BOPPER
Rear:
Type Tubeless
Size 140/60-13 57L TL
anufacturer/ Model PIRELLI / SL36
PIRELLI / EVO 22
MICHELIN / BOPPER
Maximum load* 180 kg
Tir air pressure
(mesured on cold tires):
Up to 90 kg
Front150 kpa
Rear 150 kpa
90kg—maximum*
Front150 kpa
Rear 170 kpa
* Total weight of rider, passenger, cargo and accessoriesWheels:
Front
Type Cast wheel
Size 13 X MT 3.00
Rear
Type Cast wheel
Size 13 X MT 3.50
Brakes:
Front
Type Single disc brake
Operation Right hand operation
Type brake fluid DOT 3 or DOT 4
Rear
Type Single disc brake
Operation Left hand operation
Type brake fluid DOT 3 or DOT 4
Suspension:
Front suspension Telescopic fork
Rear suspension Unit swing
Shock absorber:
Front fork type Coil spring/oil damper
Rear shock absorber Coil spring/oil damper
assembly type or Coil spring/Gas-oil damper
(Depends on model)
Wheel travel:
Front wheel travel 80 mm
Rear wheel travel 72 mm
8-2