key YAMAHA AEROX50 2018 Owners Manual
[x] Cancel search | Manufacturer: YAMAHA, Model Year: 2018, Model line: AEROX50, Model: YAMAHA AEROX50 2018Pages: 78, PDF Size: 4.36 MB
Page 4 of 78

Important manual information
EAU10134
Particularly important information is distinguished in this manual by the following notations:
*Product and specifications are subject to change without notice.This is the safety alert symbol. It is used to alert you to potential personal injury
hazards. Obey all safety messages that follow this symbol to avoid possible injury
or death.
A WARNING indicates a hazardous situation which, if not avoided, could result in
death or serious injury.
A NOTICE indicates special precautions that must be taken to avoid damage to the
vehicle or other property.
A TIP provides key information to make procedures easier or clearer.
WARNING
NOTICETIP
U1GBE1E0.book Page 1 Tuesday, October 17, 2017 11:45 AM
Page 17 of 78
Instrument and control functions
3-1
3
EAU10462
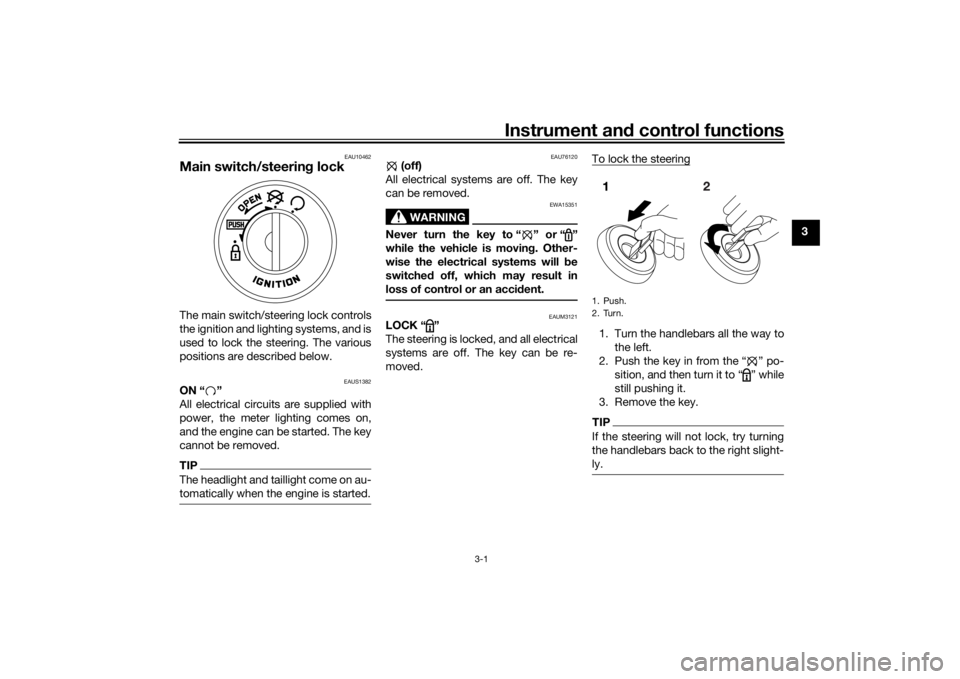
Main switch/steering lockThe main switch/steering lock controls
the ignition and lighting systems, and is
used to lock the steering. The various
positions are described below.
EAUS1382
ON “ ”
All electrical circuits are supplied with
power, the meter lighting comes on,
and the engine can be started. The key
cannot be removed.TIPThe headlight and taillight come on au-
tomatically when the engine is started.
EAU76120
(off)
All electrical systems are off. The key
can be removed.
WARNING
EWA15351
Never turn the key to “ ” or “ ”
while the vehicle is moving. Other-
wise the electrical systems will be
switched off, which may result in
loss of control or an accident.
EAUM3121
LOCK “ ”
The steering is locked, and all electrical
systems are off. The key can be re-
moved.To lock the steering
1. Turn the handlebars all the way to
the left.
2. Push the key in from the “ ” po-
sition, and then turn it to “ ” while
still pushing it.
3. Remove the key.TIPIf the steering will not lock, try turning
the handlebars back to the right slight-
ly.1. Push.
2. Turn.
U1GBE1E0.book Page 1 Tuesday, October 17, 2017 11:45 AM
Page 18 of 78
Instrument and control functions
3-2
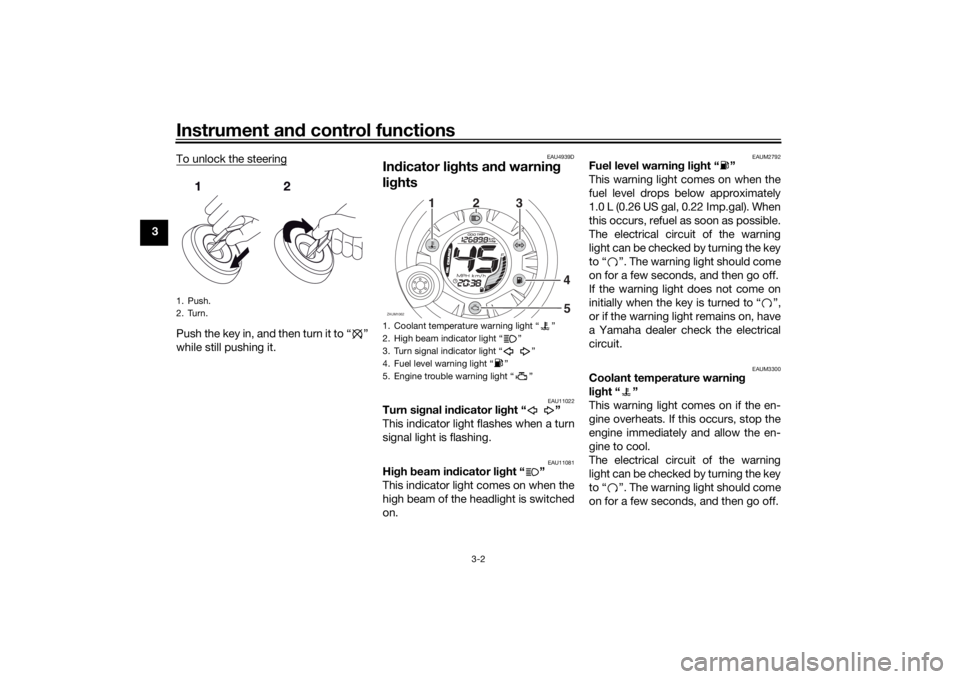
3To unlock the steering
Push the key in, and then turn it to “ ”
while still pushing it.
EAU4939D
Indicator lights and warning
lights
EAU11022
Turn signal indicator light “ ”
This indicator light flashes when a turn
signal light is flashing.
EAU11081
High beam indicator light “ ”
This indicator light comes on when the
high beam of the headlight is switched
on.
EAUM2792
Fuel level warning light “ ”
This warning light comes on when the
fuel level drops below approximately
1.0 L (0.26 US gal, 0.22 Imp.gal). When
this occurs, refuel as soon as possible.
The electrical circuit of the warning
light can be checked by turning the key
to “ ”. The warning light should come
on for a few seconds, and then go off.
If the warning light does not come on
initially when the key is turned to “ ”,
or if the warning light remains on, have
a Yamaha dealer check the electrical
circuit.
EAUM3300
Coolant temperature warning
light “ ”
This warning light comes on if the en-
gine overheats. If this occurs, stop the
engine immediately and allow the en-
gine to cool.
The electrical circuit of the warning
light can be checked by turning the key
to “ ”. The warning light should come
on for a few seconds, and then go off.
1. Push.
2. Turn.
1. Coolant temperature warning light “ ”
2. High beam indicator light “ ”
3. Turn signal indicator light “ ”
4. Fuel level warning light “ ”
5. Engine trouble warning light “ ”ZAUM1062
O
IL CHA
NGE
12
3
4
5
U1GBE1E0.book Page 2 Tuesday, October 17, 2017 11:45 AM
Page 19 of 78
Instrument and control functions
3-3
3 If the warning light does not come on
initially when the key is turned to “ ”,
or if the warning light remains on, have
a Yamaha dealer check the electrical
circuit.
NOTICE
ECA10022
Do not continue to operate the en-
gine if it is overheating.TIPIf the engine overheats, see page 6-30
for further instructions.
EAU78310
Engine trouble warning light “ ”
This warning light comes on if a prob-
lem is detected in the engine or other
vehicle control system. If this occurs,
have a Yamaha dealer check the on-
board diagnostic system.
The electrical circuit of the warning
light can be checked by turning the key
to “ ”. The warning light should come
on for a few seconds, and then go off.
If the warning light does not come on
initially when the key is turned to “ ”,
or if the warning light remains on, have
a Yamaha dealer check the vehicle.
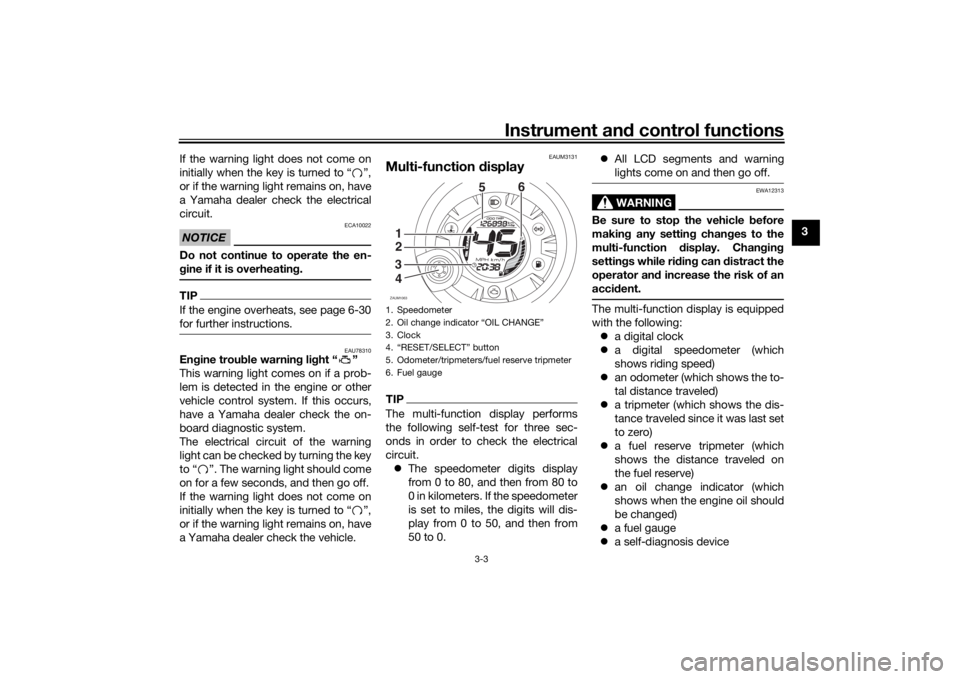
EAUM3131
Multi-function displayTIPThe multi-function display performs
the following self-test for three sec-
onds in order to check the electrical
circuit.
The speedometer digits display
from 0 to 80, and then from 80 to
0 in kilometers. If the speedometer
is set to miles, the digits will dis-
play from 0 to 50, and then from
50 to 0.All LCD segments and warning
lights come on and then go off.
WARNING
EWA12313
Be sure to stop the vehicle before
making any setting changes to the
multi-function display. Changing
settings while riding can distract the
operator and increase the risk of an
accident.The multi-function display is equipped
with the following:
a digital clock
a digital speedometer (which
shows riding speed)
an odometer (which shows the to-
tal distance traveled)
a tripmeter (which shows the dis-
tance traveled since it was last set
to zero)
a fuel reserve tripmeter (which
shows the distance traveled on
the fuel reserve)
an oil change indicator (which
shows when the engine oil should
be changed)
a fuel gauge
a self-diagnosis device
1. Speedometer
2. Oil change indicator “OIL CHANGE”
3. Clock
4. “RESET/SELECT” button
5. Odometer/tripmeters/fuel reserve tripmeter
6. Fuel gaugeZAUM1063
O
I
L CHA
NGE56
1
3
42
U1GBE1E0.book Page 3 Tuesday, October 17, 2017 11:45 AM
Page 20 of 78
Instrument and control functions
3-4
3
TIPBe sure to turn the key to “ ” be-
fore using the “RESET/SELECT”
button.
For the U.K. only: To switch the
speedometer and odometer/trip-
meter displays between kilome-
ters and miles, when the main
switch is turned to “ ”, press the
“RESET/SELECT” button for at
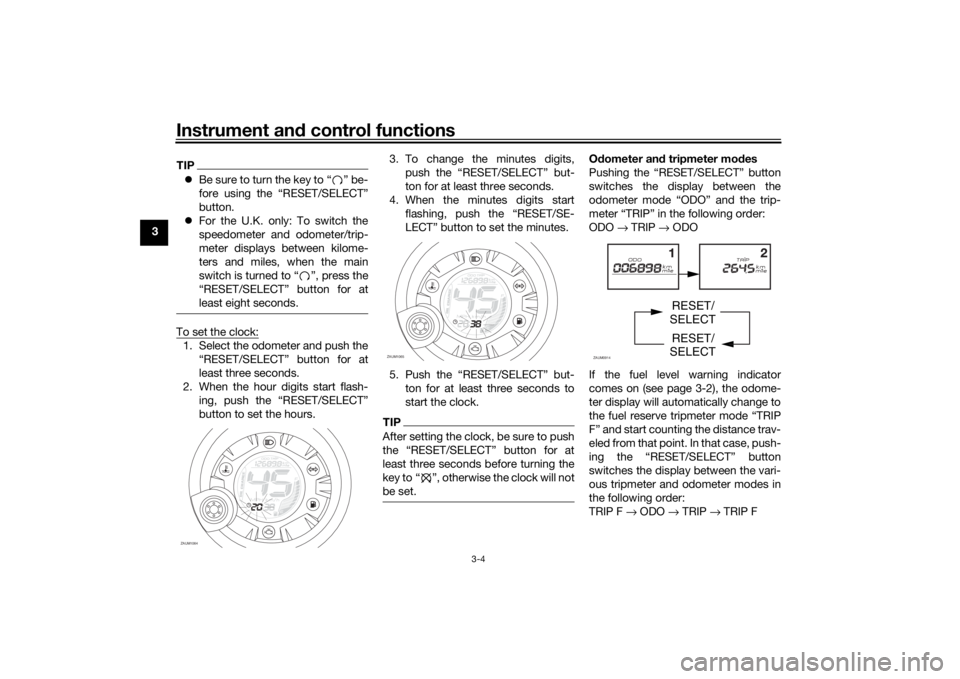
least eight seconds.To set the clock:1. Select the odometer and push the
“RESET/SELECT” button for at
least three seconds.
2. When the hour digits start flash-
ing, push the “RESET/SELECT”
button to set the hours.3. To change the minutes digits,
push the “RESET/SELECT” but-
ton for at least three seconds.
4. When the minutes digits start
flashing, push the “RESET/SE-
LECT” button to set the minutes.
5. Push the “RESET/SELECT” but-
ton for at least three seconds to
start the clock.
TIPAfter setting the clock, be sure to push
least three seconds before turning the
key to Ž, otherwise the clock will not
be set.
Odometer and tripmeter modes
Pushing the “RESET/SELECT” button
switches the display between the
odometer mode “ODO” and the trip-
meter “TRIP” in the following order:
ODO → TRIP → ODO
If the fuel level warning indicator
comes on (see page 3-2), the odome-
ter display will automatically change to
the fuel reserve tripmeter mode “TRIP
F” and start counting the distance trav-
eled from that point. In that case, push-
ing the “RESET/SELECT” button
switches the display between the vari-
ous tripmeter and odometer modes in
the following order:
TRIP F → ODO → TRIP → TRIP F
ZAUM1064
OIL CHA
NGE
ZAUM1065
O
IL
CHAN
GE
ZAUM0914
RESET/
SELECT
RESET/
SELECT
U1GBE1E0.book Page 4 Tuesday, October 17, 2017 11:45 AM
Page 27 of 78
Instrument and control functions
3-11
3
EAUM2831
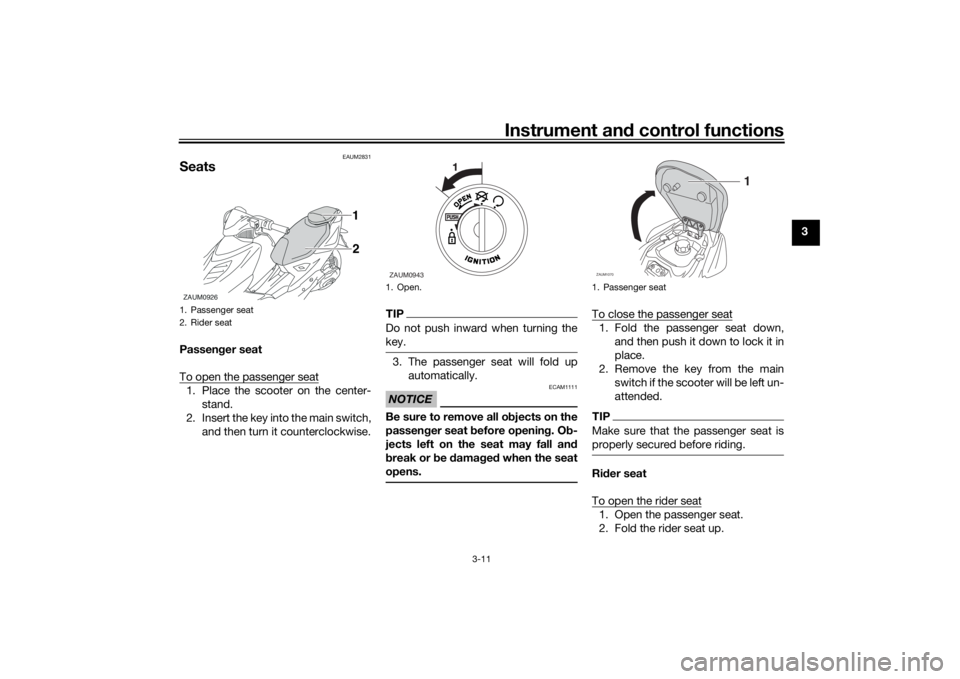
SeatsPassenger seat
To open the passenger seat1. Place the scooter on the center-
stand.
2. Insert the key into the main switch,
and then turn it counterclockwise.
TIPDo not push inward when turning the
key.3. The passenger seat will fold up
automatically.NOTICE
ECAM1111
Be sure to remove all objects on the
passenger seat before opening. Ob-
jects left on the seat may fall and
break or be damaged when the seat
opens.
To close the passenger seat1. Fold the passenger seat down,
and then push it down to lock it in
place.
2. Remove the key from the main
switch if the scooter will be left un-
attended.TIPMake sure that the passenger seat is
properly secured before riding.Rider seat
To open the rider seat1. Open the passenger seat.
2. Fold the rider seat up.
1. Passenger seat
2. Rider seatZAUM0926
2 1
1. Open.ZAUM0943
1. Passenger seatZAUM1070
1
U1GBE1E0.book Page 11 Tuesday, October 17, 2017 11:45 AM
Page 32 of 78
Operation and important riding points
5-1
5
EAU15952
Read the Owner’s Manual carefully to
become familiar with all controls. If
there is a control or function you do not
understand, ask your Yamaha dealer.
WARNING
EWA10272
Failure to familiarize yourself with
the controls can lead to loss of con-
trol, which could cause an accident
or injury.
EAUM3150
TIPThis model is equipped with a lean an-
gle sensor to stop the engine in case of
a turnover. To start the engine after a
turnover, be sure to turn the main
switch to Ž and then to Ž. Failing
to do so will prevent the engine from
starting even though the engine will
crank when pushing the start switch.
EAUM3161
Starting a cold engineNOTICE
ECA10251
See page 5-4 for engine break-in in-
structions prior to operating the ve-
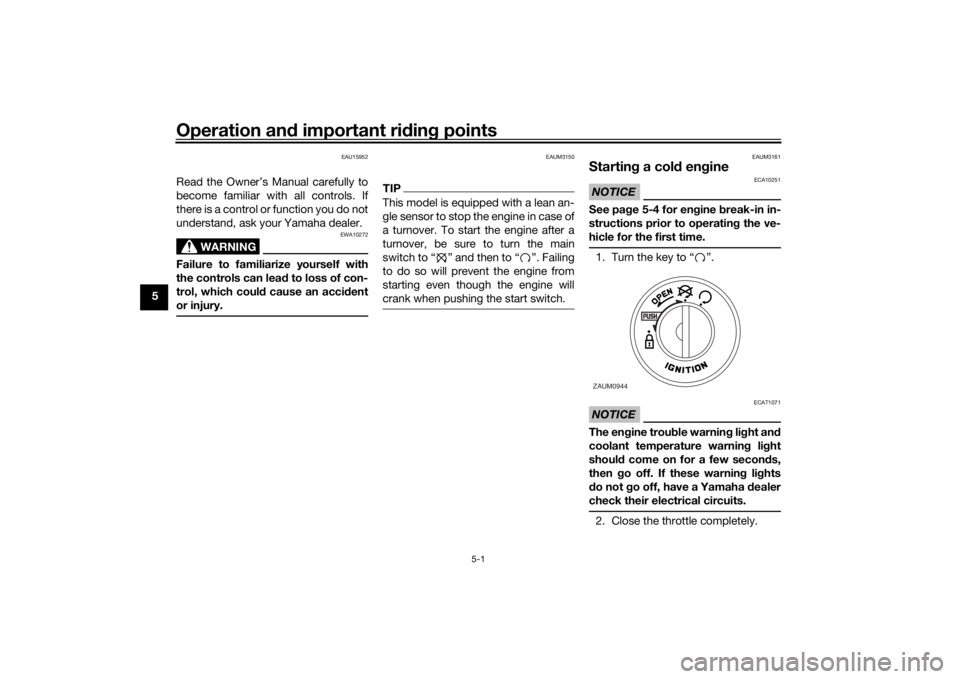
hicle for the first time.1. Turn the key to “ ”.NOTICE
ECAT1071
The engine trouble warning light and
coolant temperature warning light
should come on for a few seconds,
then go off. If these warning lights
do not go off, have a Yamaha dealer
check their electrical circuits.2. Close the throttle completely.ZAUM0944
U1GBE1E0.book Page 1 Tuesday, October 17, 2017 11:45 AM
Page 35 of 78
Operation and important riding points
5-4
5
EAU16831
Engine break-inThere is never a more important period
in the life of your engine than the period
between 0 and 1000 km (600 mi). For
this reason, you should read the fol-
lowing material carefully.
Since the engine is brand new, do not
put an excessive load on it for the first
1000 km (600 mi). The various parts in
the engine wear and polish themselves
to the correct operating clearances.
During this period, prolonged full-throt-
tle operation or any condition that
might result in engine overheating
must be avoided.
EAU45583
0–150 km (0–90 mi)
Avoid prolonged operation above 1/3
throttle.
150–500 km (90–300 mi)
Avoid prolonged operation above 1/2
throttle.500–1000 km (300–600 mi)
Avoid prolonged operation above 3/4
throttle. NOTICE: After 1000 km (600
mi) of operation, be sure to change
the engine oil and final transmission
oil, and to clean the oil strainer.
[ECA16502]1000 km (600 mi) and beyond
The vehicle can now be operated nor-
mally.NOTICE
ECA10271
If any engine trouble should occur
during the engine break-in period,
immediately have a Yamaha dealer
check the vehicle.
EAU17214
ParkingWhen parking, stop the engine, and
then remove the key from the main
switch.
WARNING
EWA10312
Since the engine and exhaust
system can become very hot,
park in a place where pedestri-
ans or children are not likely to
touch them and be burned.
Do not park on a slope or on soft
ground, otherwise the vehicle
may overturn, increasing the
risk of a fuel leak and fire.
Do not park near grass or other
flammable materials which
might catch fire.
U1GBE1E0.book Page 4 Tuesday, October 17, 2017 11:45 AM
Page 42 of 78
Periodic maintenance and adjustment
6-7
6
EAUM3252
Checking the spark plugThe spark plug is an important engine
component, which is easy to check.
Since heat and deposits will cause any
spark plug to slowly erode, the spark
plug should be removed and checked
in accordance with the periodic main-
tenance and lubrication chart. In addi-
tion, the condition of the spark plug
can reveal the condition of the engine.
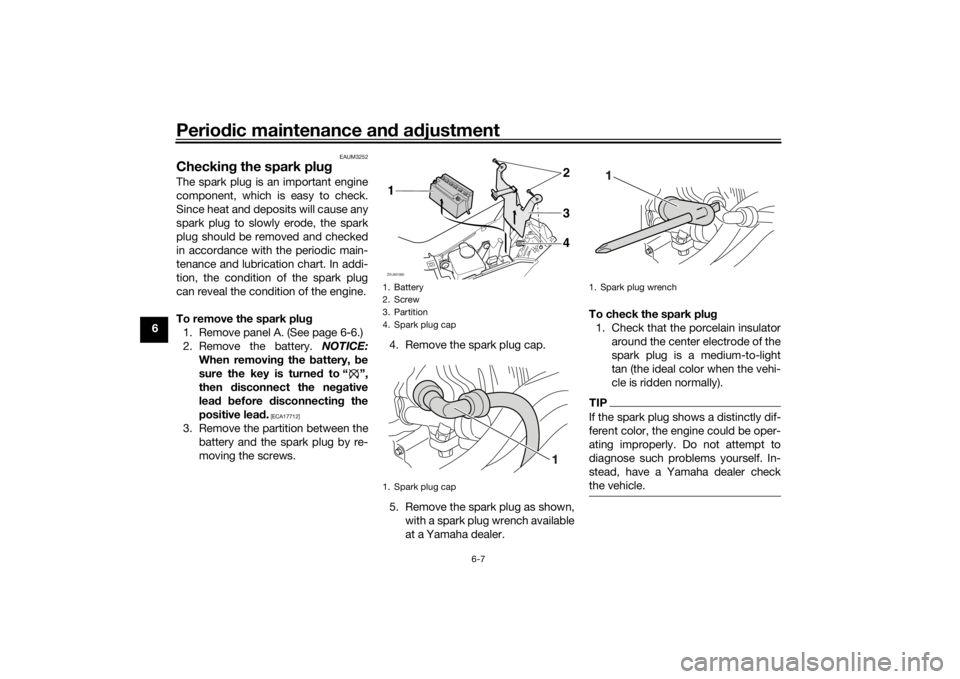
To remove the spark plug
1. Remove panel A. (See page 6-6.)
2. Remove the battery. NOTICE:
When removing the battery, be
sure the key is turned to “ ”,
then disconnect the negative
lead before disconnecting the
positive lead.
[ECA17712]
3. Remove the partition between the
battery and the spark plug by re-
moving the screws.4. Remove the spark plug cap.
5. Remove the spark plug as shown,
with a spark plug wrench available
at a Yamaha dealer.To check the spark plug
1. Check that the porcelain insulator
around the center electrode of the
spark plug is a medium-to-light
tan (the ideal color when the vehi-
cle is ridden normally).
TIPIf the spark plug shows a distinctly dif-
ferent color, the engine could be oper-
ating improperly. Do not attempt to
diagnose such problems yourself. In-
stead, have a Yamaha dealer check
the vehicle.
1. Battery
2. Screw
3. Partition
4. Spark plug cap
1. Spark plug capZAUM1080
3 142
1. Spark plug wrench
U1GBE1E0.book Page 7 Tuesday, October 17, 2017 11:45 AM
Page 43 of 78
Periodic maintenance and adjustment
6-8
6 2. Check the spark plug for electrode
erosion and excessive carbon or
other deposits, and replace it if
necessary.
To install the spark plug
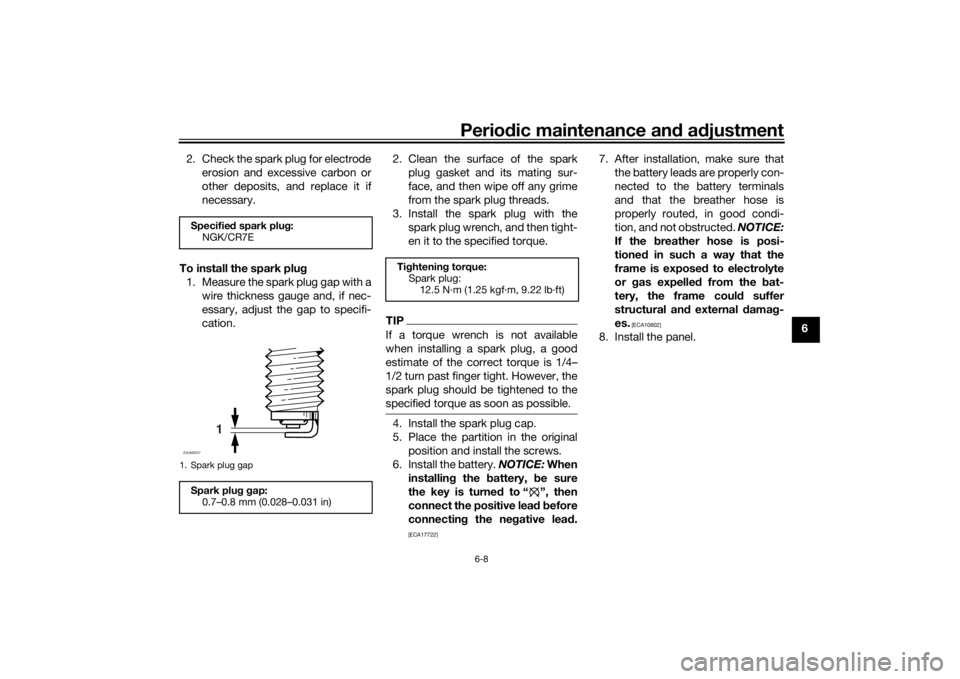
1. Measure the spark plug gap with a
wire thickness gauge and, if nec-
essary, adjust the gap to specifi-
cation.2. Clean the surface of the spark
plug gasket and its mating sur-
face, and then wipe off any grime
from the spark plug threads.
3. Install the spark plug with the
spark plug wrench, and then tight-
en it to the specified torque.
TIPIf a torque wrench is not available
when installing a spark plug, a good
estimate of the correct torque is 1/4…
1/2 turn past finger tight. However, the
spark plug should be tightened to the
specified torque as soon as possible.4. Install the spark plug cap.
5. Place the partition in the original
position and install the screws.
6. Install the battery. NOTICE: When
installing the battery, be sure
the key is turned to “ ”, then
connect the positive lead before
connecting the negative lead.
[ECA17722]
7. After installation, make sure that
the battery leads are properly con-
nected to the battery terminals
and that the breather hose is
properly routed, in good condi-
tion, and not obstructed. NOTICE:
If the breather hose is posi-
tioned in such a way that the
frame is exposed to electrolyte
or gas expelled from the bat-
tery, the frame could suffer
structural and external damag-
es.
[ECA10602]
8. Install the panel.
Specified spark plug:
NGK/CR7E1. Spark plug gapSpark plug gap:
0.7–0.8 mm (0.028–0.031 in)
1
ZAUM0037
Tightening torque:
Spark plug:
12.5 N·m (1.25 kgf·m, 9.22 lb·ft)
U1GBE1E0.book Page 8 Tuesday, October 17, 2017 11:45 AM