brake YAMAHA BANSHEE 350 2002 Manuale de Empleo (in Spanish)
[x] Cancel search | Manufacturer: YAMAHA, Model Year: 2002, Model line: BANSHEE 350, Model: YAMAHA BANSHEE 350 2002Pages: 389, tamaño PDF: 4.69 MB
Page 12 of 389

LOCATION OF THE WARNING AND
SPECIFICATION LABELS .......................1-1
SAFETY INFORMATION .........................2-1
DESCRIPTION AND MACHINE
IDENTIFICATION.....................................3-1
Identification number records ...............3-3
Key identification number .....................3-5
Vehicle identification number ...............3-7
Model label ...........................................3-9
CONTROL FUNCTIONS .........................4-1
Main switch ...........................................4-1
Handlebar switches ..............................4-3
Throttle lever ........................................4-5
Throttle OverRide System ....................4-7
Speed limiter ........................................4-9
Clutch lever ........................................4-11
4321
Front brake lever ................................4-11
Rear brake pedal ................................4-13
Parking brake .....................................4-13
Shift pedal ..........................................4-17
Kick starter .........................................4-17
Fuel tank cap ......................................4-19
Fuel cock ............................................4-19
Starter (choke) ....................................4-21
Seat ....................................................4-23
Front shock absorber adjustment .......4-25
Rear shock absorber adjustment .......4-27
PRE-OPERATION CHECKS ...................5-1
Front and rear brakes ...........................5-5
Fuel ....................................................5-11
Engine mixing oil ................................5-15
Transmission oil .................................5-17
Chain ..................................................5-19
Throttle lever ......................................5-19
5
EBU00015
CONTENTS
5FK-9-63-0~3 2/7/02 1:24 PM Page 12
Page 14 of 389

Cooling system ...................................8-23
Spark plug inspection .........................8-39
Air filter cleaning .................................8-43
Carburetor settings .............................8-51
Idle speed adjustment ........................8-67
Throttle lever adjustment ....................8-71
Front and rear brake pad
inspection .........................................8-73
Inspecting the brake fluid level ...........8-75
Brake fluid replacement ......................8-79
Front brake adjustment ......................8-81
Rear brake adjustment .......................8-83
Parking brake adjustment ...................8-85
Adjusting the rear brake light switch ...8-89
Clutch adjustment ...............................8-91
Drive chain slack check ......................8-91
Drive chain slack adjustment ..............8-93
Lubricating the drive chain .................8-95
Cable inspection and lubrication ........8-99Brake and shift pedal/brake and
clutch lever lubrication ....................8-101
Upper arm and lower arm pivot
lubrication .......................................8-101
Rear arm pivot lubrication ................8-103
Wheel removal .................................8-105
Wheel installation .............................8-105
Replacing the headlight bulb ............8-107
Headlight beam adjustment ..............8-109
Tail/brake light bulb replacement .....8-111
Troubleshooting ................................8-113
Troubleshooting chart .......................8-117
CLEANING AND STORAGE ...................9-1
A. Cleaning ...........................................9-1
B. Storage ............................................9-7
SPECIFICATIONS .................................10-1
109
5FK-9-63-0~3 2/7/02 1:24 PM Page 14
Page 40 of 389

2-13
8Never attempt to operate over large obstacles,
such as large rocks or fallen trees. Always fol-
low proper procedures when operating over
obstacles as described in this manual.
8Always be careful when skidding or sliding.
Learn to safely control skidding or sliding by
practicing at low speeds and on level, smooth
terrain. On extremely slippery surfaces, such
as ice, go slowly and be very cautious in order
to reduce the chance of skidding or sliding out
of control.
8Never operate an ATV in fast flowing water or
in water deeper than that recommended in
this manual. Remember that wet brakes may
have reduced stopping ability. Test your
brakes after leaving water. If necessary, apply
them several times to let friction dry out the
linings.
8Always use the size and type tires specified in
this manual.
8Always maintain proper tire pressure as
described in this manual.
5FK-9-63-0~3 2/7/02 1:24 PM Page 40
Page 46 of 389

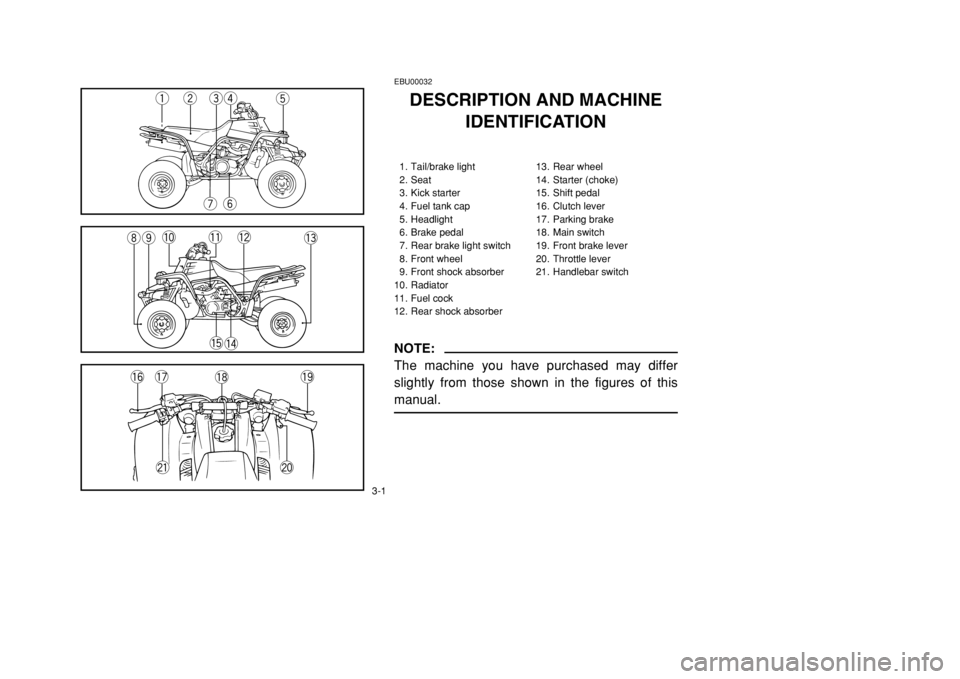
3-1
EBU00032
DESCRIPTION AND MACHINE
IDENTIFICATION1. Tail/brake light 13. Rear wheel
2. Seat 14. Starter (choke)
3. Kick starter 15. Shift pedal
4. Fuel tank cap 16. Clutch lever
5. Headlight 17. Parking brake
6. Brake pedal 18. Main switch
7. Rear brake light switch 19. Front brake lever
8. Front wheel 20. Throttle lever
9. Front shock absorber 21. Handlebar switch
10. Radiator
11. Fuel cock
12. Rear shock absorberNOTE:
The machine you have purchased may differ
slightly from those shown in the figures of this
manual.
e
r
t
y
w
q
u
!6 !7
!8!9
@1 @0i!0!1
o
!2
!3
!4 !5
5FK-9-63-0~3 2/7/02 1:24 PM Page 46
Page 66 of 389

4-11
EBU00068Clutch lever
The clutch lever is located on the left handlebar.
Pull the clutch lever to the handlebar to disen-
gage the clutch, and release the lever to engage
the clutch. The lever should be pulled rapidly and
released slowly for smooth clutch operation.EBU00070Front brake lever
The front brake lever is located on the right han-
dlebar. Pull it toward the handlebar to apply the
front brake.
q
q
1. Clutch lever1. Levier d’embrayage1. Palanca de embrague
1. Front brake lever1. Levier de frein avant1. Palanca del freno delantero
5FK-9-63-4~5 2/7/02 1:25 PM Page 12
Page 68 of 389

4-13
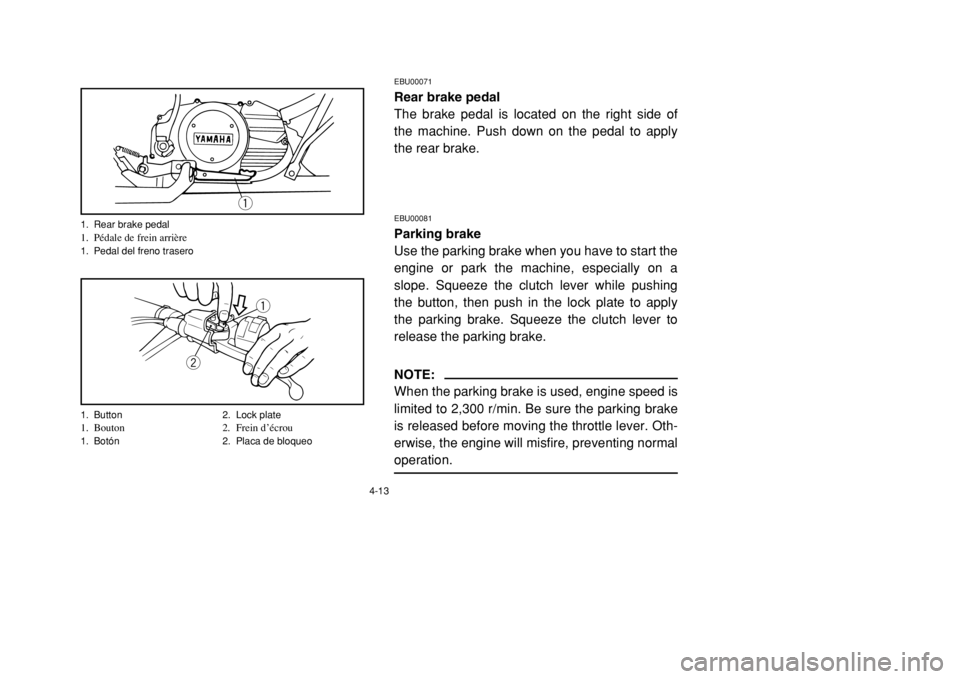
EBU00071Rear brake pedal
The brake pedal is located on the right side of
the machine. Push down on the pedal to apply
the rear brake.EBU00081Parking brake
Use the parking brake when you have to start the
engine or park the machine, especially on a
slope. Squeeze the clutch lever while pushing
the button, then push in the lock plate to apply
the parking brake. Squeeze the clutch lever to
release the parking brake.NOTE:
When the parking brake is used, engine speed is
limited to 2,300 r/min. Be sure the parking brake
is released before moving the throttle lever. Oth-
erwise, the engine will misfire, preventing normal
operation.
q
q
w
1. Rear brake pedal1. Pédale de frein arrière1. Pedal del freno trasero
1. Button 2. Lock plate1. Bouton 2. Frein d’écrou1. Botón 2. Placa de bloqueo
5FK-9-63-4~5 2/7/02 1:25 PM Page 14
Page 70 of 389

4-15
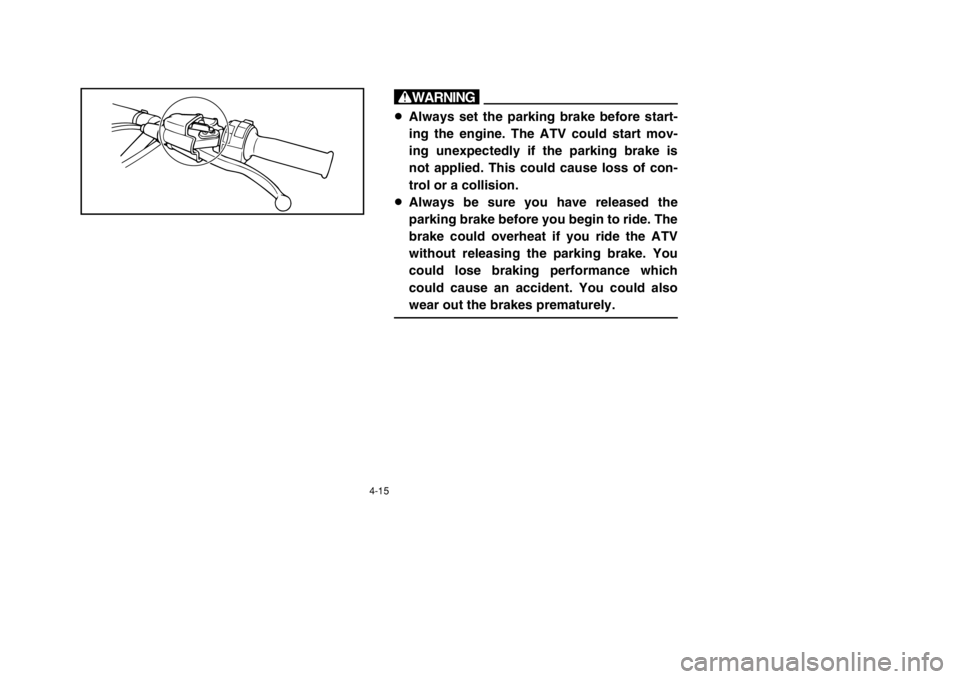
w8Always set the parking brake before start-
ing the engine. The ATV could start mov-
ing unexpectedly if the parking brake is
not applied. This could cause loss of con-
trol or a collision.
8Always be sure you have released the
parking brake before you begin to ride. The
brake could overheat if you ride the ATV
without releasing the parking brake. You
could lose braking performance which
could cause an accident. You could also
wear out the brakes prematurely.
5FK-9-63-4~5 2/7/02 1:25 PM Page 16
Page 90 of 389

5-1
EBU00113
PRE-OPERATION CHECKS
Before using this machine, check the following points:
ITEM ROUTINE PAGE
Brakes9Check operation, free play, fluid level and fluid leakage. 5-5 ~ 5-9
9Fill with DOT 4 brake fluid if necessary. 8-73 ~ 8-83
Clutch9Check operation, condition and lever free play. 8-91
Parking brake9Check operation, condition and free play. 8-85 ~ 8-87
Fuel 9Check fuel level.
9Fill with fuel if necessary.5-11 ~ 5-13
Transmission oil9Check oil level.
9Fill with oil if necessary.5-17, 8-17 ~ 8-23
Coolant reservoir 9Check coolant level.
9Fill with coolant if necessary.8-23 ~ 8-37
Drive chain9Check chain slack and condition.
9Adjust if necessary.5-19, 8-91 ~ 8-97
Throttle9Check for proper throttle cable operation. 5-19, 8-71
Wheels and tires9Check tire pressure, wear and damage. 5-23 ~ 5-29, 8-105
Fittings and Fasteners9Check all fittings and fasteners. 5-19
Lights9Check for proper operation. 5-21, 8-107 ~ 8-111
5FK-9-63-4~5 2/7/02 1:25 PM Page 36
Page 94 of 389

5-5
EBU00814*Front and rear brakes
1. Brake lever and brake pedal
Check that there is no free play in the brake
lever. If there is free play, adjust it. (See
pages 8-81.)
Check the operation of the lever and pedal.
They should move smoothly and there
should be a firm feeling when the brakes
are applied. If not, have the machine
inspected by a Yamaha dealer.
2. Brake fluid level
Check the brake fluid level.
Add fluid if necessary. (See pages 8-75
~
8-79.)
Recommended brake fluid: DOT 4
5FK-9-63-4~5 2/7/02 1:25 PM Page 40
Page 96 of 389

5-7
3. Brake fluid leakage
Check to see if any brake fluid is leaking
out of the pipe joints or master cylinder.
Apply the brakes firmly for one minute. If
there is any leaking, have the machine
inspected by a Yamaha dealer.
4. Brake operation
Test the brakes at slow speed after starting
out to make sure they are working properly.
If the brakes do not provide proper braking
performance, inspect the brake pads for
wear. (See page 8-73.)
5FK-9-63-4~5 2/7/02 1:25 PM Page 42