light YAMAHA BANSHEE 350 2002 User Guide
[x] Cancel search | Manufacturer: YAMAHA, Model Year: 2002, Model line: BANSHEE 350, Model: YAMAHA BANSHEE 350 2002Pages: 389, PDF Size: 4.69 MB
Page 128 of 389

6-9
EBU00180Starting a warm engine
To start a warm engine, refer to the “Starting a
cold engine” section. The starter (choke) should
not be used. The throttle should be opened
slightly.EBU00538Warming up
To get maximum engine life, always warm up
the engine before starting off. Never accelerate
hard with a cold engine! To see whether or not
the engine is warm, check if it responds to the
throttle normally with the starter (choke) turned
off.NOTE:
When the parking brake is used, engine speed
is limited to 2,300 r/min. Be sure the parking
brake is released before moving the throttle
lever. Otherwise, the engine will misfire, pre-
venting normal operation.
5FK-9-63-6 2/7/02 1:26 PM Page 10
Page 130 of 389
6-11
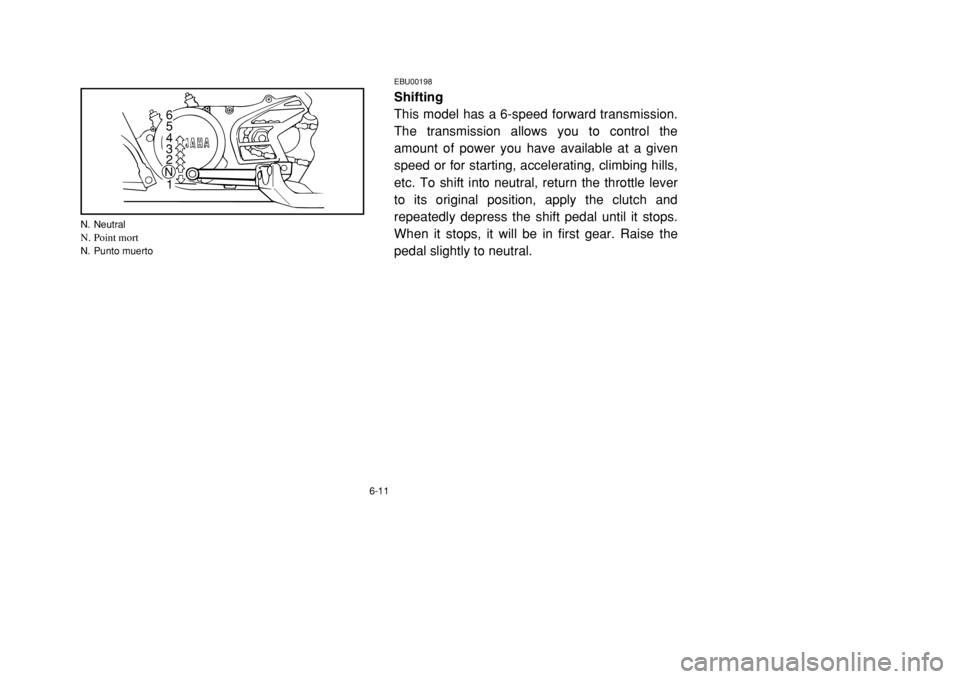
EBU00198Shifting
This model has a 6-speed forward transmission.
The transmission allows you to control the
amount of power you have available at a given
speed or for starting, accelerating, climbing hills,
etc. To shift into neutral, return the throttle lever
to its original position, apply the clutch and
repeatedly depress the shift pedal until it stops.
When it stops, it will be in first gear. Raise the
pedal slightly to neutral.
1 2 3 4 5 6N
N. NeutralN. Point mortN. Punto muerto
5FK-9-63-6 2/7/02 1:26 PM Page 12
Page 200 of 389
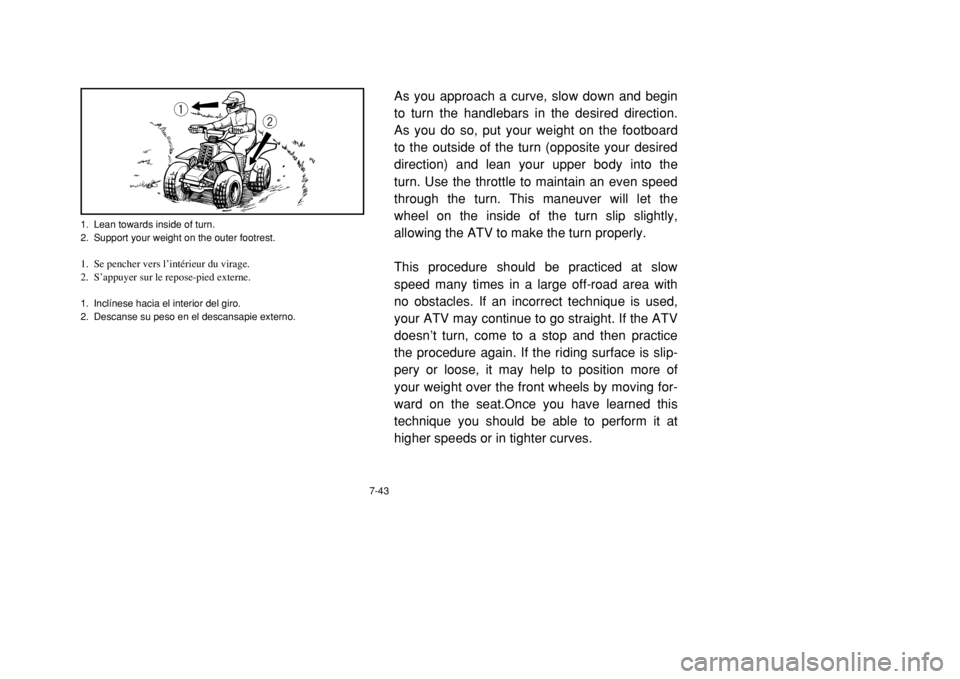
1. Lean towards inside of turn.
2. Support your weight on the outer footrest.1. Se pencher vers l’intérieur du virage.
2. S’appuyer sur le repose-pied externe.1. Inclínese hacia el interior del giro.
2. Descanse su peso en el descansapie externo.
7-43
As you approach a curve, slow down and begin
to turn the handlebars in the desired direction.
As you do so, put your weight on the footboard
to the outside of the turn (opposite your desired
direction) and lean your upper body into the
turn. Use the throttle to maintain an even speed
through the turn. This maneuver will let the
wheel on the inside of the turn slip slightly,
allowing the ATV to make the turn properly.
This procedure should be practiced at slow
speed many times in a large off-road area with
no obstacles. If an incorrect technique is used,
your ATV may continue to go straight. If the ATV
doesn’t turn, come to a stop and then practice
the procedure again. If the riding surface is slip-
pery or loose, it may help to position more of
your weight over the front wheels by moving for-
ward on the seat.Once you have learned this
technique you should be able to perform it at
higher speeds or in tighter curves.
q
w
5FK-9-63-7 2/7/02 1:27 PM Page 44
Page 218 of 389

7-61
CROSSING A SLOPE
Traversing a sloping surface on your ATV
requires you to properly position your weight to
maintain proper balance. Be sure that you have
learned the basic riding skills on flat ground
before attempting to cross a sloping surface.
Avoid slopes with slippery surfaces or rough ter-
rain that may upset your balance.
As you travel across a slope, lean your body in
the uphill direction. It may be necessary to cor-
rect the steering when riding on loose surfaces
by pointing the front wheels slightly uphill. When
riding on slopes be sure not to make sharp turns
either up or down hill.
5FK-9-63-7 2/7/02 1:27 PM Page 62
Page 245 of 389

8-8 * It is recommended that these items be serviced by a Yamaha dealer.
** Lithium soap base greaseINITIAL EVERY
ITEM ROUTINE 1 3 6 6 1
month months months months year
* Clutch9Inspect free play and operation.
2222
9Replace if necessary.
9Check chain slack/alignment.
Drive chain9Adjust if necessary.
2222
9Clean and lube.
9Replace if necessary.
*Drive chain guard
9Check wear and replace if necessary.222
and rollers
* Steering system9Inspect free play, clean and lubricate.22222
*Front and rear
9Inspect and lubricate.**22222
suspension
9Inspect air pressure, wheel runout, and tire wear.
Tires, wheels9*Inspect bearings.22222
9*Replace bearings if necessary.
Throttle, control cable9Check routing and connection.
22222
9Lubricate.
Outside nuts and bolts9Retighten.22222
Frame9Clean and inspect.2222
Lighting equipment9Inspect.22222
5FK-9-63-8 2/7/02 1:28 PM Page 9
Page 276 of 389

8-39
EBU00287Spark plug inspection
The spark plugs are important engine compo-
nents and are easy to inspect. The condition of
the spark plugs can indicate the condition of the
engine.
Normally, all spark plugs from the same engine
should have the same color on the white porce-
lain insulator around the center electrode. The
ideal color at this point is a medium to light tan
color for a machine that is being ridden normal-
ly. If one spark plug shows a distinctly different
color, there could be something wrong with the
engine.
Do not attempt to diagnose such problems your-
self. Instead, take the machine to a Yamaha
dealer. You should periodically remove and
inspect the spark plugs because heat and
deposits will cause any spark plug to slowly
break down and erode. If electrode erosion
becomes excessive, or if carbon and other
deposits are excessive, you should replace the
spark plug with the specified plug.
5FK-9-63-8 2/7/02 1:28 PM Page 40
Page 304 of 389
8-67
EBU00302Idle speed adjustmentNOTE:
A diagnostic tachometer must be used for this
procedure.NOTE:
The throttle cables and carburetor synchroniza-
tion must be set properly before adjusting the
idle speed.
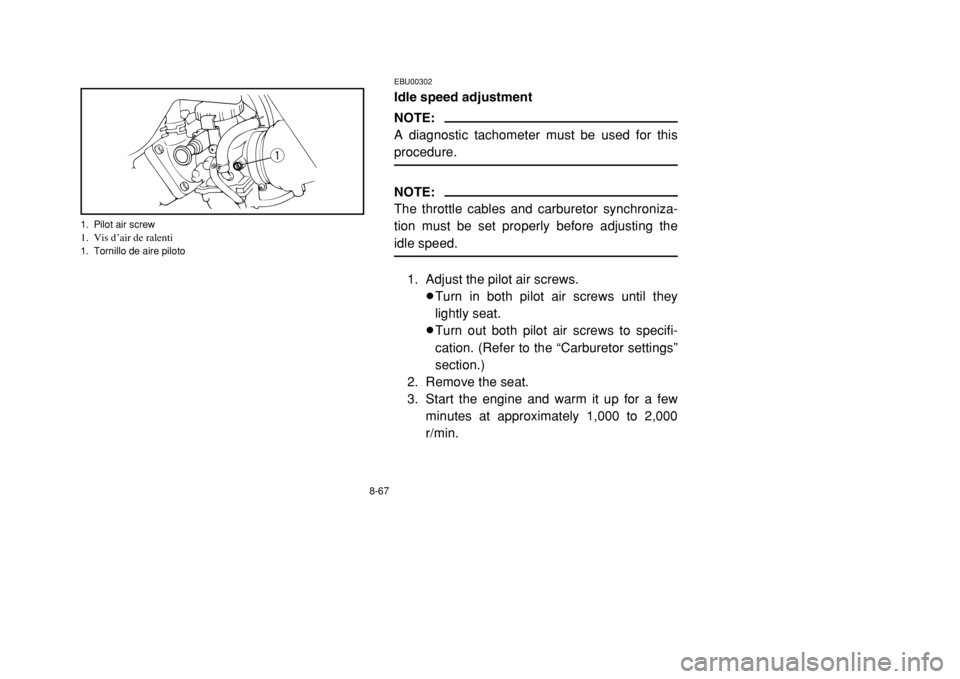
1. Adjust the pilot air screws.
8Turn in both pilot air screws until they
lightly seat.
8Turn out both pilot air screws to specifi-
cation. (Refer to the “Carburetor settings”
section.)
2. Remove the seat.
3. Start the engine and warm it up for a few
minutes at approximately 1,000 to 2,000
r/min.
q
1. Pilot air screw1. Vis d’air de ralenti1. Tornillo de aire piloto
5FK-9-63-8 2/7/02 1:28 PM Page 68
Page 326 of 389

8-89
EBU00833Adjusting the rear brake light switch
The rear brake light switch, which is activated by
the brake pedal and brake lever, is properly
adjusted when the brake light comes on just
before braking takes effect. If necessary, adjust
the brake light switch as follows.
Turn the adjusting nut while holding the rear
brake light switch in place. To make the brake
light come on earlier, turn the adjusting nut in
direction a. To make the brake light come on
later, turn the adjusting nut in direction b.
qa
b
w
1. Rear brake light switch
2. Adjusting nut1. Contacteur de feu stop sur frein arrière
2.Écrou de réglage1. Interruptor de la luz de freno trasero
2. Tuerca de ajuste
5FK-9-63-8 2/7/02 1:28 PM Page 90
Page 344 of 389
8-107
EBU00646Replacing the headlight bulb
If the headlight bulb burns out, replace the bulb
as follows:
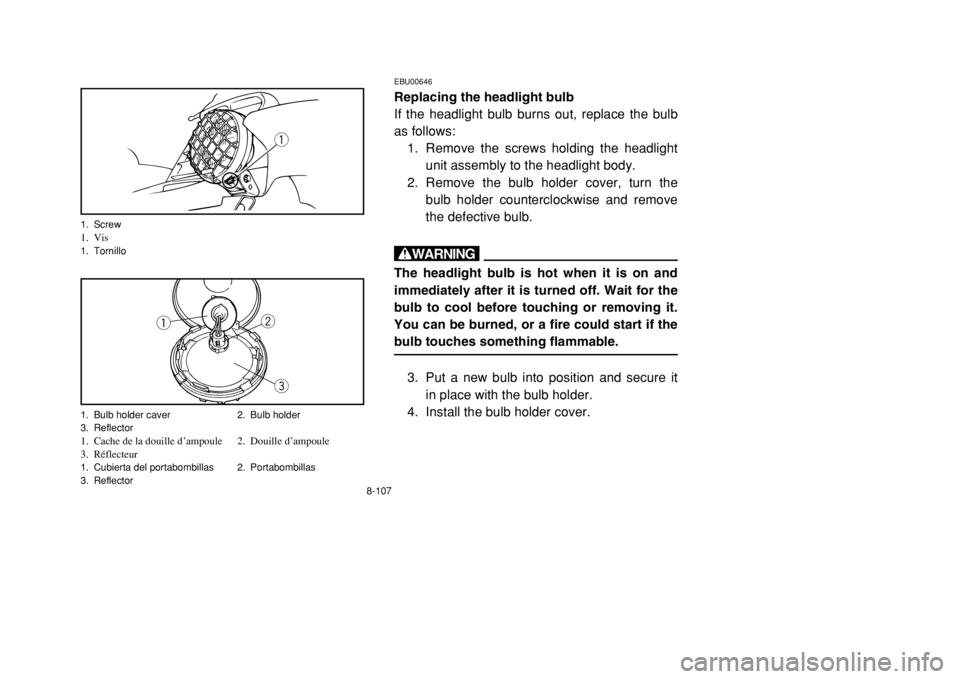
1. Remove the screws holding the headlight
unit assembly to the headlight body.
2. Remove the bulb holder cover, turn the
bulb holder counterclockwise and remove
the defective bulb.wThe headlight bulb is hot when it is on and
immediately after it is turned off. Wait for the
bulb to cool before touching or removing it.
You can be burned, or a fire could start if the
bulb touches something flammable.
3. Put a new bulb into position and secure it
in place with the bulb holder.
4. Install the bulb holder cover.
q
1. Screw 1. Vis 1. Tornillo
e qw
1. Bulb holder caver 2. Bulb holder
3. Reflector1. Cache de la douille d’ampoule 2. Douille d’ampoule
3. Réflecteur1. Cubierta del portabombillas 2. Portabombillas
3. Reflector
5FK-9-63-8 2/7/02 1:28 PM Page 108
Page 346 of 389
8-109
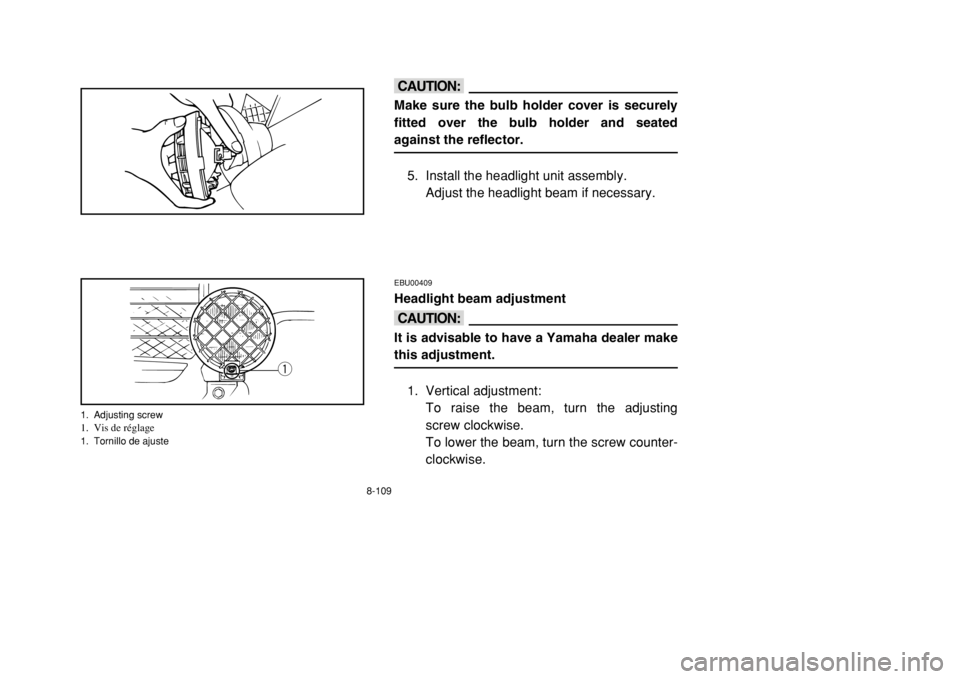
cCMake sure the bulb holder cover is securely
fitted over the bulb holder and seated
against the reflector.
5. Install the headlight unit assembly.
Adjust the headlight beam if necessary.
EBU00409Headlight beam adjustmentcCIt is advisable to have a Yamaha dealer make
this adjustment.
1. Vertical adjustment:
To raise the beam, turn the adjusting
screw clockwise.
To lower the beam, turn the screw counter-
clockwise.
q
1. Adjusting screw1. Vis de réglage1. Tornillo de ajuste
5FK-9-63-8 2/7/02 1:28 PM Page 110