parking brake YAMAHA BLASTER 200 2004 Notices Demploi (in French)
[x] Cancel search | Manufacturer: YAMAHA, Model Year: 2004, Model line: BLASTER 200, Model: YAMAHA BLASTER 200 2004Pages: 386, PDF Size: 7.52 MB
Page 13 of 386

LOCATION OF THE WARNING AND
SPECIFICATION LABELS .......................1-1
SAFETY INFORMATION .........................2-1
DESCRIPTION AND MACHINE
IDENTIFICATION.....................................3-1
Identification number records ...............3-3
Key identification number .....................3-5
Vehicle identification number ...............3-7
Model label ...........................................3-9
CONTROL FUNCTIONS..........................4-1
Main switch ...........................................4-1
Indicator lights ......................................4-3
Oil level warning light checking
method ...............................................4-5
Handlebar switches ..............................4-9Throttle lever ......................................4-11
Throttle OverRide System ..................4-13
Speed limiter ......................................4-15
Clutch lever ........................................4-17
Brake lever .........................................4-17
Brake pedal ........................................4-19
Parking brake .....................................4-19
Shift pedal ..........................................4-23
Kick starter .........................................4-23
Fuel tank cap ......................................4-25
Fuel cock ............................................4-25
Starter (choke) ....................................4-27
Seat ....................................................4-29
Front shock absorber adjustment .......4-31
Rear shock absorber adjustment .......4-33
PRE-OPERATION CHECKS ...................5-1
Front and rear brakes ...........................5-5
Fuel ......................................................5-9
EBU00015
CONTENTS
1
2
3
4
5
5VM-9-61-01 3/14/03 9:34 PM Page 12
Page 15 of 386

Spark plug inspection .........................8-25
Air filter element cleaning ...................8-31
Carburetor settings .............................8-39
Idle speed adjustment ........................8-51
Throttle lever adjustment ....................8-53
Brake fluid level check ........................8-55
Brake fluid replacement ......................8-57
Front brake pad check ........................8-59
Rear brake pad inspection .................8-59
Front brake lever free play .................8-61
Brake pedal height adjustment ...........8-63
Parking brake adjustment ...................8-65
Adjusting the rear brake light switch ...8-69
Clutch adjustment ...............................8-71
Autolube pump adjustment .................8-71
Drive chain slack check ......................8-73
Drive chain slack adjustment ..............8-75
Lubricating the drive chain .................8-77
Cable inspection and lubrication ........8-81
Brake and shift pedal/brake and
clutch lever lubrication ......................8-83Front upper and lower arm pivot
lubrication .........................................8-83
Steering shaft lubrication ....................8-85
Wheel removal ...................................8-87
Wheel installation ...............................8-87
Replacing the headlight bulb ..............8-89
Headlight beam adjustment ................8-97
Tail/brake light bulb replacement .......8-99
Troubleshooting ................................8-101
Troubleshooting chart .......................8-105
CLEANING AND STORAGE....................9-1
A. Cleaning ...........................................9-1
B. Storage ............................................9-7
SPECIFICATIONS .................................10-1
Conversion table ....................................11-1
9
10
11
5VM-9-61-01 3/14/03 9:34 PM Page 14
Page 55 of 386
3-1
EBU00032
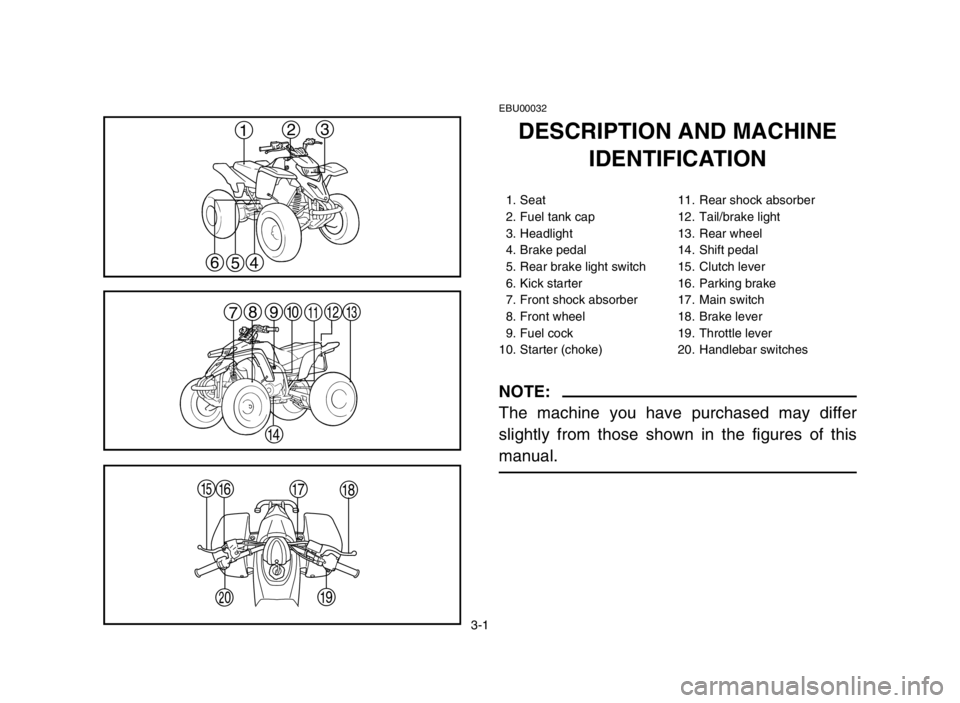
DESCRIPTION AND MACHINE
IDENTIFICATION
1. Seat 11. Rear shock absorber
2. Fuel tank cap 12. Tail/brake light
3. Headlight 13. Rear wheel
4. Brake pedal 14. Shift pedal
5. Rear brake light switch 15. Clutch lever
6. Kick starter 16. Parking brake
7. Front shock absorber 17. Main switch
8. Front wheel 18. Brake lever
9. Fuel cock 19. Throttle lever
10. Starter (choke) 20. Handlebar switches
NOTE:
The machine you have purchased may differ
slightly from those shown in the figures of this
manual.
123
4
5 6
t
yu
oi
p
78
90
qwe
r
5VM-9-61-01 3/14/03 9:34 PM Page 54
Page 83 of 386
4-19
EBU00989
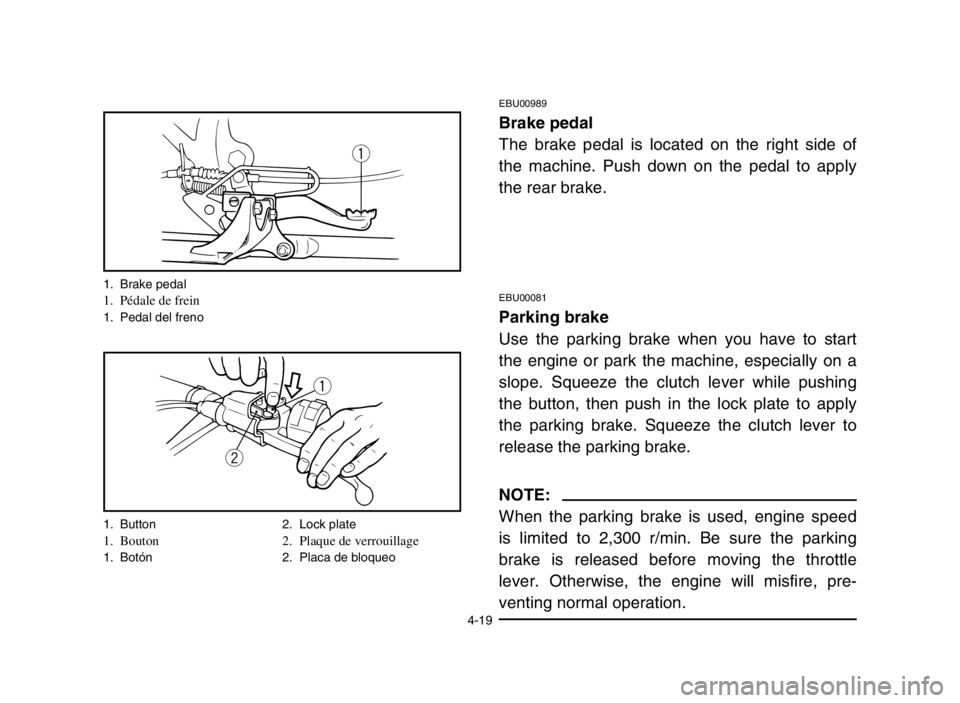
Brake pedal
The brake pedal is located on the right side of
the machine. Push down on the pedal to apply
the rear brake.
EBU00081
Parking brake
Use the parking brake when you have to start
the engine or park the machine, especially on a
slope. Squeeze the clutch lever while pushing
the button, then push in the lock plate to apply
the parking brake. Squeeze the clutch lever to
release the parking brake.
NOTE:
When the parking brake is used, engine speed
is limited to 2,300 r/min. Be sure the parking
brake is released before moving the throttle
lever. Otherwise, the engine will misfire, pre-
venting normal operation.
q
q
w
1. Brake pedal1. Pédale de frein1. Pedal del freno
1. Button 2. Lock plate
1. Bouton 2. Plaque de verrouillage1. Botón 2. Placa de bloqueo
5VM-9-61-02 3/14/03 9:35 PM Page 20
Page 85 of 386
4-21
w
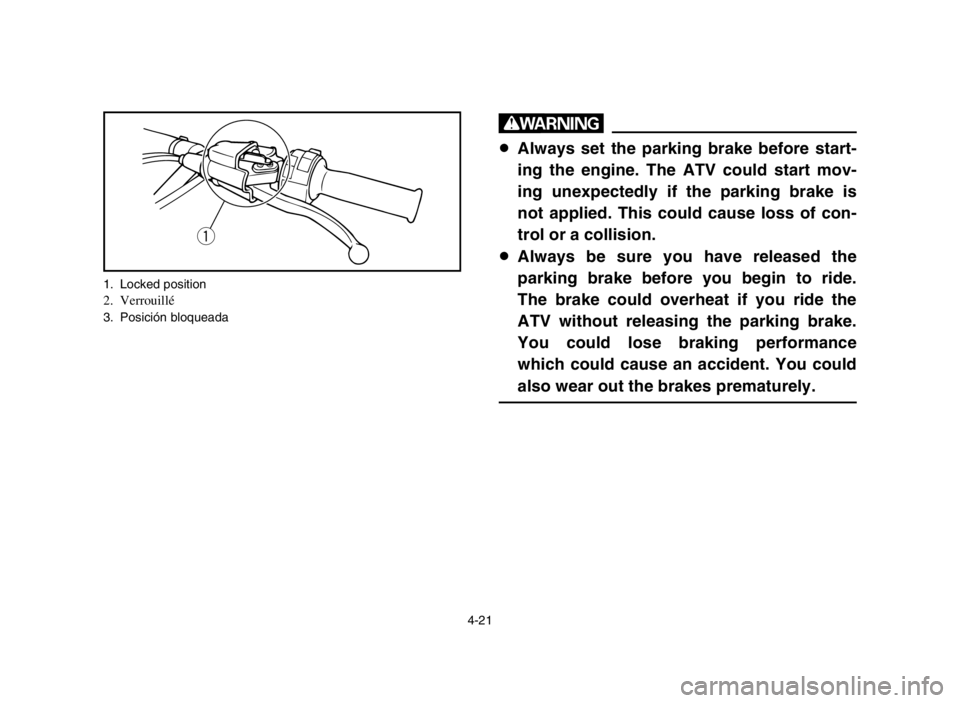
8Always set the parking brake before start-
ing the engine. The ATV could start mov-
ing unexpectedly if the parking brake is
not applied. This could cause loss of con-
trol or a collision.
8Always be sure you have released the
parking brake before you begin to ride.
The brake could overheat if you ride the
ATV without releasing the parking brake.
You could lose braking performance
which could cause an accident. You could
also wear out the brakes prematurely.
q
1. Locked position2. Verrouillé3. Posición bloqueada
5VM-9-61-02 3/14/03 9:35 PM Page 22
Page 101 of 386

5-1
EBU00113
PRE-OPERATION CHECKS
Before using this machine, check the following points:
ITEM ROUTINE PAGE
Brakes9Check operation, free play, fluid level and fluid leakage. 5-5–5-7
9Fill with DOT 4 brake fluid if necessary. 8-55–8-63
Clutch9Check operation, condition and lever free play. 8-71
Parking brake9Check operation, condition and cable free play. 8-65–8-67
Fuel 9Check fuel level.
9Fill with fuel if necessary.5-9–5-11
Transmission oil9Check oil level.
9Fill with oil if necessary.5-15, 8-17–8-23
2-cycle engine oil9Check oil level.
9Fill with oil if necessary.5-13
Drive chain9Check chain slack and condition.
9Adjust if necessary.5-17, 8-73–8-79
Throttle9Check for proper throttle cable operation. 5-17, 8-53
Wheels and tires9Check tire pressure, wear and damage. 5-21–5-27, 8-87
Fittings and fasteners9Check all fittings and fasteners. 5-17
Lights and switches9Check for proper operation. 5-19, 8-89–8-99
5VM-9-61-02 3/14/03 9:35 PM Page 38
Page 131 of 386

6-3
EBU00512
Starting a cold engine
w
Always make sure all control cables work
smoothly before you begin riding in cold
weather. If the control cables are frozen or
do not work smoothly, you could be unable
to control the ATV, which could lead to an
accident or collision.
1. Set the parking brake.
2. Turn the fuel cock to “ON”.
3. Turn the main switch to “ON” and the engine
stop switch to “RUN”.
4. Shift the transmission into neutral.
5. Use the starter (choke) in reference to the
figure:
5VM-9-61-03 3/14/03 10:47 PM Page 4
Page 153 of 386
6-25
EBU00212
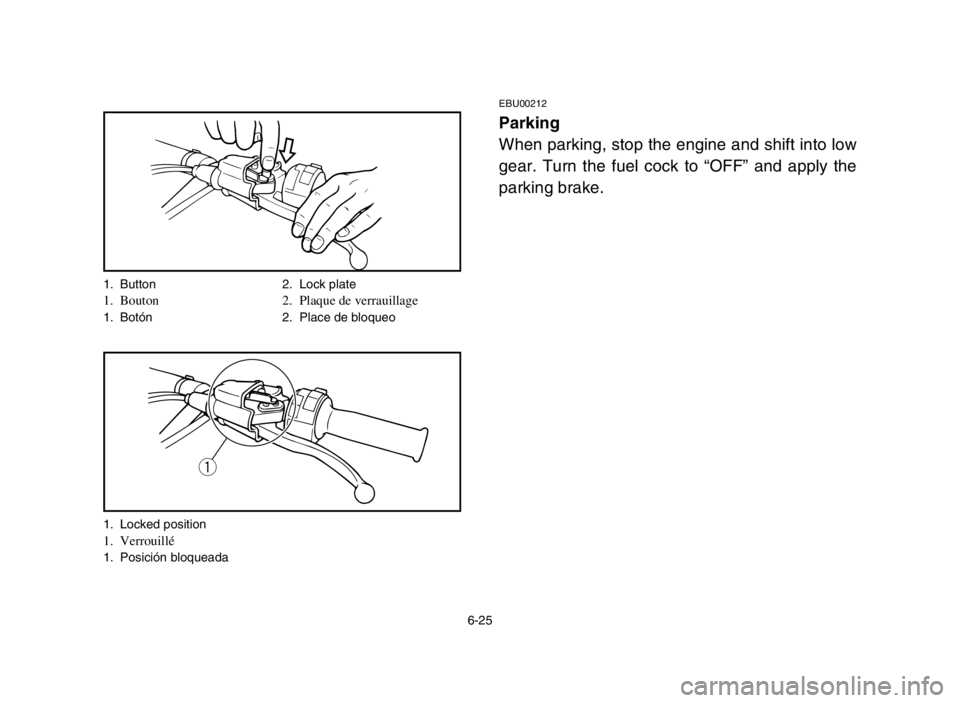
Parking
When parking, stop the engine and shift into low
gear. Turn the fuel cock to “OFF” and apply the
parking brake.
1. Button 2. Lock plate1. Bouton 2. Plaque de verrauillage1. Botón 2. Place de bloqueo
1. Locked position
1. Verrouillé1. Posición bloqueada
q
5VM-9-61-03 3/14/03 10:47 PM Page 26
Page 155 of 386
6-27
EBU01175
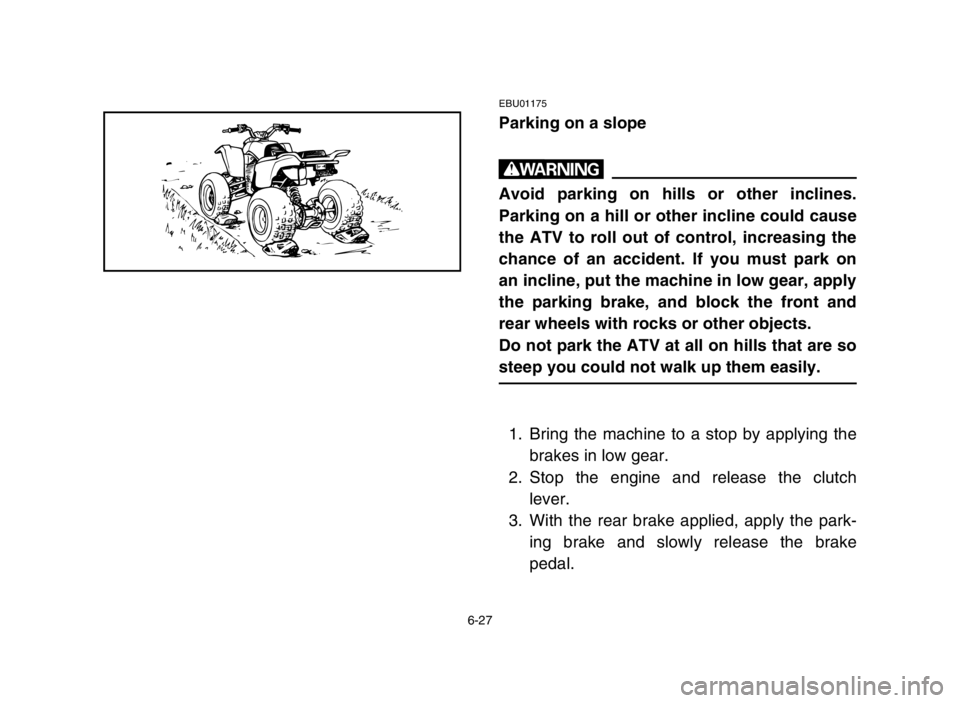
Parking on a slope
w
Avoid parking on hills or other inclines.
Parking on a hill or other incline could cause
the ATV to roll out of control, increasing the
chance of an accident. If you must park on
an incline, put the machine in low gear, apply
the parking brake, and block the front and
rear wheels with rocks or other objects.
Do not park the ATV at all on hills that are so
steep you could not walk up them easily.
1. Bring the machine to a stop by applying the
brakes in low gear.
2. Stop the engine and release the clutch
lever.
3. With the rear brake applied, apply the park-
ing brake and slowly release the brake
pedal.
5VM-9-61-03 3/14/03 10:47 PM Page 28
Page 201 of 386

7-35
Select a large, flat area off-road to become
familiar with your ATV. Make sure that this area
is free of obstacles and other riders. You should
practice control of the throttle, brakes, shifting
procedures, and turning techniques in this area
before trying more difficult terrain. Always avoid
riding on paved surfaces: the ATV is designed
for off-road use only, and handling maneuvers
are more difficult to perform on pavement.
Set the parking brake and follow the instruction
on page 6-3 to start the engine. Once it has
warmed up you are ready to begin riding your
ATV. As you get on the ATV, be sure not to
accidentally move the shift pedal. Remember
that the engine and exhaust pipe will be hot
when riding and afterwards; do not allow skin or
clothing to come in contact with these compo-
nents.
5VM-9-61-04 3/14/03 9:37 PM Page 36