engine YAMAHA FJR1300A 2014 User Guide
[x] Cancel search | Manufacturer: YAMAHA, Model Year: 2014, Model line: FJR1300A, Model: YAMAHA FJR1300A 2014Pages: 118, PDF Size: 3.29 MB
Page 24 of 118
INSTRUMENT AND CONTROL FUNCTIONS
3-9
3stalls, or the sidestand is lowered, then
the “ ” indicator light will go off (the
“SET” indicator light will not flash).
If the cruise control system is automat-
ically deactivated, please stop and
confirm that your vehicle is in good op-
erating condition.
Before using the cruise control system
again, activate it using the power
switch.
TIPIn some cases, the cruise control sys-
tem may not be able to maintain the set
cruising speed when the vehicle is
traveling uphill or downhill.
When the vehicle is traveling up-
hill, the actual traveling speed may
become lower than the set cruis-
ing speed. If this occurs, acceler-
ate to the desired traveling speed
using the throttle.
When the vehicle is traveling
downhill, the actual traveling
speed may become higher than
the set cruising speed. If this oc-
curs, the setting switch cannot be
used to adjust the set cruising
speed. To reduce the traveling speed, apply the brakes. When
the brakes are applied, the cruise
control system will become deac-
tivated.
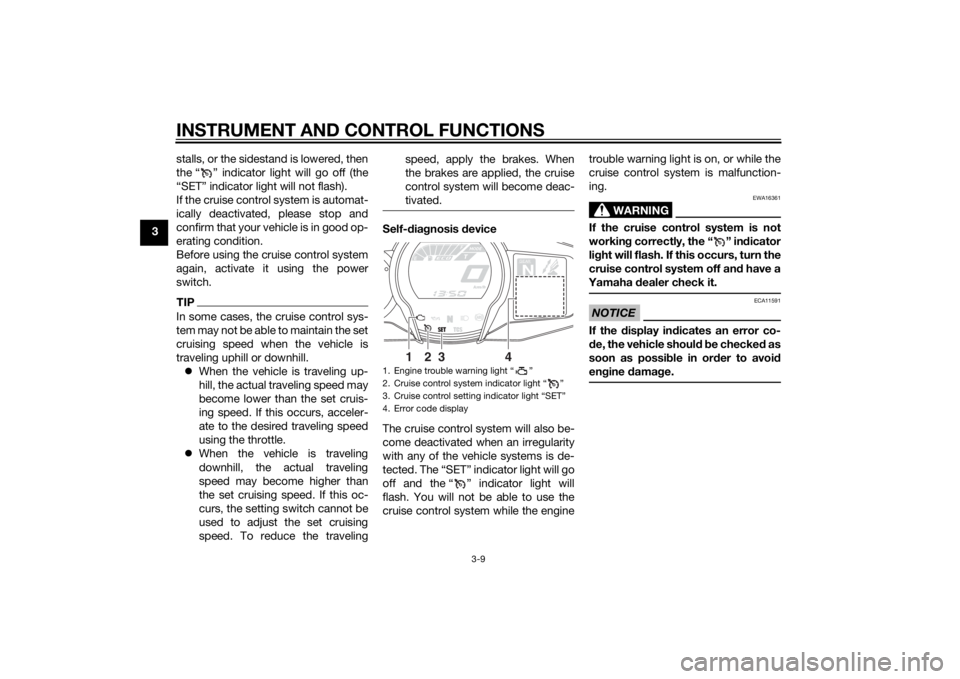
Self-
dia gnosis device
The cruise control system will also be-
come deactivated when an irregularity
with any of the vehicle systems is de-
tected. The “SET” indicator light will go
off and the “ ” indicator light will
flash. You will not be able to use the
cruise control system while the engine trouble warning light is on, or while the
cruise control system is malfunction-
ing.
WARNING
EWA16361
If the cruise control system is not
workin
g correctly, the “ ” in dicator
li g ht will flash. If this occurs, turn the
cruise control system off an d have a
Yamaha dealer check it.NOTICE
ECA11591
If the display in dicates an error co-
d e, the vehicle shoul d b e checked as
soon as possi ble in or der to avoi d
en gine damag e.
1. Engine trouble warning light “ ”
2. Cruise control system indicator light “ ”
3. Cruise control setting indicator light “SET”
4. Error code display
GEARN
25
A.TEMP ˚C
Lo
C.TEMP˚C
0:06
TIME TRIP
1
2
3
4
U1MCE1E0.book Page 9 Thursday, August 8, 2013 9:03 AM
Page 26 of 118
INSTRUMENT AND CONTROL FUNCTIONS
3-11
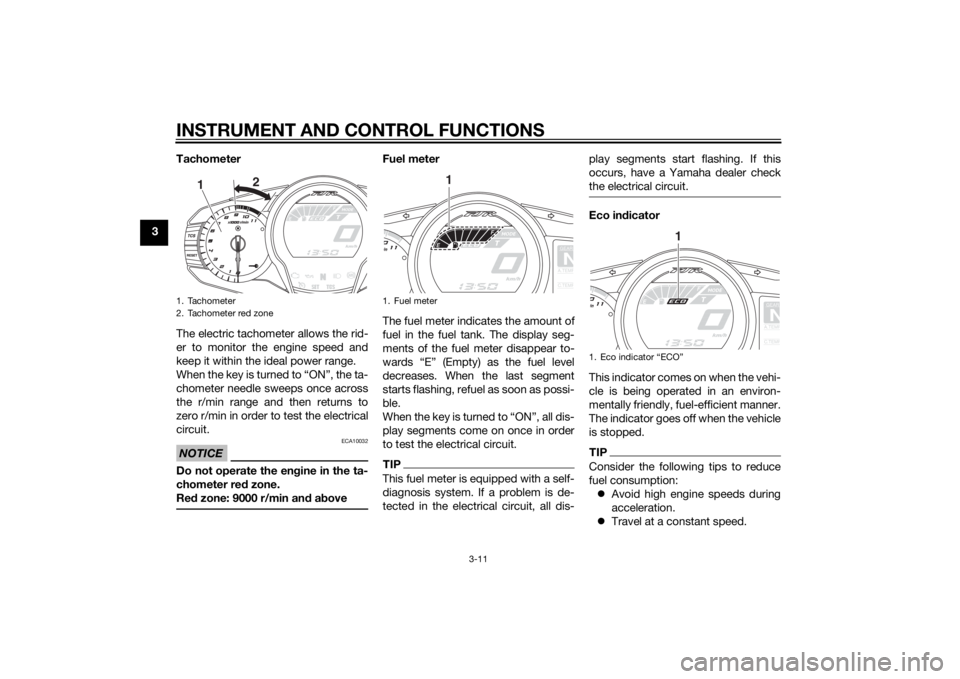
3Tachometer
The electric tachometer allows the rid-
er to monitor the engine speed and
keep it within the ideal power range.
When the key is turned to “ON”, the ta-
chometer needle sweeps once across
the r/min range and then returns to
zero r/min in order to test the electrical
circuit.
NOTICE
ECA10032
Do not operate the en
gine in the ta-
chometer red zone.
Re d zone: 9000 r/min an d a bove
Fuel meter
The fuel meter indicates the amount of
fuel in the fuel tank. The display seg-
ments of the fuel meter disappear to-
wards “E” (Empty) as the fuel level
decreases. When the last segment
starts flashing, refuel as soon as possi-
ble.
When the key is turned to “ON”, all dis-
play segments come on once in order
to test the electrical circuit.TIPThis fuel meter is equipped with a self-
diagnosis system. If a problem is de-
tected in the electrical circuit, all dis- play segments start flashing. If this
occurs, have a Yamaha dealer check
the electrical circuit.
Eco in
dicator
This indicator comes on when the vehi-
cle is being operated in an environ-
mentally friendly, fuel-efficient manner.
The indicator goes off when the vehicle
is stopped.TIPConsider the following tips to reduce
fuel consumption: Avoid high engine speeds during
acceleration.
Travel at a constant speed.
1. Tachometer
2. Tachometer red zone
1 2
1. Fuel meter
GEARNA.TEM
P
C.TEM
P
1
1. Eco indicator “ECO”
GEARNA.TEM
P
C.TEM
P
1
U1MCE1E0.book Page 11 Thursday, August 8, 2013 9:03 AM
Page 28 of 118
INSTRUMENT AND CONTROL FUNCTIONS
3-13
3Adjusting the grip warmer
This vehicle is equipped with grip
warmers, which can only be used
when the engine is running. There are 4
grip warmer settings.
To increase the grip warmer tempera-
ture, push the “ ” side of the select
switch. To decrease the grip warmer
temperature, push the “ ” side of the
select switch.NOTICE
ECA17931
Be sure to wear gloves when
usin g the grip warmers.
If the am bient temperature is 20
°C (68 °F) or hi gher, do not set
the grip warmer to the hi gh set-
ting .
If the han dle bar grip or throttle
g rip becomes worn or dam-
a g ed , stop usin g the grip warm-
ers an d replace the g rips.
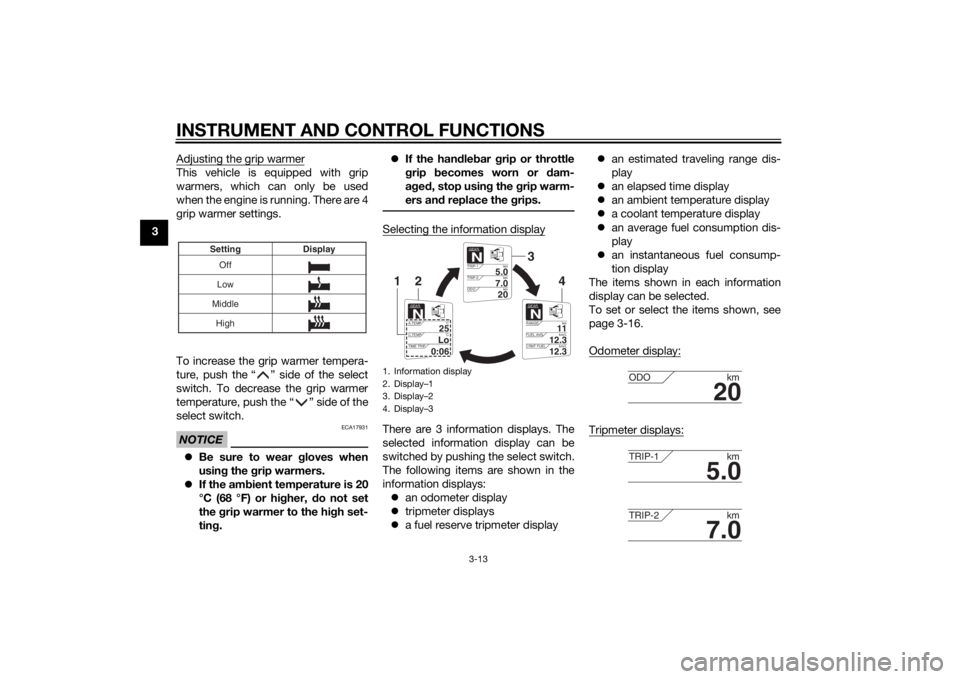
Selecting the information displayThere are 3 information displays. The
selected information display can be
switched by pushing the select switch.
The following items are shown in the
information displays:
an odometer display
tripmeter displays
a fuel reserve tripmeter display
an estimated traveling range dis-
play
an elapsed time display
an ambient temperature display
a coolant temperature display
an average fuel consumption dis-
play
an instantaneous fuel consump-
tion display
The items shown in each information
display can be selected.
To set or select the items shown, see
page 3-16.
Odometer display:
Tripmeter displays:
Off
Low
Middle Display
Setting
High
1. Information display
2. Display–1
3. Display–2
4. Display–3
GEARN
5.0
TRIP-1 km
7.0
TRIP-2km
km
20
ODO
GEARN
11
RANGE km
12.3
FUEL AVG km/L
km/L
12.3
CRNT FUEL
GEARN
25
A.TEMP ˚C
Lo
C.TEMP ˚C
0:06
TIME TRIP
3
4
2
1
20
ODOkm
5.0
TRIP-1km
7.0
TRIP-2km
U1MCE1E0.book Page 13 Thursday, August 8, 2013 9:03 AM
Page 30 of 118
INSTRUMENT AND CONTROL FUNCTIONS
3-15
3
TIP–9 °C will be displayed even if the
ambient temperature falls below
–9 °C.
50 °C will be displayed even if the
ambient temperature climbs
above 50 °C.
The accuracy of the temperature
reading may be affected when rid-
ing slowly [approximately under
20 km/h (12.5 mi/h)] or when
stopped at traffic signals, railroad
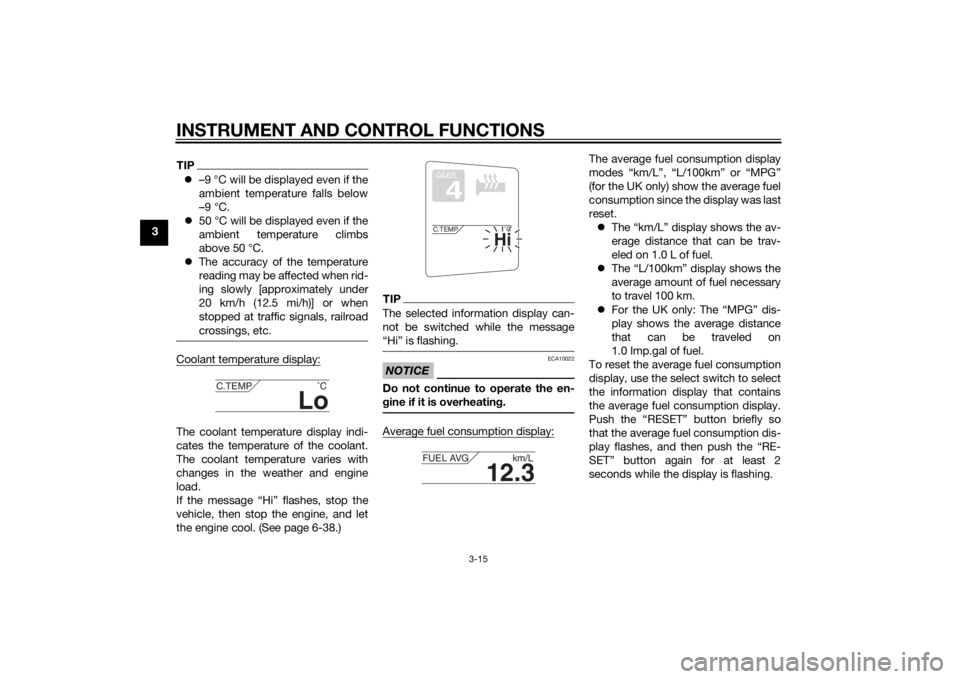
crossings, etc.Coolant temperature display:The coolant temperature display indi-
cates the temperature of the coolant.
The coolant temperature varies with
changes in the weather and engine
load.
If the message “Hi” flashes, stop the
vehicle, then stop the engine, and let
the engine cool. (See page 6-38.)
TIPThe selected information display can-
not be switched while the message
“Hi” is flashing.NOTICE
ECA10022
Do not continue to operate the en-
gine if it is overheatin g.Average fuel consumption display:
The average fuel consumption display
modes “km/L”, “L/100km” or “MPG”
(for the UK only) show the average fuel
consumption since the display was last
reset.
The “km/L” display shows the av-
erage distance that can be trav-
eled on 1.0 L of fuel.
The “L/100km” display shows the
average amount of fuel necessary
to travel 100 km.
For the UK only: The “MPG” dis-
play shows the average distance
that can be traveled on
1.0 Imp.gal of fuel.
To reset the average fuel consumption
display, use the select switch to select
the information display that contains
the average fuel consumption display.
Push the “RESET” button briefly so
that the average fuel consumption dis-
play flashes, and then push the “RE-
SET” button again for at least 2
seconds while the display is flashing.
Lo
C.TEMP ˚C
GEAR4
Hi
C.TEMP˚C
12.3
FUEL AVG km/L
U1MCE1E0.book Page 15 Thursday, August 8, 2013 9:03 AM
Page 37 of 118
INSTRUMENT AND CONTROL FUNCTIONS
3-22
3
TIPThe odometer and the clock cannot be
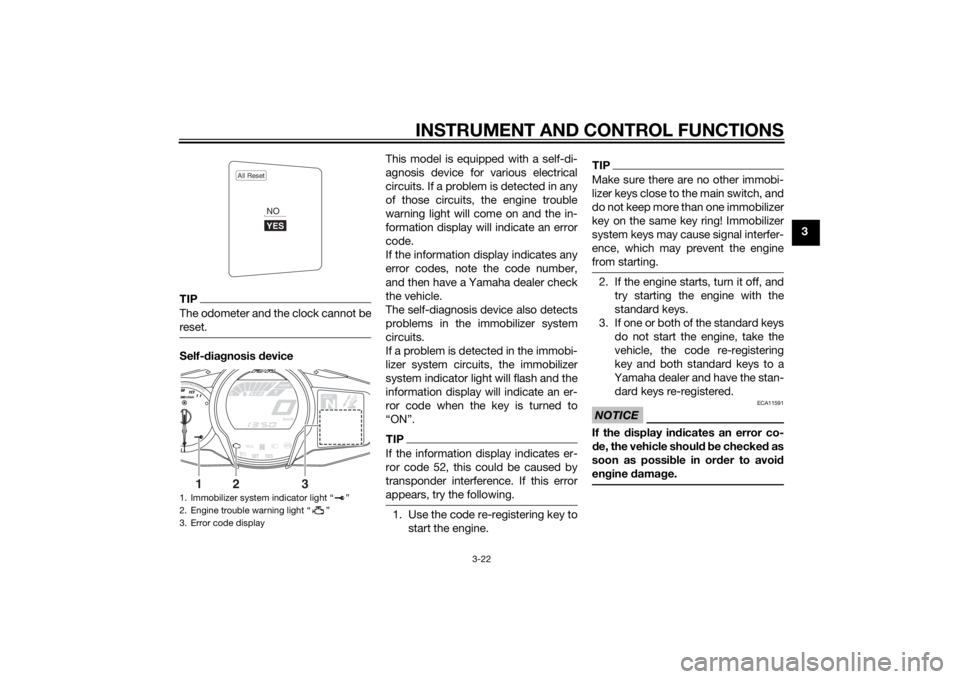
reset.Self-diagnosis device This model is equipped with a self-di-
agnosis device for various electrical
circuits. If a problem is detected in any
of those circuits, the engine trouble
warning light will come on and the in-
formation display will indicate an error
code.
If the information display indicates any
error codes, note the code number,
and then have a Yamaha dealer check
the vehicle.
The self-diagnosis device also detects
problems in the immobilizer system
circuits.
If a problem is detected in the immobi-
lizer system circuits, the immobilizer
system indicator light will flash and the
information display will indicate an er-
ror code when the key is turned to
“ON”.
TIPIf the information display indicates er-
ror code 52, this could be caused by
transponder interference. If this error
appears, try the following.1. Use the code re-registering key to
start the engine.
TIPMake sure there are no other immobi-
lizer keys close to the main switch, and
do not keep more than one immobilizer
key on the same key ring! Immobilizer
system keys may cause signal interfer-
ence, which may prevent the engine
from starting.2. If the engine starts, turn it off, andtry starting the engine with the
standard keys.
3. If one or both of the standard keys do not start the engine, take the
vehicle, the code re-registering
key and both standard keys to a
Yamaha dealer and have the stan- dard keys re-registered.NOTICE
ECA11591
If the d isplay in dicates an error co-
d e, the vehicle shoul d b e checked as
soon as possi ble in or der to avoi d
en gine damag e.
1. Immobilizer system indicator light “ ”
2. Engine trouble warning light “ ”
3. Error code display
All Reset
YESNO
GEARN
25
A.TEMP ˚C
Lo
C.TEMP˚C
0:06
TIME TRIP
1
2
3
U1MCE1E0.book Page 22 Thursday, August 8, 2013 9:03 AM
Page 38 of 118
INSTRUMENT AND CONTROL FUNCTIONS
3-23
3
EAU49432
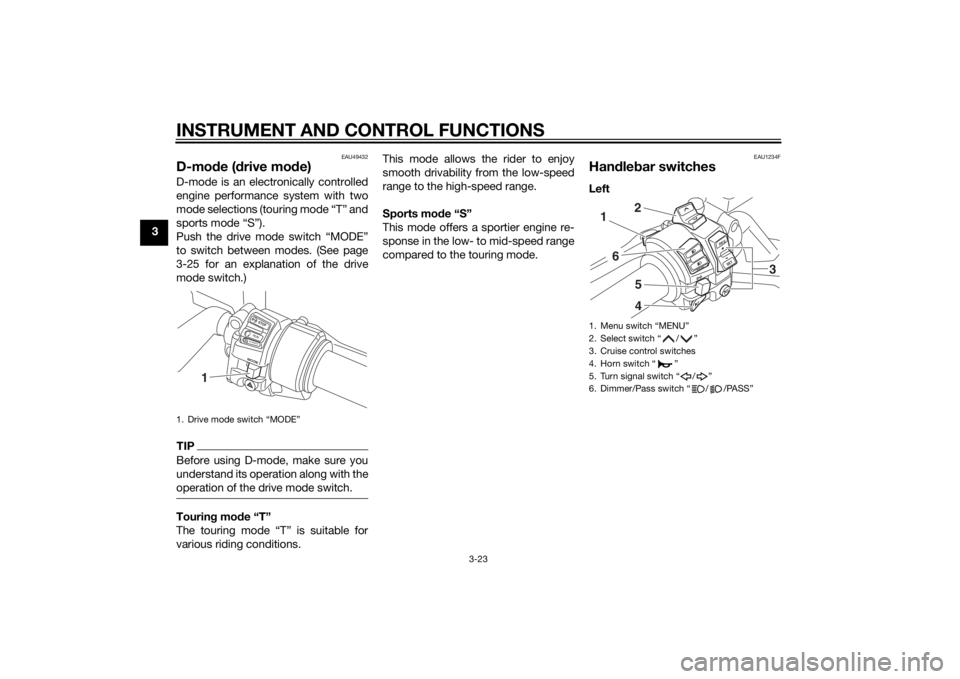
D-mode ( drive mo de)D-mode is an electronically controlled
engine performance system with two
mode selections (touring mode “T” and
sports mode “S”).
Push the drive mode switch “MODE”
to switch between modes. (See page
3-25 for an explanation of the drive
mode switch.)TIPBefore using D-mode, make sure you
understand its operation along with the
operation of the drive mode switch.Tourin g mo de “T”
The touring mode “T” is suitable for
various riding conditions. This mode allows the rider to enjoy
smooth drivability from the low-speed
range to the high-speed range.
Sports mo
de “S”
This mode offers a sportier engine re-
sponse in the low- to mid-speed range
compared to the touring mode.
EAU1234F
Han dle bar switchesLeft
1. Drive mode switch “MODE”
STOPM ODERUNSTART
1
1. Menu switch “MENU”
2. Select switch “ / ”
3. Cruise control switches
4. Horn switch “ ”
5. Turn signal switch “ / ”
6. Dimmer/Pass switch “ / /PASS”
RESSET
PA S S
1
6
542
3
U1MCE1E0.book Page 23 Thursday, August 8, 2013 9:03 AM
Page 39 of 118
INSTRUMENT AND CONTROL FUNCTIONS
3-24
3
Ri
ght
EAU54201
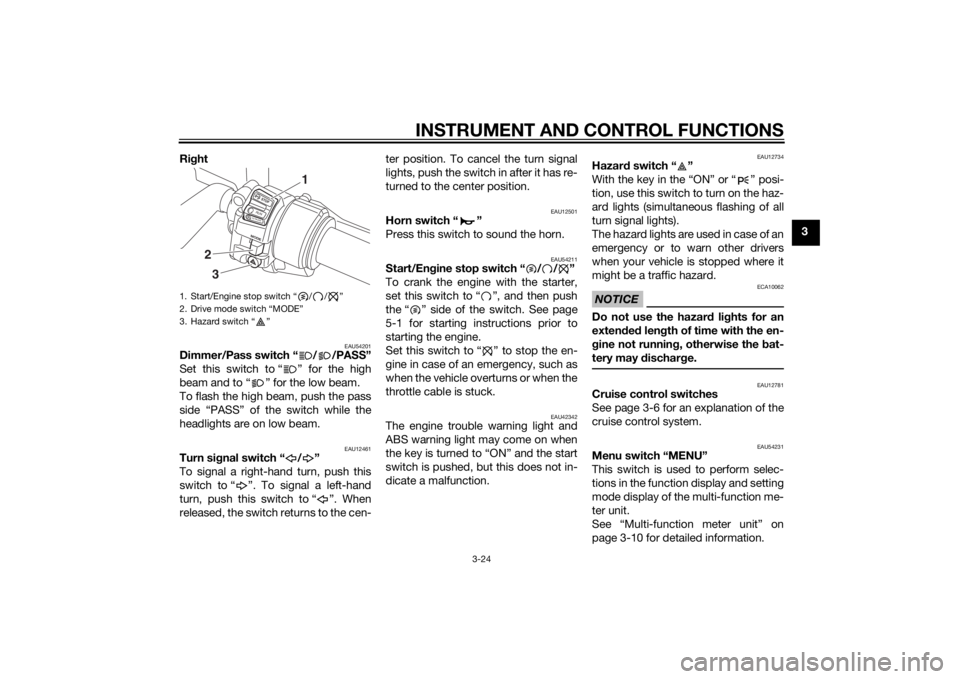
Dimmer/Pass switch “ / /PASS”
Set this switch to “ ” for the high
beam and to “ ” for the low beam.
To flash the high beam, push the pass
side “PASS” of the switch while the
headlights are on low beam.
EAU12461
Turn si gnal switch “ / ”
To signal a right-hand turn, push this
switch to “ ”. To signal a left-hand
turn, push this switch to “ ”. When
released, the switch returns to the cen- ter position. To cancel the turn signal
lights, push the switch in after it has re-
turned to the center position.
EAU12501
Horn switch “ ”
Press this switch to sound the horn.
EAU54211
Start/En
gine stop switch “ / / ”
To crank the engine with the starter,
set this switch to “ ”, and then push
the “ ” side of the switch. See page
5-1 for starting instructions prior to
starting the engine.
Set this switch to “ ” to stop the en-
gine in case of an emergency, such as
when the vehicle overturns or when the
throttle cable is stuck.
EAU42342
The engine trouble warning light and
ABS warning light may come on when
the key is turned to “ON” and the start
switch is pushed, but this does not in-
dicate a malfunction.
EAU12734
Hazar d switch “ ”
With the key in the “ON” or “ ” posi-
tion, use this switch to turn on the haz-
ard lights (simultaneous flashing of all
turn signal lights).
The hazard lights are used in case of an
emergency or to warn other drivers
when your vehicle is stopped where it
might be a traffic hazard.NOTICE
ECA10062
Do not use the hazar d lig hts for an
exten ded len gth of time with the en-
g ine not runnin g, otherwise the bat-
tery may d ischarge.
EAU12781
Cruise control switches
See page 3-6 for an explanation of the
cruise control system.
EAU54231
Menu switch “MENU”
This switch is used to perform selec-
tions in the function display and setting
mode display of the multi-function me-
ter unit.
See “Multi-function meter unit” on
page 3-10 for detailed information.
1. Start/Engine stop switch “ / / ”
2. Drive mode switch “MODE”
3. Hazard switch “ ”
STOPM ODERUNSTART
32
1
U1MCE1E0.book Page 24 Thursday, August 8, 2013 9:03 AM
Page 43 of 118
INSTRUMENT AND CONTROL FUNCTIONS
3-28
3
EAU54271
Traction control systemThe traction control system helps
maintain traction when accelerating on
slippery surfaces, such as unpaved or
wet roads. If sensors detect that the
rear wheel is starting to slip (uncon-
trolled spinning), the traction control
system assists by regulating engine
power as needed until traction is re-
stored. The “TCS” indicator/warning
light flashes to let the rider know that
traction control has engaged.TIPThe rider may also notice slight chang-
es in engine and exhaust sounds when
the traction control system is engaged.
WARNING
EWA15432
The traction control system is not a
substitute for ri din g appropriately
for the con ditions. Traction control
cannot prevent loss of traction d ue
to excessive spee d when enterin g
turns, when acceleratin g har d at a
sharp lean an gle, or while b raking,
an d cannot prevent front wheel slip-
pin g. As with any motorcycle, ap- proach surfaces that may
be
slippery with caution an d avoi d es-
pecially slippery surfaces.
When the key is turned to “ON”, the
traction control system automatically
turns on.
The traction control system can be
turned on or off manually only when
the key is in the “ON” position and the
motorcycle is stopped.TIPTurn the traction control system off to
help free the rear wheel if the motorcy-
cle gets stuck in mud, sand, or other
soft surfaces.NOTICE
ECA16801
Use only the specifie d tires. (See
pa ge 6-19.) Usin g different sized
tires will prevent the traction control
system from controllin g tire rotation
accurately.
Turnin g on/off the traction control
system
WARNING
EWA15441
Be sure to stop the vehicle before
makin g any settin g chan ges to the
traction control system. Chan gin g
settin gs while ri din g can d istract the
operator an d increase the risk of an
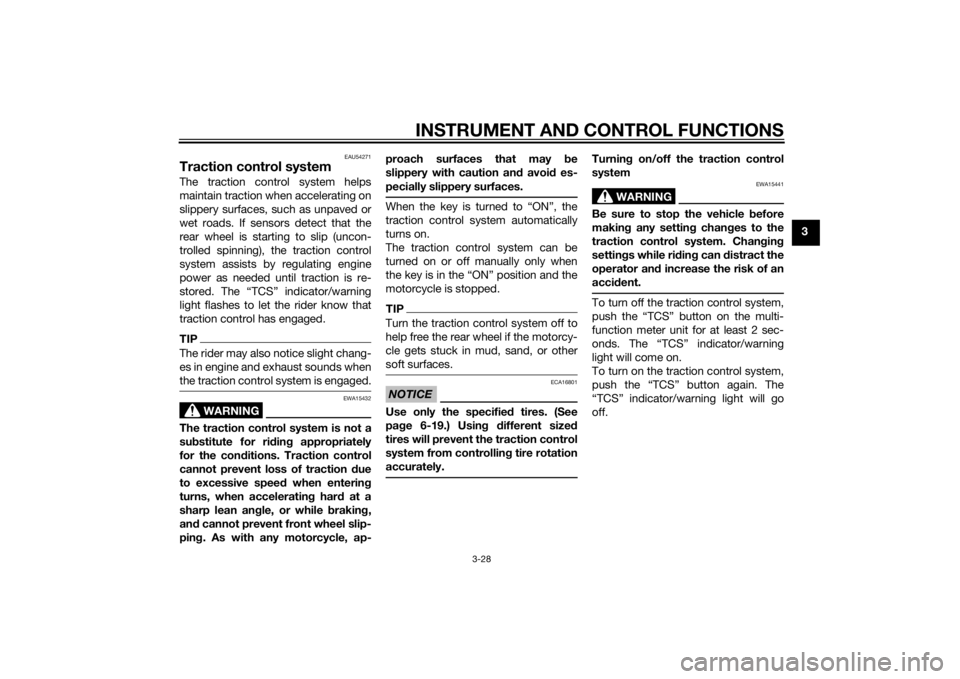
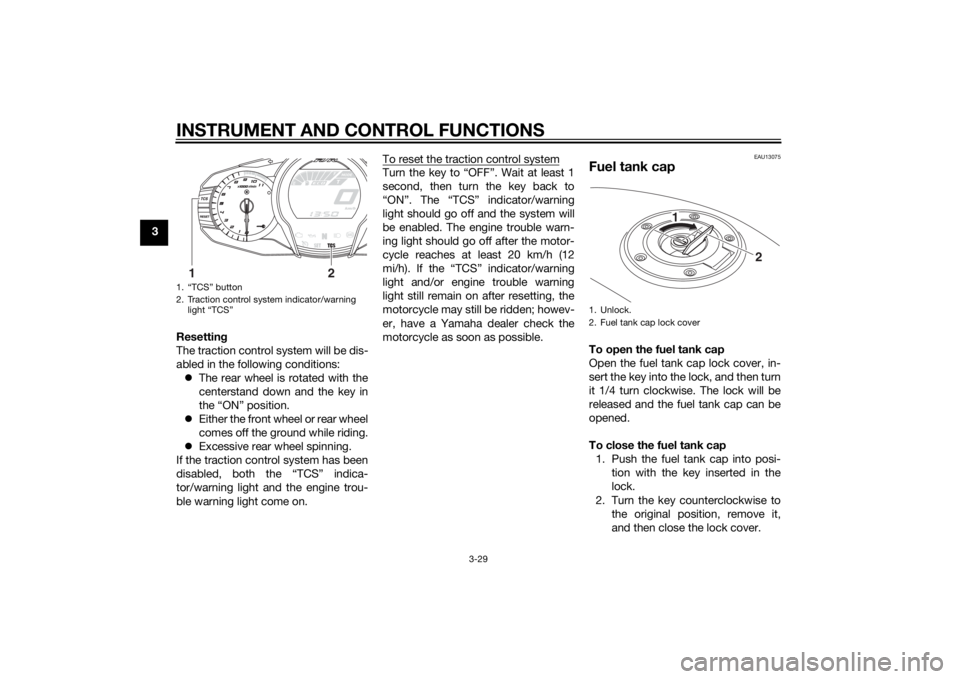
acci dent.To turn off the traction control system,
push the “TCS” button on the multi-
function meter unit for at least 2 sec-
onds. The “TCS” indicator/warning
light will come on.
To turn on the traction control system,
push the “TCS” button again. The
“TCS” indicator/warning light will go
off.
U1MCE1E0.book Page 28 Thursday, August 8, 2013 9:03 AM
Page 44 of 118
INSTRUMENT AND CONTROL FUNCTIONS
3-29
3Resetting
The traction control system will be dis-
abled in the following conditions: The rear wheel is rotated with the
centerstand down and the key in
the “ON” position.
Either the front wheel or rear wheel
comes off the ground while riding.
Excessive rear wheel spinning.
If the traction control system has been
disabled, both the “TCS” indica-
tor/warning light and the engine trou-
ble warning light come on. To reset the traction control system
Turn the key to “OFF”. Wait at least 1
second, then turn the key back to
“ON”. The “TCS” indicator/warning
light should go off and the system will
be enabled. The engine trouble warn-
ing light should go off after the motor-
cycle reaches at least 20 km/h (12
mi/h). If the “TCS” indicator/warning
light and/or engine trouble warning
light still remain on after resetting, the
motorcycle may still be ridden; howev-
er, have a Yamaha dealer check the
motorcycle as soon as possible.
EAU13075
Fuel tank capTo open the fuel tank cap
Open the fuel tank cap lock cover, in-
sert the key into the lock, and then turn
it 1/4 turn clockwise. The lock will be
released and the fuel tank cap can be
opened.
To close the fuel tank cap
1. Push the fuel tank cap into posi- tion with the key inserted in the
lock.
2. Turn the key counterclockwise to the original position, remove it,
and then close the lock cover.
1. “TCS” button
2. Traction control system indicator/warning light “TCS”
1
2
1. Unlock.
2. Fuel tank cap lock cover
2
1
U1MCE1E0.book Page 29 Thursday, August 8, 2013 9:03 AM
Page 45 of 118
INSTRUMENT AND CONTROL FUNCTIONS
3-30
3
TIPThe fuel tank cap cannot be closed un-
less the key is in the lock. In addition,
the key cannot be removed if the cap is
not properly closed and locked.
WARNING
EWA11092
Make sure that the fuel tank cap is
properly closed after filling fuel.
Leakin g fuel is a fire hazar d.
EAU13222
FuelMake sure there is sufficient gasoline in
the tank.
WARNING
EWA10882
Gasoline an d gasoline vapors are
extremely flammab le. To avoid fires
an d explosions an d to re duce the
risk of injury when refueling , follow
these instructions.1. Before refueling, turn off the en- gine and be sure that no one is sit-
ting on the vehicle. Never refuel
while smoking, or while in the vi-
cinity of sparks, open flames, or
other sources of ignition such as
the pilot lights of water heaters
and clothes dryers.
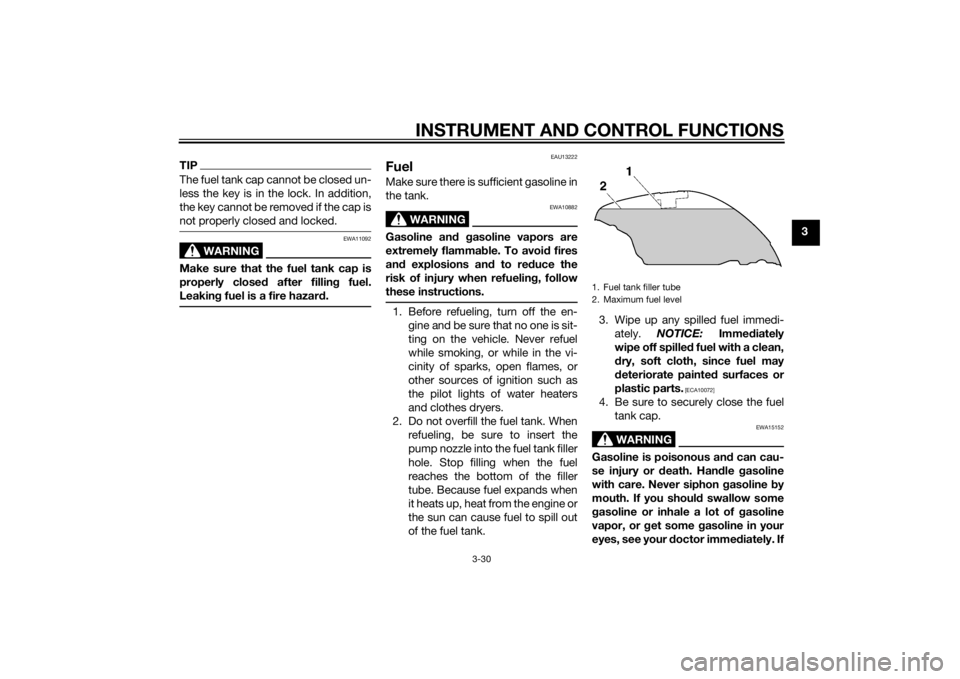
2. Do not overfill the fuel tank. When refueling, be sure to insert the
pump nozzle into the fuel tank filler
hole. Stop filling when the fuel
reaches the bottom of the filler
tube. Because fuel expands when
it heats up, heat from the engine or
the sun can cause fuel to spill out
of the fuel tank. 3. Wipe up any spilled fuel immedi-
ately. NOTICE: Immediately
wipe off spille d fuel with a clean,
d ry, soft cloth, since fuel may
d eteriorate painte d surfaces or
plastic parts.
[ECA10072]
4. Be sure to securely close the fuel tank cap.
WARNING
EWA15152
Gasoline is poisonous an d can cau-
se injury or death. Han dle gasoline
with care. Never siphon gasoline by
mouth. If you shoul d swallow some
g asoline or inhale a lot of gasoline
vapor, or g et some gasoline in your
eyes, see your d octor immediately. If1. Fuel tank filler tube
2. Maximum fuel level
U1MCE1E0.book Page 30 Thursday, August 8, 2013 9:03 AM