oil level YAMAHA FJR1300A 2015 Owners Manual
[x] Cancel search | Manufacturer: YAMAHA, Model Year: 2015, Model line: FJR1300A, Model: YAMAHA FJR1300A 2015Pages: 120, PDF Size: 3.4 MB
Page 6 of 120

TABLE OF CONTENTSSAFETY INFORMATION.................. 1-1
DESCRIPTION .................................. 2-1
Left view ......................................... 2-1
Right view ....................................... 2-2
Controls and instruments ............... 2-3
INSTRUMENT AND CONTROL
FUNCTIONS ...................................... 3-1
Immobilizer system......................... 3-1
Main switch/steering lock............... 3-2
Indicator lights and warning lights............................................ 3-4
Cruise control system..................... 3-6
Multi-function meter unit .............. 3-10
D-mode (drive mode).................... 3-23
Handlebar switches ...................... 3-23
Clutch lever .................................. 3-25
Shift pedal .................................... 3-26
Brake lever.................................... 3-26
Brake pedal .................................. 3-26
ABS .............................................. 3-27
Traction control system ................ 3-28
Fuel tank cap ................................ 3-29
Fuel ............................................... 3-30
Fuel tank breather/overflow
hose .......................................... 3-31
Catalytic converters...................... 3-31
Seats ............................................ 3-32
Adjusting the rider seat height...... 3-33
Storage compartments................. 3-35 Accessory box .............................. 3-36
Adjusting the headlight beams ..... 3-37
Handlebar position ........................ 3-37
Opening and closing the cowling
vents .......................................... 3-37
Rear view mirrors .......................... 3-39
Adjusting the front fork ................. 3-39
Adjusting the shock absorber assembly.................................... 3-41
Sidestand ...................................... 3-42
Ignition circuit cut-off system ....... 3-43
Auxiliary DC jack ........................... 3-45
FOR YOUR SAFETY –
PRE-OPERATION CHECKS ............. 4-1
OPERATION AND IMPORTANT
RIDING POINTS ................................ 5-1
Starting the engine .......................... 5-1
Shifting ............................................ 5-2
Tips for reducing fuel consumption ................................ 5-3
Engine break-in ............................... 5-3
Parking ............................................ 5-4
PERIODIC MAINTENANCE AND
ADJUSTMENT ................................... 6-1
Owner’s tool kit ............................... 6-2
Periodic maintenance chart for the emission control system .............. 6-3 General maintenance and
lubrication chart .......................... 6-4
Removing and installing panels ...... 6-8
Checking the spark plugs ............. 6-11
Engine oil and oil filter cartridge ... 6-12
Final gear oil ................................. 6-14
Coolant ......................................... 6-16
Cleaning the air filter element ....... 6-17
Checking the engine idling speed ........................................ 6-18
Checking the throttle grip free
play ............................................ 6-19
Valve clearance............................. 6-19
Tires .............................................. 6-19
Cast wheels .................................. 6-22
Clutch lever................................... 6-22
Checking the brake lever free play ............................................ 6-22
Brake light switches ..................... 6-23
Checking the front and rear brake pads ................................ 6-23
Checking the brake and clutch fluid levels.................................. 6-24
Changing the brake and clutch fluids .......................................... 6-25
Checking and lubricating the
cables ........................................ 6-26
Checking and lubricating the throttle grip and cable ............... 6-26
Checking and lubricating the brake and shift pedals............... 6-26U1MCE2E0.book Page 1 Monday, June 16, 2014 8:57 AM
Page 13 of 120
DESCRIPTION
2-1
2
EAU10411
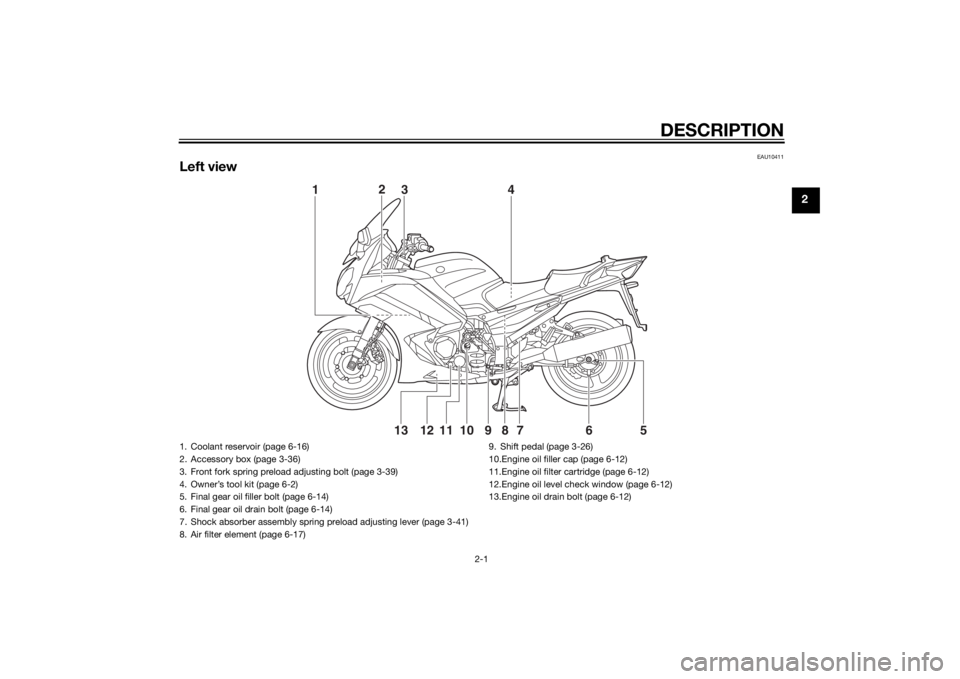
Left view
12
34
5
76
8910111213
1. Coolant reservoir (page 6-16)
2. Accessory box (page 3-36)
3. Front fork spring preload adjusting bolt (page 3-39)
4. Owner’s tool kit (page 6-2)
5. Final gear oil filler bolt (page 6-14)
6. Final gear oil drain bolt (page 6-14)
7. Shock absorber assembly spring preload adjusting lever (page 3-41)
8. Air filter element (page 6-17) 9. Shift pedal (page 3-26)
10.Engine oil filler cap (page 6-12)
11.Engine oil filter cartridge (page 6-12)
12.Engine oil level check window (page 6-12)
13.Engine oil drain bolt (page 6-12)
U1MCE2E0.book Page 1 Monday, June 16, 2014 8:57 AM
Page 19 of 120
INSTRUMENT AND CONTROL FUNCTIONS
3-4
3
EAU49396
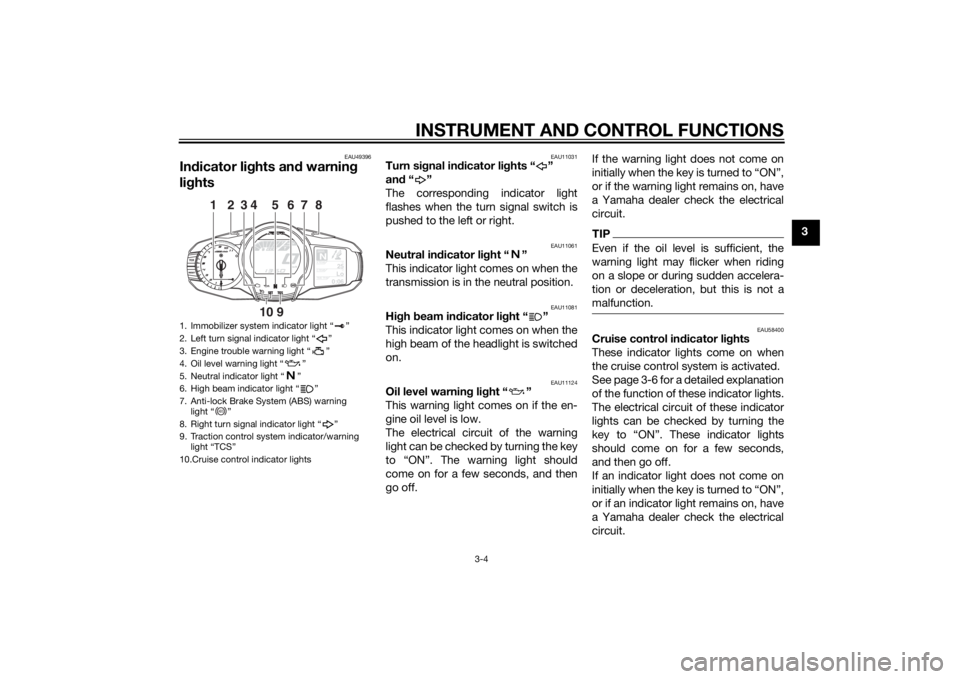
Indicator lig hts and warning
lig hts
EAU11031
Turn si gnal in dicator li ghts “ ”
an d“”
The corresponding indicator light
flashes when the turn signal switch is
pushed to the left or right.
EAU11061
Neutral in dicator li ght “ ”
This indicator light comes on when the
transmission is in the neutral position.
EAU11081
Hi gh beam in dicator li ght “ ”
This indicator light comes on when the
high beam of the headlight is switched
on.
EAU11124
Oil level warnin g lig ht “ ”
This warning light comes on if the en-
gine oil level is low.
The electrical circuit of the warning
light can be checked by turning the key
to “ON”. The warning light should
come on for a few seconds, and then
go off. If the warning light does not come on
initially when the key is turned to “ON”,
or if the warning light remains on, have
a Yamaha dealer check the electrical
circuit.
TIPEven if the oil level is sufficient, the
warning light may flicker when riding
on a slope or during sudden accelera-
tion or deceleration, but this is not a
malfunction.
EAU58400
Cruise control in
dicator li ghts
These indicator lights come on when
the cruise control system is activated.
See page 3-6 for a detailed explanation
of the function of these indicator lights.
The electrical circuit of these indicator
lights can be checked by turning the
key to “ON”. These indicator lights
should come on for a few seconds,
and then go off.
If an indicator light does not come on
initially when the key is turned to “ON”,
or if an indicator light remains on, have
a Yamaha dealer check the electrical
circuit.
1. Immobilizer system indicator light “ ”
2. Left turn signal indicator light “ ”
3. Engine trouble warning light “ ”
4. Oil level warning light “ ”
5. Neutral indicator light “ ”
6. High beam indicator light “ ”
7. Anti-lock Brake System (ABS) warning light “ ”
8. Right turn signal indicator light “ ”
9. Traction control system indicator/warning light “TCS”
10.Cruise control indicator lights
GEARN
25
A.TEMP ˚C
Lo
C.TEMP˚C
0:06
TIME TRIP
1
2
8
3
7
4
9
10
6
5
ABS
U1MCE2E0.book Page 4 Monday, June 16, 2014 8:57 AM
Page 31 of 120
INSTRUMENT AND CONTROL FUNCTIONS
3-16
3
TIPAfter resetting the average fuel con-
sumption display, “_ _._” will be shown
for that display until the vehicle has
traveled 1 km (0.6 mi).NOTICE
ECA15474
If there is a malfunction, “– –.–” will
be continuously d isplayed. Have a
Yamaha dealer check the vehicle.Instantaneous fuel consumption dis-play:The instantaneous fuel consumption
display modes “km/L”, “L/100km” or
“MPG” (for the UK only) show the fuel
consumption under the current riding
conditions.
The “km/L” display shows the dis-
tance that can be traveled on 1.0 L
of fuel.
The “L/100km” display shows the
amount of fuel necessary to travel
100 km.
For the UK only: The “MPG” dis-
play shows the distance that can
be traveled on 1.0 Imp.gal of fuel.
TIPIf traveling at speeds under 10 km/h (6
mi/h), “_ _._” will be displayed.NOTICE
ECA15474
If there is a malfunction, “– –.–” will
be continuously displaye d. Have a
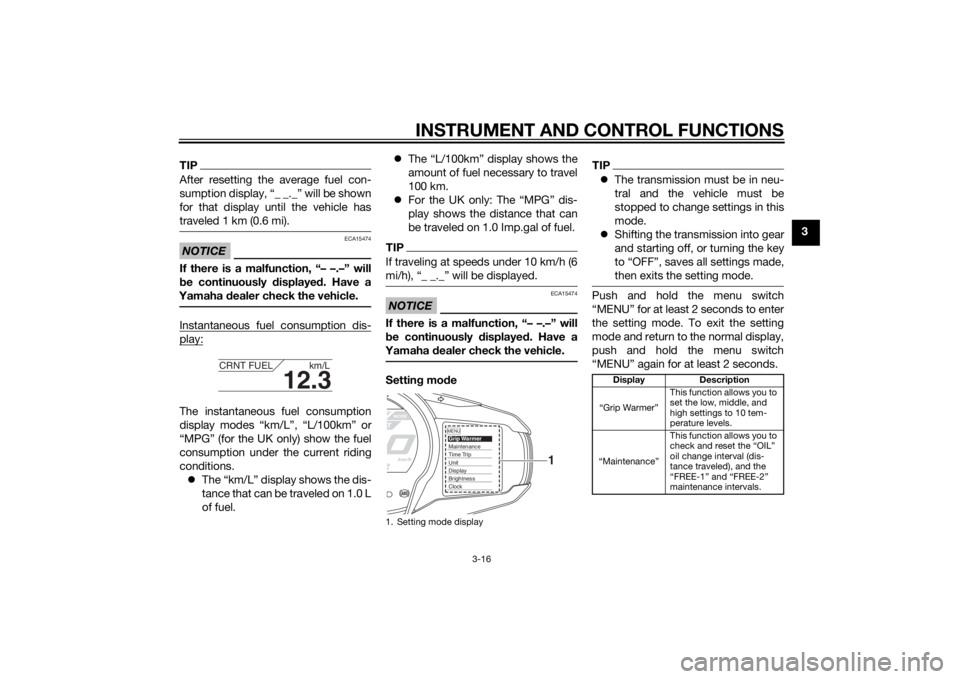
Yamaha dealer check the vehicle.Settin g mo de
TIP The transmission must be in neu-
tral and the vehicle must be
stopped to change settings in this
mode.
Shifting the transmission into gear
and starting off, or turning the key
to “OFF”, saves all settings made,
then exits the setting mode.Push and hold the menu switch
“MENU” for at least 2 seconds to enter
the setting mode. To exit the setting
mode and return to the normal display,
push and hold the menu switch
“MENU” again for at least 2 seconds.
12.3
CRNT FUEL km/L
1. Setting mode display
MENUGrip WarmerMaintenanceTime TripUnitDisplayBrightnessClock
1
Display Description
“Grip Warmer” This function allows you to
set the low, middle, and
high settings to 10 tem-
perature levels.
“Maintenance” This function allows you to
check and reset the “OIL”
oil change interval (dis-
tance traveled), and the
“FREE-1” and “FREE-2”
maintenance intervals.
U1MCE2E0.book Page 16 Monday, June 16, 2014 8:57 AM
Page 33 of 120
INSTRUMENT AND CONTROL FUNCTIONS
3-18
3
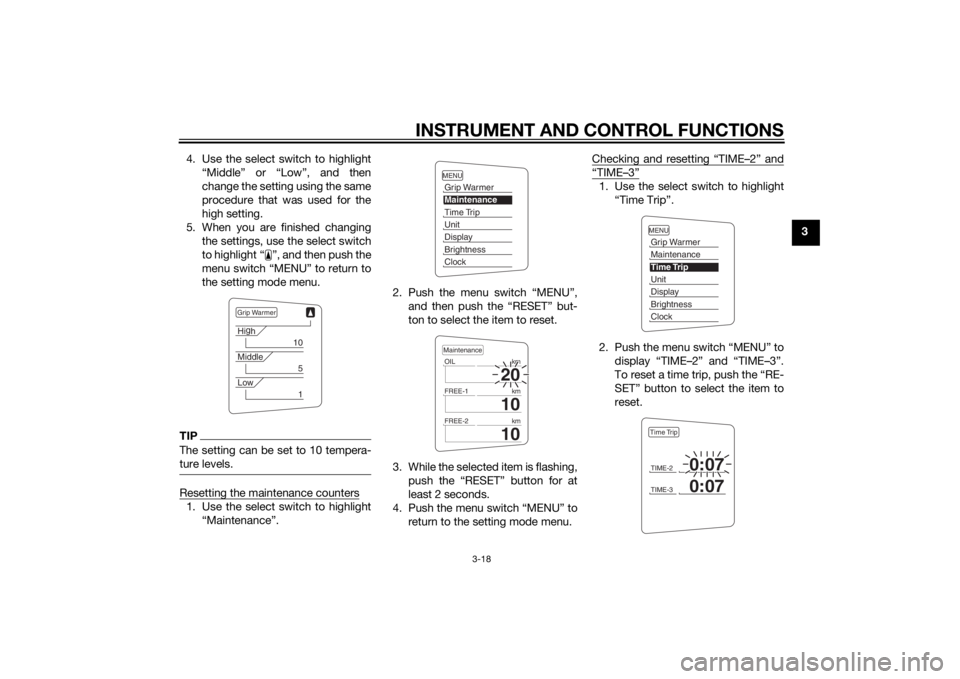
4. Use the select switch to highlight
“Middle” or “Low”, and then
change the setting using the same
procedure that was used for the
high setting.
5. When you are finished changing the settings, use the select switch
to highlight “ ”, and then push the
menu switch “MENU” to return to
the setting mode menu.
TIPThe setting can be set to 10 tempera-
ture levels.Resetting the maintenance counters1. Use the select switch to highlight“Maintenance”. 2. Push the menu switch “MENU”,
and then push the “RESET” but-
ton to select the item to reset.
3. While the selected item is flashing, push the “RESET” button for at
least 2 seconds.
4. Push the menu switch “MENU” to return to the setting mode menu. Checking and resetting “TIME–2” and
“TIME–3”1. Use the select switch to highlight
“Time Trip”.
2. Push the menu switch “MENU” to display “TIME–2” and “TIME–3”.
To reset a time trip, push the “RE-
SET” button to select the item to
reset.
Grip WarmerHig
h
10
Middle
5
Low
1
MENUGrip WarmerMaintenanceTime TripUnitDisplayBrightnessClock
20
OIL km
10
FREE-1km
10
FREE-2kmMaintenance
MENUGrip WarmerMaintenanceTime TripUnitDisplayBrightnessClockTIME-2
0:07
TIME-3
0:07
Time Trip
U1MCE2E0.book Page 18 Monday, June 16, 2014 8:57 AM
Page 61 of 120
FOR YOUR SAFETY – PRE-OPERATION CHECKS
4-1
4
EAU15598
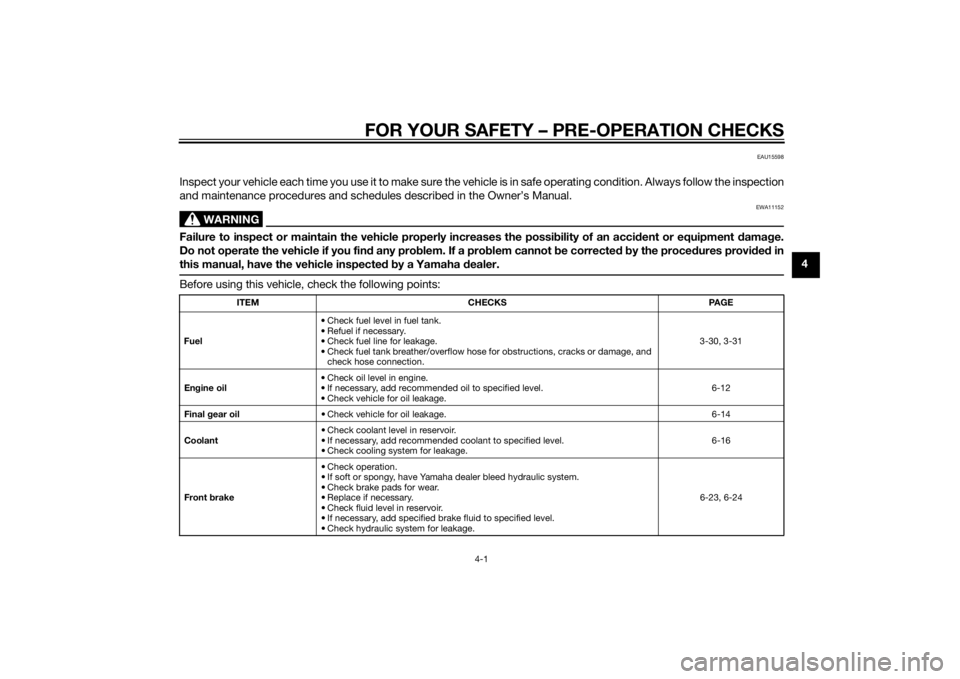
Inspect your vehicle each time you use it to make sure the vehicle is in safe operating condition. Always follow the inspection
and maintenance procedures and schedules described in the Owner’s Manual.
WARNING
EWA11152
Failure to inspect or maintain the vehicle properly increases the possibility of an accident or equipment d amage.
Do not operate the vehicle if you fin d any pro blem. If a pro blem cannot b e corrected b y the proce dures provi ded in
this manual, have the vehicle inspecte d b y a Yamaha dealer.Before using this vehicle, check the following points:
ITEM CHECKS PAGE
Fuel • Check fuel level in fuel tank.
• Refuel if necessary.
• Check fuel line for leakage.
• Check fuel tank breather/overflow hose for obstructions, cracks or damage, and
check hose connection. 3-30, 3-31
En gine oil • Check oil level in engine.
• If necessary, add recommended oil to specified level.
• Check vehicle for oil leakage. 6-12
Final gear oil • Check vehicle for oil leakage. 6-14
Coolant • Check coolant level in reservoir.
• If necessary, add recommended coolant to specified level.
• Check cooling system for leakage. 6-16
Front brake • Check operation.
• If soft or spongy, have Yamaha dealer bleed hydraulic system.
• Check brake pads for wear.
• Replace if necessary.
• Check fluid level in reservoir.
• If necessary, add specified brake fluid to specified level.
• Check hydraulic system for leakage. 6-23, 6-24
U1MCE2E0.book Page 1 Monday, June 16, 2014 8:57 AM
Page 64 of 120
OPERATION AND IMPORTANT RIDING POINTS
5-1
5
EAU15952
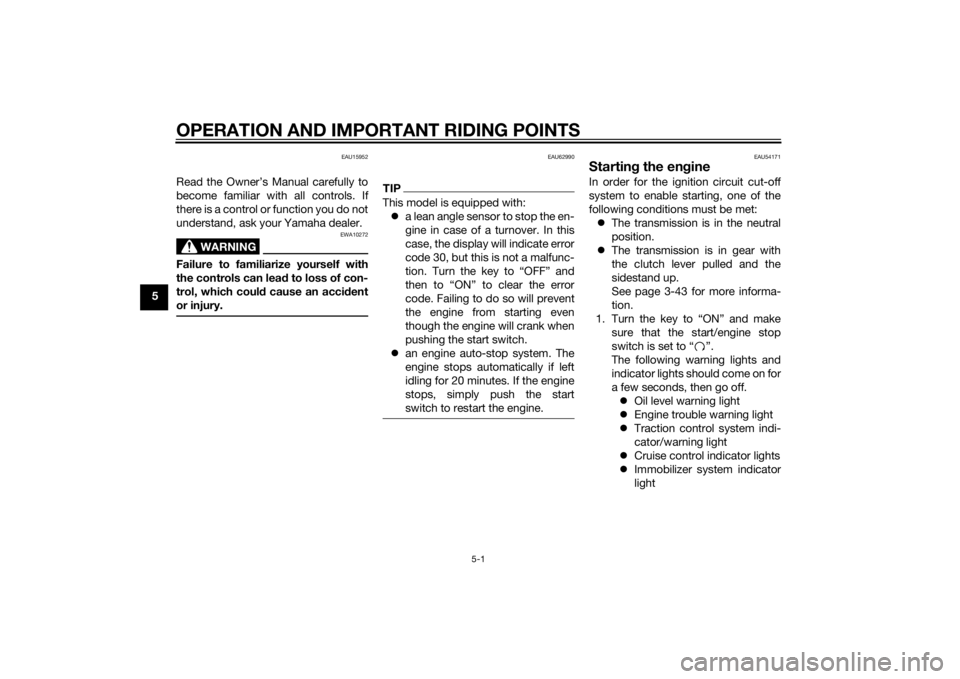
Read the Owner’s Manual carefully to
become familiar with all controls. If
there is a control or function you do not
understand, ask your Yamaha dealer.
WARNING
EWA10272
Failure to familiarize yourself with
the controls can lead to loss of con-
trol, which coul d cause an acci dent
or injury.
EAU62990
TIPThis model is equipped with: a lean angle sensor to stop the en-
gine in case of a turnover. In this
case, the display will indicate error
code 30, but this is not a malfunc-
tion. Turn the key to “OFF” and
then to “ON” to clear the error
code. Failing to do so will prevent
the engine from starting even
though the engine will crank when
pushing the start switch.
an engine auto-stop system. The
engine stops automatically if left
idling for 20 minutes. If the engine
stops, simply push the start
switch to restart the engine.
EAU54171
Startin g the en gineIn order for the ignition circuit cut-off
system to enable starting, one of the
following conditions must be met:
The transmission is in the neutral
position.
The transmission is in gear with
the clutch lever pulled and the
sidestand up.
See page 3-43 for more informa-
tion.
1. Turn the key to “ON” and make sure that the start/engine stop
switch is set to “ ”.
The following warning lights and
indicator lights should come on for
a few seconds, then go off. Oil level warning light
Engine trouble warning light
Traction control system indi-
cator/warning light
Cruise control indicator lights
Immobilizer system indicator
light
U1MCE2E0.book Page 1 Monday, June 16, 2014 8:57 AM
Page 73 of 120

PERIODIC MAINTENANCE AND ADJUSTMENT
6-6
6
21*Rear suspension re-
lay arm an
d con-
nectin g arm
pivotin g points • Check operation.
√√√√
• Lubricate with lithium-soap- based grease. √√
22 En gine oil • Change.
• Check oil level and vehicle for oil
leakage. √√√√√√
23 En
gine oil filter car-
tri dg e •Replace.
√√√
24 *Coolin g system • Check coolant level and vehicle
for coolant leakage. √√√√√
• Change coolant. Every 3 years
25 Final gear oil • Check oil level and vehicle for oil
leakage.
• Change. √√√√√
26 *Front an
d rear
b rake switches • Check operation.
√√√√√√
27 Movin
g parts an d
ca bles • Lubricate.
√√√√√
28 *Throttle g rip • Check operation.
• Check throttle grip free play, and
adjust if necessary.
• Lubricate cable and grip housing. √√√√√
29 *Li
ghts, si gnals an d
switches • Check operation.
• Adjust headlight beam.
√√√√√√
NO. ITEM CHECK OR MAINTENANCE JOB
ODOMETER READING
ANNUAL
CHECK
1000 km
(600 mi) 10000 km
(6000 mi) 20000 km
(12000 mi) 30000 km
( 18
000 mi)40000 km
(24000 mi)
U1MCE2E0.book Page 6 Monday, June 16, 2014 8:57 AM
Page 79 of 120
PERIODIC MAINTENANCE AND ADJUSTMENT
6-12
6
EAU19887
Engine oil an d oil filter car-
tri dgeThe engine oil level should be checked
before each ride. In addition, the oil
must be changed and the oil filter car-
tridge replaced at the intervals speci-
fied in the periodic maintenance and
lubrication chart.
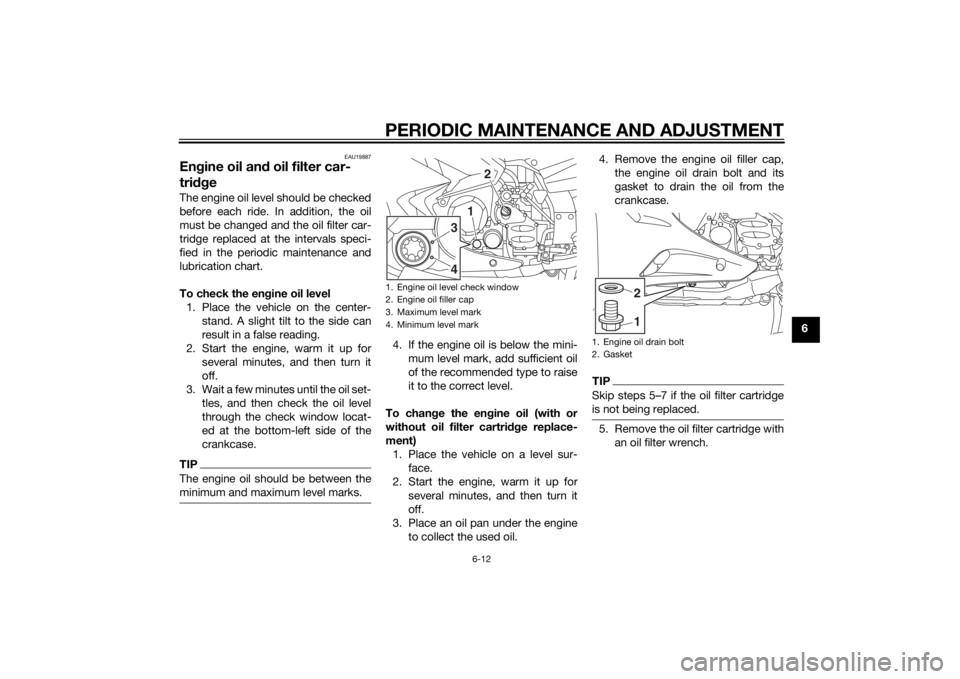
To check the en gine oil level
1. Place the vehicle on the center- stand. A slight tilt to the side can
result in a false reading.
2. Start the engine, warm it up for several minutes, and then turn it
off.
3. Wait a few minutes until the oil set- tles, and then check the oil level
through the check window locat-
ed at the bottom-left side of the
crankcase.TIPThe engine oil should be between the
minimum and maximum level marks.
4. If the engine oil is below the mini-mum level mark, add sufficient oil
of the recommended type to raise
it to the correct level.
To chan ge the en gine oil (with or
without oil filter cartri dge replace-
ment) 1. Place the vehicle on a level sur- face.
2. Start the engine, warm it up for several minutes, and then turn it
off.
3. Place an oil pan under the engine to collect the used oil. 4. Remove the engine oil filler cap,
the engine oil drain bolt and its
gasket to drain the oil from the
crankcase.
TIPSkip steps 5–7 if the oil filter cartridge
is not being replaced.5. Remove the oil filter cartridge withan oil filter wrench.
1. Engine oil level check window
2. Engine oil filler cap
3. Maximum level mark
4. Minimum level mark
31
4
2
1. Engine oil drain bolt
2. Gasket
12
U1MCE2E0.book Page 12 Monday, June 16, 2014 8:57 AM
Page 81 of 120
PERIODIC MAINTENANCE AND ADJUSTMENT
6-14
6
NOTICE
ECA11621
In or der to prevent clutch slip-
pa ge (since the en gine oil also
lu bricates the clutch), do not
mix any chemical additives. Do
not use oils with a diesel speci-
fication of “CD” or oils of a hi gh-
er quality than specifie d. In
a ddition, do not use oils lab eled
“ENERGY CONSERVING II” or
hi gher.
Make sure that no forei gn mate-
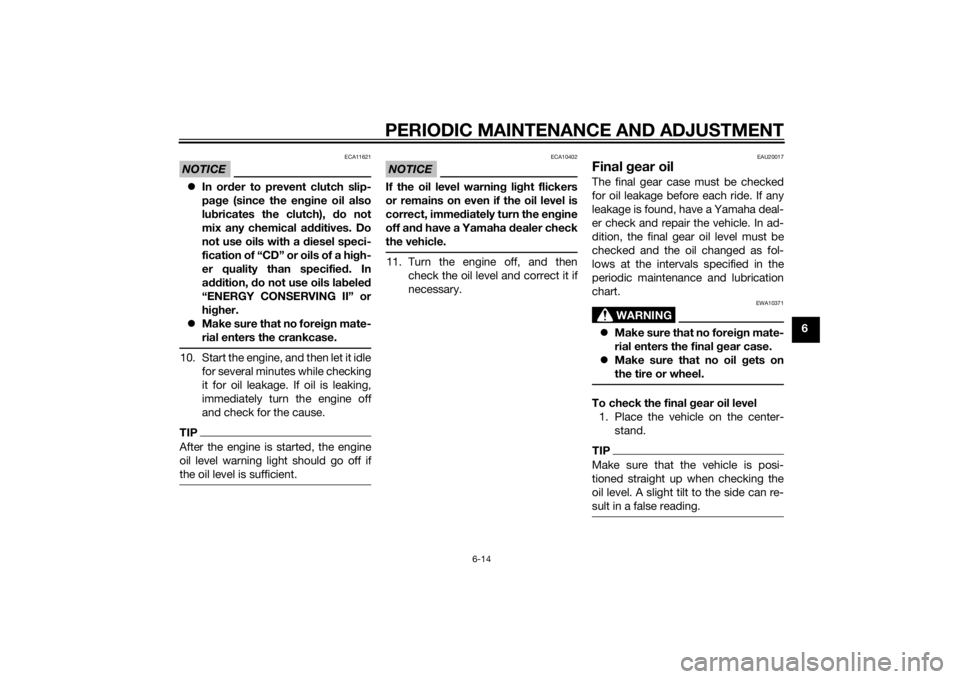
rial enters the crankcase.10. Start the engine, and then let it idle for several minutes while checking
it for oil leakage. If oil is leaking,
immediately turn the engine off
and check for the cause.TIPAfter the engine is started, the engine
oil level warning light should go off if
the oil level is sufficient.
NOTICE
ECA10402
If the oil level warnin g li ght flickers
or remains on even if the oil level is
correct, imme diately turn the en gine
off an d have a Yamaha dealer check
the vehicle.11. Turn the engine off, and then check the oil level and correct it if
necessary.
EAU20017
Final gear oilThe final gear case must be checked
for oil leakage before each ride. If any
leakage is found, have a Yamaha deal-
er check and repair the vehicle. In ad-
dition, the final gear oil level must be
checked and the oil changed as fol-
lows at the intervals specified in the
periodic maintenance and lubrication
chart.
WARNING
EWA10371
Make sure that no forei gn mate-
rial enters the final gear case.
Make sure that no oil gets on
the tire or wheel.To check the final g ear oil level
1. Place the vehicle on the center- stand.TIPMake sure that the vehicle is posi-
tioned straight up when checking the
oil level. A slight tilt to the side can re-
sult in a false reading.
U1MCE2E0.book Page 14 Monday, June 16, 2014 8:57 AM