fuse YAMAHA FZ6 N 2006 Owners Manual
[x] Cancel search | Manufacturer: YAMAHA, Model Year: 2006, Model line: FZ6 N, Model: YAMAHA FZ6 N 2006Pages: 88, PDF Size: 4.27 MB
Page 6 of 88
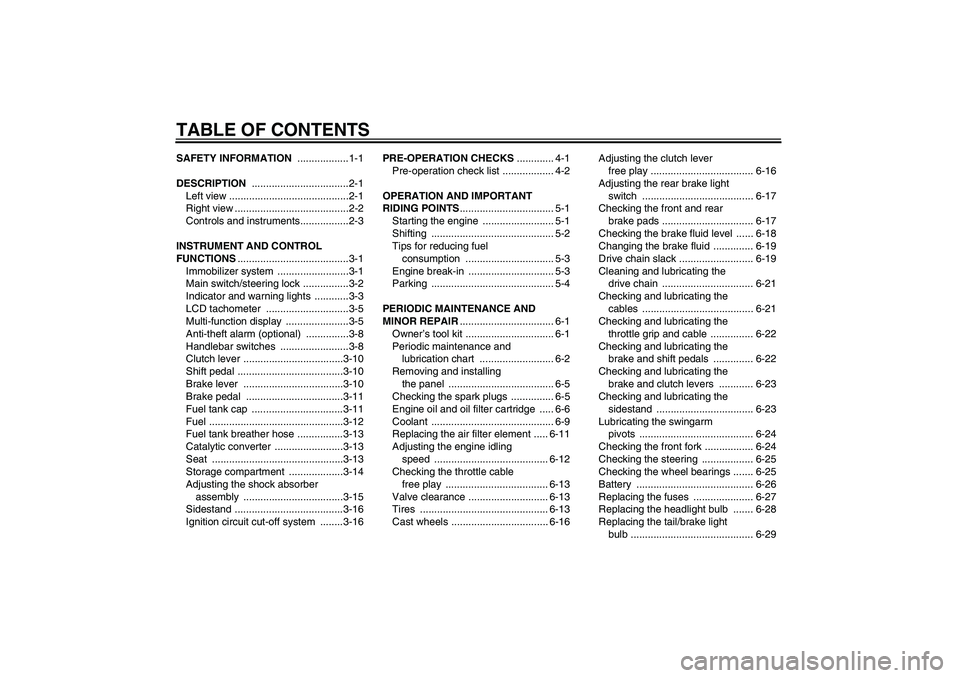
TABLE OF CONTENTSSAFETY INFORMATION ..................1-1
DESCRIPTION ..................................2-1
Left view ..........................................2-1
Right view ........................................2-2
Controls and instruments.................2-3
INSTRUMENT AND CONTROL
FUNCTIONS.......................................3-1
Immobilizer system .........................3-1
Main switch/steering lock ................3-2
Indicator and warning lights ............3-3
LCD tachometer .............................3-5
Multi-function display ......................3-5
Anti-theft alarm (optional) ...............3-8
Handlebar switches ........................3-8
Clutch lever ...................................3-10
Shift pedal .....................................3-10
Brake lever ...................................3-10
Brake pedal ..................................3-11
Fuel tank cap ................................3-11
Fuel ...............................................3-12
Fuel tank breather hose ................3-13
Catalytic converter ........................3-13
Seat ..............................................3-13
Storage compartment ...................3-14
Adjusting the shock absorber
assembly ...................................3-15
Sidestand ......................................3-16
Ignition circuit cut-off system ........3-16PRE-OPERATION CHECKS............. 4-1
Pre-operation check list .................. 4-2
OPERATION AND IMPORTANT
RIDING POINTS................................. 5-1
Starting the engine ......................... 5-1
Shifting ........................................... 5-2
Tips for reducing fuel
consumption ............................... 5-3
Engine break-in .............................. 5-3
Parking ........................................... 5-4
PERIODIC MAINTENANCE AND
MINOR REPAIR................................. 6-1
Owner’s tool kit ............................... 6-1
Periodic maintenance and
lubrication chart .......................... 6-2
Removing and installing
the panel ..................................... 6-5
Checking the spark plugs ............... 6-5
Engine oil and oil filter cartridge ..... 6-6
Coolant ........................................... 6-9
Replacing the air filter element ..... 6-11
Adjusting the engine idling
speed ........................................ 6-12
Checking the throttle cable
free play .................................... 6-13
Valve clearance ............................ 6-13
Tires ............................................. 6-13
Cast wheels .................................. 6-16Adjusting the clutch lever
free play .................................... 6-16
Adjusting the rear brake light
switch ....................................... 6-17
Checking the front and rear
brake pads ................................ 6-17
Checking the brake fluid level ...... 6-18
Changing the brake fluid .............. 6-19
Drive chain slack .......................... 6-19
Cleaning and lubricating the
drive chain ................................ 6-21
Checking and lubricating the
cables ....................................... 6-21
Checking and lubricating the
throttle grip and cable ............... 6-22
Checking and lubricating the
brake and shift pedals .............. 6-22
Checking and lubricating the
brake and clutch levers ............ 6-23
Checking and lubricating the
sidestand .................................. 6-23
Lubricating the swingarm
pivots ........................................ 6-24
Checking the front fork ................. 6-24
Checking the steering .................. 6-25
Checking the wheel bearings ....... 6-25
Battery ......................................... 6-26
Replacing the fuses ..................... 6-27
Replacing the headlight bulb ....... 6-28
Replacing the tail/brake light
bulb ........................................... 6-29U1B3E2E0.book Page 1 Monday, August 1, 2005 3:07 PM
Page 12 of 88
DESCRIPTION
2-1
2
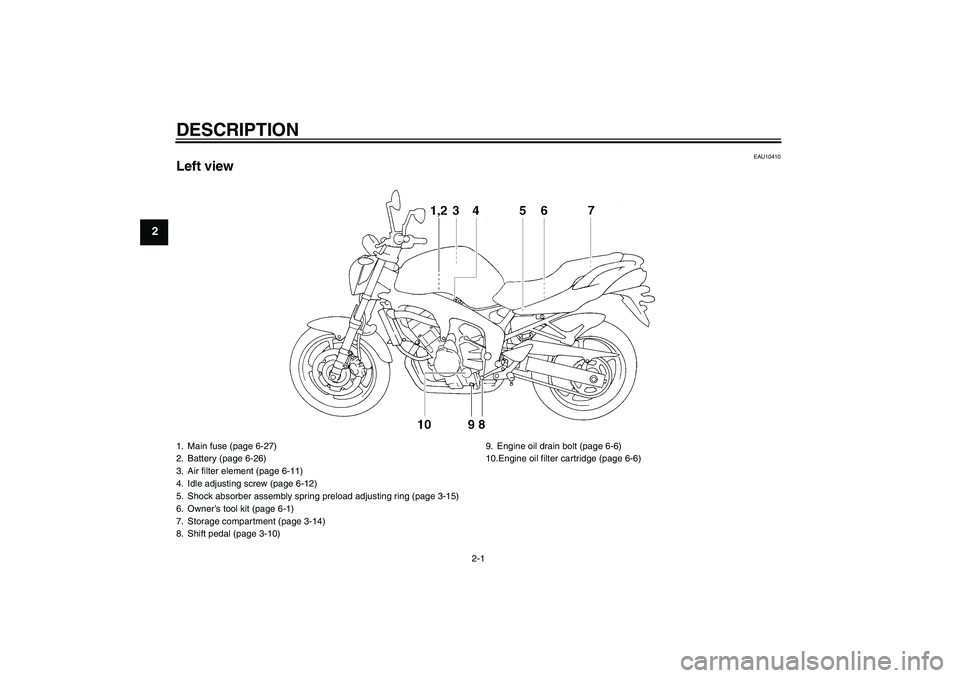
EAU10410
Left view1. Main fuse (page 6-27)
2. Battery (page 6-26)
3. Air filter element (page 6-11)
4. Idle adjusting screw (page 6-12)
5. Shock absorber assembly spring preload adjusting ring (page 3-15)
6. Owner’s tool kit (page 6-1)
7. Storage compartment (page 3-14)
8. Shift pedal (page 3-10)9. Engine oil drain bolt (page 6-6)
10.Engine oil filter cartridge (page 6-6)U1B3E2E0.book Page 1 Monday, August 1, 2005 3:07 PM
Page 13 of 88

DESCRIPTION
2-2
2
EAU10420
Right view1. Fuse box (page 6-27)
2. Rear brake fluid reservoir (page 6-18)
3. Coolant reservoir cap (page 6-9)
4. Engine oil filler cap (page 6-6)
5. Front brake fluid reservoir (page 6-18)
6. Dipstick (page 6-6)
7. Brake pedal (page 3-11)
U1B3E2E0.book Page 2 Monday, August 1, 2005 3:07 PM
Page 65 of 88
PERIODIC MAINTENANCE AND MINOR REPAIR
6-27
6 charger will damage the battery.
If you do not have access to a
sealed-type (MF) battery charg-
er, have a Yamaha dealer
charge your battery.
EAU32842
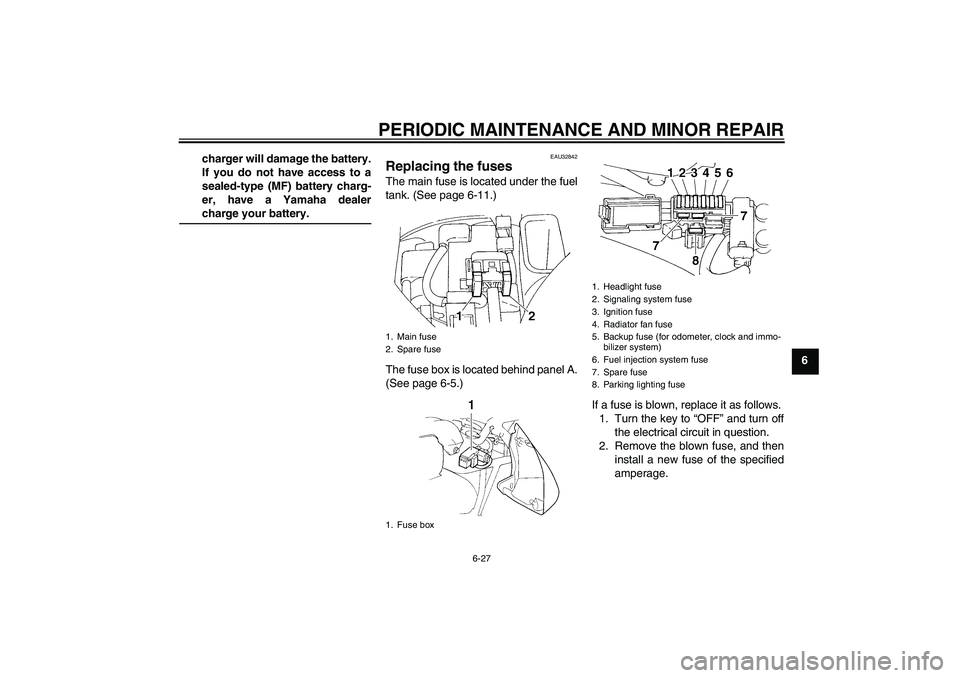
Replacing the fuses The main fuse is located under the fuel
tank. (See page 6-11.)
The fuse box is located behind panel A.
(See page 6-5.)
If a fuse is blown, replace it as follows.
1. Turn the key to “OFF” and turn off
the electrical circuit in question.
2. Remove the blown fuse, and then
install a new fuse of the specified
amperage.1. Main fuse
2. Spare fuse
1. Fuse box
1. Headlight fuse
2. Signaling system fuse
3. Ignition fuse
4. Radiator fan fuse
5. Backup fuse (for odometer, clock and immo-
bilizer system)
6. Fuel injection system fuse
7. Spare fuse
8. Parking lighting fuse
U1B3E2E0.book Page 27 Monday, August 1, 2005 3:07 PM
Page 66 of 88
PERIODIC MAINTENANCE AND MINOR REPAIR
6-28
6
CAUTION:
ECA10640
Do not use a fuse of a higher amper-
age rating than recommended to
avoid causing extensive damage to
the electrical system and possibly afire.
3. Turn the key to “ON” and turn on
the electrical circuit in question to
check if the device operates.
4. If the fuse immediately blows
again, have a Yamaha dealer
check the electrical system.
EAU34380
Replacing the headlight bulb This model is equipped with a quartz
bulb headlight. If the headlight bulb
burns out, replace it as follows.
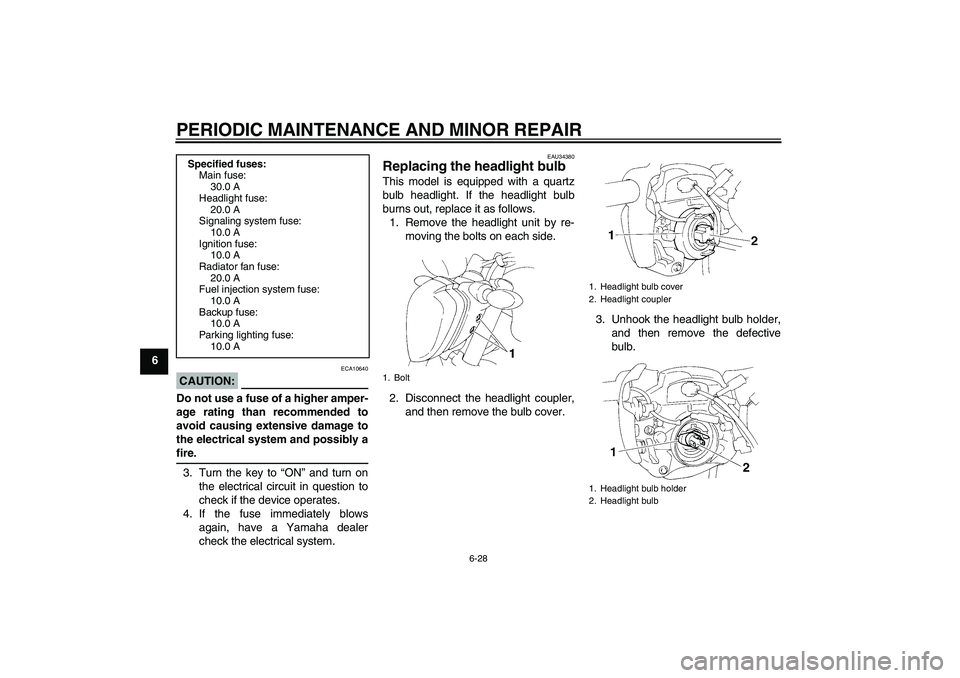
1. Remove the headlight unit by re-
moving the bolts on each side.
2. Disconnect the headlight coupler,
and then remove the bulb cover.3. Unhook the headlight bulb holder,
and then remove the defective
bulb.
Specified fuses:
Main fuse:
30.0 A
Headlight fuse:
20.0 A
Signaling system fuse:
10.0 A
Ignition fuse:
10.0 A
Radiator fan fuse:
20.0 A
Fuel injection system fuse:
10.0 A
Backup fuse:
10.0 A
Parking lighting fuse:
10.0 A
1. Bolt
1. Headlight bulb cover
2. Headlight coupler
1. Headlight bulb holder
2. Headlight bulb
U1B3E2E0.book Page 28 Monday, August 1, 2005 3:07 PM
Page 82 of 88
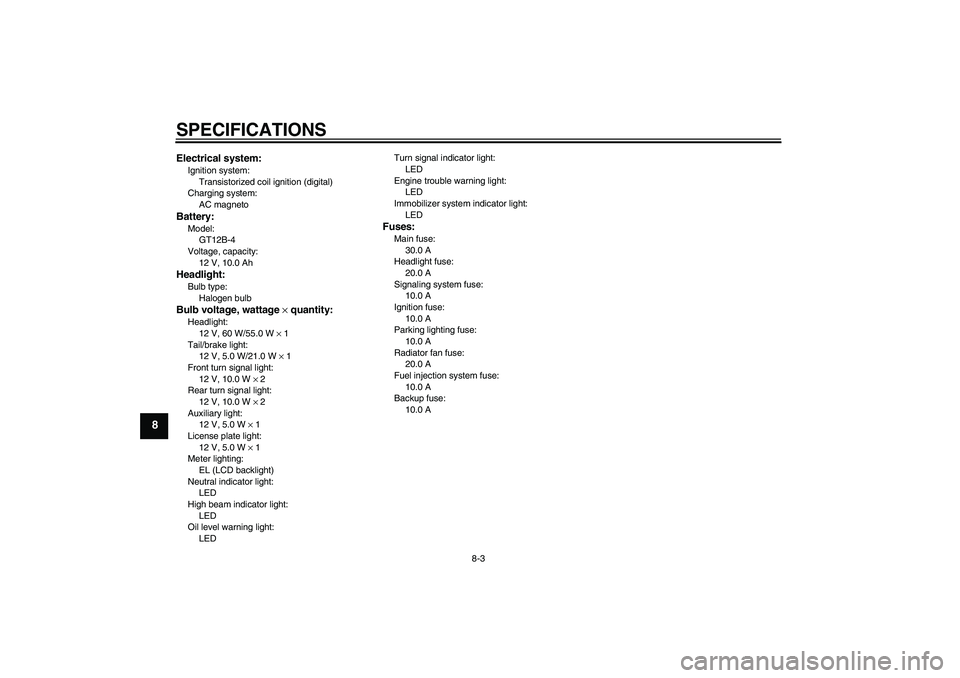
SPECIFICATIONS
8-3
8
Electrical system:Ignition system:
Transistorized coil ignition (digital)
Charging system:
AC magnetoBattery:Model:
GT12B-4
Voltage, capacity:
12 V, 10.0 AhHeadlight:Bulb type:
Halogen bulbBulb voltage, wattage × quantity:Headlight:
12 V, 60 W/55.0 W × 1
Tail/brake light:
12 V, 5.0 W/21.0 W × 1
Front turn signal light:
12 V, 10.0 W × 2
Rear turn signal light:
12 V, 10.0 W × 2
Auxiliary light:
12 V, 5.0 W × 1
License plate light:
12 V, 5.0 W × 1
Meter lighting:
EL (LCD backlight)
Neutral indicator light:
LED
High beam indicator light:
LED
Oil level warning light:
LEDTurn signal indicator light:
LED
Engine trouble warning light:
LED
Immobilizer system indicator light:
LED
Fuses:Main fuse:
30.0 A
Headlight fuse:
20.0 A
Signaling system fuse:
10.0 A
Ignition fuse:
10.0 A
Parking lighting fuse:
10.0 A
Radiator fan fuse:
20.0 A
Fuel injection system fuse:
10.0 A
Backup fuse:
10.0 A
U1B3E2E0.book Page 3 Monday, August 1, 2005 3:07 PM
Page 85 of 88
INDEX
AAir filter element, replacing ................... 6-11
Anti-theft alarm (optional) ....................... 3-8
Auxiliary light bulb, replacing ................ 6-31BBattery .................................................. 6-26
Brake and clutch levers,
checking and lubricating ..................... 6-23
Brake and shift pedals,
checking and lubricating ..................... 6-22
Brake fluid, changing ............................ 6-19
Brake fluid level, checking .................... 6-18
Brake lever ........................................... 3-10
Brake pedal .......................................... 3-11CCables, checking and lubricating .......... 6-21
Care ........................................................ 7-1
Catalytic converter ................................ 3-13
Clutch lever........................................... 3-10
Clutch lever free play, adjusting ........... 6-16
Coolant ................................................... 6-9DDimmer switch ........................................ 3-9
Drive chain, cleaning and lubricating .... 6-21
Drive chain slack .................................. 6-19EEngine break-in ...................................... 5-3
Engine idling speed .............................. 6-12
Engine oil and oil filter cartridge ............. 6-6
Engine stop switch.................................. 3-9
Engine trouble warning light ................... 3-4FFront and rear brake pads, checking .... 6-17
Front fork, checking .............................. 6-24Fuel ....................................................... 3-12
Fuel consumption, tips for reducing ........ 5-3
Fuel tank breather hose ........................ 3-13
Fuel tank cap......................................... 3-11
Fuses, replacing .................................... 6-27
HHandlebar switches ................................. 3-8
Hazard switch.......................................... 3-9
Headlight bulb, replacing....................... 6-28
High beam indicator light......................... 3-4
Horn switch ............................................. 3-9IIdentification numbers ............................. 9-1
Ignition circuit cut-off system ................. 3-16
Immobilizer system .................................3-1
Immobilizer system indicator light ........... 3-4
Indicator and warning lights .................... 3-3KKey identification number ........................ 9-1LLCD tachometer ...................................... 3-5
License plate light bulb, replacing ......... 6-30MMain switch/steering lock ........................ 3-2
Model label .............................................. 9-2
Multi-function display...............................3-5NNeutral indicator light .............................. 3-3OOil level warning light .............................. 3-4PPanel, removing and installing ................ 6-5
Parking ....................................................5-4
Part locations .......................................... 2-1Pass switch ............................................. 3-9
Periodic maintenance and lubrication
chart...................................................... 6-2
Pre-operation check list .......................... 4-2
RRear brake light switch, adjusting ......... 6-17SSafety information ................................... 1-1
Seat ...................................................... 3-13
Shifting .................................................... 5-2
Shift pedal ............................................. 3-10
Shock absorber assembly, adjusting .... 3-15
Sidestand .............................................. 3-16
Sidestand, checking and lubricating ..... 6-23
Spark plugs, checking............................. 6-5
Specifications.......................................... 8-1
Starting the engine.................................. 5-1
Start switch ............................................. 3-9
Steering, checking ................................ 6-25
Storage ................................................... 7-3
Storage compartment ........................... 3-14
Supporting the motorcycle .................... 6-31
Swingarm pivots, lubricating ................. 6-24TTail/brake light bulb, replacing .............. 6-29
Throttle cable free play, checking ......... 6-13
Throttle grip and cable,
checking and lubricating ..................... 6-22
Tires ...................................................... 6-13
Tool kit .................................................... 6-1
Troubleshooting .................................... 6-35
Troubleshooting charts ......................... 6-36
Turn signal indicator lights ...................... 3-3
Turn signal light bulb, replacing ............ 6-30
U1B3E2E0.book Page 1 Monday, August 1, 2005 3:07 PM