tires YAMAHA GRIZZLY 125 2013 Owners Manual
[x] Cancel search | Manufacturer: YAMAHA, Model Year: 2013, Model line: GRIZZLY 125, Model: YAMAHA GRIZZLY 125 2013Pages: 134, PDF Size: 3.93 MB
Page 8 of 134

EBU17420
TABLE OF CONTENTS
LOCATION OF THE WARNING AND
SPECIFICATION LABELS ............................ 1-1
SAFETY INFORMATION .............................. 2-1
DESCRIPTION .............................................. 3-1Left view ...................................................... 3-1
Right view.................................................... 3-1
Controls and instruments ............................ 3-2
INSTRUMENT AND CONTROL
FUNCTIONS .................................................. 4-1 Main switch ................................................ 4-1
Indicator lights ............................................ 4-2
Handlebar switches .................................... 4-2
Throttle lever .............................................. 4-3
Speed limiter .............................................. 4-4
Front brake lever ........................................ 4-4
Rear brake lever ......................................... 4-5
Parking brake ............................................. 4-5
Drive select lever ........................................ 4-6
Fuel tank cap .............................................. 4-7
Fuel ............................................................ 4-7
Fuel cock .................................................... 4-8 Starter (choke) ..........................................4-10
Seat ..........................................................4-10
Front carrier ..............................................4-11
Rear carrier ...............................................4-11
PRE-OPERATION CHECKS ..........................5-1 Fuel .............................................................5-3
Engine oil ....................................................5-3
Transmission oil ..........................................5-3
Front and rear brakes .................................5-3
Throttle lever ...............................................5-3
Drive chain ..................................................5-3
Tires ............................................................5-3
Chassis fasteners .......................................5-6
Instruments, lights and switches .................5-6
Battery ........................................................5-6
OPERATION...................................................6-1 Starting a cold engine .................................6-1
Starting a warm engine ...............................6-3
Operating the drive select lever and driving in reverse ......................................6-3
Engine break-in ...........................................6-4
Parking ........................................................6-5U1PY61E0.book Page 1 Wednesday, March 14, 2012 5:22 PM
Page 15 of 134

1-5
1
**.* kPa
*.** kgf/cm²*.* psi **.* kPa
*.** kgf/cm²
*.* psi
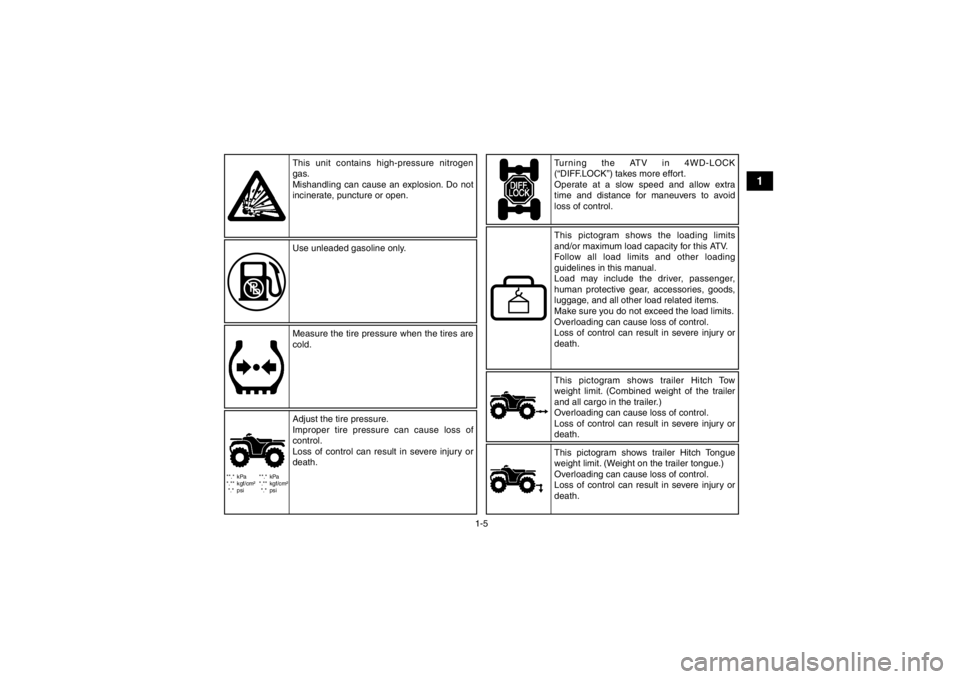
This pictogram shows trailer Hitch Tow
weight limit. (Combined weight of the trailer
and all cargo in the trailer.)
Overloading can cause loss of control.
Loss of control can result in severe injury or
death.
This unit contains high-pressure nitrogen
gas.
Mishandling can cause an explosion. Do not
incinerate, puncture or open.
Use unleaded gasoline only.
Measure the tire pressure when the tires are
cold. Turning the ATV in 4WD-LOCK
(“DIFF.LOCK”) takes more effort.
Operate at a slow speed and allow extra
time and distance for maneuvers to avoid
loss of control.
Adjust the tire pressure.
Improper tire pressure can cause loss of
control.
Loss of control can result in severe injury or
death. This pictogram shows the loading limits
and/or maximum load capacity for this ATV.
Follow all load limits and other loading
guidelines in this manual.
Load may include the driver, passenger,
human protective gear, accessories, goods,
luggage, and all other load related items.
Make sure you do not exceed the load limits.
Overloading can cause loss of control.
Loss of control can result in severe injury or
death.
This pictogram shows trailer Hitch Tongue
weight limit. (Weight on the trailer tongue.)
Overloading can cause loss of control.
Loss of control can result in severe injury or
death.
U1PY61E0.book Page 5 Wednesday, March 14, 2012 5:22 PM
Page 19 of 134

2-3
2
●Always use proper procedures if you stall or roll
backwards when climbing a hill. To avoid stall-
ing, maintain a steady speed when climbing a
hill. If you stall or roll backwards, follow the spe-
cial procedure for braking described in this man-
ual. Dismount on the uphill side or to a side if
pointed straight uphill. Turn the ATV around and
remount, following the procedure described in
this manual.●Always check for obstacles before operating in a
new area.●Never attempt to operate over large obstacles,
such as large rocks or fallen trees. Always follow
proper procedures when operating over obsta-
cles as described in this manual.●Always be careful when skidding or sliding.
Learn to safely control skidding or sliding by
practicing at low speeds and on level, smooth
terrain. On extremely slippery surfaces, such as
ice, go slowly and be very cautious in order to re-
duce the chance of skidding or sliding out of con-
trol.●Never operate an ATV in fast flowing water or in
water deeper than that recommended in this
manual. Remember that wet brakes may havereduced stopping ability. Test your brakes after
leaving water. If necessary, apply them several
times to let friction dry out the linings.
●Always be sure there are no obstacles or people
behind you when you operate in reverse. When
it is safe to proceed in reverse, go slowly.●Always use the size and type of tires specified in
this manual.●Always maintain proper tire pressure as de-
scribed in this manual.●Never exceed the stated load capacity for an
ATV. Cargo should be properly distributed and
securely attached. Reduce speed and follow in-
structions in this manual for carrying cargo. Al-
low greater distance for braking.●Do not operate your ATV during darkness un-
less it is equipped with a properly functioning
headlight. Off-road riding is inherently danger-
ous and additionally, off-road trails do not have
streetlights to guide you.●Never maintain an ATV without proper knowl-
edge. Contact an authorized ATV dealer to in-
form you on basic ATV maintenance. Certain
maintenance can only be carried out by certified
staff.
U1PY61E0.book Page 3 Wednesday, March 14, 2012 5:22 PM
Page 37 of 134

5-2
5
Rear brake Check operation, and correct if necessary.
Lubricate cable if necessary.
Check lever free play, and adjust if necessary. 5-3, 8-28, 8-33
Throttle lever Make sure that operation is smooth. Lubricate cable and lever hous-
ing if necessary.
Check lever free play, and adjust if necessary. 5-3, 8-26
Control cables Make sure that operation is smooth. Lubricate if necessary. 8-37
Drive chain Check chain slack, and adjust if necessary.
Check chain condition. Lubricate if necessary. 5-3, 8-34, 8-37
Wheels and tires Check wheel condition, and replace if damaged.
Check tire condition and tread depth. Replace if necessary.
Check air pressure. Correct if necessary. 5-3
Brake levers Make sure that operation is smooth. Lubricate lever pivoting points if
necessary. 8-38
Chassis fasteners Make sure that all nuts, bolts and screws are properly tightened. 5-6
Instruments, lights and
switches Check operation, and correct if necessary. 5-6
Battery Check electrolyte level. Fill with distilled water if necessary. 5-6, 8-41
ITEM ROUTINE PAGE
U1PY61E0.book Page 2 Wednesday, March 14, 2012 5:22 PM
Page 38 of 134

5-3
5
EBU19541Fuel Make sure that there is sufficient fuel in the tank.
(See page 4-7.)EBU19560Engine oil Make sure that the engine oil is at the specified lev-
el. Add oil as necessary. (See page 8-11.)EBU19580Transmission oil Make sure that the transmission oil is at the speci-
fied level. Add oil as necessary. (See page 8-14.)EBU19652Front and rear brakes Brake levers●Check for correct free play in the brake levers. If
the free play is incorrect, adjust it. (See pages
8-29 and 8-33.)●Check operation of the levers. They should
move smoothly and there should be a firm feel-
ing when the brake is applied. If not, have the
ATV checked by a Yamaha dealer.Brake operation
Test the brakes at slow speed after starting out to
make sure they are working properly. If the brakes
do not provide proper braking performance, check
the brake shoes for wear. (See page 8-28.)
EBU19761Throttle lever Check the operation of the throttle lever. It must
open smoothly and spring back to the idle position
when released. Have a Yamaha dealer correct if
necessary.EBU19770Drive chain Check the condition of the drive chain and check
the drive chain slack. Lubricate and adjust the
drive chain as necessary. (See page 8-34.)EBU19794Tires Check tire pressure regularly to make sure it is at
the recommended specifications. Also check for
wear and damage.
U1PY61E0.book Page 3 Wednesday, March 14, 2012 5:22 PM
Page 39 of 134

5-4
5
Tire pressure
Use the low-pressure tire gauge to check and ad-
just tire pressures when the tires are cold. Tire
pressures must be equal on both sides.
WARNING! Operation of this vehicle with im- proper tire pressure may cause severe injury
or death from loss of control or rollover. Tire
pressure below the minimum specified could
also cause the tire to dislodge from the rim un-
der severe riding conditions.
[EWB02541]
Set tire
pressures to the following specifications:
The low-pressure tire gauge is included as stan-
dard equipment. Make two measurements of the
tire pressure and use the second reading. Dust or
dirt in the gauge could cause the first reading to be
incorrect.Recommended tire pressure:
Fron t20.0 kPa (0.200 kgf/cm², 2.9 psi)
Rear 25.0 kPa (0.250 kgf/cm², 3.6 psi)
Minimum tire pressure: Fron t17.0 kPa (0.170 kgf/cm², 2.5 psi)
Rear 22.0 kPa (0.220 kgf/cm², 3.2 psi)
Maximum tire seating pressure: Fron t250 kPa (2.5 kgf/cm², 36 psi)
Rear 250 kPa (2.5 kgf/cm², 36 psi)
U1PY61E0.book Page 4 Wednesday, March 14, 2012 5:22 PM
Page 40 of 134

5-5
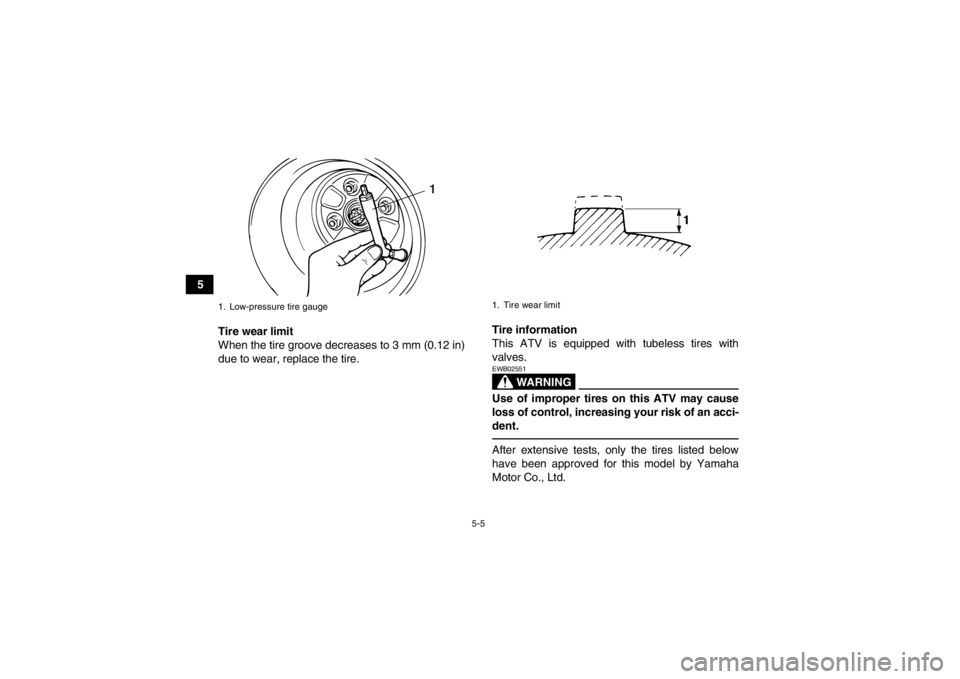
5Tire wear limit
When the tire groove decreases to 3 mm (0.12 in)
due to wear, replace the tire. Tire information
This ATV is equipped with tubeless tires with
valves.
WARNING
EWB02551Use of improper tires on this ATV may cause
loss of control, increasing your risk of an acci-
dent.After extensive tests, only the tires listed below
have been approved for this model by Yamaha
Motor Co., Ltd.
1. Low-pressure tire gauge
1
1. Tire wear limit
U1PY61E0.book Page 5 Wednesday, March 14, 2012 5:22 PM
Page 41 of 134

5-6
5
Aftermarket tires and rims
The tires and rims that came with your ATV were
designed to match the performance capabilities
and to provide the best combination of handling,
braking, and comfort. Other tires, rims, sizes, and
combinations may not be appropriate.
EBU19840Chassis fasteners Make sure that all nuts, bolts and screws are prop-
erly tightened.
EBU19850Instruments, lights and switches Check that all instruments, lights and switches are
working properly. Correct if necessary.EBU19860Battery Check the fluid level in the battery. Fill with distilled
water if necessary. (See page 8-41.)
Fro nt:
Manufacturer/model:DURO/DI-K635A
Size: AT20 x 7-8
Ty p e : Tu b e l e s s
Rear: Manufacturer/model:DURO/DI-K735A
Size: AT22 x 10-8
Ty p e : Tu b e l e s s
U1PY61E0.book Page 6 Wednesday, March 14, 2012 5:22 PM
Page 61 of 134

7-12
7
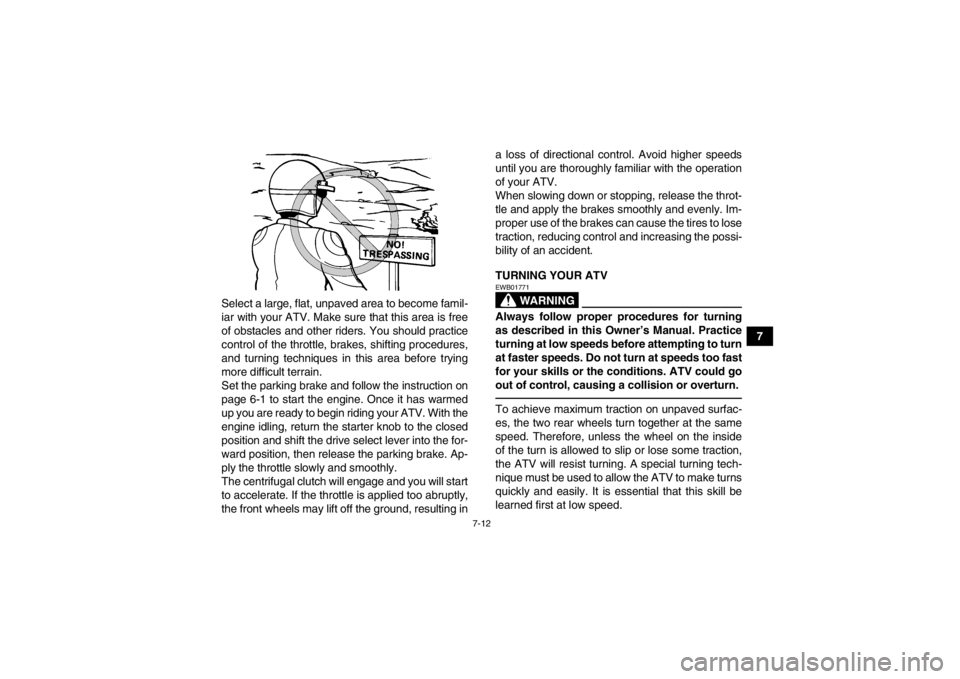
Select a large, flat, unpaved area to become famil-
iar with your ATV. Make sure that this area is free
of obstacles and other riders. You should practice
control of the throttle, brakes, shifting procedures,
and turning techniques in this area before trying
more difficult terrain.
Set the parking brake and follow the instruction on
page 6-1 to start the engine. Once it has warmed
up you are ready to begin riding your ATV. With the
engine idling, return the starter knob to the closed
position and shift the drive select lever into the for-
ward position, then release the parking brake. Ap-
ply the throttle slowly and smoothly.
The centrifugal clutch will engage and you will start
to accelerate. If the throttle is applied too abruptly,
the front wheels may lift off the ground, resulting in a loss of directional control. Avoid higher speeds
until you are thoroughly familiar with the operation
of your ATV.
When slowing down or stopping, release the throt-
tle and apply the brakes smoothly and evenly. Im-
proper use of the brakes can cause the tires to lose
traction, reducing control and increasing the possi-
bility of an accident.
TURNING YOUR ATV
WARNING
EWB01771Always follow proper procedures for turning
as described in this Owner’s Manual. Practice
turning at low speeds before attempting to turn
at faster speeds. Do not turn at speeds too fast
for your skills or the conditions. ATV could go
out of control, causing a collision or overturn.To achieve maximum traction on unpaved surfac-
es, the two rear wheels turn together at the same
speed. Therefore, unless the wheel on the inside
of the turn is allowed to slip or lose some traction,
the ATV will resist turning. A special turning tech-
nique must be used to allow the ATV to make turns
quickly and easily. It is essential that this skill be
learned first at low speed.
U1PY61E0.book Page 12 Wednesday, March 14, 2012 5:22 PM
Page 67 of 134

7-18
7
●Shift your weight to the uphill side of the
ATV.●Never attempt to turn the ATV around on any
hill until you have mastered the turning tech-
nique as described in the Owner’s Manual on
level ground. Be very careful when turning
on any hill.Traversing a sloping surface on your ATV requires
you to properly position your weight to maintain
proper balance. Be sure that you have learned the
basic riding skills on flat ground before attempting
to cross a sloping surface. Avoid slopes with slip-
pery surfaces or rough terrain that may upset your
balance.
As you travel across a slope, lean your body in the
uphill direction. It may be necessary to correct the
steering when riding on loose surfaces by pointing
the front wheels slightly uphill. When riding on
slopes, be sure not to make sharp turns either up
or down hill.
If your ATV does begin to tip over, gradually steer
in the downhill direction if there are no obstacles in
your path. As you regain proper balance, gradually
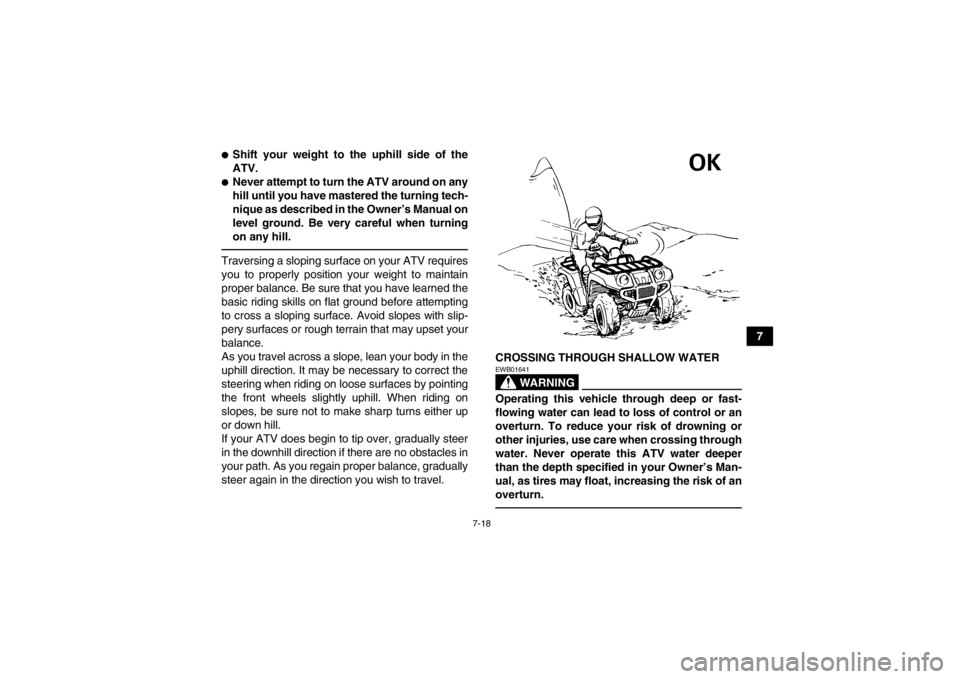
steer again in the direction you wish to travel.CROSSING THROUGH SHALLOW WATER
WARNING
EWB01641Operating this vehicle through deep or fast-
flowing water can lead to loss of control or an
overturn. To reduce your risk of drowning or
other injuries, use care when crossing through
water. Never operate this ATV water deeper
than the depth specified in your Owner’s Man-
ual, as tires may float, increasing the risk of an
overturn.
U1PY61E0.book Page 18 Wednesday, March 14, 2012 5:22 PM