brakes YAMAHA GRIZZLY 350 2013 Owners Manual
[x] Cancel search | Manufacturer: YAMAHA, Model Year: 2013, Model line: GRIZZLY 350, Model: YAMAHA GRIZZLY 350 2013Pages: 144, PDF Size: 3.33 MB
Page 8 of 144

EBU17420
TABLE OF CONTENTS
LOCATION OF THE WARNING AND
SPECIFICATION LABELS ............................ 1-1
SAFETY INFORMATION .............................. 2-1
DESCRIPTION .............................................. 3-1Left view ...................................................... 3-1
Right view.................................................... 3-1
Controls and instruments ............................ 3-2
INSTRUMENT AND CONTROL
FUNCTIONS .................................................. 4-1 Main switch ................................................ 4-1
Indicator lights and warning light ................ 4-2
Speedometer .............................................. 4-3
Handlebar switches .................................... 4-5
Throttle lever .............................................. 4-6
Speed limiter .............................................. 4-7
Front brake lever ........................................ 4-8
Brake pedal and rear brake lever ............... 4-8
Parking brake ............................................. 4-9
Drive select lever ...................................... 4-10
Fuel tank cap ............................................ 4-10
Fuel .......................................................... 4-11 Fuel cock ..................................................4-12
Starter (choke) ..........................................4-14
Seat ..........................................................4-14
Storage compartment ...............................4-15
Front carrier ..............................................4-16
Rear carrier ...............................................4-16
Adjusting the front shock absorber
assemblies ..............................................4-17
Adjusting the rear shock absorber assembly .................................................4-18
PRE-OPERATION CHECKS ..........................5-1 Fuel .............................................................5-3
Engine oil ....................................................5-3
Final gear oil ...............................................5-3
Differential gear oil ......................................5-3
Front and rear brakes .................................5-3
Throttle lever ...............................................5-4
Tires ............................................................5-4
Chassis fasteners .......................................5-6
Instruments, lights and switches .................5-6
OPERATION...................................................6-1 Starting a cold engine .................................6-1U1NS61E0.book Page 1 Tuesday, May 15, 2012 5:19 PM
Page 9 of 144

Starting a warm engine .............................. 6-3
Operating the drive select lever and driving in reverse ................................................. 6-3
Engine break-in .......................................... 6-4
Parking ....................................................... 6-5
Parking on a slope ..................................... 6-5
Accessories and loading ............................ 6-6
RIDING YOUR ATV ...................................... 7-1 GETTING TO KNOW YOUR ATV............... 7-2
RIDE WITH CARE AND GOOD JUDGMENT .............................................. 7-2
BE CAREFUL WHERE YOU RIDE ............. 7-9
TURNING YOUR ATV .............................. 7-12
CLIMBING UPHILL ................................... 7-13
RIDING DOWNHILL.................................. 7-16
CROSSING A SLOPE............................... 7-17
CROSSING THROUGH SHALLOW WATER ................................................... 7-18
RIDING OVER ROUGH TERRAIN ........... 7-21
SLIDING AND SKIDDING ......................... 7-21
WHAT TO DO IF... .................................... 7-22
WHAT TO DO... ........................................ 7-22
PERIODIC MAINTENANCE AND
ADJUSTMENT ............................................... 8-1 Owner’s manual and tool kit ....................... 8-2 Periodic maintenance chart for the
emission control system ...........................8-3
General maintenance and lubrication chart ..........................................................8-5
Checking the spark plug .............................8-9
Engine oil and oil filter cartridge ................8-11
Final gear oil .............................................8-15
Changing the differential gear oil ..............8-18
Cleaning the air filter element ...................8-19
Cleaning the spark arrester ......................8-22
V-belt cooling duct check hose .................8-24
V-belt case drain plug ...............................8-24
Adjusting the carburetor ............................8-25
Adjusting the engine idling speed .............8-25
Adjusting the throttle lever free play .........8-26
Valve clearance ........................................8-27
Adjusting the drive select lever safety system cable ...........................................8-27
Brakes .......................................................8-27
Checking the front brake pads and rear brake shoes ............................................8-27
Checking the brake fluid level ...................8-29
Changing the brake fluid ...........................8-30
Checking the front brake lever free play ...8-30
Adjusting the brake pedal height, and the brake pedal and rear brake lever free
play .........................................................8-30
U1NS61E0.book Page 2 Tuesday, May 15, 2012 5:19 PM
Page 22 of 144

2-3
2
●Always use proper procedures if you stall or roll
backwards when climbing a hill. Maintain a
steady speed when climbing a hill. If you stall or
roll backwards, follow the special procedure for
braking described in this manual. Dismount on
the uphill side or to a side if pointed straight up-
hill. Turn the ATV around and remount, following
the procedure described in this manual.●Always check for obstacles before operating in a
new area.●Never attempt to operate over large obstacles,
such as large rocks or fallen trees. Always follow
proper procedures when operating over obsta-
cles as described in this manual.●Always be careful when skidding or sliding.
Learn to safely control skidding or sliding by
practicing at low speeds and on level, smooth
terrain. On extremely slippery surfaces, such as
ice, go slowly and be very cautious in order to re-
duce the chance of skidding or sliding out of con-
trol.●Never operate an ATV in fast flowing water or in
water deeper than that recommended in this
manual. Remember that wet brakes may havereduced stopping ability. Test your brakes after
leaving water. If necessary, apply them several
times to let friction dry out the linings.
●Always be sure there are no obstacles or people
behind you when you operate in reverse. When
it is safe to proceed in reverse, go slowly.●Always use the size and type of tires specified in
this manual.●Always maintain proper tire pressure as de-
scribed in this manual.●Never exceed the stated load capacity for an
ATV. Cargo should be properly distributed and
securely attached. Reduce speed and follow in-
structions in this manual for carrying cargo or
pulling a trailer. Allow greater distance for brak-
ing.●Do not operate your ATV during darkness un-
less it is equipped with a properly functioning
headlight. Off-road riding is inherently danger-
ous and additionally, off-road trails do not have
streetlights to guide you.●Never maintain an ATV without proper knowl-
edge. Contact an authorized ATV dealer to in-
form you on basic ATV maintenance. Certain
maintenance can only be carried out by certified
staff.
U1NS61E0.book Page 3 Tuesday, May 15, 2012 5:19 PM
Page 37 of 144

4-10
4
●Always be sure you have released the park-
ing brake before you begin to ride. The brake
could overheat if you ride the ATV without re-
leasing the parking brake. You could lose
braking performance which could cause an
accident. You could also wear out the brakes
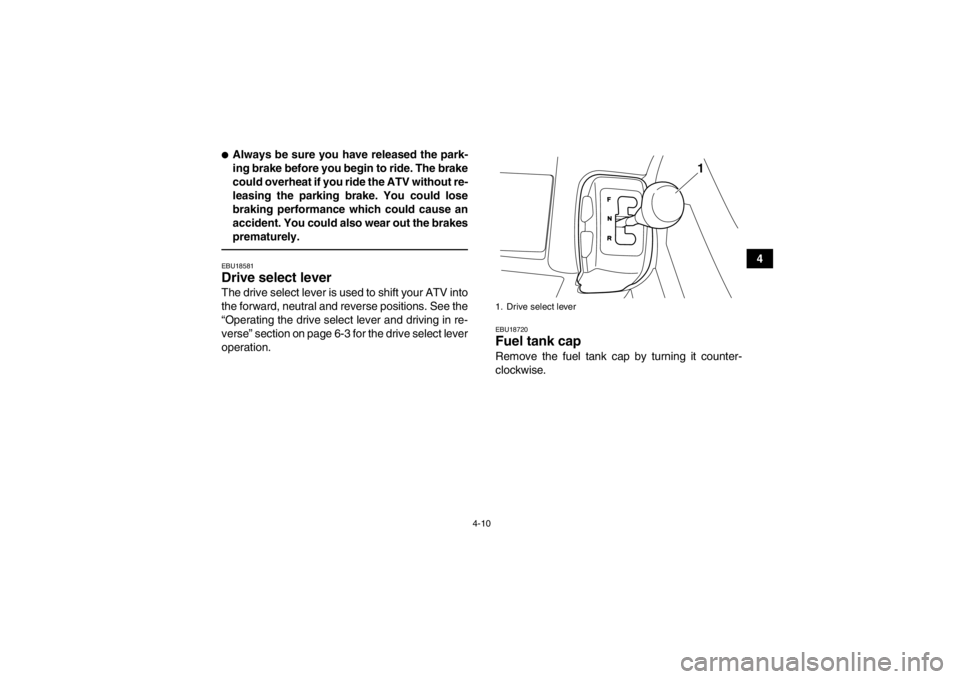
prematurely.EBU18581Drive select lever The drive select lever is used to shift your ATV into
the forward, neutral and reverse positions. See the
“Operating the drive select lever and driving in re-
verse” section on page 6-3 for the drive select lever
operation.
EBU18720Fuel tank cap Remove the fuel tank cap by turning it counter-
clockwise.1. Drive select lever
1
U1NS61E0.book Page 10 Tuesday, May 15, 2012 5:19 PM
Page 49 of 144

5-3
5
EBU19541Fuel Make sure that there is sufficient fuel in the tank.
(See page 4-11.)EBU19560Engine oil Make sure that the engine oil is at the specified lev-
el. Add oil as necessary. (See page 8-11.)EBU19590Final gear oil Make sure that the final gear oil is at the specified
level. Add oil as necessary. (See page 8-15.)EBU19600Differential gear oil Make sure that the differential gear oil is at the
specified level. Add oil as necessary. (See page
8-18.)EBU27672Front and rear brakes Brake levers and brake pedal●Check that there is no free play in the front brake
lever. If there is free play, have a Yamaha dealer
check the brake system.
●Check for correct free play in the rear brake lever
and brake pedal. If the free play is incorrect, ad-
just it. (See page 8-30.)●Check operation of the levers and pedal. They
should move smoothly and there should be a
firm feeling when the brake is applied. If not,
have a Yamaha dealer check them.
Brake fluid level (front brake)
Check the brake fluid level. Add fluid if necessary.
(See page 8-29.)
Brake fluid leakage (front brake)
Check to see if any brake fluid is leaking out of the
hose, joint or brake fluid reservoir of the front
brake. Apply the brake firmly for one minute. If the
lever moves slowly inward, there may be a leak in
the brake system. If there is any leakage, the brake
system should be checked by a Yamaha dealer. Specified brake fluid:
DOT 4
U1NS61E0.book Page 3 Tuesday, May 15, 2012 5:19 PM
Page 50 of 144

5-4
5Brake operation
Test the brakes at slow speed after starting out to
make sure they are working properly. If the brakes
do not provide proper braking performance, check
the brake pads and shoes for wear. (See page
8-27.)
EBU19761Throttle lever Check the operation of the throttle lever. It must
open smoothly and spring back to the idle position
when released. Have a Yamaha dealer correct if
necessary.EBU19814Tires Check tire pressure regularly to make sure it is at
the recommended specifications. Also check for
wear and damage.
Tire pressure
Use the low-pressure tire gauge to check and ad-
just tire pressures when the tires are cold. Tire
pressures must be equal on both sides.
WARNING! Operation of this vehicle with im- proper tire pressure may cause severe injury
or death from loss of control or rollover. Tire pressure below the minimum specified could
also cause the tire to dislodge from the rim un-
der severe riding conditions.
[EWB02541]
Set tire
pressures to the following specifications:
The low-pressure tire gauge is included as stan-
dard equipment. Make two measurements of the
tire pressure and use the second reading. Dust or
dirt in the gauge could cause the first reading to be
incorrect. Recommended tire pressure:
Fro nt25.0 kPa (0.250 kgf/cm², 3.6 psi)
Rear 25.0 kPa (0.250 kgf/cm², 3.6 psi)
Minimum tire pressure: Fro nt22.0 kPa (0.220 kgf/cm², 3.2 psi)
Rear 22.0 kPa (0.220 kgf/cm², 3.2 psi)
Maximum tire seating pressure: Fro nt250 kPa (2.5 kgf/cm², 36 psi)
Rear 250 kPa (2.5 kgf/cm², 36 psi)
U1NS61E0.book Page 4 Tuesday, May 15, 2012 5:19 PM
Page 58 of 144

6-6
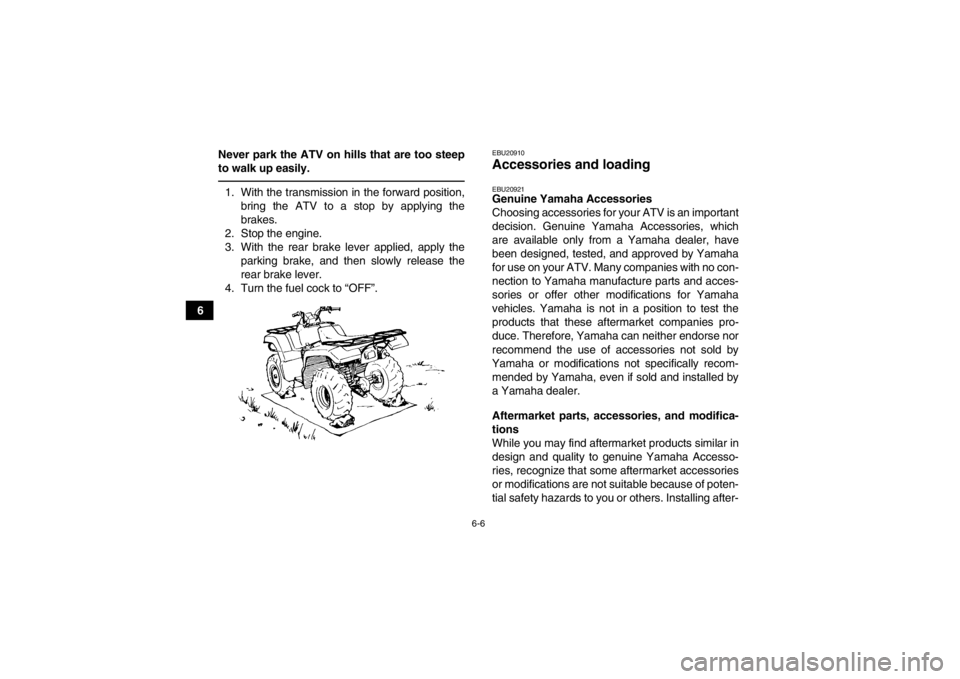
6Never park the ATV on hills that are too steep
to walk up easily.
1. With the transmission in the forward position,
bring the ATV to a stop by applying the
brakes.
2. Stop the engine.
3. With the rear brake lever applied, apply the parking brake, and then slowly release the
rear brake lever.
4. Turn the fuel cock to “OFF”.
EBU20910Accessories and loading EBU20921Genuine Yamaha Accessories
Choosing accessories for your ATV is an important
decision. Genuine Yamaha Accessories, which
are available only from a Yamaha dealer, have
been designed, tested, and approved by Yamaha
for use on your ATV. Many companies with no con-
nection to Yamaha manufacture parts and acces-
sories or offer other modifications for Yamaha
vehicles. Yamaha is not in a position to test the
products that these aftermarket companies pro-
duce. Therefore, Yamaha can neither endorse nor
recommend the use of accessories not sold by
Yamaha or modifications not specifically recom- mended by Yamaha, even if sold and installed by
a Yamaha dealer.
Aftermarket parts, accessories, and modifica-
tions
While you may find aftermarket products similar in
design and quality to genuine Yamaha Accesso-
ries, recognize that some aftermarket accessories
or modifications are not suitable because of poten-
tial safety hazards to you or others. Installing after-
U1NS61E0.book Page 6 Tuesday, May 15, 2012 5:19 PM
Page 72 of 144

7-12
7Select a large, flat, unpaved area to become famil-
iar with your ATV. Make sure that this area is free
of obstacles and other riders. You should practice
control of the throttle, brakes, and turning tech-
niques in this area before trying more difficult ter-
rain.
Set the parking brake and follow the instruction on
page 6-1 to start the engine. Once it has warmed
up you are ready to begin riding your ATV. With the
engine idling, return the starter (choke) to the
closed position, and shift the drive select lever into
the forward position, and then release the parking
brake. Apply the throttle slowly and smoothly.
The centrifugal clutch will engage and you will start
to accelerate. If the throttle is applied too abruptly,
the front wheels may lift off the ground, resulting in
a loss of directional control. Avoid higher speeds
until you are thoroughly familiar with the operation
of your ATV.
When slowing down or stopping, release the throt-
tle and apply the brakes smoothly and evenly. Im-
proper use of the brakes can cause the tires to lose
traction, reducing control and increasing the possi-
bility of an accident. TURNING YOUR ATV
WARNING
EWB01771Always follow proper procedures for turning
as described in this Owner’s Manual. Practice
turning at low speeds before attempting to turn
at faster speeds. Do not turn at speeds too fast
for your skills or the conditions. ATV could go
out of control, causing a collision or overturn.To achieve maximum traction on unpaved surfac-
es, the two rear wheels turn together at the same
speed. Therefore, unless the wheel on the inside
of the turn is allowed to slip or lose some traction,
the ATV will resist turning. A special turning tech-
nique must be used to allow the ATV to make turns
quickly and easily. It is essential that this skill be
learned first at low speed.
As you approach a curve, slow down and begin to
turn the handlebars in the desired direction. As you
do so, put your weight on the footboard to the out-
side of the turn (opposite your desired direction)
and lean your upper body into the turn. Use the
throttle to maintain an even speed through the turn.
This maneuver will let the wheel on the inside of
the turn slip slightly, allowing the ATV to make the
turn properly.
U1NS61E0.book Page 12 Tuesday, May 15, 2012 5:19 PM
Page 75 of 144

7-15
7
Do not attempt to climb hills until you have mas-
tered basic maneuvers on flat ground. Always
check the terrain carefully before attempting any
hill. In all cases avoid inclines with slippery or loose
surfaces, or obstacles that might cause you to lose
control.
To climb a hill, you need traction, momentum, and
steady throttle. For more traction and control for
climbing steeper and/or rougher slopes, select
“4WD”. Travel fast enough to maintain momentum,
but not so fast that you cannot react to changes in
the terrain as you climb.
It is important when climbing a hill to make sure
that your weight is transferred forward on the ATV.
This can be accomplished by leaning forward and,
on steeper inclines, standing on the footboards
and leaning forward over the handlebars. Whenev-
er possible, ride straight up hills.
Slow down when you reach the crest of the hill if
you cannot see clearly what is on the other side –
there could be another person, an obstacle, or a
sharp drop-off. Use common sense and remember
that some hills are too steep for you to climb or de-
scend. If you are climbing a hill and you find that you have
not properly judged your ability to make it to the
top, you should turn the ATV around while you still
have forward motion (provided you have the room
to do so) and go down the hill.
If your ATV has stalled or stopped and you believe
you can continue up the hill, restart carefully to
make sure you do not lift the front wheels which
could cause you to lose control. If you are unable
to continue up the hill, dismount the ATV on the up-
hill side. Physically turn the ATV around and then
descend the hill.
If you start to roll backwards, DO NOT apply either
brake abruptly. If you are in “2WD”, apply only the
front brake. When fully stopped, apply the rear
brake as well, and then lock the parking brake. If
you are in “4WD”, because all wheels are intercon-
nected by the drive train, applying either brake will
brake all wheels, therefore, avoid sudden applica-
tion of either the front or rear brake as the wheels
on the uphill side could come off the ground. The
ATV could easily tip over backwards. Apply both
the front and rear brakes gradually. When fully
stopped, lock the parking brake and dismount the
ATV immediately on the uphill side, or to a side if
pointed straight uphill. Turn the ATV around and
U1NS61E0.book Page 15 Tuesday, May 15, 2012 5:19 PM
Page 76 of 144

7-16
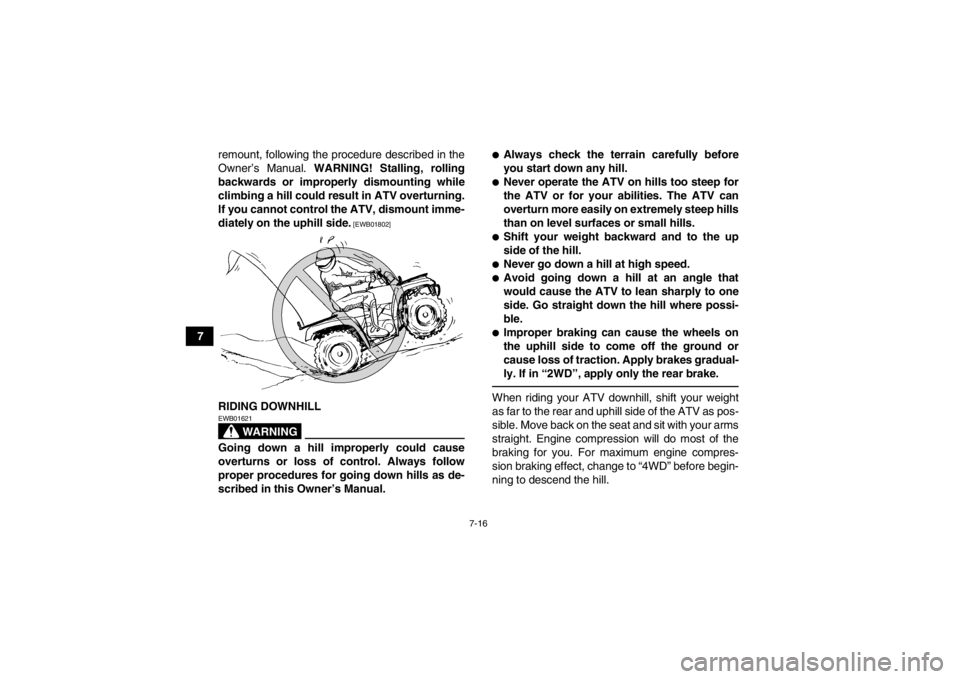
7remount, following the procedure described in the
Owner’s Manual. WARNING! Stalling, rolling
backwards or improperly dismounting while
climbing a hill could result in ATV overturning.
If you cannot control the ATV, dismount imme-
diately on the uphill side.
[EWB01802]
RIDING DOWNHILL
WARNING
EWB01621Going down a hill improperly could cause
overturns or loss of control. Always follow
proper procedures for going down hills as de-
scribed in this Owner’s Manual.
●Always check the terrain carefully before
you start down any hill.●Never operate the ATV on hills too steep for
the ATV or for your abilities. The ATV can
overturn more easily on extremely steep hills
than on level surfaces or small hills.●Shift your weight backward and to the up
side of the hill.●Never go down a hill at high speed.●Avoid going down a hill at an angle that
would cause the ATV to lean sharply to one
side. Go straight down the hill where possi-
ble.●Improper braking can cause the wheels on
the uphill side to come off the ground or
cause loss of traction. Apply brakes gradual-
ly. If in “2WD”, apply only the rear brake.When riding your ATV downhill, shift your weight
as far to the rear and uphill side of the ATV as pos-
sible. Move back on the seat and sit with your arms
straight. Engine compression will do most of the
braking for you. For maximum engine compres-
sion braking effect, change to “4WD” before begin-
ning to descend the hill.
U1NS61E0.book Page 16 Tuesday, May 15, 2012 5:19 PM