fuel YAMAHA GRIZZLY 350 2015 User Guide
[x] Cancel search | Manufacturer: YAMAHA, Model Year: 2015, Model line: GRIZZLY 350, Model: YAMAHA GRIZZLY 350 2015Pages: 146, PDF Size: 3.35 MB
Page 39 of 146

4-12
4
3. Wipe up any spilled fuel immediately. NOTICE: Immediately wipe off spilled fuel
with a clean, dry, soft cloth, since fuel may
deteriorate painted surfaces or plastic
parts.
[ECB00982]
4. Turn the fuel tank cap fully clockwise to make sure it is securely closed.
WARNING
EWB02532Gasoline is poisonous and can cause injury or
death. Handle gasoline with care. Never siphon
gasoline by mouth. If you should swallow some
gasoline or inhale a lot of gasoline vapor, or get
some gasoline in your eyes, see your doctor immediately. If gasoline spills on your skin,
wash with soap and water. If gasoline spills on
your clothing, change your clothes.
NOTICEECB00071Use only unleaded gasoline. The use of leaded
gasoline will cause severe damage to internal
engine parts, such as the valves and piston
rings, as well as to the exhaust system. Your Yamaha engine has been designed to use
regular unleaded gasoline with a research octane
number of 91 or higher (95 or higher for Europe). If
knocking (or pinging) occurs, use a gasoline of a
different brand. Use of unleaded fuel will extend
spark plug life and reduce maintenance costs.EBU18821Fuel cockThe fuel cock supplies fuel from the tank to the
carburetor while also filtering it.
The fuel cock lever positions are explained as fol-
lows and shown in the illustrations.
Recommended fuel:
Regular unleaded gasoline only
For Europe: Regular unleaded gasoline only
with a research octane number of 95 or
higher
Fuel tank capacity: 13.5 L (3.57 US gal, 2.97 Imp.gal)
Fuel reserve amount: 3.3 L (0.87 US gal, 0.73 Imp.gal)
U1NS63E0.book Page 12 Monday, March 10, 2014 9:05 AM
Page 40 of 146

4-13
4OFF
With the fuel cock lever in this position, fuel will not
flow. Always turn the fuel cock lever to this posi-
tion when the engine is not running. ON
With the fuel cock lever in this position, fuel flows
to the carburetor. Turn the fuel cock lever to this
position when starting the engine and riding.
1. Arrow mark pointing to “OFF”
1. Arrow mark pointing to “ON”
U1NS63E0.book Page 13 Monday, March 10, 2014 9:05 AM
Page 41 of 146

4-14
4
RES
This indicates reserve. With the fuel cock lever in
this position, the fuel reserve is made available.
Turn the fuel cock lever to this position if you run
out of fuel while riding. When this occurs, refuel as
soon as possible and be sure to turn the fuel cock
lever back to “ON”!
EBU18851Starter (choke) “ ”Starting a cold engine requires a richer air-fuel
mixture, which is supplied by the starter (choke).
Move the starter (choke) in direction (a) to turn on
the starter (choke). Move the starter (choke) in direction (b) to turn off
the starter (choke).
See the “Starting a cold engine” section on page
6-1 for proper operation.
EBU18882SeatTo remove the seat
Pull the seat lock lever upward and pull up the seat
at the rear.
1. Arrow mark pointing to “RES”
1. Starter (choke) “ ”
U1NS63E0.book Page 14 Monday, March 10, 2014 9:05 AM
Page 47 of 146
5-1
5
EBU19202
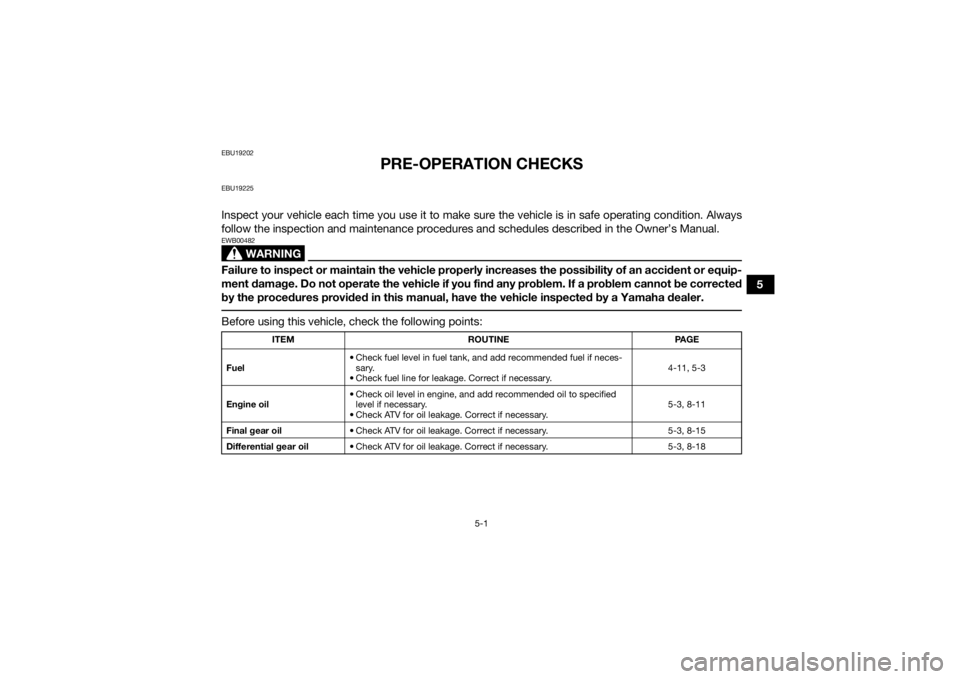
PRE-OPERATION CHECKS
EBU19225Inspect your vehicle each time you use it to make sure the vehicle is in safe operating condition. Always
follow the inspection and maintenance procedures and schedules described in the Owner’s Manual.
WARNING
EWB00482Failure to inspect or maintain the vehicle properly increases the possibility of an accident or equip-
ment damage. Do not operate the vehicle if you find any problem. If a problem cannot be corrected
by the procedures provided in this manual, have the vehicle inspected by a Yamaha dealer. Before using this vehicle, check the following points:
ITEMROUTINE PAGE
Fuel • Check fuel level in fuel tank,
and add recommended fuel if neces-
sary.
• Check fuel line for leakage. Correct if necessary. 4-11, 5-3
Engine oil • Check oil level in engine, and add recommended oil to specified
level if necessary.
• Check ATV for oil leakage. Correct if necessary. 5-3, 8-11
Final gear oil • Check ATV for oil leakage. Correct if necessary. 5-3, 8-15
Differential gear oil • Check ATV for oil leakage. Correct if necessary. 5-3, 8-18
U1NS63E0.book Page 1 Monday, March 10, 2014 9:05 AM
Page 49 of 146

5-3
5
EBU19542FuelMake sure that there is sufficient fuel in the tank.
(See page 4-11.)EBU19561Engine oilMake sure that the engine oil is at the specified
level. Add oil as necessary. (See page 8-11.)EBU19591Final gear oilMake sure that the final gear oil is at the specified
level. Add oil as necessary. (See page 8-15.)EBU19601Differential gear oilMake sure that the differential gear oil is at the
specified level. Add oil as necessary. (See page
8-18.)EBU27673Front and rear brakesBrake levers and brake pedal
Check that there is no free play in the front
brake lever. If there is free play, have a Yamaha
dealer check the brake system.
Check for correct free play in the rear brake le-
ver and brake pedal. If the free play is incorrect,
adjust it. (See page 8-31.)
Check operation of the levers and pedal. They
should move smoothly and there should be a
firm feeling when the brake is applied. If not,
have a Yamaha dealer check them.
Brake fluid level (front brake)
Check the brake fluid level. Add fluid if necessary.
(See page 8-29.)
Brake fluid leakage (front brake)
Check to see if any brake fluid is leaking out of the
hose, joint or brake fluid reservoir of the front
brake. Apply the brake firmly for one minute. If the
lever moves slowly inward, there may be a leak in
the brake system. If there is any leakage, the brake
system should be checked by a Yamaha dealer.
Brake operation
Test the brakes at slow speed after starting out to
make sure they are working properly. If the brakes
do not provide proper braking performance, Specified brake fluid:
DOT 4U1NS63E0.book Page 3 Monday, March 10, 2014 9:05 AM
Page 53 of 146
6-1
6
EBU19882
OPERATION
EBU19902Read the Owner’s Manual carefully before riding
the ATV. If there is a control or function you do not
understand, ask your Yamaha dealer.
WARNING
EWB00632Read the Owner’s Manual carefully to become
familiar with all controls in order to help pre-
vent any loss of control, which could cause an
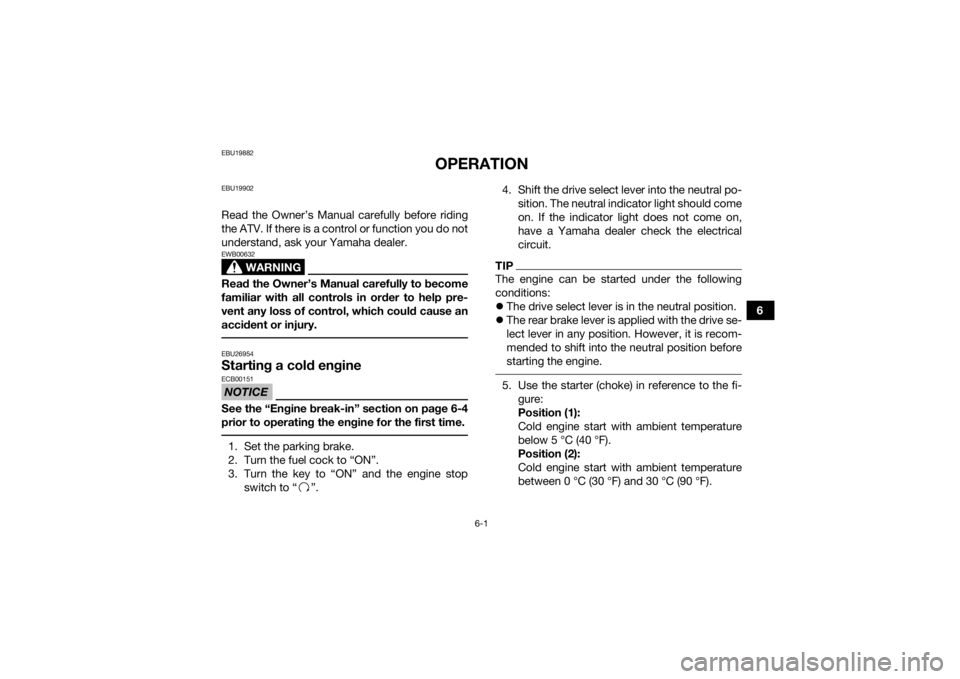
accident or injury. EBU26954Starting a cold engineNOTICEECB00151See the “Engine break-in” section on page 6-4
prior to operating the engine for the first time. 1. Set the parking brake.
2. Turn the fuel cock to “ON”.
3. Turn the key to “ON” and the engine stopswitch to “ ”. 4. Shift the drive select lever into the neutral po-
sition. The neutral indicator light should come
on. If the indicator light does not come on,
have a Yamaha dealer check the electrical
circuit.
TIPThe engine can be started under the following
conditions:
The drive select lever is in the neutral position.
The rear brake lever is applied with the drive se-
lect lever in any position. However, it is recom-
mended to shift into the neutral position before
starting the engine. 5. Use the starter (choke) in reference to the fi-
gure:
Position (1):
Cold engine start with ambient temperature
below 5 °C (40 °F).
Position (2):
Cold engine start with ambient temperature
between 0 °C (30 °F) and 30 °C (90 °F).
U1NS63E0.book Page 1 Monday, March 10, 2014 9:05 AM
Page 57 of 146
6-5
6
0–160 km (0–100 mi) or 0–10 hours
Avoid prolonged operation above 1/2 throttle.
Vary the speed of the ATV regularly. Do not oper-
ate it at one set throttle position.
160–320 km (100–200 mi) or 10–20 hours
Avoid prolonged operation above 3/4 throttle. Rev
the engine freely, but do not use full throttle at any
time.
320 km (200 mi) or 20 hours and beyond
The ATV can now be operated normally.
NOTICEECB00221If any engine trouble should occur during the
engine break-in period, immediately have a
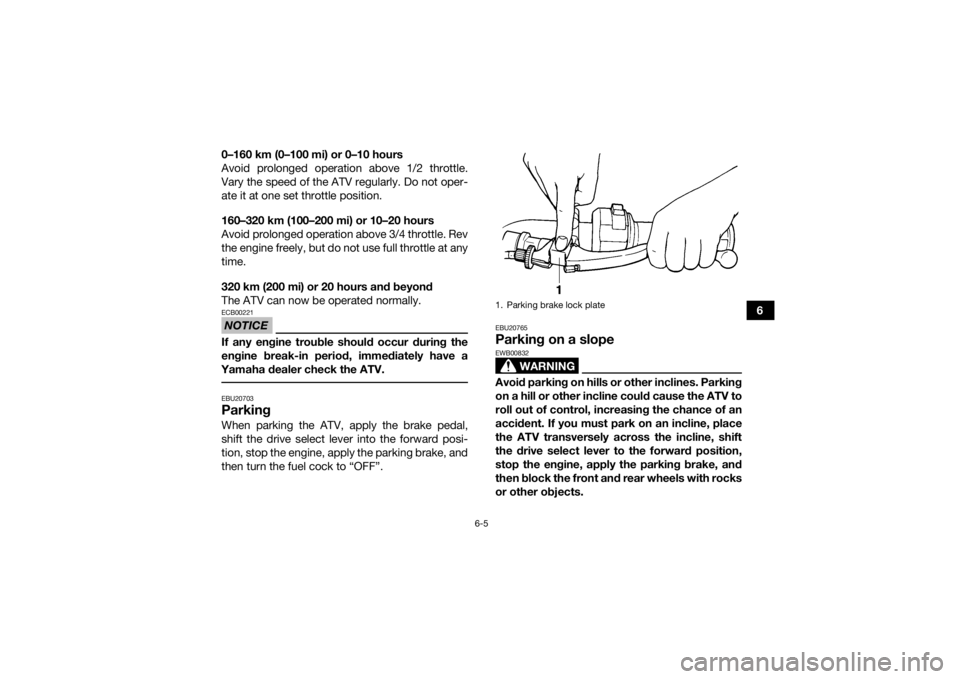
Yamaha dealer check the ATV. EBU20703ParkingWhen parking the ATV, apply the brake pedal,
shift the drive select lever into the forward posi-
tion, stop the engine, apply the parking brake, and
then turn the fuel cock to “OFF”.
EBU20765Parking on a slope
WARNING
EWB00832Avoid parking on hills or other inclines. Parking
on a hill or other incline could cause the ATV to
roll out of control, increasing the chance of an
accident. If you must park on an incline, place
the ATV transversely across the incline, shift
the drive select lever to the forward position,
stop the engine, apply the parking brake, and
then block the front and rear wheels with rocks
or other objects.1. Parking brake lock plate
U1NS63E0.book Page 5 Monday, March 10, 2014 9:05 AM
Page 58 of 146
6-6
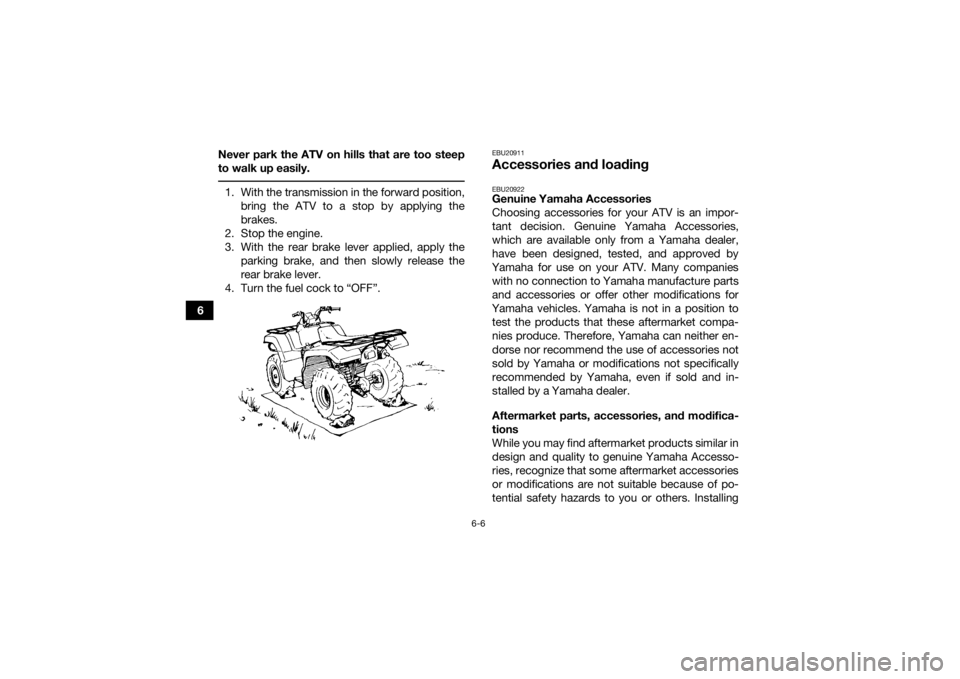
6Never park the ATV on hills that are too steep
to walk up easily.
1. With the transmission in the forward position,
bring the ATV to a stop by applying the
brakes.
2. Stop the engine.
3. With the rear brake lever applied, apply the parking brake, and then slowly release the
rear brake lever.
4. Turn the fuel cock to “OFF”.
EBU20911Accessories and loadingEBU20922Genuine Yamaha Accessories
Choosing accessories for your ATV is an impor-
tant decision. Genuine Yamaha Accessories,
which are available only from a Yamaha dealer,
have been designed, tested, and approved by
Yamaha for use on your ATV. Many companies with no connection to Yamaha manufacture parts
and accessories or offer other modifications for
Yamaha vehicles. Yamaha is not in a position to test the products that these aftermarket compa-
nies produce. Therefore, Yamaha can neither en-
dorse nor recommend the use of accessories not
sold by Yamaha or modifications not specifically
recommended by Yamaha, even if sold and in-
stalled by a Yamaha dealer.
Aftermarket parts, accessories, and modifica-
tions
While you may find aftermarket products similar in
design and quality to genuine Yamaha Accesso-
ries, recognize that some aftermarket accessories
or modifications are not suitable because of po-
tential safety hazards to you or others. Installing
U1NS63E0.book Page 6 Monday, March 10, 2014 9:05 AM
Page 86 of 146

8-3
8
EBU21745Periodic maintenance chart for the emission control systemTIPFor ATVs not equipped with an odometer or an hour meter, follow the month maintenance intervals.
For ATVs equipped with an odometer or an hour meter, follow the km (mi) or hours maintenance inter-
vals. However, keep in mind that if the ATV isn’t used for a long period of time, the month maintenance
intervals should still be followed.
Items marked with an asterisk should be performed by a Yamaha dealer as they require special tools,
data and technical skills. NO. ITEM CHECK OR MAINTENANCE
JOB INITIAL
EVERY
Whichev-
er comes first month136612
km (mi) 320
(200) 1300
(800) 2500
(1600) 2500
(1600) 5000
(3200)
hours 20 80 160 160 320
1 *Fuel line • Check fuel hoses for cracks or other damage, and
replace if necessary. √√√
2 Spark plug • Check condition and clean, regap, or replace if
necessary. √√√√√
3 *Va l ve s • Check valve clearance and adjust if necessary. √ √√√
4 *Carburetor • Check starter (choke) operation and correct if
necessary.
• Check engine idling speed and adjust if neces- sary. √√√√
5 *Crankcase breath-
er system • Check breather hose for cracks or other damage,
and replace if necessary. √√√
U1NS63E0.book Page 3 Monday, March 10, 2014 9:05 AM
Page 110 of 146
8-27
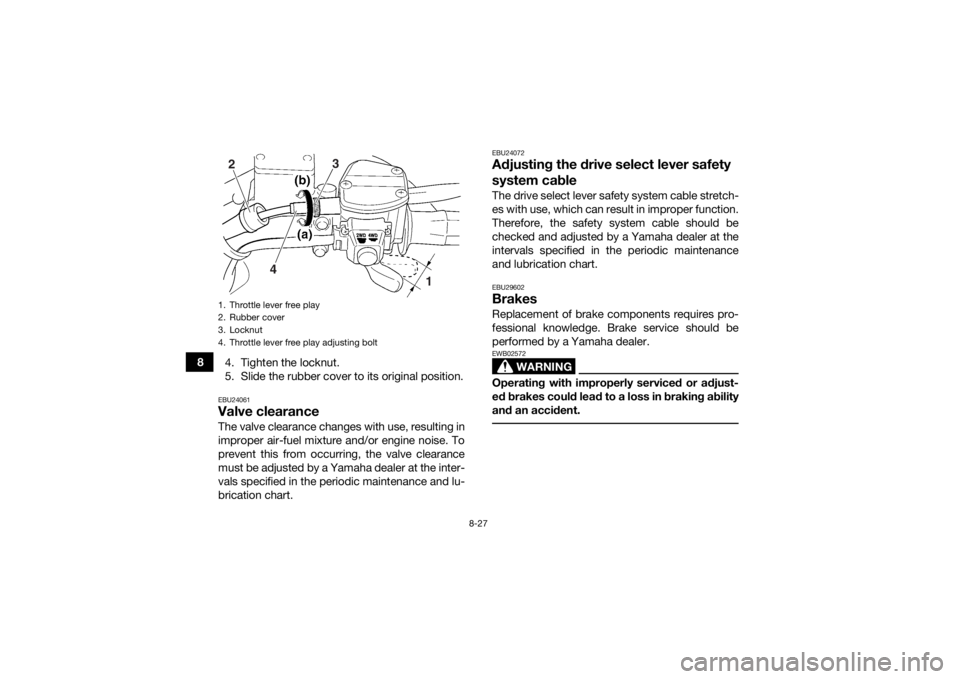
84. Tighten the locknut.
5. Slide the rubber cover to its original position.
EBU24061Valve clearanceThe valve clearance changes with use, resulting in
improper air-fuel mixture and/or engine noise. To
prevent this from occurring, the valve clearance
must be adjusted by a Yamaha dealer at the inter-
vals specified in the periodic maintenance and lu-
brication chart.
EBU24072Adjusting the drive select lever safety
system cableThe drive select lever safety system cable stretch-
es with use, which can result in improper function.
Therefore, the safety system cable should be
checked and adjusted by a Yamaha dealer at the
intervals specified in the periodic maintenance
and lubrication chart.EBU29602BrakesReplacement of brake components requires pro-
fessional knowledge. Brake service should be
performed by a Yamaha dealer.
WARNING
EWB02572Operating with improperly serviced or adjust-
ed brakes could lead to a loss in braking ability
and an accident.
1. Throttle lever free play
2. Rubber cover
3. Locknut
4. Throttle lever free play adjusting bolt2
4 3
1
U1NS63E0.book Page 27 Monday, March 10, 2014 9:05 AM