Front steering YAMAHA GRIZZLY 700 2016 Owners Manual
[x] Cancel search | Manufacturer: YAMAHA, Model Year: 2016, Model line: GRIZZLY 700, Model: YAMAHA GRIZZLY 700 2016Pages: 176, PDF Size: 4.47 MB
Page 11 of 176

Checking and lubricating the front and rear brake levers ..................................... 8-50
Checking and lubricating the brake pedal ....................................................... 8-51
Checking the wheel hub bearings............. 8-52
Checking the stabilizer bushes ................. 8-52
Lubricating the rear knuckle pivots ........... 8-52
Lubricating the steering shaft ................... 8-53
Battery....................................................... 8-54
Replacing a fuse ....................................... 8-57
Replacing a headlight bulb ....................... 8-59
Adjusting a headlight beam ...................... 8-61
Tail/brake light........................................... 8-62
Removing a wheel ..................................... 8-62
Installing a wheel....................................... 8-62
Troubleshooting ........................................ 8-64
Troubleshooting charts ............................. 8-65
CLEANING AND STORAGE ........................... 9-1 Cleaning ...................................................... 9-1
Storage........................................................ 9-2
SPECIFICATIONS ........................................ 10-1
CONSUMER INFORMATION ....................... 11-1 Identification numbers .............................. 11-1 INDEX .......................................................... 12-1
U2UD60E0.book Page 3 Tuesday, April 28, 2015 11:55 AM
Page 72 of 176

6-7
6bulky object attached to the handlebars which
could make steering difficult, an accessory that
limits your ability to move around on the seat, or
one that limits your view.
Use extra caution when riding an ATV with ac-
cessories. The ATV may handle differently than
it does without accessories.
EBU34691Loading
WARNING
EWB00821Never exceed the stated load capacity for this
ATV. Overloading this ATV or carrying or tow-
ing cargo improperly could cause changes in
ATV handling which could lead to an accident.
Cargo should be properly distributed and se-
curely attached. Reduce speed when carrying
cargo or pulling a trailer. Allow greater dis-
tance for braking. Cargo or a trailer can change the stability and han-
dling of an ATV.
You must use common sense and good judgment
when carrying cargo or towing a trailer. Keep the
following points in mind:
Never exceed the weight limits shown. An over-
loaded ATV can be unstable.
MAXIMUM LOADING LIMIT
ATV loading limit (total weight of rider, car-
go, accessories, and tongue):240.0 kg (530 lb)
Front carrier: 50.0 kg (110 lb)
Rear carrier: 90.0 kg (198 lb)
Front storage compartment: 0.5 kg (1 lb)
Center storage compartment: 4.0 kg (9 lb)
Rear storage compartment: 2.0 kg (4 lb)
Trailer hitch: Pulling load (total weight of trailer and
cargo):5880 N (600 kgf, 1322 lbf)
Tongue weight (vertical weight on trailer
hitch point): 147 N (15 kgf, 33 lbf)U2UD60E0.book Page 7 Tuesday, April 28, 2015 11:55 AM
Page 91 of 176

7-18
7
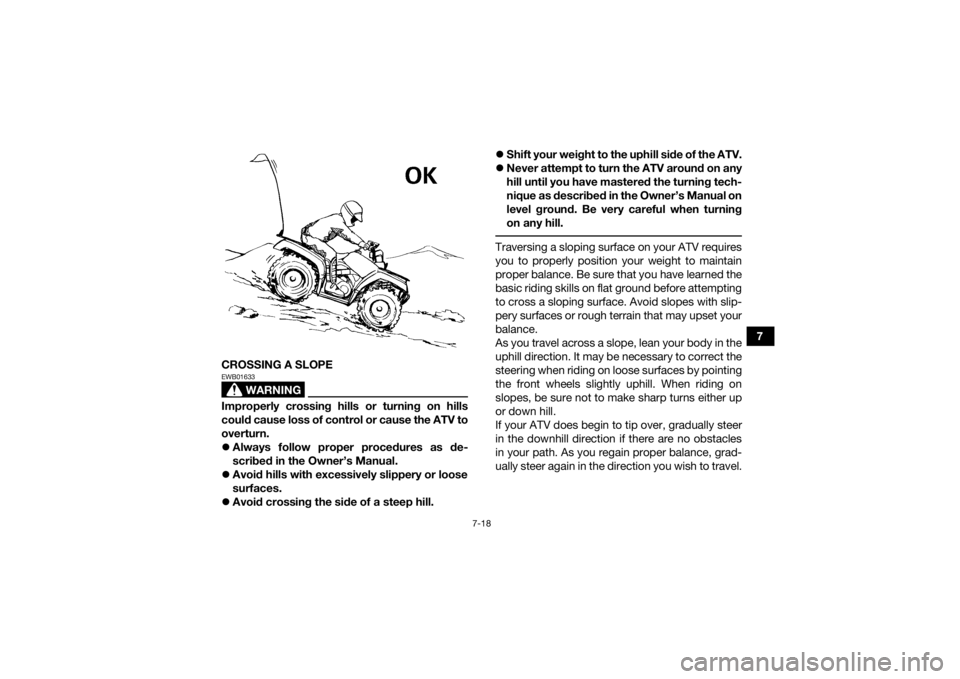
CROSSING A SLOPE
WARNING
EWB01633Improperly crossing hills or turning on hills
could cause loss of control or cause the ATV to
overturn.
Always follow proper procedures as de-
scribed in the Owner’s Manual.
Avoid hills with excessively slippery or loose
surfaces.
Avoid crossing the side of a steep hill.
Shift your weight to the uphill side of the ATV.
Never attempt to turn the ATV around on any
hill until you have mastered the turning tech-
nique as described in the Owner’s Manual on
level ground. Be very careful when turning
on any hill.
Traversing a sloping surface on your ATV requires
you to properly position your weight to maintain
proper balance. Be sure that you have learned the
basic riding skills on flat ground before attempting
to cross a sloping surface. Avoid slopes with slip-
pery surfaces or rough terrain that may upset your
balance.
As you travel across a slope, lean your body in the
uphill direction. It may be necessary to correct the
steering when riding on loose surfaces by pointing
the front wheels slightly uphill. When riding on
slopes, be sure not to make sharp turns either up
or down hill.
If your ATV does begin to tip over, gradually steer
in the downhill direction if there are no obstacles
in your path. As you regain proper balance, grad-
ually steer again in the direction you wish to travel.
U2UD60E0.book Page 18 Tuesday, April 28, 2015 11:55 AM
Page 95 of 176

7-22
7
accident. Be sure to keep your feet firmly mounted
on the footboards at all times. Avoid jumping the
ATV as loss of control and damage to the ATV may
result.
SLIDING AND SKIDDING
WARNING
EWB01663Skidding or sliding improperly may cause you
to lose control of this ATV. You may also regain
traction unexpectedly, which may cause the
ATV to overturn.
Learn to safely control skidding or sliding by
practicing at low speeds and on level,
smooth terrain.
On extremely slippery surfaces, such as ice,
go slowly and be very cautious in order to re-
duce the chance of skidding or sliding out of
control. Care should be used when riding on loose or slip-
pery surfaces since the ATV may slide. If unex-
pected and uncorrected, sliding could lead to an
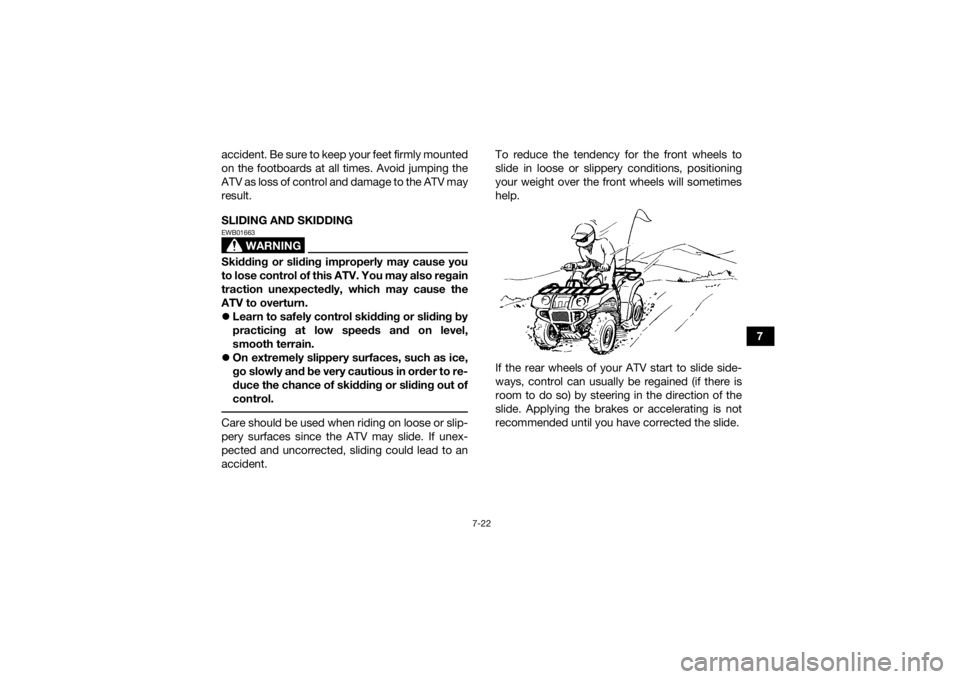
accident. To reduce the tendency for the front wheels to
slide in loose or slippery conditions, positioning
your weight over the front wheels will sometimes
help.
If the rear wheels of your ATV start to slide side-
ways, control can usually be regained (if there is
room to do so) by steering in the direction of the
slide. Applying the brakes or accelerating is not
recommended until you have corrected the slide.U2UD60E0.book Page 22 Tuesday, April 28, 2015 11:55 AM
Page 175 of 176

12-2
12
MMain switch .................................................................... 4-1
Maintenance and lubrication chart ................................ 8-5
Maintenance chart, emission control system ................ 8-3
Model label .................................................................. 11-1
Multi-function display .................................................... 4-5NNeutral indicator light ..................................................... 4-2OOn-Command differential gear lock switch ................. 4-10
On-Command four-wheel-drive switch ......................... 4-9
Override switch .............................................................. 4-8
Owner’s manual and tool kit .......................................... 8-2PPanels, removing and installing ................................... 8-10
Park indicator light ......................................................... 4-2
Parking ........................................................................... 6-5
Parking on a slope ......................................................... 6-5
Part locations ................................................................. 3-1RRear knuckle pivots, lubricating .................................. 8-52
Reverse indicator light ................................................... 4-2
Riding your ATV ............................................................. 7-1SSafety information .......................................................... 2-1
Seat .............................................................................. 4-17
Shock absorber assemblies, adjusting the front and rear ............................................................................ 4-22
Spark arrester, cleaning ............................................... 8-40
Spark plug, checking ................................................... 8-18
Specifications .............................................................. 10-1 Speed limiter ................................................................ 4-13
Stabilizer bushes, checking ..........
............................... 8-52
Starting the engine ........................................................ 6-1
Start switch .................................................................... 4-8
Steering shaft, lubricating ............................................ 8-53
Storage .......................................................................... 9-2
Storage compartments ................................................ 4-18
TTail/brake light ............................................................. 8-62
Throttle lever ......................................................... 4-13, 5-4
Throttle lever free play, adjusting ................................ 8-42
Tires ............................................................................... 5-4
Trailer hitch (YFM70GPSG / YFM70GPLG) ................. 4-23
Troubleshooting ........................................................... 8-64
Troubleshooting charts ................................................ 8-65VValve clearance ............................................................ 8-43
V-belt case drain plug .................................................. 8-42
Vehicle identification number ...................................... 11-1WWheel hub bearings, checking .................................... 8-52
Wheel, installing ........................................................... 8-62
Wheel, removing .......................................................... 8-62
U2UD60E0.book Page 2 Tuesday, April 28, 2015 11:55 AM