battery YAMAHA GRIZZLY 700 2020 Owners Manual
[x] Cancel search | Manufacturer: YAMAHA, Model Year: 2020, Model line: GRIZZLY 700, Model: YAMAHA GRIZZLY 700 2020Pages: 182, PDF Size: 7.18 MB
Page 10 of 182

Checking and lubricating the brake pedal ....................................................... 9-50
Checking the wheel hub bearings............. 9-51
Checking the stabilizer bushes ................. 9-51
Lubricating the rear knuckle pivots ........... 9-51
Lubricating the steering shaft ................... 9-52
Battery....................................................... 9-52
Replacing a fuse ....................................... 9-56
Replacing a headlight bulb ....................... 9-58
Adjusting a headlight beam ...................... 9-60
Brake/tail light ........................................... 9-61
Removing a wheel ..................................... 9-61
Installing a wheel....................................... 9-62
Troubleshooting ........................................ 9-63
Troubleshooting charts ............................. 9-64
CLEANING AND STORAGE ......................... 10-1 Cleaning .................................................... 10-1
Storage...................................................... 10-2
SPECIFICATIONS ........................................ 11-1
CONSUMER INFORMATION ....................... 12-1 Emissions Certification label (for Europe) ............................................. 12-1
INDEX ........................................................... 13-1
UBDE60E0.book Page 3 Monday, April 22, 2019 4:12 PM
Page 31 of 182
3-6
3
gerous loss of lights or engine power. Also, the
battery tends to discharge more quickly if elec-
trical accessories are added.
WARNING
EWB00073Avoid Carbon Monoxide Poisoning
All engine exhaust contains carbon monoxide,
a deadly gas. Breathing carbon monoxide can
cause headaches, dizziness, drowsiness, nau-
sea, confusion, and eventually death.
Carbon Monoxide is a colorless, odorless,
tasteless gas which may be present even if you
do not see or smell any engine exhaust. Deadly
levels of carbon monoxide can collect rapidly
and you can quickly be overcome and unable
to save yourself. Also, deadly levels of carbon
monoxide can linger for hours or days in en-
closed or poorly ventilated areas. If you experi-
ence any symptoms of carbon monoxide
poisoning, leave the area immediately, get
fresh air, and SEEK MEDICAL TREATMENT.
Do not run engine indoors. Even if you try to
ventilate engine exhaust with fans or open
windows and doors, carbon monoxide can
rapidly reach dangerous levels.
Do not run engine in poorly ventilated or par-
tially enclosed areas such as barns, garages,
or carports.
Do not run engine outdoors where engine
exhaust can be drawn into a building through
openings such as windows and doors.
UBDE60E0.book Page 6 Monday, April 22, 2019 4:12 PM
Page 32 of 182
4-1
4
EBU17681
DESCRIPTION
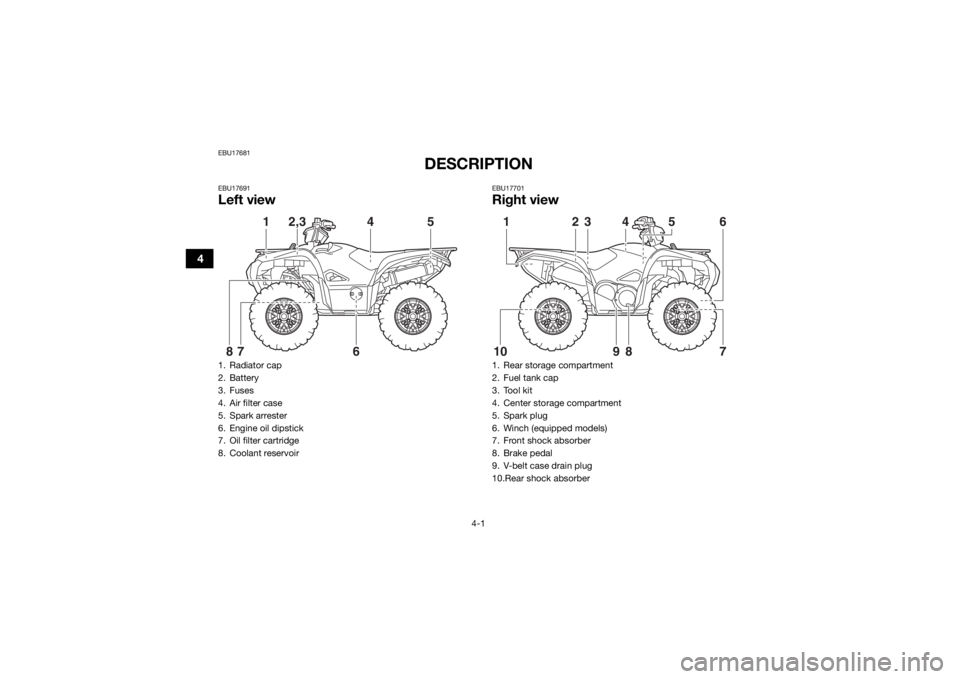
EBU17691Left view
EBU17701Right view
1. Radiator cap
2. Battery
3. Fuses
4. Air filter case
5. Spark arrester
6. Engine oil dipstick
7. Oil filter cartridge
8. Coolant reservoir
5
1
2,3
4
6
7
8
1. Rear storage compartment
2. Fuel tank cap
3. Tool kit
4. Center storage compartment
5. Spark plug
6. Winch (equipped models)
7. Front shock absorber
8. Brake pedal
9. V-belt case drain plug
10.Rear shock absorber
5
6
1
7
10
2
3
489
UBDE60E0.book Page 1 Monday, April 22, 2019 4:12 PM
Page 35 of 182
5-2
5
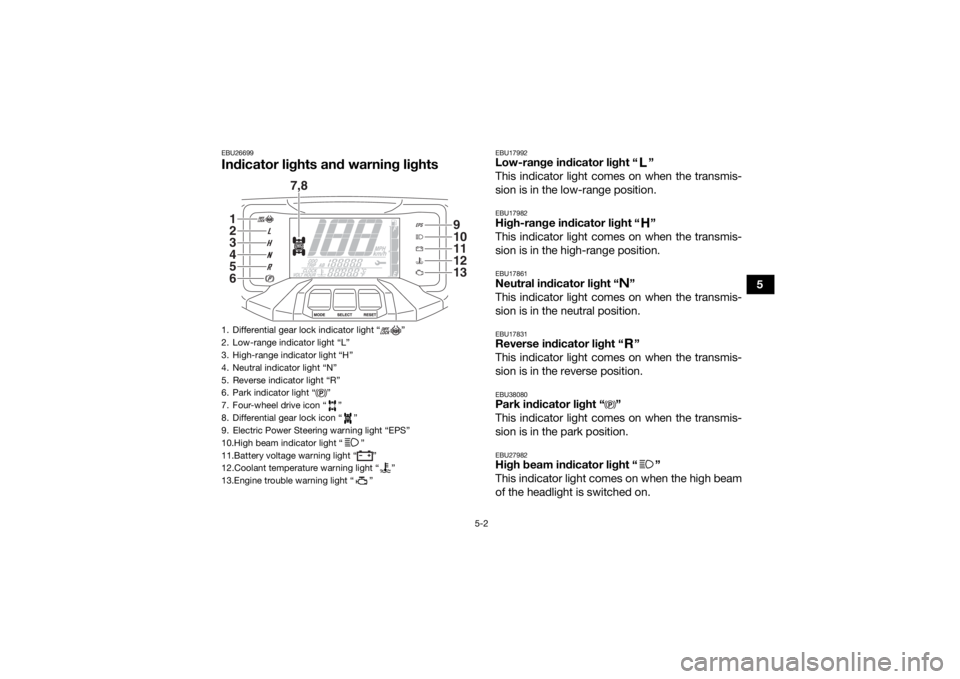
EBU26699Indicator lights and warning lights
EBU17992Low-range indicator light “ ”
This indicator light comes on when the transmis-
sion is in the low-range position.EBU17982High-range indicator light “ ”
This indicator light comes on when the transmis-
sion is in the high-range position.EBU17861Neutral indicator light “ ”
This indicator light comes on when the transmis-
sion is in the neutral position.EBU17831Reverse indicator light “ ”
This indicator light comes on when the transmis-
sion is in the reverse position.EBU38080Park indicator light “ ”
This indicator light comes on when the transmis-
sion is in the park position.EBU27982High beam indicator light “ ”
This indicator light comes on when the high beam
of the headlight is switched on.
1. Differential gear lock indicator light “ ”
2. Low-range indicator light “L”
3. High-range indicator light “H”
4. Neutral indicator light “N”
5. Reverse indicator light “R”
6. Park indicator light “ ”
7. Four-wheel drive icon “ ”
8. Differential gear lock icon “ ”
9. Electric Power Steering warning light “EPS”
10.High beam indicator light “ ”
11.Battery voltage warning light “ ”
12.Coolant temperature warning light “ ”
13.Engine trouble warning light “ ”1
7,8
23456
910111213
UBDE60E0.book Page 2 Monday, April 22, 2019 4:12 PM
Page 36 of 182
5-3
5
EBU38261Battery voltage warning light “ ”
This warning light comes on if the detected battery
voltage is less than 10 volts, or greater than 18
volts.EBU38091Coolant temperature warning light “ ”
This warning light comes on in red when the en-
gine is overheating. If the red light comes on, stop
the vehicle as soon as it is safe to do so and allow
the engine to idle for about 10 minutes. If the
warning light does not go off, stop the engine and
allow it to cool. (See page 9-65.)TIPThe coolant temperature warning light can be
checked by turning the key to “ ” (on). The
warning light should come on in purple briefly and
then go off. If the warning light does not come on
initially when the key is turned to “ ” (on), or if
the warning light remains on, have a Yamaha deal-
er check the vehicle.
NOTICEECB02040The engine may overheat if the vehicle is
overloaded. If this happens, reduce the load
to specification.
After restarting, make sure that the warning
light is out. Continuous use while this warn-
ing light is on may cause damage to the en-
gine. EBU30483Engine trouble warning light “ ”
This warning light comes on or flashes if a problem
is detected in the electrical circuit monitoring the
engine. When this occurs, the display will indicate
an error code (see page 5-10). Have a Yamaha
dealer check the self-diagnosis system.
The electrical circuit of the warning light can be
checked by turning the key to “ ” (on). The
warning light should come on for a few seconds,
and then go off.
If the warning light does not come on initially when
the key is turned to “ ” (on), or if the warning
light remains on, have a Yamaha dealer check the
vehicle.
UBDE60E0.book Page 3 Monday, April 22, 2019 4:12 PM
Page 41 of 182
5-8
5
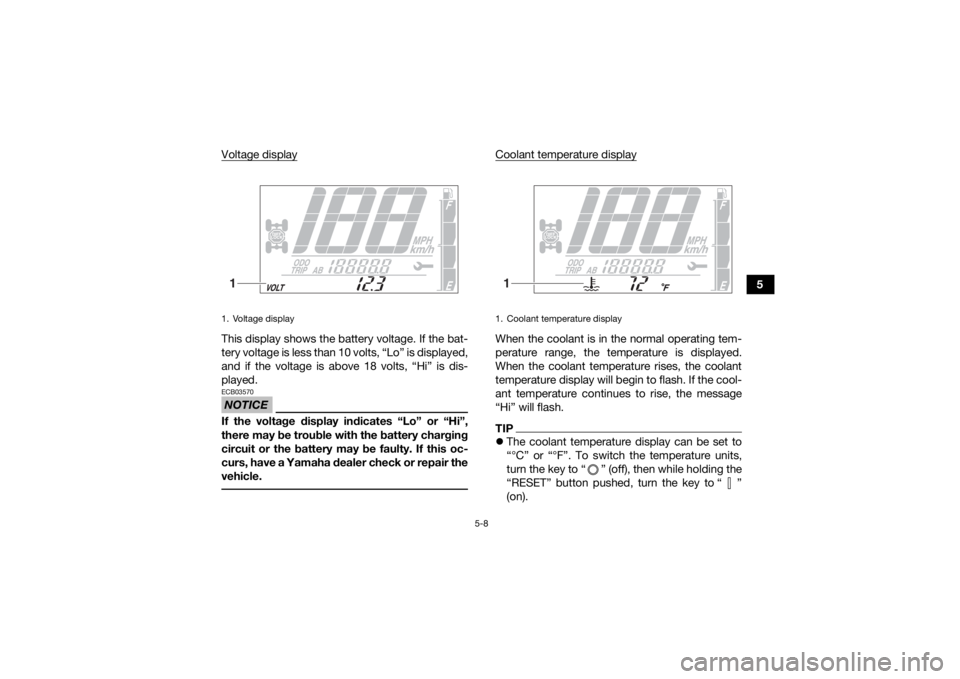
Voltage display
This display shows the battery voltage. If the bat-
tery voltage is less than 10 volts, “Lo” is displayed,
and if the voltage is above 18 volts, “Hi” is dis-
played.NOTICEECB03570If the voltage display indicates “Lo” or “Hi”,
there may be trouble with the battery charging
circuit or the battery may be faulty. If this oc-
curs, have a Yamaha dealer check or repair the
vehicle.
Coolant temperature displayWhen the coolant is in the normal operating tem-
perature range, the temperature is displayed.
When the coolant temperature rises, the coolant
temperature display will begin to flash. If the cool-
ant temperature continues to rise, the message
“Hi” will flash. TIP
The coolant temperature display can be set to
“°C” or “°F”. To switch the temperature units,
turn the key to “ ” (off), then while holding the
“RESET” button pushed, turn the key to “ ”
(on).
1. Voltage display1
1. Coolant temperature display1
UBDE60E0.book Page 8 Monday, April 22, 2019 4:12 PM
Page 45 of 182
5-12
5
EBU18102Start switch “ ”
Push this switch to crank the engine with the start-
er. See the starting instructions on page 7-1 prior
to starting the engine.EBU34123Light switch “ / /OFF”
Set this switch to “ ” to turn on the left and right
headlights (low beams) and the taillight. Set the
switch to “ ” to turn on the left and right head-
lights (high beams), the handlebar-mounted light ,
and the taillight. Set the switch to “OFF” to turn off
all the lights.NOTICEECB00046Do not use the headlights with the engine
turned off for an extended period of time. The
battery may discharge to the point that the
starter will not have enough power to crank the
engine. If this should happen, remove the bat-
tery and recharge it. (See page 9-52.) EBU18171Horn switch “ ”
Press the switch to sound the horn.
EBUM0432Winch switch “OUT/IN” (equipped models)
This switch is used when operating the winch
(page 5-28). Read this manual and the Basic
Guide to Winching Techniques completely before
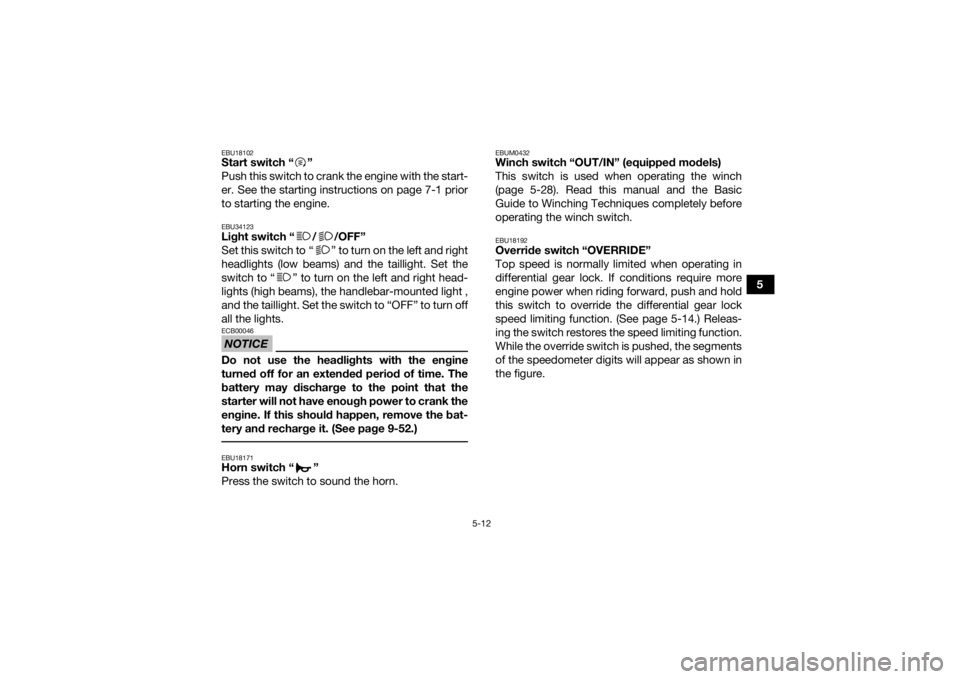
operating the winch switch.EBU18192Override switch “OVERRIDE”
Top speed is normally limited when operating in
differential gear lock. If conditions require more
engine power when riding forward, push and hold
this switch to override the differential gear lock
speed limiting function. (See page 5-14.) Releas-
ing the switch restores the speed limiting function.
While the override switch is pushed, the segments
of the speedometer digits will appear as shown in
the figure.
UBDE60E0.book Page 12 Monday, April 22, 2019 4:12 PM
Page 61 of 182
5-28
5
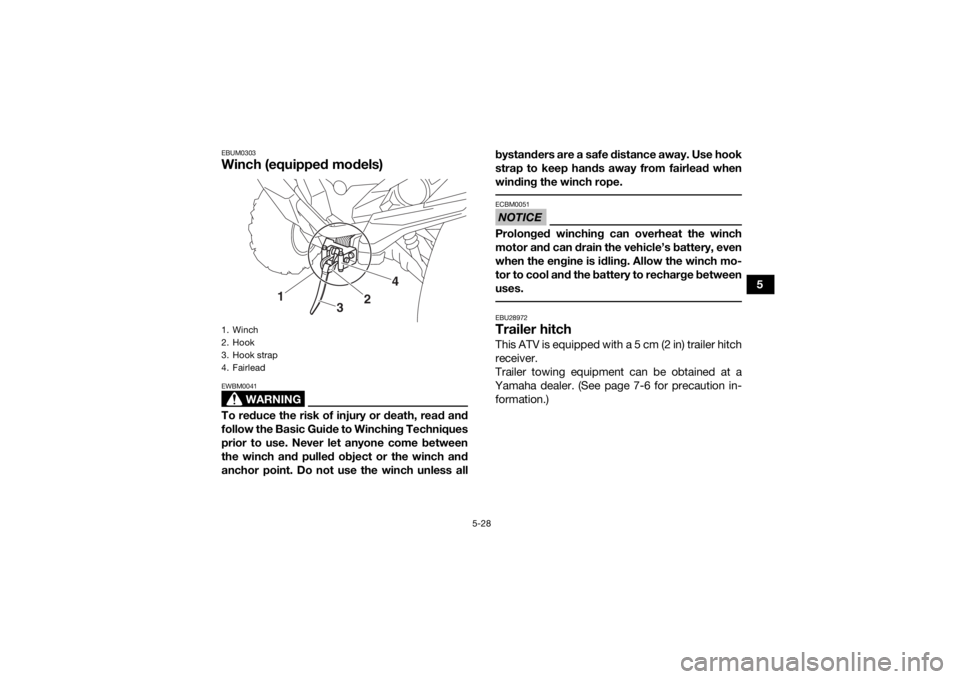
EBUM0303Winch (equipped models)
WARNING
EWBM0041To reduce the risk of injury or death, read and
follow the Basic Guide to Winching Techniques
prior to use. Never let anyone come between
the winch and pulled object or the winch and
anchor point. Do not use the winch unless allbystanders are a safe distance away. Use hook
strap to keep hands away from fairlead when
winding the winch rope.
NOTICEECBM0051Prolonged winching can overheat the winch
motor and can drain the vehicle’s battery, even
when the engine is idling. Allow the winch mo-
tor to cool and the battery to recharge between
uses. EBU28972Trailer hitch This ATV is equipped with a 5 cm (2 in) trailer hitch
receiver.
Trailer towing equipment can be obtained at a
Yamaha dealer. (See page 7-6 for precaution in- formation.)
1. Winch
2. Hook
3. Hook strap
4. Fairlead
1
3
2
4
UBDE60E0.book Page 28 Monday, April 22, 2019 4:12 PM
Page 63 of 182
5-30
5
NOTICEECB03760Do not use any single electrical accessory or
combination of accessories that require more
than the stated capacity at any one time. This
may overload the circuit and cause the fuse to
blow. TIPWhen using a winch or other electrical accesso-
ries, the power taken from the DC jack must be re-
duced accordingly. A 12-V accessory, such as a work light or radio
with the proper adapter, can be used when the
main switch is turned on. However, to prevent bat-
tery drain, use when the engine is running and the
headlights are turned off.1. Start the engine.
2. Turn the headlights off.
3. Turn the accessory off.
4. Open the auxiliary DC jack cap.
5. Insert the accessory power plug into the jack.
6. Turn the accessory on.
TIP When inserting or removing the accessory pow-
er plug, turn the accessory off.
When the auxiliary DC jack is not being used,
cover it with the cap. NOTICEECB00122If accessories are used with the engine off or
with the headlights on, the battery may dis-
charge to the point that the engine will not
start.
Do not use an automotive cigarette lighter or
other accessory with a plug that gets hot.
The DC jack may be damaged.
UBDE60E0.book Page 30 Monday, April 22, 2019 4:12 PM
Page 72 of 182
7-1
7
EBU19882
OPERATION
EBU19902Read the Owner’s Manual carefully before riding
the ATV. If there is a control or function you do not
understand, ask your Yamaha dealer.
WARNING
EWB00632Read the Owner’s Manual carefully to become
familiar with all controls in order to help pre-
vent any loss of control, which could cause an
accident or injury. EBU38120Starting the engineThis model is equipped with an ignition circuit cut-
off system. To enable starting one of the following
conditions must be met:
The drive select lever is in the neutral or park po-
sition.
The rear brake lever or brake pedal is applied.TIPIt is recommended to shift into neutral or park and
apply the rear brake when starting the engine.
NOTICEECB00151See the “Engine break-in” section on page 7-4
prior to operating the engine for the first time. To start the engine
1. Turn the key to “ ” (on) and the engine stop switch to “ ” (run).
The battery voltage warning light, the cool-
ant temperature warning light, and the en-
gine trouble warning light should come on
for a few seconds, then go off.
The electric power steering warning light
should come on and stay on until the en-
gine is started.NOTICEECB00826To avoid possible damage, do not operate the
ATV if a warning light does not work as de-
scribed above. 2. Apply the brake pedal, then shift the drive se-
lect lever into the neutral or park position. The
corresponding indicator light should come
UBDE60E0.book Page 1 Monday, April 22, 2019 4:12 PM