engine coolant YAMAHA GRIZZLY 700 2022 User Guide
[x] Cancel search | Manufacturer: YAMAHA, Model Year: 2022, Model line: GRIZZLY 700, Model: YAMAHA GRIZZLY 700 2022Pages: 176, PDF Size: 4.75 MB
Page 131 of 176
9-32
9
EBU34213To change the coolant
WARNING
EWB01891Wait for the engine and radiator to cool before
removing the radiator cap. You could be
burned by hot fluid and steam blown out under
pressure. Always place a thick rag over the cap
when opening. Allow any remaining pressure
to escape before completely removing the cap. 1. Park the ATV on a level surface.
2. Remove panels A, B, C, and D. (See page9-10.)
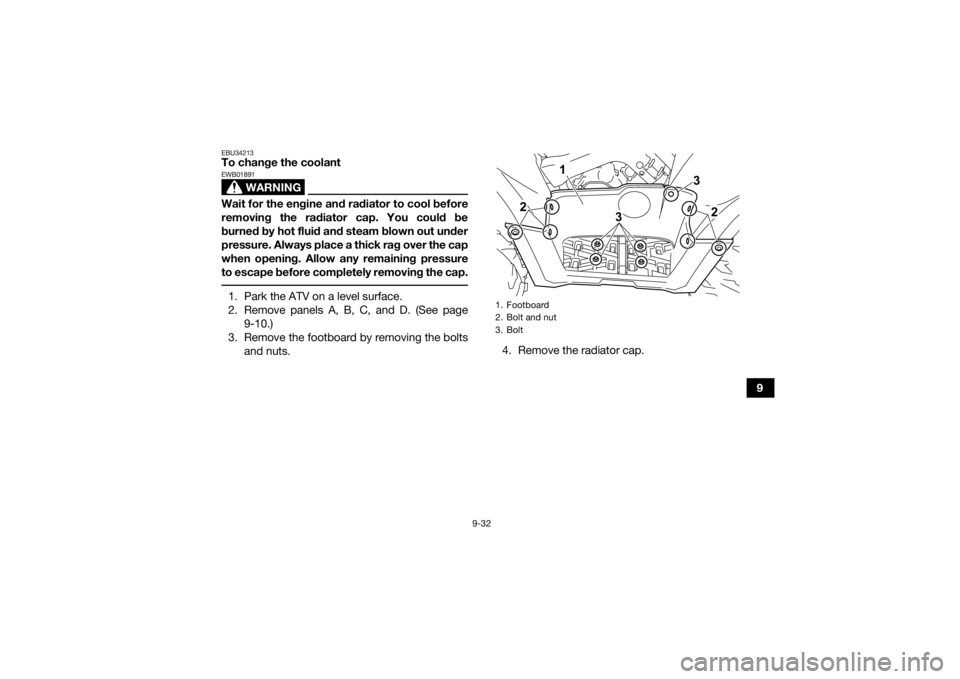
3. Remove the footboard by removing the bolts and nuts. 4. Remove the radiator cap.
1. Footboard
2. Bolt and nut
3. Bolt
3
2
2
3
1
UBLT60E0.book Page 32 Tuesday, July 13, 2021 9:16 AM
Page 132 of 176
9-33
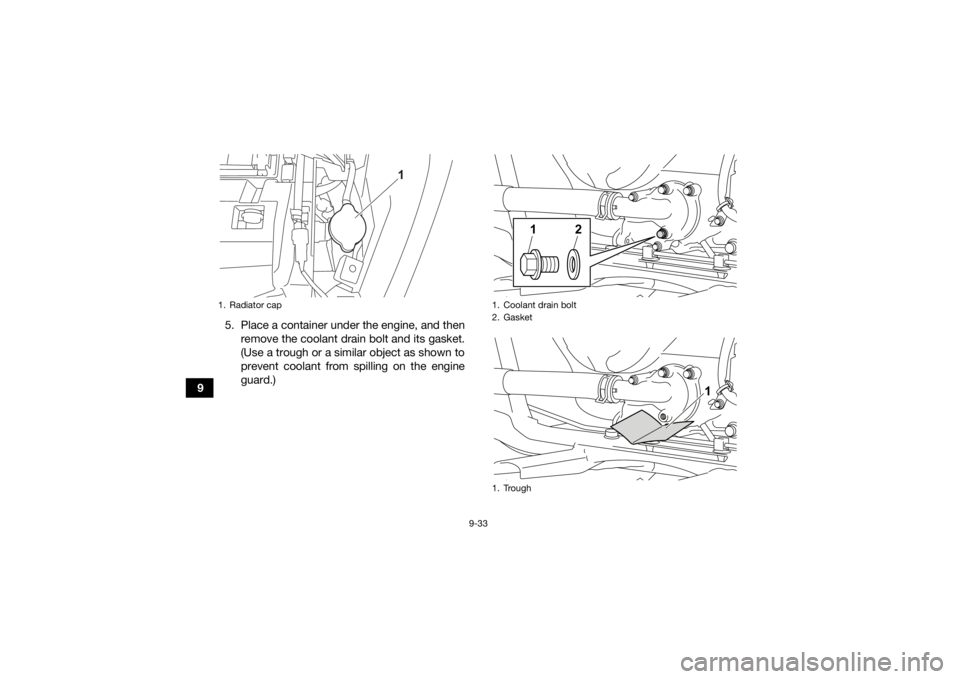
95. Place a container under the engine, and then
remove the coolant drain bolt and its gasket.
(Use a trough or a similar object as shown to
prevent coolant from spilling on the engine
guard.)
1. Radiator cap
1
1. Coolant drain bolt
2. Gasket
1. Trough
1
2
1
UBLT60E0.book Page 33 Tuesday, July 13, 2021 9:16 AM
Page 134 of 176
9-35
915. When coolant begins to flow out of the bolt
hole, tighten the water pump air bleed bolt to
the specified torque.
16. Remove panel E. (See page 9-10.)
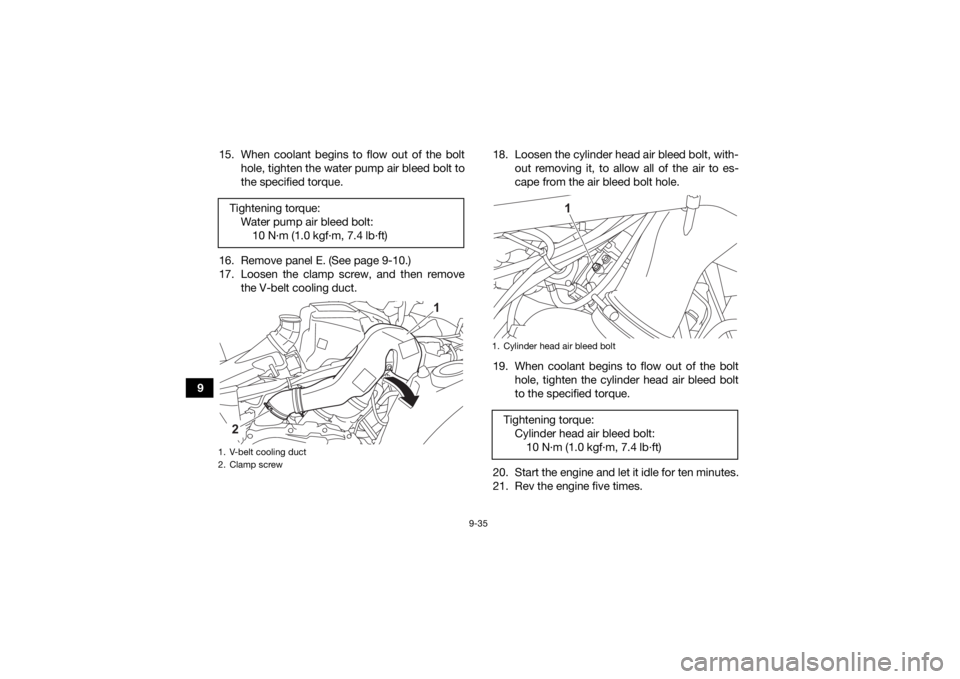
17. Loosen the clamp screw, and then remove the V-belt cooling duct. 18. Loosen the cylinder head air bleed bolt, with-
out removing it, to allow all of the air to es-
cape from the air bleed bolt hole.
19. When coolant begins to flow out of the bolt hole, tighten the cylinder head air bleed bolt
to the specified torque.
20. Start the engine and let it idle for ten minutes.
21. Rev the engine five times.
Tightening torque:
Water pump air bleed bolt:10 N·m (1.0 kgf·m, 7.4 lb·ft)
1. V-belt cooling duct
2. Clamp screw
1
2
1. Cylinder head air bleed boltTightening torque:Cylinder head air bleed boltW10 N
Page 135 of 176
9-36
9
22. Pour additional coolant into the radiator until
it is full.
23. Stop the engine and allow it to cool. If the coolant level has dropped after the engine
has cooled, add sufficient coolant until it
reaches the top of the radiator, and then in-
stall the radiator cap.
24. Start the engine, and then check for coolant leakage.
TIPIf any leakage is found, have a Yamaha dealer
check the cooling system. 25. Install the V-belt cooling duct, and then tight-en the clamp screw.
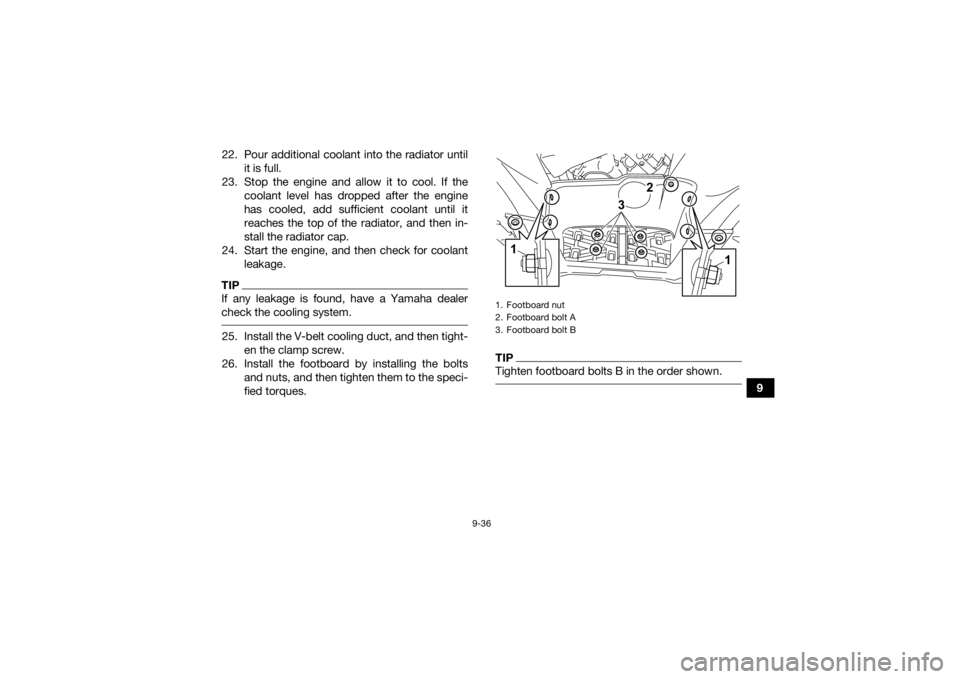
26. Install the footboard by installing the bolts and nuts, and then tighten them to the speci-
fied torques.
TIPTighten footboard bolts B in the order shown. 1. Footboard nut
2. Footboard bolt A
3. Footboard bolt B
3
1
2
1
UBLT60E0.book Page 36 Tuesday, July 13, 2021 9:16 AM
Page 164 of 176
9-65
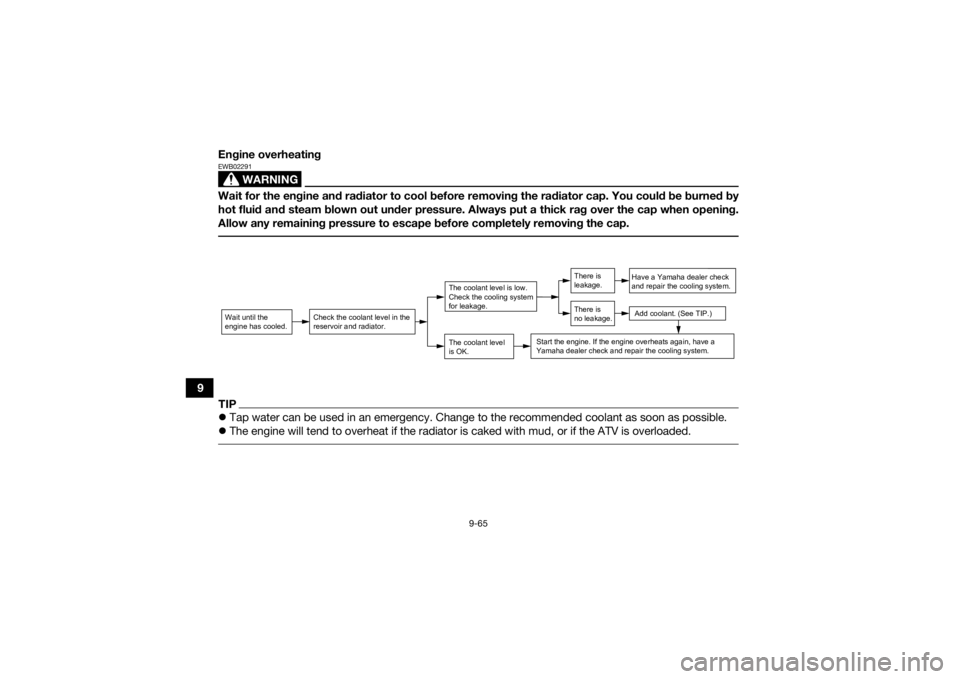
9Engine overheating
WARNING
EWB02291Wait for the engine and radiator to cool before removing the radiator cap. You could be burned by
hot fluid and steam blown out under pressure. Always put a thick rag over the cap when opening.
Allow any remaining pressure to escape before completely removing the cap. TIP
Tap water can be used in an emergency. Change to the recommended coolant as soon as possible.
The engine will tend to overheat if the radiator is caked with mud, or if the ATV is overloaded. Wait until the
engine has cooled.
Check the coolant level in the
reservoir and radiator.
The coolant level
is OK.The coolant level is low.
Check the cooling system
for leakage.
Have a Yamaha dealer check
and repair the cooling system.Add coolant. (See TIP.)
Start the engine. If the engine overheats again, have a
Yamaha dealer check and repair the cooling system.
There is
leakage.
There is
no leakage.
UBLT60E0.book Page 65 Tuesday, July 13, 2021 9:16 AM
Page 173 of 176

13-1
13
INDEX
AAccessories and loading ................................................ 7-5
Accessories, DC jack ................................................... 5-29
Air filter element, cleaning ........................................... 9-37
Axle boots .................................................................... 9-48BBattery ......................................................................... 9-52
Battery voltage warning light ......................................... 5-3
Brake fluid, changing ................................................... 9-45
Brake fluid level, checking ........................................... 9-44
Brake lever, front ......................................................... 5-17
Brake levers, checking and lubricating ........................ 9-49
Brake pads, checking the front and rear ..................... 9-43
Brake pedal and rear brake lever ................................. 5-17
Brake pedal, checking and lubricating ........................ 9-50
Brake pedal free play, adjusting .................................. 9-47
Brakes .......................................................................... 9-42
Brakes, front and rear .................................................... 6-4
Brake/tail light .............................................................. 9-61CCables, checking and lubricating ................................ 9-49
Carrier, front ................................................................. 5-26
Carrier, rear .................................................................. 5-26
Chassis fasteners .......................................................... 6-8
Cleaning ....................................................................... 10-1
Coolant .................................................................6-4, 9-29
Coolant temperature warning light ................................ 5-3DDifferential gear oil ................................................6-4, 9-27Drive select lever ......................................................... 5-18
Drive select lever and driving in reverse ........................ 7-2
EEmissions Certification label (for
Europe) .................... 12-1
Engine break-in .............................................................. 7-4
Engine oil ....................................................................... 6-4
Engine oil and oil filter cartridge .................................. 9-20
Engine stop switch ...................................................... 5-11
Engine trouble warning light .......................................... 5-3
EPS warning light .......................................................... 5-4FFinal gear oil ......................................................... 6-4, 9-25
Four-wheel drive/differential gear lock icon .................. 5-4
Four-wheel drive switch (On-Command 4WD) ............ 5-13
Front and rear brake lever free play, checking ............ 9-46
Fuel ....................................................................... 5-20, 6-4
Fuel tank cap ............................................................... 5-19
Fuses, replacing .......................................................... 9-56HHandlebar switches ..................................................... 5-11
Headlight beam, adjusting ........................................... 9-60
Headlight bulb, replacing ............................................. 9-58
High beam indicator light ............................................... 5-2
High-range indicator light .............................................. 5-2
Horn switch .................................................................. 5-12IIdentification numbers ................................................... 1-1
Indicator lights and warning lights ................................. 5-2
Instruments, lights and switches ................................... 6-8
UBLT60E0.book Page 1 Tuesday, July 13, 2021 9:16 AM