8-31 YAMAHA KODIAK 450 2006 Owners Manual
[x] Cancel search | Manufacturer: YAMAHA, Model Year: 2006, Model line: KODIAK 450, Model: YAMAHA KODIAK 450 2006Pages: 452, PDF Size: 18.89 MB
Page 304 of 452
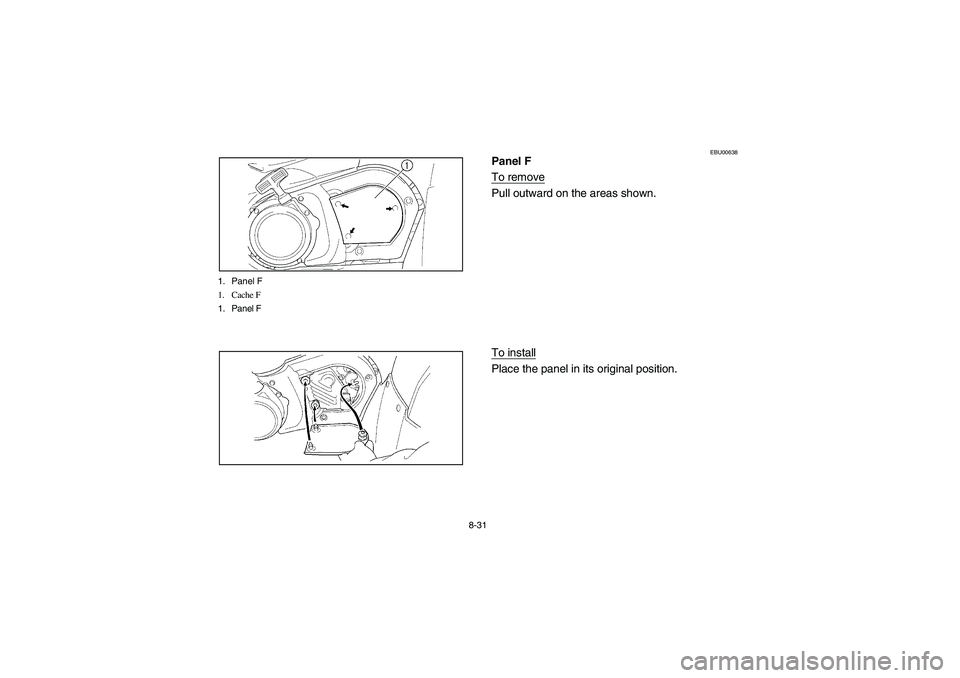
8-31 1. Panel F
1. Cache F
1. Panel F
EBU00638
Panel F
To removePull outward on the areas shown.
To installPlace the panel in its original position.
EE.book Page 31 Wednesday, May 11, 2005 1:21 PM
Page 306 of 452
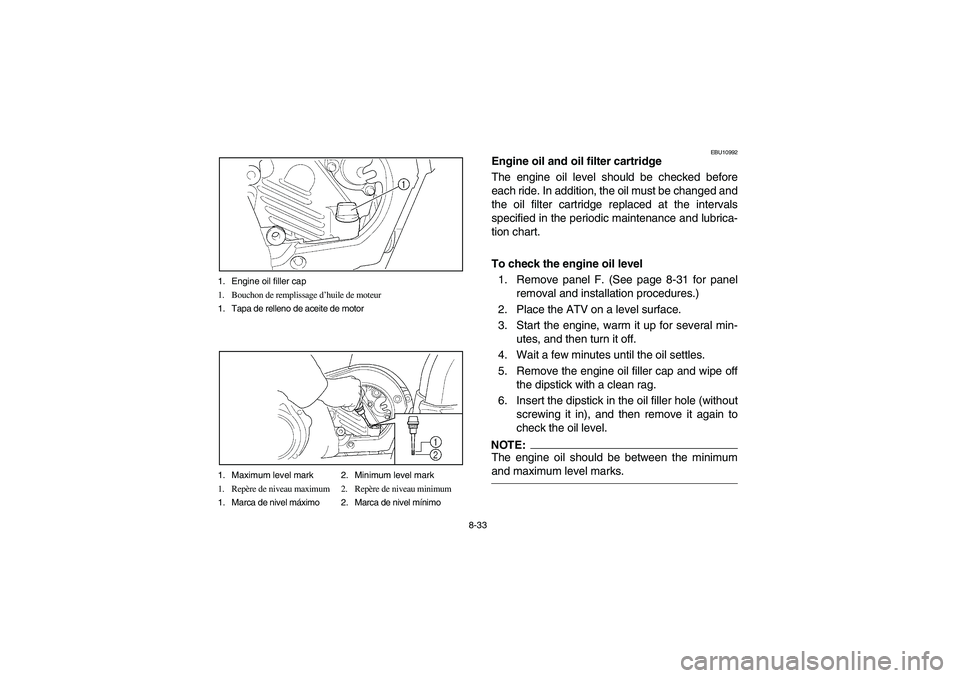
8-33 1. Engine oil filler cap
1. Bouchon de remplissage d’huile de moteur
1. Tapa de relleno de aceite de motor
1. Maximum level mark 2. Minimum level mark
1. Repère de niveau maximum 2. Repère de niveau minimum
1. Marca de nivel máximo 2. Marca de nivel mínimo
EBU10992
Engine oil and oil filter cartridge
The engine oil level should be checked before
each ride. In addition, the oil must be changed and
the oil filter cartridge replaced at the intervals
specified in the periodic maintenance and lubrica-
tion chart.
To check the engine oil level
1. Remove panel F. (See page 8-31 for panel
removal and installation procedures.)
2. Place the ATV on a level surface.
3. Start the engine, warm it up for several min-
utes, and then turn it off.
4. Wait a few minutes until the oil settles.
5. Remove the engine oil filler cap and wipe off
the dipstick with a clean rag.
6. Insert the dipstick in the oil filler hole (without
screwing it in), and then remove it again to
check the oil level.NOTE:_ The engine oil should be between the minimum
and maximum level marks. _
EE.book Page 33 Wednesday, May 11, 2005 1:21 PM
Page 308 of 452
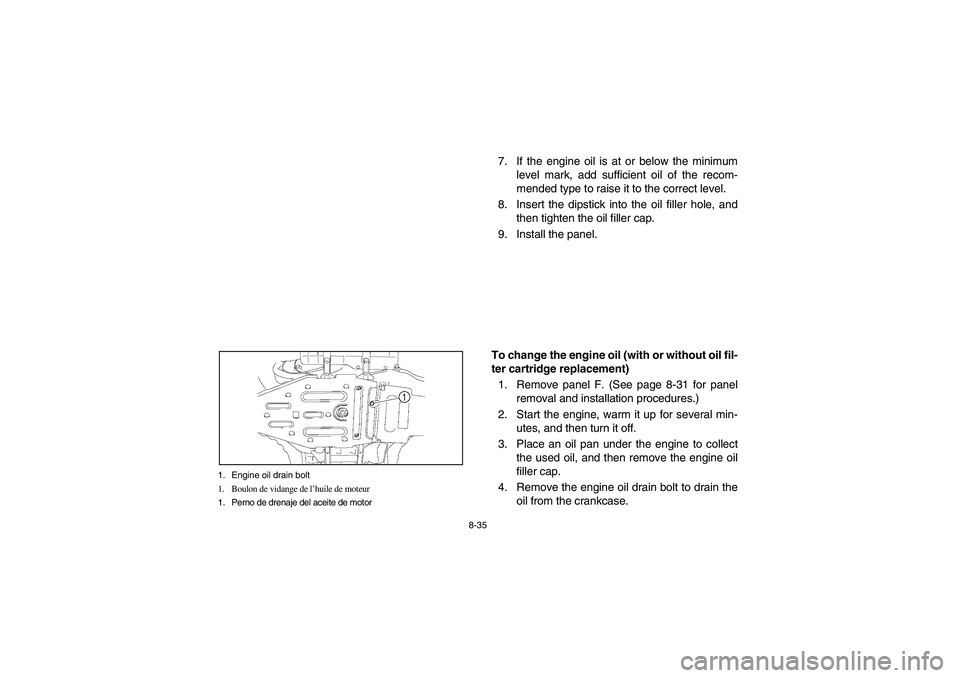
8-35 1. Engine oil drain bolt
1. Boulon de vidange de l’huile de moteur
1. Perno de drenaje del aceite de motor
7. If the engine oil is at or below the minimum
level mark, add sufficient oil of the recom-
mended type to raise it to the correct level.
8. Insert the dipstick into the oil filler hole, and
then tighten the oil filler cap.
9. Install the panel.
To change the engine oil (with or without oil fil-
ter cartridge replacement)
1. Remove panel F. (See page 8-31 for panel
removal and installation procedures.)
2. Start the engine, warm it up for several min-
utes, and then turn it off.
3. Place an oil pan under the engine to collect
the used oil, and then remove the engine oil
filler cap.
4. Remove the engine oil drain bolt to drain the
oil from the crankcase.
EE.book Page 35 Wednesday, May 11, 2005 1:21 PM
Page 334 of 452
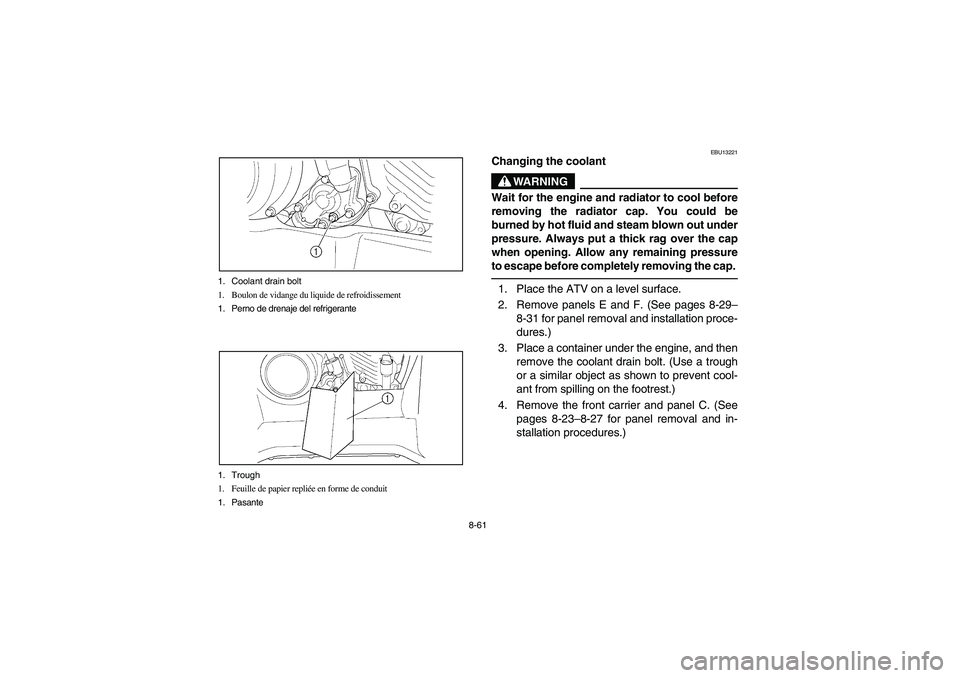
8-61 1. Coolant drain bolt
1. Boulon de vidange du liquide de refroidissement
1. Perno de drenaje del refrigerante
1. Trough
1. Feuille de papier repliée en forme de conduit
1. Pasante
EBU13221
Changing the coolant
WARNING
_ Wait for the engine and radiator to cool before
removing the radiator cap. You could be
burned by hot fluid and steam blown out under
pressure. Always put a thick rag over the cap
when opening. Allow any remaining pressure
to escape before completely removing the cap. _1. Place the ATV on a level surface.
2. Remove panels E and F. (See pages 8-29–
8-31 for panel removal and installation proce-
dures.)
3. Place a container under the engine, and then
remove the coolant drain bolt. (Use a trough
or a similar object as shown to prevent cool-
ant from spilling on the footrest.)
4. Remove the front carrier and panel C. (See
pages 8-23–8-27 for panel removal and in-
stallation procedures.)
EE.book Page 61 Wednesday, May 11, 2005 1:21 PM