key YAMAHA MT-07 2014 User Guide
[x] Cancel search | Manufacturer: YAMAHA, Model Year: 2014, Model line: MT-07, Model: YAMAHA MT-07 2014Pages: 106, PDF Size: 3.29 MB
Page 30 of 106
INSTRUMENT AND CONTROL FUNCTIONS
3-15
3
EAU12942
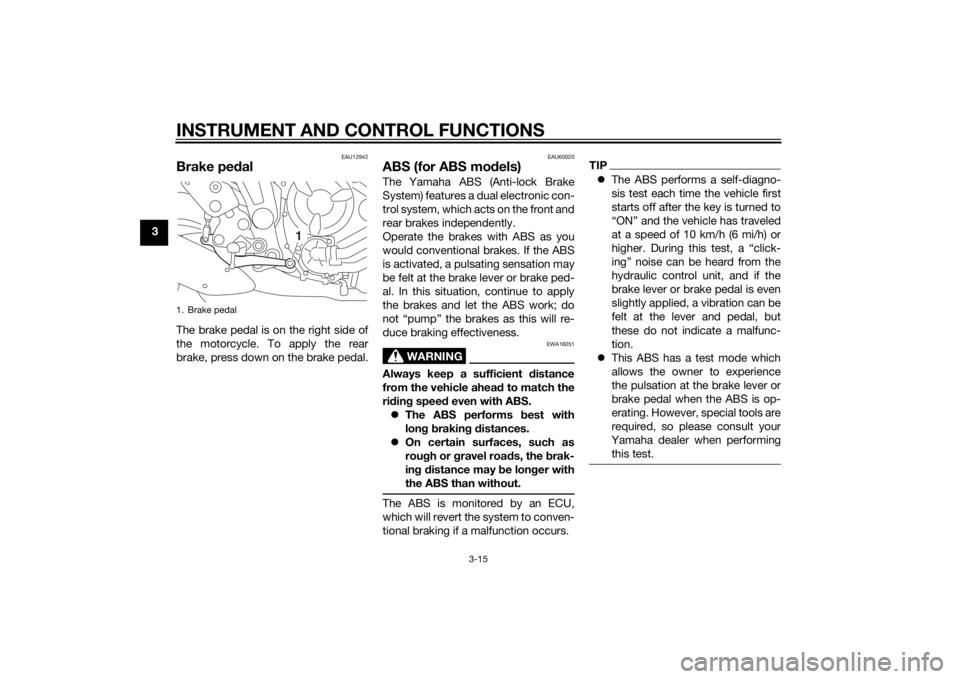
Brake pedalThe brake pedal is on the right side of
the motorcycle. To apply the rear
brake, press down on the brake pedal.
EAU60020
ABS (for ABS mo dels)The Yamaha ABS (Anti-lock Brake
System) features a dual electronic con-
trol system, which acts on the front and
rear brakes independently.
Operate the brakes with ABS as you
would conventional brakes. If the ABS
is activated, a pulsating sensation may
be felt at the brake lever or brake ped-
al. In this situation, continue to apply
the brakes and let the ABS work; do
not “pump” the brakes as this will re-
duce braking effectiveness.
WARNING
EWA16051
Always keep a sufficient distance
from the vehicle ahea d to match the
ri din g spee d even with ABS.
The ABS performs best with
lon g b rakin g d istances.
On certain surfaces, such as
rou gh or g ravel roa ds, the b rak-
in g d istance may b e longer with
the ABS than without.The ABS is monitored by an ECU,
which will revert the system to conven-
tional braking if a malfunction occurs.
TIP The ABS performs a self-diagno-
sis test each time the vehicle first
starts off after the key is turned to
“ON” and the vehicle has traveled
at a speed of 10 km/h (6 mi/h) or
higher. During this test, a “click-
ing” noise can be heard from the
hydraulic control unit, and if the
brake lever or brake pedal is even
slightly applied, a vibration can be
felt at the lever and pedal, but
these do not indicate a malfunc-
tion.
This ABS has a test mode which
allows the owner to experience
the pulsation at the brake lever or
brake pedal when the ABS is op-
erating. However, special tools are
required, so please consult your
Yamaha dealer when performing
this test.
1. Brake pedal
1
U1WSE0E0.book Page 15 Wednesday, November 13, 2013 10:28 AM
Page 31 of 106
INSTRUMENT AND CONTROL FUNCTIONS
3-16
3
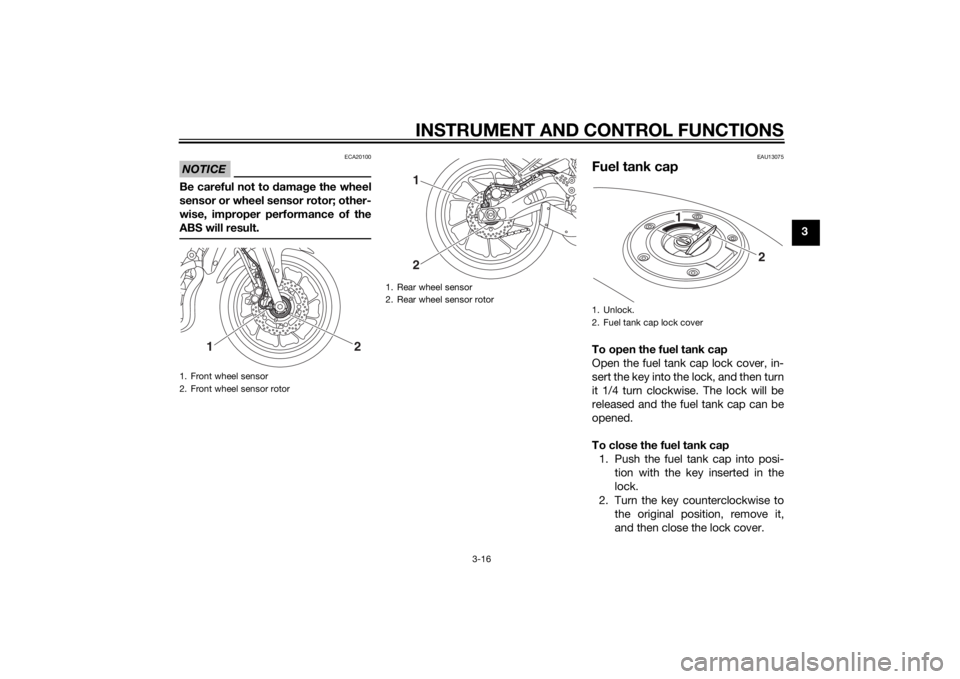
NOTICE
ECA20100
Be careful not to damage the wheel
sensor or wheel sensor rotor; other-
wise, improper performance of the
ABS will result.
EAU13075
Fuel tank capTo open the fuel tank cap
Open the fuel tank cap lock cover, in-
sert the key into the lock, and then turn
it 1/4 turn clockwise. The lock will be
released and the fuel tank cap can be
opened.
To close the fuel tank cap 1. Push the fuel tank cap into posi- tion with the key inserted in the
lock.
2. Turn the key counterclockwise to the original position, remove it,
and then close the lock cover.
1. Front wheel sensor
2. Front wheel sensor rotor
1
2
1. Rear wheel sensor
2. Rear wheel sensor rotor
12
1. Unlock.
2. Fuel tank cap lock cover
2
1
U1WSE0E0.book Page 16 Wednesday, November 13, 2013 10:28 AM
Page 32 of 106
INSTRUMENT AND CONTROL FUNCTIONS
3-17
3
TIPThe fuel tank cap cannot be closed un-
less the key is in the lock. In addition,
the key cannot be removed if the cap is
not properly closed and locked.
WARNING
EWA11092
Make sure that the fuel tank cap is
properly closed after fillin g fuel.
Leakin g fuel is a fire hazar d.
EAU13222
FuelMake sure there is sufficient gasoline in
the tank.
WARNING
EWA10882
Gasoline an d g asoline vapors are
extremely flamma ble. To avoi d fires
an d explosions an d to re duce the
risk of injury when refuelin g, follow
these instructions.1. Before refueling, turn off the en- gine and be sure that no one is sit-
ting on the vehicle. Never refuel
while smoking, or while in the vi-
cinity of sparks, open flames, or
other sources of ignition such as
the pilot lights of water heaters
and clothes dryers.
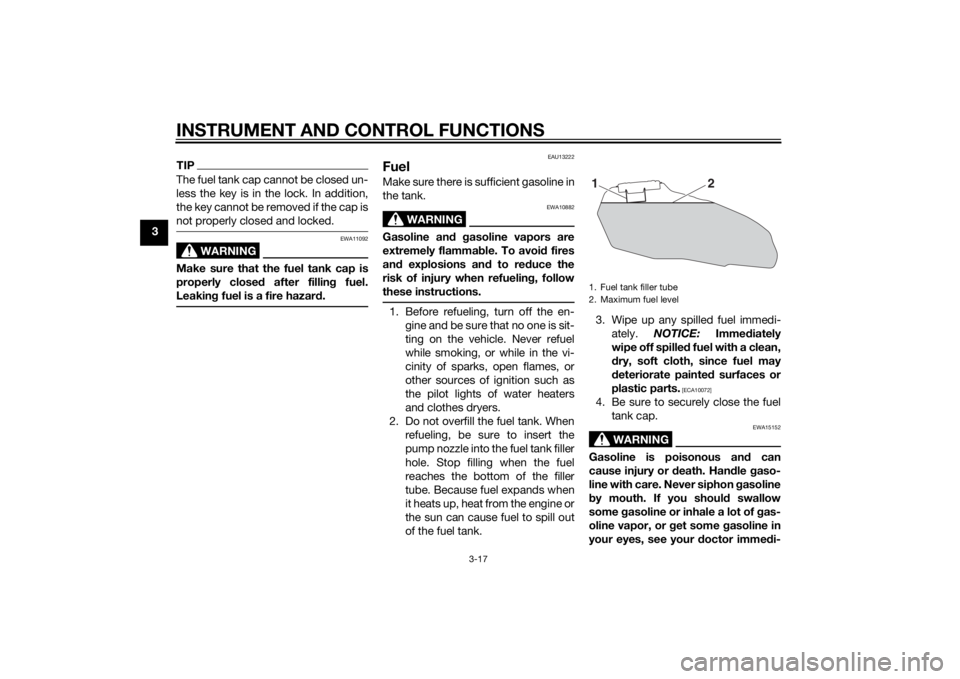
2. Do not overfill the fuel tank. When refueling, be sure to insert the
pump nozzle into the fuel tank filler
hole. Stop filling when the fuel
reaches the bottom of the filler
tube. Because fuel expands when
it heats up, heat from the engine or
the sun can cause fuel to spill out
of the fuel tank. 3. Wipe up any spilled fuel immedi-
ately. NOTICE: Immediately
wipe off spille d fuel with a clean,
d ry, soft cloth, since fuel may
d eteriorate painted surfaces or
plastic parts.
[ECA10072]
4. Be sure to securely close the fuel tank cap.
WARNING
EWA15152
Gasoline is poisonous an d can
cause injury or death. Han dle gaso-
line with care. Never siphon gasoline
b y mouth. If you shoul d swallow
some gasoline or inhale a lot of g as-
oline vapor, or g et some gasoline in
your eyes, see your doctor imme di-1. Fuel tank filler tube
2. Maximum fuel level
2
1
U1WSE0E0.book Page 17 Wednesday, November 13, 2013 10:28 AM
Page 34 of 106
INSTRUMENT AND CONTROL FUNCTIONS
3-19
3
EAU13434
Catalytic converterThis model is equipped with a catalytic
converter in the exhaust system.
WARNING
EWA10863
The exhaust system is hot after op-
eration. To prevent a fire hazard or
b urns:
Do not park the vehicle near
possi ble fire hazard s such as
g rass or other materials that
easily burn.
Park the vehicle in a place
where ped estrians or chil dren
are not likely to touch the hot
exhaust system.
Make sure that the exhaust sys-
tem has cooled down before
d oin g any maintenance work.
Do not allow the en gine to i dle
more than a few minutes. Lon g
i d lin g can cause a b uild-up of
heat.
NOTICE
ECA10702
Use only unlea ded g asoline. The use
of lead ed g asoline will cause unre-
pairab le dama ge to the catalytic
converter.
EAU59901
SeatsPassen ger seat
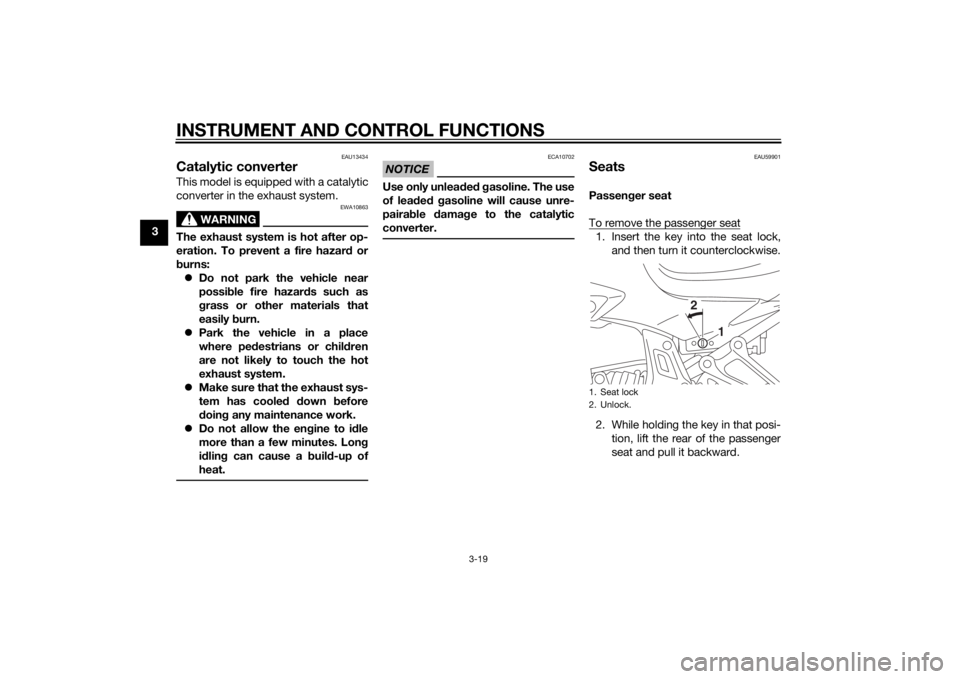
To remove the passenger seat1. Insert the key into the seat lock, and then turn it counterclockwise.
2. While holding the key in that posi- tion, lift the rear of the passenger
seat and pull it backward.1. Seat lock
2. Unlock.
1
2
U1WSE0E0.book Page 19 Wednesday, November 13, 2013 10:28 AM
Page 35 of 106
INSTRUMENT AND CONTROL FUNCTIONS
3-20
3
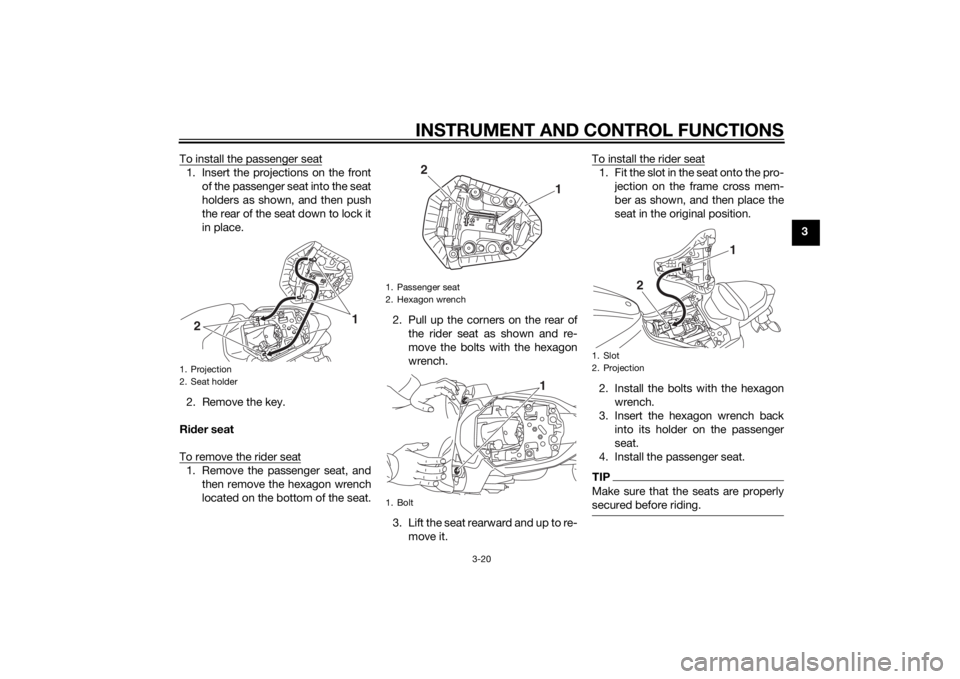
To install the passenger seat
1. Insert the projections on the front
of the passenger seat into the seat
holders as shown, and then push
the rear of the seat down to lock it
in place.
2. Remove the key.
Ri der seat
To remove the rider seat1. Remove the passenger seat, and then remove the hexagon wrench
located on the bottom of the seat. 2. Pull up the corners on the rear of
the rider seat as shown and re-
move the bolts with the hexagon
wrench.
3. Lift the seat rearward and up to re- move it. To install the rider seat
1. Fit the slot in the seat onto the pro-
jection on the frame cross mem-
ber as shown, and then place the
seat in the original position.
2. Install the bolts with the hexagon wrench.
3. Insert the hexagon wrench back into its holder on the passenger
seat.
4. Install the passenger seat.TIPMake sure that the seats are properly
secured before riding.
1. Projection
2. Seat holder
1
2
1. Passenger seat
2. Hexagon wrench
1. Bolt
1
2
1
1. Slot
2. Projection
2 1
U1WSE0E0.book Page 20 Wednesday, November 13, 2013 10:28 AM
Page 41 of 106

INSTRUMENT AND CONTROL FUNCTIONS
3-26
3
With the engine turned off:
1. Move the sidestand down.
2. Make sure that the start/engine stop switch is set to “ ”.
3. Turn the key on.
4. Shift the transmission into the neutral position.
5. Push the “ ” side of the start/engine stop switch.
Does the engine start?
With the engine still running:
6. Move the sidestand up.
7. Keep the clutch lever pulled.
8. Shift the transmission into gear.
9. Move the sidestand down.
Does the engine stall?
After the engine has stalled:
10. Move the sidestand up.
11. Keep the clutch lever pulled.
12. Push the “ ” side of the start/engine stop switch.
Does the engine start?
The system is OK. The motorcycle can be ridden.
YES NO YES NO YES NO
The neutral switch may not be working correctly.
The motorcycle should not be ridden until
checked by a Yamaha dealer.
The clutch switch may not be working correctly.
The motorcycle should not be ridden until
checked by a Yamaha dealer.The sidestand switch may not be working correctly.
The motorcycle should not be ridden until
checked by a Yamaha dealer.If a malfunction is noted, have a Yamaha
dealer check the system before riding.
WA R N I N G
U1WSE0E0.book Page 26 Wednesday, November 13, 2013 10:28 AM
Page 42 of 106
INSTRUMENT AND CONTROL FUNCTIONS
3-27
3
EAU59950
Auxiliary DC connector
WARNING
EWA12532
To prevent electrical shock or short-
circuiting, make sure that the cap is
installe d when the auxiliary DC con-
nector is not bein g use d.NOTICE
ECA20090
The accessory connecte d to the
auxiliary DC connector shoul d not
b e used with the en gine turne d off,
an d the loa d must never excee d 24
W (2 A), otherwise the fuse may b low
or the battery may dischar ge.
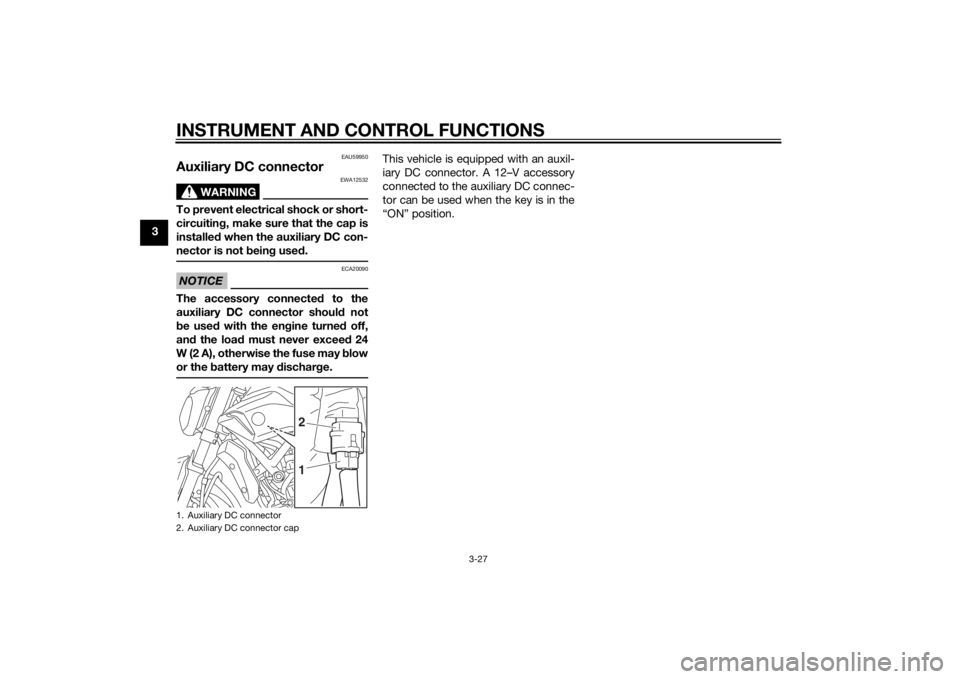
This vehicle is equipped with an auxil-
iary DC connector. A 12–V accessory
connected to the auxiliary DC connec-
tor can be used when the key is in the
“ON” position.
1. Auxiliary DC connector
2. Auxiliary DC connector cap
21
U1WSE0E0.book Page 27 Wednesday, November 13, 2013 10:28 AM
Page 46 of 106
OPERATION AND IMPORTANT RIDING POINTS
5-1
5
EAU15952
Read the Owner’s Manual carefully to
become familiar with all controls. If
there is a control or function you do not
understand, ask your Yamaha dealer.
WARNING
EWA10272
Failure to familiarize yourself with
the controls can lead to loss of con-
trol, which coul d cause an acci dent
or injury.
EAU48711
TIPThis model is equipped with: a lean angle sensor to stop the en-
gine in case of a turnover. In this
case, the multi-function display in-
dicates error code 30, but this is
not a malfunction. Turn the key to
“OFF” and then to “ON” to clear
the error code. Failing to do so will
prevent the engine from starting
even though the engine will crank
when pushing the start switch.
an engine auto-stop system. The
engine stops automatically if left
idling for 20 minutes. If the engine
stops, simply push the start
switch to restart the engine.
EAU59851
Startin g the en gineIn order for the ignition circuit cut-off
system to enable starting, one of the
following conditions must be met:
The transmission is in the neutral
position.
The transmission is in gear with
the clutch lever pulled and the
sidestand up.
See page 3-25 for more informa-
tion.
1. Turn the key to “ON” and make sure that the start/engine stop
switch is set to “ ”.
The following warning lights and
indicator light should come on for
a few seconds, then go off. Coolant temperature warning
light
Engine trouble warning light
Immobilizer system indicator
light
Oil pressure warning light
(This warning light comes on
again after going off briefly,
and then remains on until the
engine is started.)
U1WSE0E0.book Page 1 Wednesday, November 13, 2013 10:28 AM
Page 47 of 106
OPERATION AND IMPORTANT RIDING POINTS
5-2
5
NOTICE
ECA20790
If the a bove warnin g or in dicator
li g hts do not come on initially
when the key is turne d to “ON”,
or if a warnin g or in dicator li ght
(except the oil pressure warnin g
li g ht) remains on, see pa ge 3-3
for the correspon din g warnin g
an d in dicator li ght circuit check.
After goin g off once, the oil
pressure warnin g lig ht will
come back on until the en gine is
starte d. If the warnin g lig ht does
not come on, or if the warnin g
li g ht does not go off after start-
in g the en gine, see pag e 3-3 for
the en gine oil pressure warnin g
li g ht circuit check.
For ABS models:The ABS warning light should
come on when the key is turned to
“ON”, and then go off after travel-
ing at a speed of 10 km/h (6 mi/h)
or higher.
NOTICE
ECA17682
If the ABS warnin g li ght does not
come on an d then g o off as ex-
plaine d a bove, see pa ge 3-3 for the
warnin g li ght circuit check.2. Shift the transmission into the
neutral position. The neutral indi-
cator light should come on. If not,
ask a Yamaha dealer to check the
electrical circuit.
3. Start the engine by pushing the “ ” side of the start/engine
stop switch.
If the engine fails to start, release
the start/engine stop switch, wait
a few seconds, and then try again.
Each starting attempt should be
as short as possible to preserve
the battery. Do not crank the en-
gine more than 10 seconds on any
one attempt.NOTICE
ECA11043
For maximum en gine life, never ac-
celerate har d when the en gine is
col d!
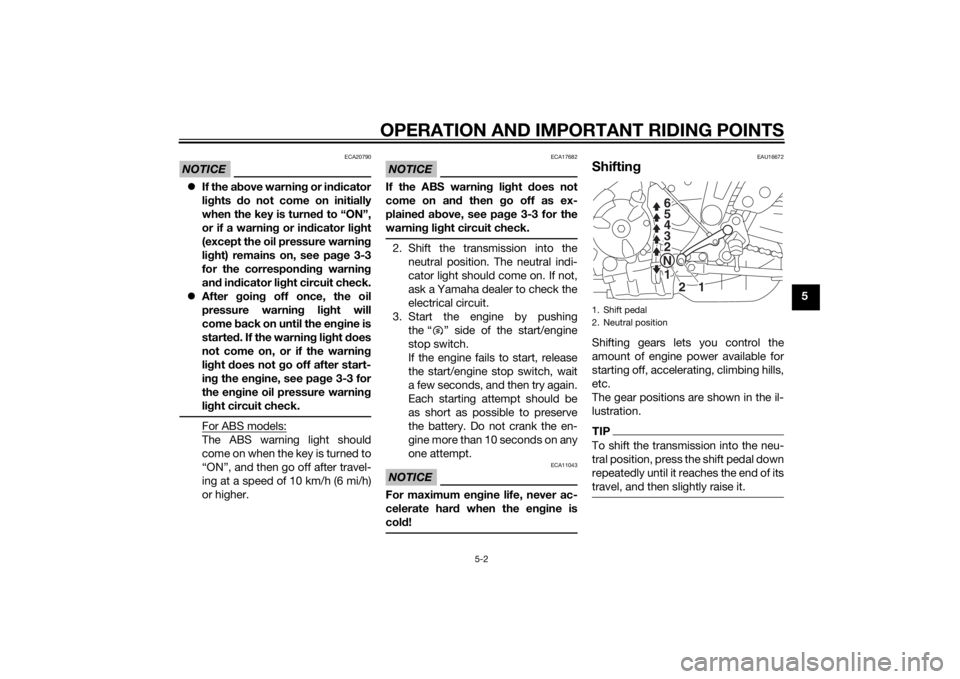
EAU16672
Shiftin gShifting gears lets you control the
amount of engine power available for
starting off, accelerating, climbing hills,
etc.
The gear positions are shown in the il-
lustration.TIPTo shift the transmission into the neu-
tral position, press the shift pedal down
repeatedly until it reaches the end of its
travel, and then slightly raise it.1. Shift pedal
2. Neutral position
1
N
2 3 4 5
6
1
2
U1WSE0E0.book Page 2 Wednesday, November 13, 2013 10:28 AM
Page 49 of 106

OPERATION AND IMPORTANT RIDING POINTS
5-4
5
1600 km (1000 mi) an
d b eyon d
The vehicle can now be operated nor-
mally.
NOTICE
ECA10311
Keep the en gine speed out of
the tachometer re d zone.
If any en gine trou ble shoul d oc-
cur durin g the en gine break-in
period , imme diately have a
Yamaha dealer check the vehi-
cle.
EAU17214
Parkin gWhen parking, stop the engine, and
then remove the key from the main
switch.
WARNING
EWA10312
Since the en gine an d exhaust
system can b ecome very hot,
park in a place where ped estri-
ans or chil dren are not likely to
touch them an d b e burne d.
Do not park on a slope or on soft
groun d, otherwise the vehicle
may overturn, increasin g the
risk of a fuel leak an d fire.
Do not park near grass or other
flamma ble materials which
mi ght catch fire.
U1WSE0E0.book Page 4 Wednesday, November 13, 2013 10:28 AM