lock YAMAHA MT-07 2014 User Guide
[x] Cancel search | Manufacturer: YAMAHA, Model Year: 2014, Model line: MT-07, Model: YAMAHA MT-07 2014Pages: 106, PDF Size: 3.29 MB
Page 32 of 106
INSTRUMENT AND CONTROL FUNCTIONS
3-17
3
TIPThe fuel tank cap cannot be closed un-
less the key is in the lock. In addition,
the key cannot be removed if the cap is
not properly closed and locked.
WARNING
EWA11092
Make sure that the fuel tank cap is
properly closed after fillin g fuel.
Leakin g fuel is a fire hazar d.
EAU13222
FuelMake sure there is sufficient gasoline in
the tank.
WARNING
EWA10882
Gasoline an d g asoline vapors are
extremely flamma ble. To avoi d fires
an d explosions an d to re duce the
risk of injury when refuelin g, follow
these instructions.1. Before refueling, turn off the en- gine and be sure that no one is sit-
ting on the vehicle. Never refuel
while smoking, or while in the vi-
cinity of sparks, open flames, or
other sources of ignition such as
the pilot lights of water heaters
and clothes dryers.
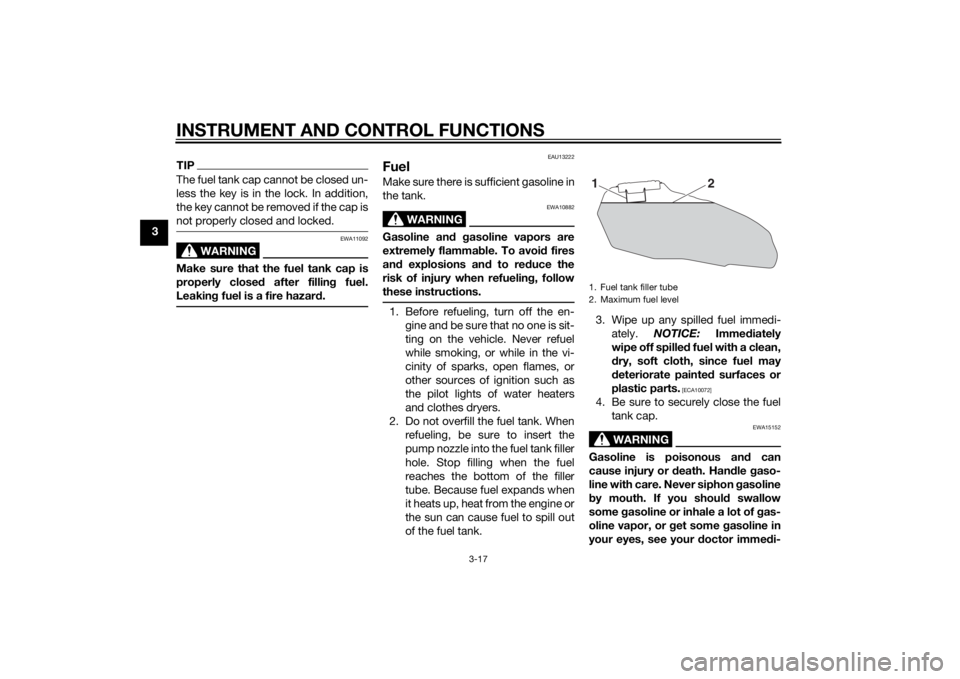
2. Do not overfill the fuel tank. When refueling, be sure to insert the
pump nozzle into the fuel tank filler
hole. Stop filling when the fuel
reaches the bottom of the filler
tube. Because fuel expands when
it heats up, heat from the engine or
the sun can cause fuel to spill out
of the fuel tank. 3. Wipe up any spilled fuel immedi-
ately. NOTICE: Immediately
wipe off spille d fuel with a clean,
d ry, soft cloth, since fuel may
d eteriorate painted surfaces or
plastic parts.
[ECA10072]
4. Be sure to securely close the fuel tank cap.
WARNING
EWA15152
Gasoline is poisonous an d can
cause injury or death. Han dle gaso-
line with care. Never siphon gasoline
b y mouth. If you shoul d swallow
some gasoline or inhale a lot of g as-
oline vapor, or g et some gasoline in
your eyes, see your doctor imme di-1. Fuel tank filler tube
2. Maximum fuel level
2
1
U1WSE0E0.book Page 17 Wednesday, November 13, 2013 10:28 AM
Page 33 of 106

INSTRUMENT AND CONTROL FUNCTIONS
3-18
3
ately. If g
asoline spills on your skin,
wash with soap an d water. If gaso-
line spills on your clothin g, chan ge
your clothes.
EAU58110
NOTICE
ECA11401
Use only unlea ded g asoline. The use
of lead ed g asoline will cause severe
d amag e to internal en gine parts,
such as the valves an d piston rin gs,
as well as to the exhaust system.Your Yamaha engine has been de-
signed to use premium unleaded gas-
oline with a research octane number of
95 or higher. If knocking (or pinging)
occurs, use a gasoline of a different brand. Use of unleaded fuel will extend
spark plug life and reduce mainte-
nance costs.
Gasohol
There are two types of gasohol: gaso-
hol containing ethanol and that con-
taining methanol. Gasohol containing
ethanol can be used if the ethanol con-
tent does not exceed 10% (E10). Gas-
ohol containing methanol is not
recommended by Yamaha because it
can cause damage to the fuel system
or vehicle performance problems.
EAU55512
Fuel tank
breather hose an d
overflow hoseBefore operating the motorcycle:
Check each hose connection.
Check each hose for cracks or
damage, and replace if necessary.
Make sure that the end of each
hose is not blocked, and clean if
necessary.
Make sure that each hose is rout-
ed through the clamp.
Make sure that the paint mark on
each hose is below the clamp.
Recommen ded fuel:
Premium unleaded gasoline (Gaso-
hol (E10) acceptable)
Fuel tank capacity:
14 L (3.70 US gal, 3.08 Imp.gal)
Fuel reserve amount: 2.7 L (0.71 US gal, 0.59 Imp.gal)
1. Fuel tank overflow hose
2. Fuel tank breather hose
3. Clamp
4. Original position (paint mark)
1
23
4
U1WSE0E0.book Page 18 Wednesday, November 13, 2013 10:28 AM
Page 34 of 106
INSTRUMENT AND CONTROL FUNCTIONS
3-19
3
EAU13434
Catalytic converterThis model is equipped with a catalytic
converter in the exhaust system.
WARNING
EWA10863
The exhaust system is hot after op-
eration. To prevent a fire hazard or
b urns:
Do not park the vehicle near
possi ble fire hazard s such as
g rass or other materials that
easily burn.
Park the vehicle in a place
where ped estrians or chil dren
are not likely to touch the hot
exhaust system.
Make sure that the exhaust sys-
tem has cooled down before
d oin g any maintenance work.
Do not allow the en gine to i dle
more than a few minutes. Lon g
i d lin g can cause a b uild-up of
heat.
NOTICE
ECA10702
Use only unlea ded g asoline. The use
of lead ed g asoline will cause unre-
pairab le dama ge to the catalytic
converter.
EAU59901
SeatsPassen ger seat
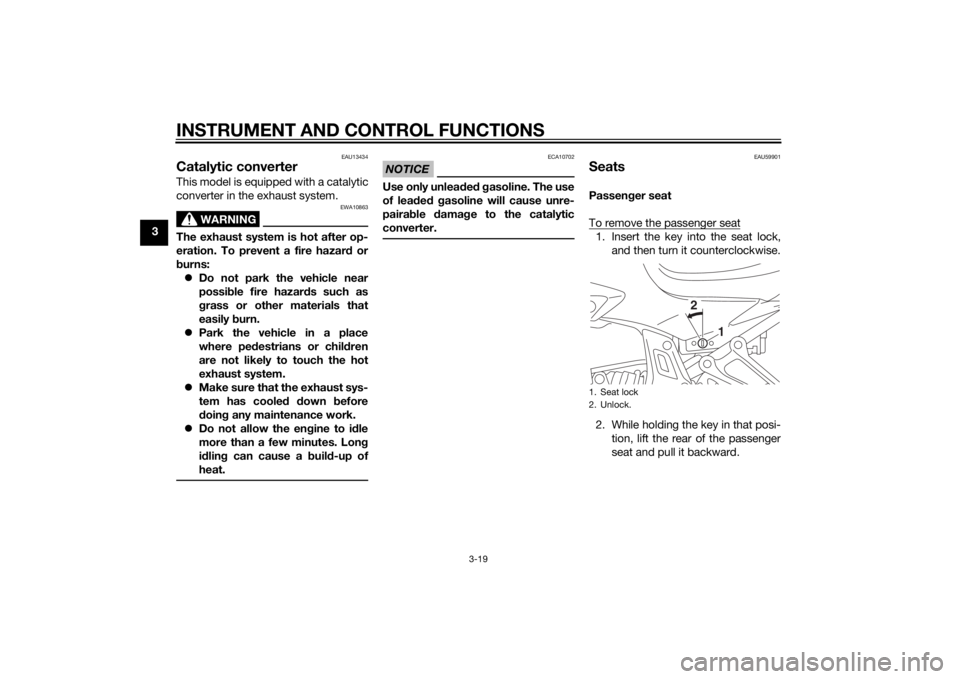
To remove the passenger seat1. Insert the key into the seat lock, and then turn it counterclockwise.
2. While holding the key in that posi- tion, lift the rear of the passenger
seat and pull it backward.1. Seat lock
2. Unlock.
1
2
U1WSE0E0.book Page 19 Wednesday, November 13, 2013 10:28 AM
Page 35 of 106
INSTRUMENT AND CONTROL FUNCTIONS
3-20
3
To install the passenger seat
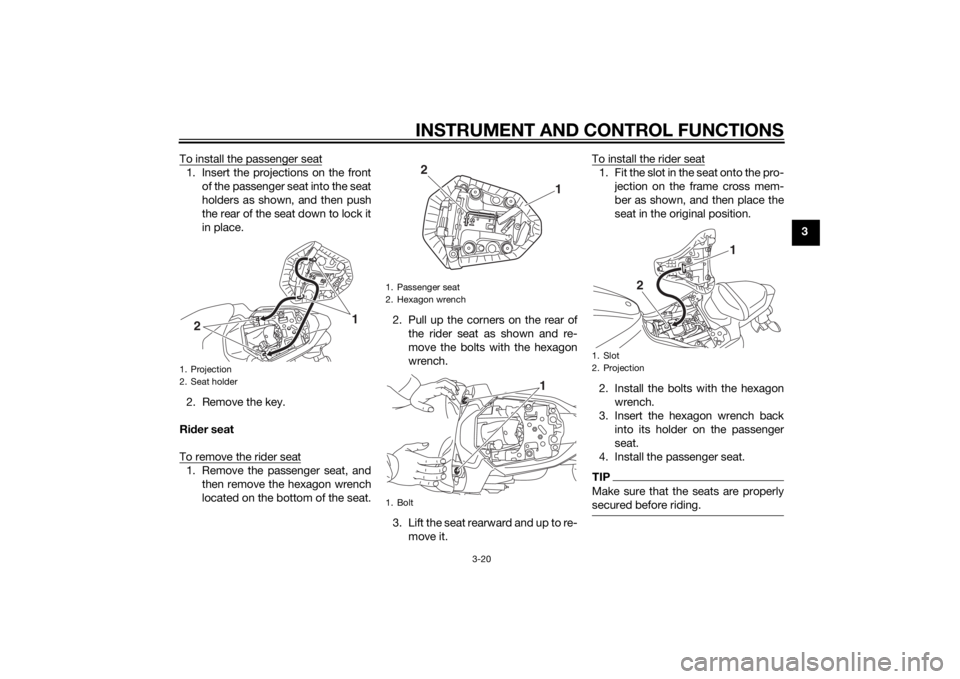
1. Insert the projections on the front
of the passenger seat into the seat
holders as shown, and then push
the rear of the seat down to lock it
in place.
2. Remove the key.
Ri der seat
To remove the rider seat1. Remove the passenger seat, and then remove the hexagon wrench
located on the bottom of the seat. 2. Pull up the corners on the rear of
the rider seat as shown and re-
move the bolts with the hexagon
wrench.
3. Lift the seat rearward and up to re- move it. To install the rider seat
1. Fit the slot in the seat onto the pro-
jection on the frame cross mem-
ber as shown, and then place the
seat in the original position.
2. Install the bolts with the hexagon wrench.
3. Insert the hexagon wrench back into its holder on the passenger
seat.
4. Install the passenger seat.TIPMake sure that the seats are properly
secured before riding.
1. Projection
2. Seat holder
1
2
1. Passenger seat
2. Hexagon wrench
1. Bolt
1
2
1
1. Slot
2. Projection
2 1
U1WSE0E0.book Page 20 Wednesday, November 13, 2013 10:28 AM
Page 67 of 106

PERIODIC MAINTENANCE AND ADJUSTMENT
6-18
6
EAU21963
Cast wheelsTo maximize the performance, durabil-
ity, and safe operation of your vehicle,
note the following points regarding the
specified wheels. The wheel rims should be
checked for cracks, bends, warp-
age or other damage before each
ride. If any damage is found, have
a Yamaha dealer replace the
wheel. Do not attempt even the
smallest repair to the wheel. A de-
formed or cracked wheel must be
replaced.
The wheel should be balanced
whenever either the tire or wheel
has been changed or replaced. An
unbalanced wheel can result in
poor performance, adverse han-
dling characteristics, and a short-
ened tire life.
EAU33892
Adjusting the clutch lever free
playThe clutch lever free play should mea-
sure 5.0–10.0 mm (0.20–0.39 in) as
shown. Periodically check the clutch
lever free play and, if necessary, adjust
it as follows.
To increase the clutch lever free play,
turn the clutch lever free play adjusting
bolt at the clutch lever in direction (a).
To decrease the clutch lever free play,
turn the adjusting bolt in direction (b).
TIPIf the specified clutch lever free play
cannot be obtained as described
above, proceed as follows.1. Fully turn the adjusting bolt at the
clutch lever in direction (a) to loos-
en the clutch cable.
2. Loosen the locknut at the crank- case.
3. To increase the clutch lever free play, turn the clutch lever free play
adjusting nut in direction (a). To
decrease the clutch lever free
play, turn the adjusting nut in di-
rection (b).
4. Tighten the locknut.
1. Clutch lever free play adjusting bolt
2. Clutch lever free play2
1 (b)(a)
1. Locknut
2. Clutch lever free play adjusting nut
1
2
(a)(b)
U1WSE0E0.book Page 18 Friday, November 22, 2013 8:56 AM
Page 70 of 106
PERIODIC MAINTENANCE AND ADJUSTMENT
6-21
6
EAU40262
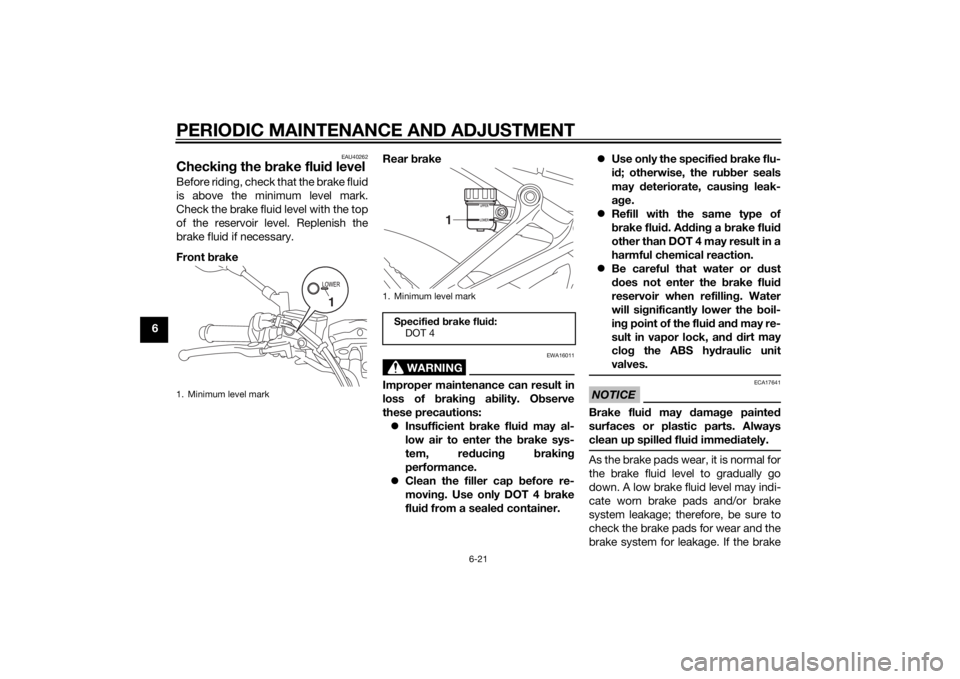
Checking the brake flui d levelBefore riding, check that the brake fluid
is above the minimum level mark.
Check the brake fluid level with the top
of the reservoir level. Replenish the
brake fluid if necessary.
Front brake Rear
brake
WARNING
EWA16011
Improper maintenance can result in
loss of b raking a bility. O bserve
these precautions: Insufficient brake flui d may al-
low air to enter the brake sys-
tem, re ducin g brakin g
performance.
Clean the filler cap before re-
movin g. Use only DOT 4 b rake
flui d from a seale d container.
Use only the specified b rake flu-
i d ; otherwise, the ru bber seals
may deteriorate, causin g leak-
a g e.
Refill with the same type of
brake flui d. A ddin g a brake flui d
other than DOT 4 may result in a
harmful chemical reaction.
Be careful that water or dust
d oes not enter the b rake fluid
reservoir when refillin g. Water
will si gnificantly lower the b oil-
in g point of the flui d an d may re-
sult in vapor lock, an d d ir
t may
clo g the ABS hy draulic unit
valves.
NOTICE
ECA17641
Brake flui d may damag e painted
surfaces or plastic parts. Always
clean up spille d flui d imme diately.As the brake pads wear, it is normal for
the brake fluid level to gradually go
down. A low brake fluid level may indi-
cate worn brake pads and/or brake
system leakage; therefore, be sure to
check the brake pads for wear and the
brake system for leakage. If the brake
1. Minimum level mark
1
1. Minimum level markSpecifie d b rake flui d:
DOT 4
1
U1WSE0E0.book Page 21 Wednesday, November 13, 2013 10:28 AM
Page 72 of 106
PERIODIC MAINTENANCE AND ADJUSTMENT
6-23
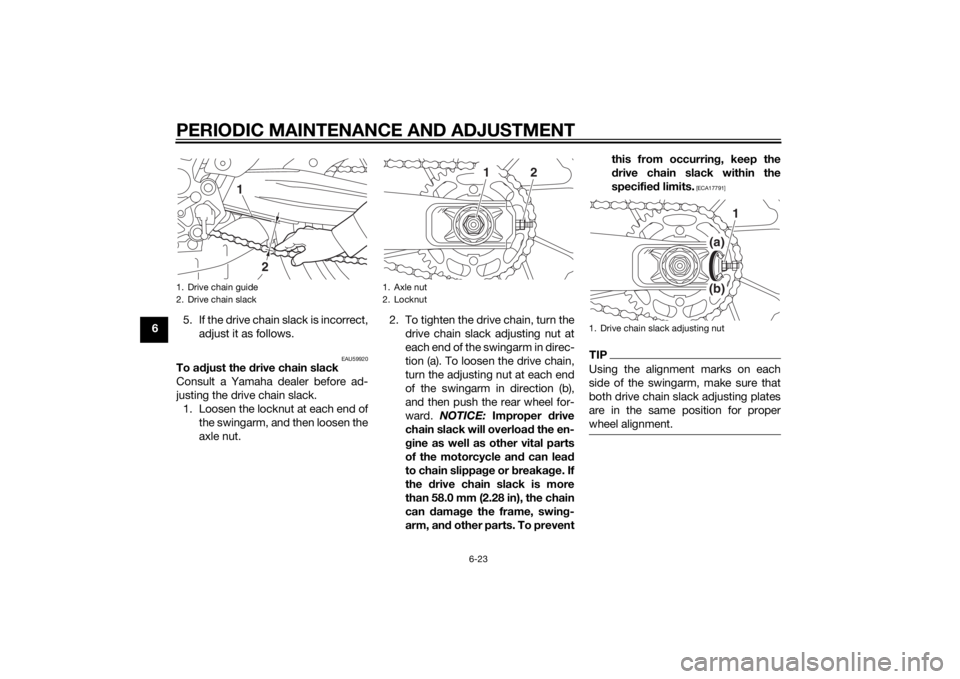
65. If the drive chain slack is incorrect,
adjust it as follows.
EAU59920
To a djust the d rive chain slack
Consult a Yamaha dealer before ad-
justing the drive chain slack. 1. Loosen the locknut at each end of the swingarm, and then loosen the
axle nut. 2. To tighten the drive chain, turn the
drive chain slack adjusting nut at
each end of the swingarm in direc-
tion (a). To loosen the drive chain,
turn the adjusting nut at each end
of the swingarm in direction (b),
and then push the rear wheel for-
ward. NOTICE: Improper drive
chain slack will overload the en-
g ine as well as other vital parts
of the motorcycle an d can lead
to chain slippa ge or breakag e. If
the drive chain slack is more
than 58.0 mm (2.28 in), the chain
can damag e the frame, swin g-
arm, an d other parts. To prevent this from occurrin
g, keep the
d rive chain slack within the
specifie d limits.
[ECA17791]
TIPUsing the alignment marks on each
side of the swingarm, make sure that
both drive chain slack adjusting plates
are in the same position for proper
wheel alignment.
1. Drive chain guide
2. Drive chain slack
2
1
1. Axle nut
2. Locknut
2
1
1. Drive chain slack adjusting nut
1
(a)(b)
U1WSE0E0.book Page 23 Wednesday, November 13, 2013 10:28 AM
Page 73 of 106
PERIODIC MAINTENANCE AND ADJUSTMENT
6-24
6
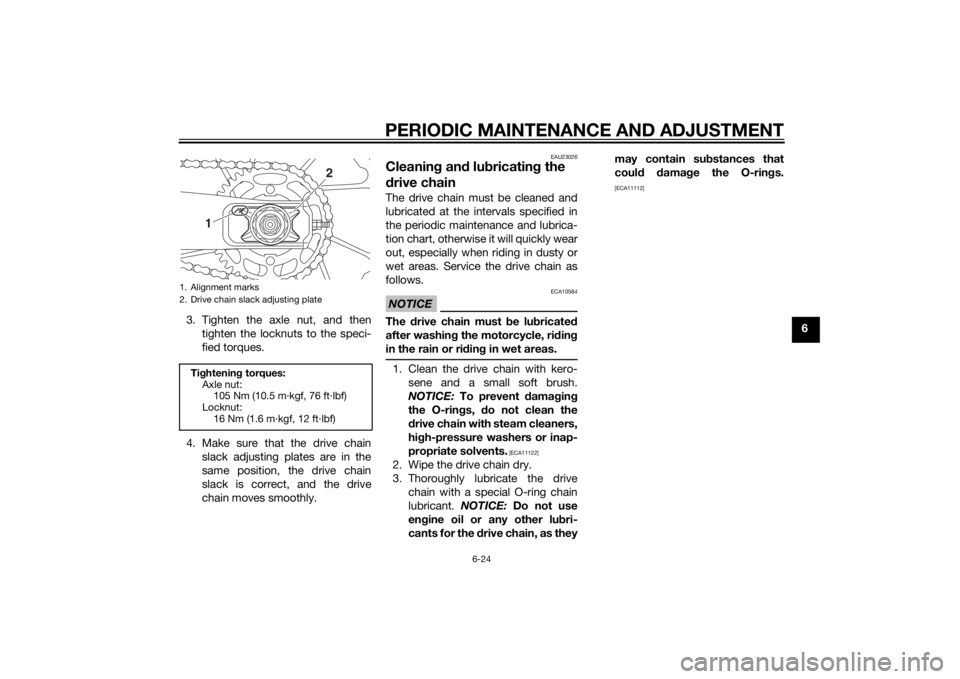
3. Tighten the axle nut, and then
tighten the locknuts to the speci-
fied torques.
4. Make sure that the drive chain slack adjusting plates are in the
same position, the drive chain
slack is correct, and the drive
chain moves smoothly.
EAU23026
Cleanin g an d lu bricatin g the
d rive chainThe drive chain must be cleaned and
lubricated at the intervals specified in
the periodic maintenance and lubrica-
tion chart, otherwise it will quickly wear
out, especially when riding in dusty or
wet areas. Service the drive chain as
follows.NOTICE
ECA10584
The drive chain must b e lubricate d
after washin g the motorcycle, ri din g
in the rain or ri din g in wet areas.1. Clean the drive chain with kero-
sene and a small soft brush.
NOTICE: To prevent d amaging
the O-rin gs, do not clean the
d rive chain with steam cleaners,
hi gh-pressure washers or inap-
propriate solvents.
[ECA11122]
2. Wipe the drive chain dry.
3. Thoroughly lubricate the drive chain with a special O-ring chain
lubricant. NOTICE: Do not use
en gine oil or any other lu bri-
cants for the d rive chain, as they may contain su
bstances that
coul d damag e the O-rin gs.
[ECA11112]
1. Alignment marks
2. Drive chain slack adjusting plateTi ghtenin g torques:
Axle nut: 105 Nm (10.5 m·kgf, 76 ft·lbf)
Locknut:
16 Nm (1.6 m·kgf, 12 ft·lbf)
2
1
U1WSE0E0.book Page 24 Wednesday, November 13, 2013 10:28 AM
Page 80 of 106
PERIODIC MAINTENANCE AND ADJUSTMENT
6-31
6
EAU59870
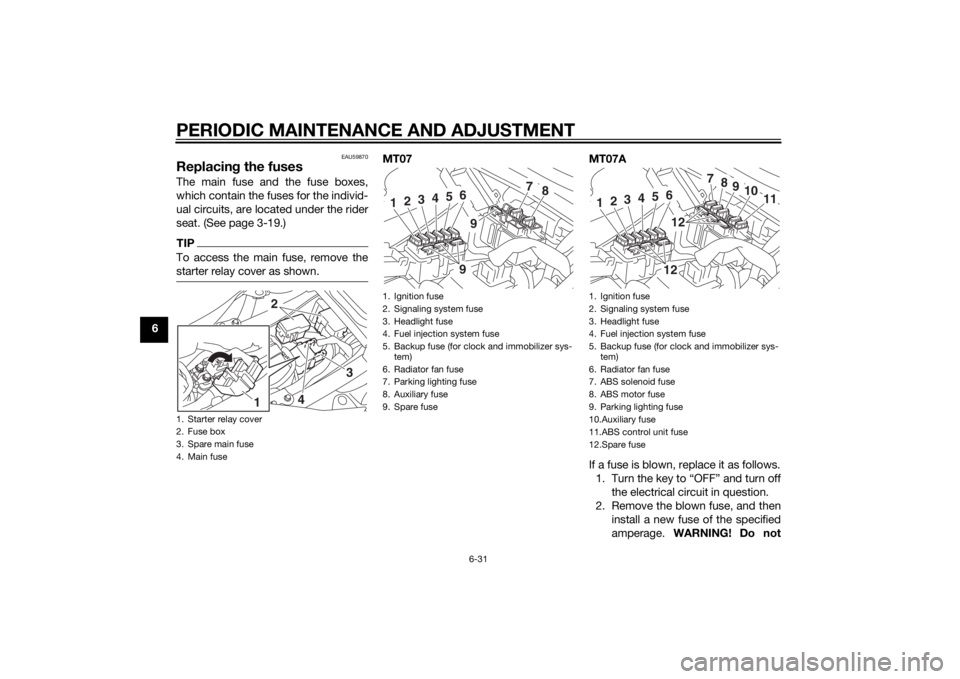
Replacing the fusesThe main fuse and the fuse boxes,
which contain the fuses for the individ-
ual circuits, are located under the rider
seat. (See page 3-19.)TIPTo access the main fuse, remove the
starter relay cover as shown.
MT07 MT07A
If a fuse is blown, replace it as follows. 1. Turn the key to “OFF” and turn off the electrical circuit in question.
2. Remove the blown fuse, and then install a new fuse of the specified
amperage. WARNING! Do not
1. Starter relay cover
2. Fuse box
3. Spare main fuse
4. Main fuse
2
3
4
1
1. Ignition fuse
2. Signaling system fuse
3. Headlight fuse
4. Fuel injection system fuse
5. Backup fuse (for clock and immobilizer sys-
tem)
6. Radiator fan fuse
7. Parking lighting fuse
8. Auxiliary fuse
9. Spare fuse
7
8
1
2
3
4
5
699
1. Ignition fuse
2. Signaling system fuse
3. Headlight fuse
4. Fuel injection system fuse
5. Backup fuse (for clock and immobilizer sys- tem)
6. Radiator fan fuse
7. ABS solenoid fuse
8. ABS motor fuse
9. Parking lighting fuse
10.Auxiliary fuse
11.ABS control unit fuse
12.Spare fuse
7
8
9
10
11
1
2
3
4
5
61212
U1WSE0E0.book Page 31 Wednesday, November 13, 2013 10:28 AM
Page 83 of 106
PERIODIC MAINTENANCE AND ADJUSTMENT
6-34
6
7. Have a Yamaha dealer adjust the
headlight beam if necessary.
EAU24182
Tail/b rake li ghtThis model is equipped with an LED-
type tail/brake light.
If the tail/brake light does not come on,
have a Yamaha dealer check it.
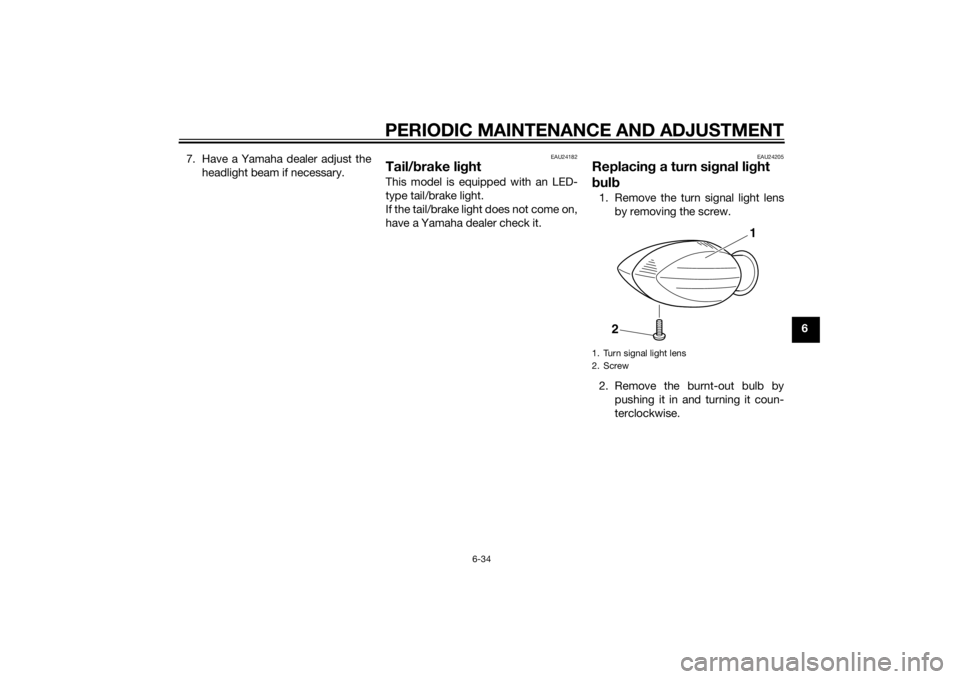
EAU24205
Replacin g a turn sig nal light
b ul b1. Remove the turn signal light lens
by removing the screw.
2. Remove the burnt-out bulb by pushing it in and turning it coun-
terclockwise.1. Turn signal light lens
2. Screw
1
2
U1WSE0E0.book Page 34 Wednesday, November 13, 2013 10:28 AM