ECO mode YAMAHA MT-09 2016 Owners Manual
[x] Cancel search | Manufacturer: YAMAHA, Model Year: 2016, Model line: MT-09, Model: YAMAHA MT-09 2016Pages: 114, PDF Size: 4.24 MB
Page 2 of 114

Q Read this manual carefully before operating this vehicle. This manual should stay with this vehicle if it is sold.
EAU70070
Date of issue:
Signature of Responsible Person: January 12, 2015
Product: IMMOBILIZER
Model: 1RC-00
Supplied by
YAMAHA MOTOR ELECTRONICS
CO.,LTD.
1450-6 Mori, Mori-machi Shuchi-gun
Shizuoka 437-0292 Japan
EN 60950-1: 2006 + Amd.11:2009 + Amd.1:2010 +
Amd.12: 2011
EN 62479: 2010
Kazuhide Takasugi
GENERAL MAN AGER
QU ALITY ASSURANCE DIV.
97/24/EC from 17.06.1997
EN 300 330-1 V1.7.1: 2010
EN 300 330-2 V1.5.1: 2010
Te
chnical Construction File held by
YAMAHA MOTOR ELECTRONICS
CO.,LTD.
1450-6 Mori, Mori-machi Shuchi-gun
Shizuoka 437-0292 Japan
R&TTE Dir ective
(Article 3.1(a) Safety)
R&TTE Dir ective
(Article 3.1(b) EMC)
R&TTE Dir ective
(Article 3.2 Spectrum)
DECLARATION of CONFORMITY
For
YAMAHA MOTOR ELECTRONICS CO., LTD.1450-6, Mori, Mori-machi, Shuchi-gun, Shizuoka-ken, 437-0292 Japan
Standard used for comply
Means of Conformity
We declare under our sole responsibility that the Product (s) is conform\
ity with the essential
requirements and other relevant requirements of the
Radio and Telecommunication Terminal Equipment (R&TTE) Directi ve (1999/5/EC).
B87-9-E0_1-immobi_Hyoshi.indd 22015/12/11 11:45:27
Page 19 of 114

Instrument and control functions
3-4
1
234
5
6
7
8
9
10
11
12
EAU49398
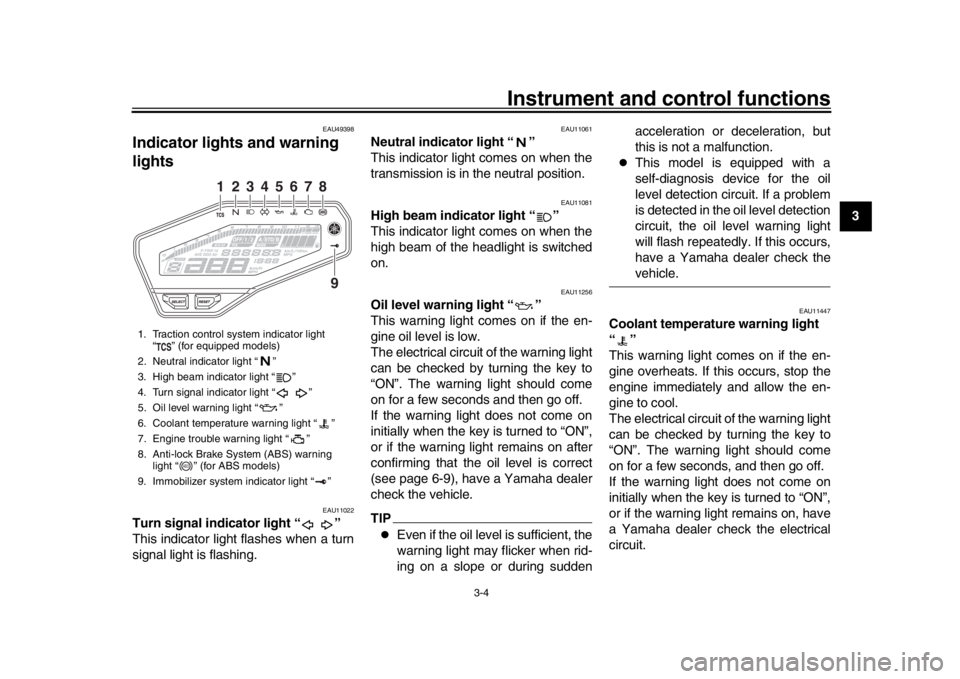
Indicator lights and warning
lights
EAU11022
Turn signal indicator light “ ”
This indicator light flashes when a turn
signal light is flashing.
EAU11061
Neutral indicator light “ ”
This indicator light comes on when the
transmission is in the neutral position.
EAU11081
High beam indicator light “ ”
This indicator light comes on when the
high beam of the headlight is switched
on.
EAU11256
Oil level warning light “ ”
This warning light comes on if the en-
gine oil level is low.
The electrical circuit of the warning light
can be checked by turning the key to
“ON”. The warning light should come
on for a few seconds and then go off.
If the warning light does not come on
initially when the key is turned to “ON”,
or if the warning light remains on after
confirming that the oil level is correct
(see page 6-9), have a Yamaha dealer
check the vehicle.TIP
Even if the oil level is sufficient, the
warning light may flicker when rid-
ing on a slope or during sudden acceleration or deceleration, but
this is not a malfunction.
This model is equipped with a
self-diagnosis device for the oil
level detection circuit. If a problem
is detected in the oil level detection
circuit, the oil level warning light
will flash repeatedly. If this occurs,
have a Yamaha dealer check thevehicle.
EAU11447
Coolant temperature warning light
“”
This warning light comes on if the en-
gine overheats. If this occurs, stop the
engine immediately and allow the en-
gine to cool.
The electrical circuit of the warning light
can be checked by turning the key to
“ON”. The warning light should come
on for a few seconds, and then go off.
If the warning light does not come on
initially when the key is turned to “ON”,
or if the warning light remains on, have
a Yamaha dealer check the electrical
circuit.
1. Traction control system indicator light
“ ” (for equipped models)
2. Neutral indicator light “ ”
3. High beam indicator light “ ”
4. Turn signal indicator light “ ”
5. Oil level warning light “ ”
6. Coolant temperature warning light “ ”
7. Engine trouble warning light “ ”
8. Anti-lock Brake System (ABS) warning light “ ” (for ABS models)
9. Immobilizer system indicator light “ ”
2
1
3
4
5
6
7
89
ABS
B87-9-E0_1.book 4 ページ 2015年12月16日 水曜日 午前10時21分
Page 20 of 114

Instrument and control functions
3-5
1
23
4
5
6
7
8
9
10
11
12
NOTICE
ECA10022
Do not continue to operate the en-gine if it is overheating.TIP
For radiator-fan-equipped vehi-
cles, the radiator fan(s) automati-
cally switch on or off according to
the coolant temperature in the ra-
diator.
If the engine overheats, see page6-45 for further instructions.
EAU73500
Engine trouble warning light “ ”
MT09
This warning light comes on if a prob-
lem is detected in the electrical circuit
monitoring the engine. If this occurs,
have a Yamaha dealer check the
self-diagnosis system. (See page 3-14
for an explanation of the self-diagnosis
mode.)
The electrical circuit of the warning light
can be checked by turning the key to
“ON”. The warning light should come on for a few seconds, and then go off.
If the warning light does not come on
initially when the key is turned to “ON”,
or if the warning light remains on, have
a Yamaha dealer check the electrical
circuit.
MT09A
This warning light comes on if a prob-
lem is detected in the engine or other
vehicle control system. If this occurs,
have a Yamaha dealer check the
on-board diagnostic system.
The electrical circuit of the warning light
can be checked by turning the key to
“ON”. The warning light should come
on for a few seconds, and then go off.
If the warning light does not come on
initially when the key is turned to “ON”,
or if the warning light remains on, have
a Yamaha dealer check the vehicle.
EAU58530
ABS warning light “ ” (for ABS
models)
In normal operation, the ABS warning
light comes on when the key is turned
to “ON”, and goes off after traveling at a
speed of 10 km/h (6 mi/h) or higher.If the ABS warning light:
does not come on when the key is
turned to “ON”
comes on or flashes while riding
does not go off after traveling at a
speed of 10 km/h (6 mi/h) or higher
The ABS may not work correctly. If any
of the above occurs, have a Yamaha
dealer check the system as soon as
possible. (See page 3-20 for an expla-
nation of the ABS.)WARNING
EWA16041
If the ABS warning light does not go
off after traveling at a speed of 10
km/h (6 mi/h) or higher, or if the
warning light comes on or flashes
while riding, the brake system re-
verts to conventional braking. If ei-
ther of the above occurs, or if the
warning light does not come on at
all, use extra caution to avoid possi-
ble wheel lock during emergency
braking. Have a Yamaha dealer
check the brake system and electri-cal circuits as soon as possible.
ABS
B87-9-E0_1.book 5 ページ 2015年12月16日 水曜日 午前10時21分
Page 21 of 114

Instrument and control functions
3-6
1
234
5
6
7
8
9
10
11
12
EAU73380
Traction control system indicator
light “ ” (for equipped models)
In normal operation, this indicator light
flashes when traction control has en-
gaged.
If the traction control system (page
3-21) becomes disabled while riding,
this indicator light and the engine trou-
ble warning light will come on.
The electrical circuit of this indicator
light can be checked by turning the key
to “ON”. The light should come on for a
few seconds, and then go off.
If the light does not come on initially
when the key is turned to “ON”, or if the
light remains on, have a Yamaha deal-
er check the electrical circuit.
EAU73510
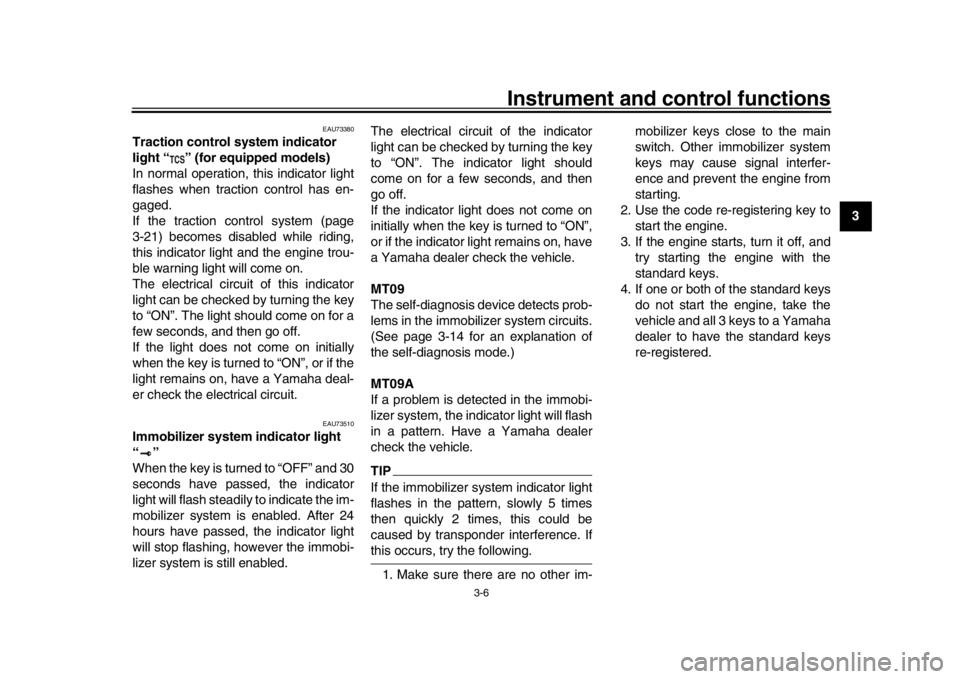
Immobilizer system indicator light
“”
When the key is turned to “OFF” and 30
seconds have passed, the indicator
light will flash steadily to indicate the im-
mobilizer system is enabled. After 24
hours have passed, the indicator light
will stop flashing, however the immobi-
lizer system is still enabled. The electrical circuit of the indicator
light can be checked by turning the key
to “ON”. The indicator light should
come on for a few seconds, and then
go off.
If the indicator light does not come on
initially when the key is turned to “ON”,
or if the indicator light remains on, have
a Yamaha dealer check the vehicle.
MT09
The self-diagnosis device detects prob-
lems in the immobilizer system circuits.
(See page 3-14 for an explanation of
the self-diagnosis mode.)
MT09A
If a problem is detected in the immobi-
lizer system, the indicator light will flash
in a pattern. Have a Yamaha dealer
check the vehicle.
TIPIf the immobilizer system indicator light
flashes in the pattern, slowly 5 times
then quickly 2 time
s, this could be
caused by transponder interference. Ifthis occurs, try the following.
1. Make sure there are no other im- mobilizer keys close to the main
switch. Other immobilizer system
keys may cause signal interfer-
ence and prevent the engine from
starting.
2. Use the code re-registering key to start the engine.
3. If the engine starts, turn it off, and try starting the engine with the
standard keys.
4. If one or both of the standard keys do not start the engine, take the
vehicle and all 3 keys to a Yamaha
dealer to have the standard keys
re-registered.
B87-9-E0_1.book 6 ページ 2015年12月16日 水曜日 午前10時21分
Page 22 of 114

Instrument and control functions
3-7
1
23
4
5
6
7
8
9
10
11
12
EAU73263
Multi-function meter unit
MT09 MT09A
WARNING
EWA12423
Be sure to stop the vehicle before
making any setting changes to the
multi-function meter unit. Changing
settings while riding can distract the
operator and increase the risk of anaccident.
1. “SELECT” button
2. “RESET” button
2
1
1. Transmission gear display
2. Tachometer
3. Drive mode display
4. Fuel meter
5. Eco indicator “ECO”
6. Multi-function display
7. Clock
8. Speedometer1
2
3
4
5
6
7
8
1. Transmission gear display
2. Tachometer
3. Eco indicator “ECO”
4. TCS display
5. Drive mode display
6. Fuel meter
7. Multi-function display
8. Clock
9. Speedometer1
2
4
3
5
6
7
8
9
B87-9-E0_1.book 7 ページ 2015年12月16日 水曜日 午前10時21分
Page 23 of 114

Instrument and control functions
3-8
1
234
5
6
7
8
9
10
11
12
The multi-function meter unit is
equipped with the following:
a speedometer
a tachometer
a clock
a fuel meter
an eco indicator
a transmission gear display
a drive mode display
a TCS display (for equipped mod-
els)
a multi-function display
TIP
Except when switching to the
brightness control mode or to dis-
play the clock, turn the key to “ON”
before using the “SELECT” and
“RESET” buttons to adjust the
multi-function meter.
For the UK: To switch the speed-
ometer and multi-function displays
between kilometers and miles,
press the “SELECT” button for onesecond.
Speedometer
The speedometer shows the vehicle’s
traveling speed.
Tachometer
The tachometer allows the rider to
monitor the engine speed and keep it
within the ideal power range.
When the key is turned to “ON”, the ta-
chometer will sweep across the r/min
range and then return to zero r/min in
order to test the electrical circuit.
NOTICE
ECA10032
Do not operate the engine in the ta-
chometer red zone.Red zone: 11250 r/min and above
Clock
The clock uses a 12-hour time system.
When the key is not in the “ON” posi-
tion, the clock can be viewed for 10
1. Speedometer
1. Tachometer
2. Tachometer red zone
1
2
1
1. Clock
1
B87-9-E0_1.book 8 ページ 2015年12月16日 水曜日 午前10時21分
Page 27 of 114

Instrument and control functions
3-12
1
234
5
6
7
8
9
10
11
12
Air_ _ C ODO TRIP 1 TRIP
2 F-TRIP
For the UK:
F-TRIP km/L, L/100 km or MPG
AVE_ _._ km/L, AVE_ _._ L/100 km or
AVE_ _._ MPG C Air_ _ C
ODO TRIP 1 TRIP 2 F-TRIP
TIP
To reset a tripmeter, select it by
pushing the “SELECT” button, and
then push the “RESET” button for
one second.
If you do not reset the fuel reserve
tripmeter manually, it resets auto-
matically and disappears after re-fueling and traveling 5 km (3 mi). Instantaneous fuel consumption
mode
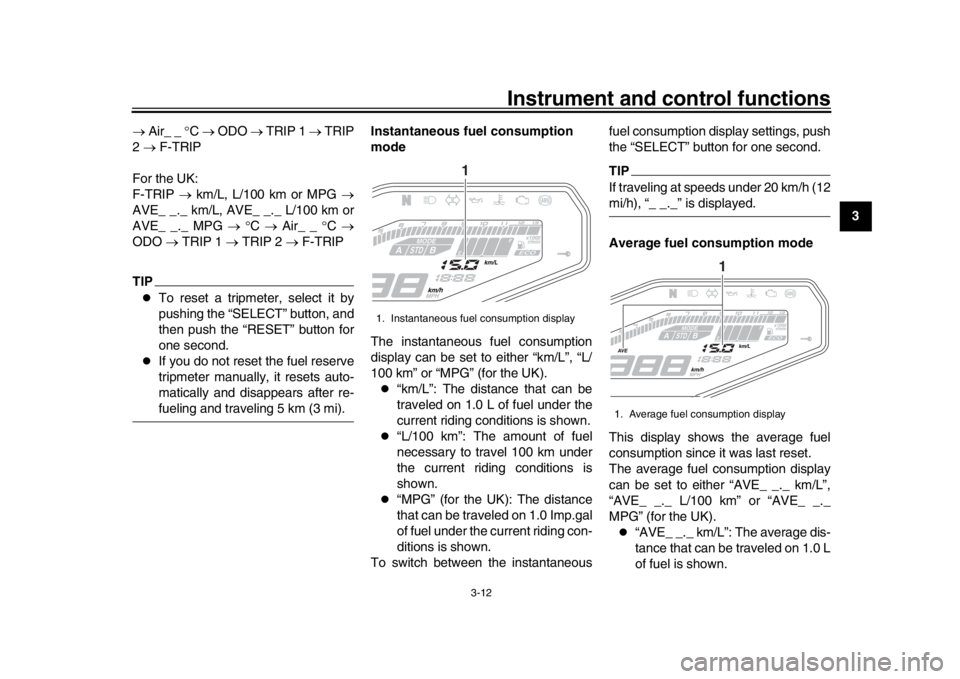
The instantaneous fuel consumption
display can be set to either “km/L”, “L/
100 km” or “MPG” (for the UK).
“km/L”: The distance that can be
traveled on 1.0 L of fuel under the
current riding conditions is shown.
“L/100 km”: The amount of fuel
necessary to travel 100 km under
the current riding conditions is
shown.
“MPG” (for the UK): The distance
that can be traveled on 1.0 Imp.gal
of fuel under the current riding con-
ditions is shown.
To switch between the instantaneous fuel consumption display settings, push
the “SELECT” button for one second.
TIPIf traveling at speeds under 20 km/h (12mi/h), “_ _._” is displayed.
Average fuel consumption mode
This display shows the average fuel
consumption since it was last reset.
The average fuel consumption display
can be set to either “AVE_ _._ km/L”,
“AVE_ _._ L/100 km” or “AVE_ _._
MPG” (for the UK).
“AVE_ _._ km/L”: The average dis-
tance that can be traveled on 1.0 L
of fuel is shown.
1. Instantaneous fuel consumption display
1
1. Average fuel consumption display
1
B87-9-E0_1.book 12 ページ 2015年12月16日 水曜日 午前10時21分
Page 28 of 114

Instrument and control functions
3-13
1
23
4
5
6
7
8
9
10
11
12
“AVE_ _._ L/100 km”: The average
amount of fuel necessary to travel
100 km is shown.
“AVE_ _._ MPG” (for the UK): The
average distance that can be trav-
eled on 1.0 Imp.gal of fuel is
shown.
To switch between the average fuel
consumption display settings, push the
“SELECT” button for one second.
To reset the average fuel consumption,
push the “RESET” button for one sec-
ond.
TIPAfter resetting the average fuel con-
sumption, “_ _._” will be shown until thevehicle has traveled 1 km (0.6 mi). Coolant temperature mode
This display shows the coolant temper-
ature from 40
C to 116 C in 1 C incre-
ments.
If the message “HI” flashes, stop the
vehicle, then stop the engine, and let
the engine cool. (See page 6-45.)
TIP
When the coolant temperature is
below 40 C, “LO” will be dis-
played.
The coolant temperature varies
with changes in the weather andengine load. Air intake temperature mode
The air intake temperature display indi-
cates the temperature of the air drawn
into the air filter case.
This display shows the air intake tem-
perature from –9
C to 99 C in 1 C in-
crements.
TIP
–9 C will be displayed even if the
air intake temperature falls below
–9 C.
The air intake temperature may
vary from the ambient tempera-ture.
1. Coolant temperature display
1
1. Air intake temperature display
1
B87-9-E0_1.book 13 ページ 2015年12月16日 水曜日 午前10時21分
Page 32 of 114

Instrument and control functions
3-17
1
23
4
5
6
7
8
9
10
11
12
EAU12461
Turn signal switch “ / ”
To signal a right-hand turn, push this
switch to “ ”. To signal a left-hand
turn, push this switch to “ ”. When re-
leased, the switch returns to the center
position. To cancel the turn signal
lights, push the switch in after it has re-
turned to the center position.
EAU12501
Horn switch “ ”
Press this switch to sound the horn.
EAU73441
Traction control system switch
“TCS” (for equipped models)
With the throttle closed, push this
switch down to change from TCS “1” to
“2”. Push up to change from TCS “2” to
“1”.
With the vehicle stopped, push this
switch up for two seconds to turn the
system off. Push down to turn the sys-
tem on.TIP
The current TCS setting is shown
in the TCS display (page 3-10).
See page 3-21 for an explanation of the traction control system and
the TCS settings.
EAU54212
Stop/Run/Start switch “ / / ”
To crank the engine with the starter, set
this switch to “ ”, and then push the
switch down towards “ ”. See page
5-2 for starting instructions prior to
starting the engine.
Set this switch to “ ” to stop the engine
in case of an emergency, such as when
the vehicle overturns or when the throt-
tle cable is stuck.
EAU41701
The engine trouble warning light will
come on when the key is turned to “ON”
and the start switch is pushed, but this
does not indicate a malfunction.
EAU12735
Hazard switch “ ”
With the key in the “ON” or “ ” posi-
tion, use this switch to turn on the haz-
ard lights (simultaneous flashing of all
turn signal lights).
The hazard lights are used in case of
an emergency or to warn other drivers
when your vehicle is stopped where it
might be a traffic hazard.
NOTICE
ECA10062
Do not use the hazard lights for an
extended length of time with the en-
gine not running, otherwise the bat-tery may discharge.
EAU47496
Drive mode switch “MODE”
WARNING
EWA15341
Do not change the D-mode while thevehicle is moving.
Using this switch changes the drive
mode to “STD”, “A”, or “B” in the follow-
ing order:
STD
A B STD
The throttle grip must be completely
closed in order to change the drive
mode. (See page 3-15 for an explana-
tion of each drive mode.)TIP
The mode is set to “STD” by de-
fault. The mode resets to “STD”
when the key is turned to “OFF”.
B87-9-E0_1.book 17 ページ 2015年12月16日 水曜日 午前10時21分
Page 39 of 114

Instrument and control functions
3-24
1
234
5
6
7
8
9
10
11
12
spark plug life and reduce maintenance
costs.
Gasohol
There are two types of gasohol: gaso-
hol containing ethanol and that contain-
ing methanol. Gasohol containing
ethanol can be used if the ethanol con-
tent does not exceed 10% (E10). Gas-
ohol containing methanol is not
recommended by Yamaha because it
can cause damage to the fuel system
or vehicle performance problems.
EAU51193
Fuel tank breather hose and
overflow hoseBefore operating the motorcycle:
Check each hose connection.
Check each hose for cracks or
damage, and replace if necessary.
Make sure that the end of each
hose is not blocked, and clean if
necessary.
Make sure that each hose is rout-
ed through the clamp.
EAU13434
Catalytic converterThis model is equipped with a catalytic
converter in the exhaust system.
WARNING
EWA10863
The exhaust system is hot after op-
eration. To prevent a fire hazard or
burns:
Do not park the vehicle near
possible fire hazards such as
grass or other materials that
easily burn.
Park the vehicle in a place
where pedestrians or children
are not likely to touch the hot
exhaust system.
Make sure that the exhaust sys-
tem has cooled down before do-
ing any maintenance work.
Do not allow the engine to idle
more than a few minutes. Long
idling can cause a build-up ofheat.
NOTICE
ECA10702
Use only unleaded gasoline. The use
of leaded gasoline will cause unre-
1. Fuel tank breather hose and overflow
hose
2. Clamp
21
B87-9-E0_1.book 24 ページ 2015年12月16日 水曜日 午前10時21分