lock YAMAHA MT-09 2022 User Guide
[x] Cancel search | Manufacturer: YAMAHA, Model Year: 2022, Model line: MT-09, Model: YAMAHA MT-09 2022Pages: 110, PDF Size: 3.8 MB
Page 33 of 110
Instrument and control functions
4-12
4
When unable to shift, QS is
white.
If the quick shifter function is turned
OFF, QS itself is not displayed.
The quick shifter functions can be
turned on or off in the setting MENU.
See page 4-15.
TIPThe upshift and downshift functions
are independent and can be activated
separately.
For more information on the quick
Settin
g menu icon “ ”
Choose this icon and push the wheel
switch to change the settings MENU
screen. (See page 4-14.)
Grip warmer in dicator (Option)
The grip warmers can be used when
the engine is running. There are 10
temperature levels. When activated,
the indicator will display the tempera-
ture level from 1 (lowest) to 10 (high-
est). To activate the grip warmer, use the
wheel switch to highlight the grip
warmer display with the cursor.
Press the wheel switch inward to se-
lect the grip warmer function.
Once selected, rotate the wheel switch
up and down to adjust the temperature
level.
Press the wheel switch inward to con-
firm the temperature level and exit the
grip warmer function.
NOTICE
ECA17932
Be sure to wear g loves when
using the grip warmers.
Do not use the grip warmers in
warm weather.
If the han dle bar grip or throttle
g rip becomes worn or d am-
a g ed , stop usin g the g rip warm-
ers an d replace the grips.The function of the wheel switch can
be locked into grip warmer mode by
pressing and holding the wheel switch
inward while the grip warmer indicator
is highlighted by the cursor. In this mode, the temperature levels
can be instantly adjusted by rotating
the wheel switch up/down.
To exit this mode and return the wheel
switch to its normal functionality, press
and hold the wheel switch inward.
TIPThe current grip warmer setting is
saved when the vehicle is turned off.Lap timer
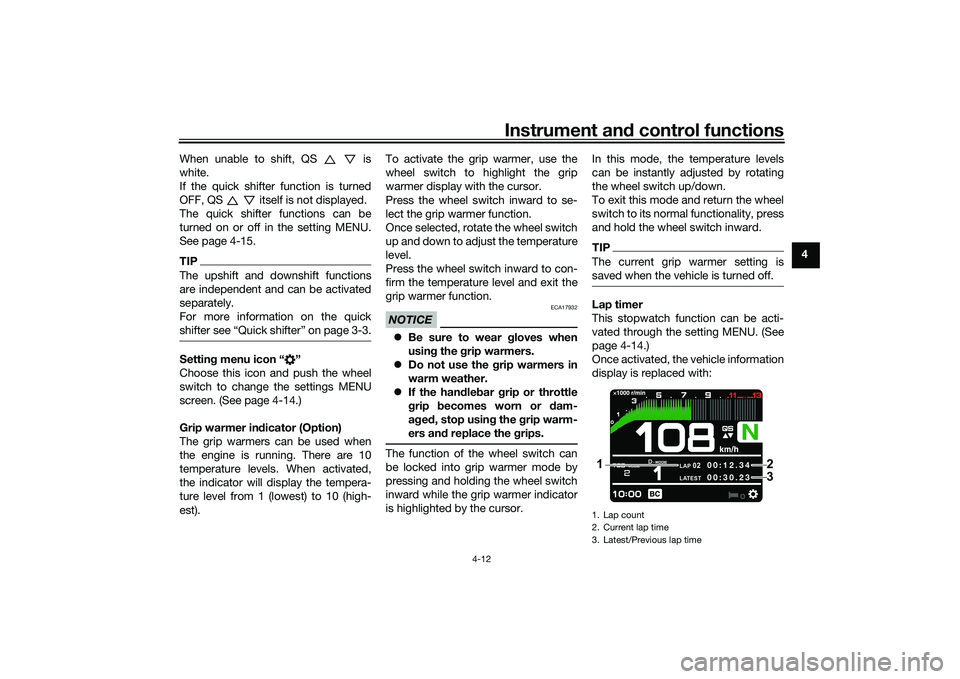
This stopwatch function can be acti-
vated through the setting MENU. (See
page 4-14.)
Once activated, the vehicle information
display is replaced with:1. Lap count
2. Current lap time
3. Latest/Previous lap time
LAP
02
LATEST
00:12.3
4
00:3 0.23
2
1
3
UB7NE1E0.book Page 12 Friday, September 3, 2021 11:25 AM
Page 38 of 110
Instrument and control functions
4-17
4 r/min value by increments of 200 r/min.
“IND Stop” is settable between 6200 -
13000 r/min.
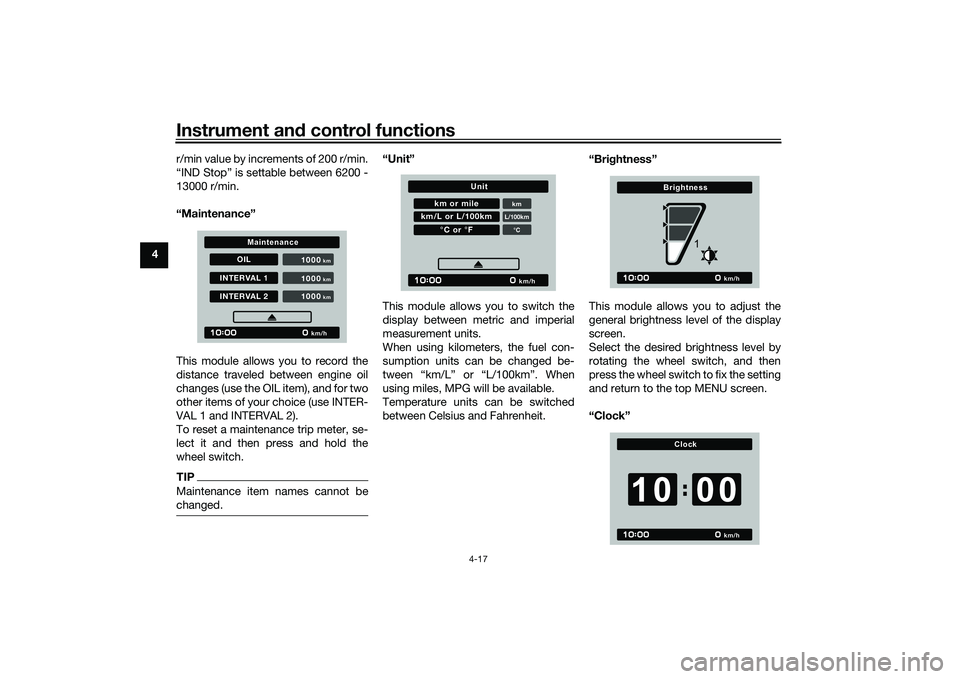
“Maintenance”
This module allows you to record the
distance traveled between engine oil
changes (use the OIL item), and for two
other items of your choice (use INTER-
VAL 1 and INTERVAL 2).
To reset a maintenance trip meter, se-
lect it and then press and hold the
wheel switch.
TIPMaintenance item names cannot be
changed.
“Unit”
This module allows you to switch the
display between metric and imperial
measurement units.
When using kilometers, the fuel con-
sumption units can be changed be-
tween “km/L” or “L/100km”. When
using miles, MPG will be available.
Temperature units can be switched
between Celsius and Fahrenheit. “Brig
htness”
This module allows you to adjust the
general brightness level of the display
screen.
Select the desired brightness level by
rotating the wheel switch, and then
press the wheel switch to fix the setting
and return to the top MENU screen.
“Clock”
OIL
INTERVAL 1INTERVAL 2 1000
km/h
km
1000
km
1000
km
Maintenance
km or mile
kmL/100km
Page 39 of 110

Instrument and control functions
4-18
4
This module allows you to set the
clock.
When the clock module is selected, the
hours will be highlighted.
Set the hours by rotating the wheel
switch. Push the switch to confirm and
highlight the minutes.
After confirming the minutes, you will
be returned to the top MENU screen.
“All Reset”
This module resets all settings items
(except the odometer and clock) to
their default or factory presets.
Select YES to reset all items. After se-
lecting YES, all items will be reset and
the screen will automatically return to
the top MENU screen.
EAU12823
Clutch leverTo disengage the drivetrain from the
engine, such as when shifting gears,
pull the clutch lever toward to the han-
dlebar. Release the lever to engage the
clutch and transmit power to the rear
wheel.TIPThe lever should be pulled rapidly and
released slowly for smooth shifting.
(See page 6-3.)
EAU83692
Shift pe
dalThe shift pedal is located on the left
side of the motorcycle. To shift the
transmission to a higher gear, move
the shift pedal up. To shift the trans-
mission to a lower gear, move the shift
pedal down. (See page 6-3.)
The shift rod is equipped with a shift
sensor, which is part of the quick shift-
er. The shift sensor reads up and down
movement, as well as the strength of
the input force when the shift pedal is
moved.
NOYES
km/h
All Reset
1. Clutch lever
1 1 1
1. Shift pedal
2. Shift rod
1 1 1
2 2
UB7NE1E0.book Page 18 Friday, September 3, 2021 11:25 AM
Page 41 of 110
Instrument and control functions
4-20
4
EAU91461
Brake control system (BC)The brake control system regulates hy-
draulic brake pressure for the front and
rear wheels independently when the
brakes are applied and wheel lock is
detected. This system has two settings
which can be changed in the settings
MENU. (See page 4-15.)
BC1 is standard ABS, which adjusts
brake pressure based on vehicle
speed and wheel speed data. BC1 is
designed to engage and maximize
braking when the vehicle is upright.
BC2 uses additional data from the IMU
to regulate applied brake power when
cornering to suppress lateral wheel
slip.
Regarding ABS, operate the brakes as
you would conventional brakes. When
the brake control system engages, a
pulsating sensation may be felt at the
brake lever or brake pedal as the hy-
draulic unit rapidly applies and reduces
brake pressure. In this situation, con-
tinue to apply the brake lever and
brake pedal to allow the ABS to work—
do not “pump the brakes” as this will
reduce braking effectiveness.
WARNING
EWA16051
Always keep a sufficient d istance
from the vehicle ahead to match the
ri din g speed even with ABS.
The ABS performs best with
lon g b rakin g d istances.
On certain surfaces, such as
rou gh or g ravel roa ds, the b rak-
in g d istance may be lon ger with
the ABS than without.The ABS hydraulic unit is monitored by
the ABS ECU, which will revert the sys-
tem to conventional braking if a mal-
function occurs.
WARNING
EWA20891
The brake control system is not a
su bstitute for the use of proper ri d-
in g an d brakin g techniques. The
b rake control system cannot pre-
vent all loss of traction due to over-
b rakin g from excessive spee d, or
lateral wheel slip when brakin g on
slippery surfaces.
TIPThe ABS performs a self-diagnostic
test when the vehicle is started and
reaches a speed of 5 km/h (3 mi/h).
During this test, a clicking noise may
be audible from the hydraulic control
unit, and a vibration may be felt at the
brake lever or pedal, but this is normal.NOTICE
ECA20100
Be careful not to d amage the wheel
sensor or wheel sensor rotor; other-
wise, improper performance of the
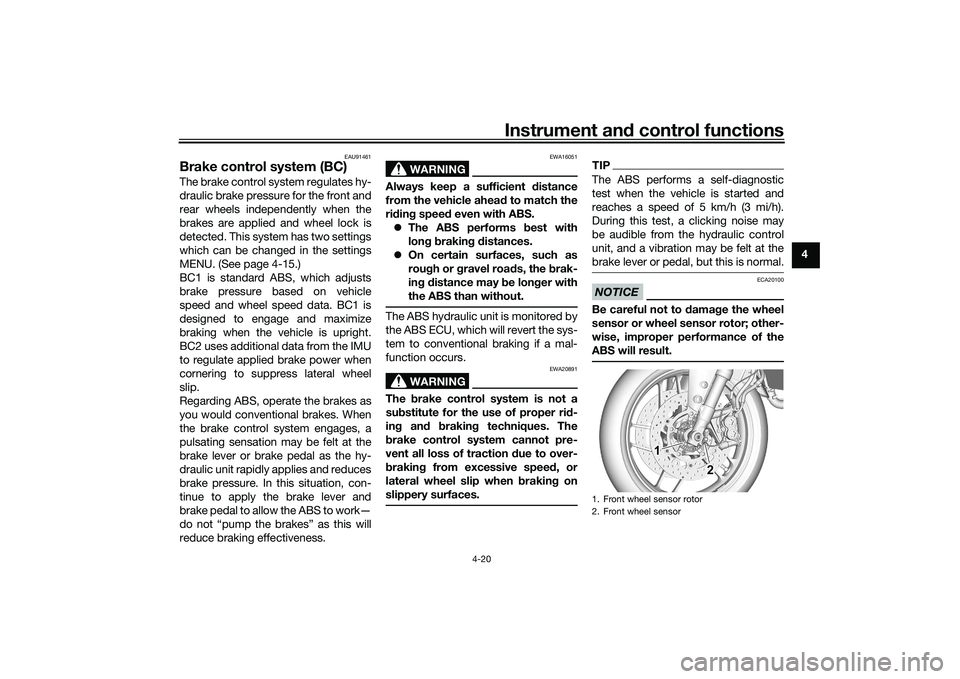
ABS will result.1. Front wheel sensor rotor
2. Front wheel sensor
1 1 1
2 2
UB7NE1E0.book Page 20 Friday, September 3, 2021 11:25 AM
Page 42 of 110
Instrument and control functions
4-21
4
EAU13077
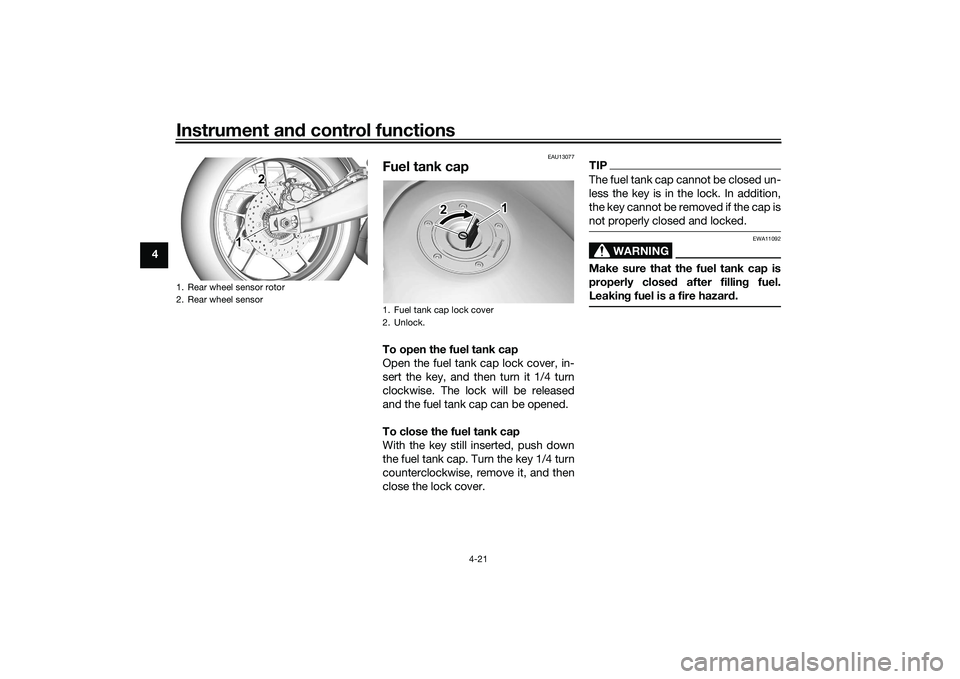
Fuel tank capTo open the fuel tank cap
Open the fuel tank cap lock cover, in-
sert the key, and then turn it 1/4 turn
clockwise. The lock will be released
and the fuel tank cap can be opened.
To close the fuel tank cap
With the key still inserted, push down
the fuel tank cap. Turn the key 1/4 turn
counterclockwise, remove it, and then
close the lock cover.
TIPThe fuel tank cap cannot be closed un-
less the key is in the lock. In addition,
the key cannot be removed if the cap is
not properly closed and locked.
WARNING
EWA11092
Make sure that the fuel tank cap is
properly close d after fillin g fuel.
Leakin g fuel is a fire hazar d.
1. Rear wheel sensor rotor
2. Rear wheel sensor
1 1 1 2 2
1. Fuel tank cap lock cover
2. UnlockK
1
2
UB7NE1E0.book Page 21 Friday, September 3, 2021 11:25 AM
Page 44 of 110
Instrument and control functions
4-23
4
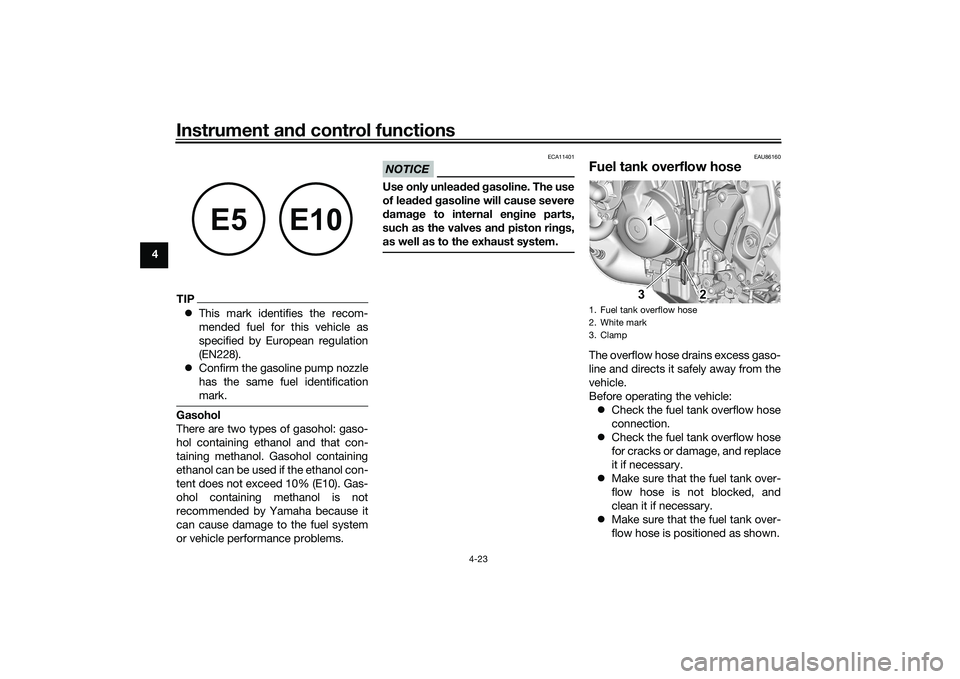
TIP This mark identifies the recom-
mended fuel for this vehicle as
specified by European regulation
(EN228).
Confirm the gasoline pump nozzle
has the same fuel identification
mark.Gasohol
There are two types of gasohol: gaso-
hol containing ethanol and that con-
taining methanol. Gasohol containing
ethanol can be used if the ethanol con-
tent does not exceed 10% (E10). Gas-
ohol containing methanol is not
recommended by Yamaha because it
can cause damage to the fuel system
or vehicle performance problems.
NOTICE
ECA11401
Use only unlea ded g asoline. The use
of lea ded g asoline will cause severe
d amag e to internal en gine parts,
such as the valves an d piston rin gs,
as well as to the exhaust system.
EAU86160
Fuel tank overflow hoseThe overflow hose drains excess gaso-
line and directs it safely away from the
vehicle.
Before operating the vehicle: Check the fuel tank overflow hose
connection.
Check the fuel tank overflow hose
for cracks or damage, and replace
it if necessary.
Make sure that the fuel tank over-
flow hose is not blocked, and
clean it if necessary.
Make sure that the fuel tank over-
flow hose is positioned as shown.
E5
E10
1. Fuel tank overflow hose
2. White mark
3. Clamp
111
32
22
UB7NE1E0.book Page 23 Friday, September 3, 2021 11:25 AM
Page 45 of 110
Instrument and control functions
4-24
4
TIPSee page 7-10 for canister information.
EAU13435
Catalytic converterThe exhaust system contains catalytic
converter(s) to reduce harmful exhaust
emissions.
WARNING
EWA10863
The exhaust system is hot after op-
eration. To prevent a fire hazar d or
b urns:
Do not park the vehicle near
possi ble fire hazar ds such as
g rass or other materials that
easily burn.
Park the vehicle in a place
where pe destrians or child ren
are not likely to touch the hot
exhaust system.
Make sure that the exhaust sys-
tem has cooled down before
d oin g any maintenance work.
Do not allow the en gine to id le
more than a few minutes. Lon g
i d lin g can cause a buil d-up of
heat.
EAU57992
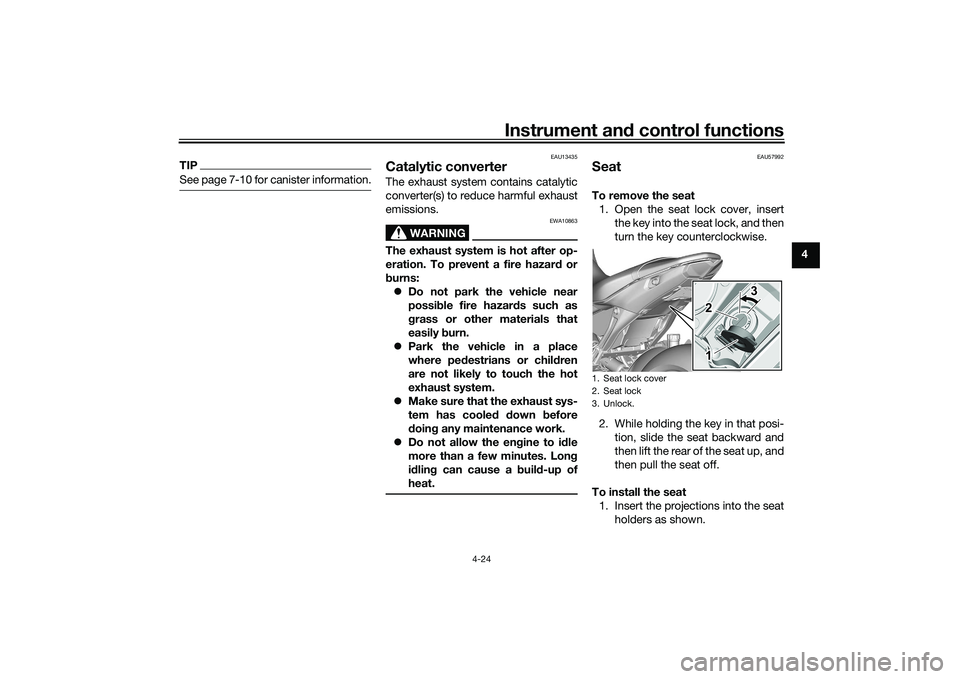
SeatTo remove the seat 1. Open the seat lock cover, insert the key into the seat lock, and then
turn the key counterclockwise.
2. While holding the key in that posi- tion, slide the seat backward and
then lift the rear of the seat up, and
then pull the seat off.
To install the seat 1. Insert the projections into the seat holders as shown.1. Seat lock cover
2. Seat lock
3. Unlock.
3 3
1 2 3
1
2
UB7NE1E0.book Page 24 Friday, September 3, 2021 11:25 AM
Page 46 of 110

Instrument and control functions
4-25
4
2. Push the rear of the seat down tolock it in place.
3. Remove the key.
TIPMake sure that the seat is properly se-
cured before riding.
EAU91560
Ri der footrest positionThe rider footrests can be adjusted to
one of two positions. From the factory,
the footrests are in the low position.
Have a Yamaha dealer adjust the posi-
tions of the rider footrests.
EAU46833
Han dle bar position The handlebar can be adjusted to one
of two positions to suit the rider’s pref-
erence. Have a Yamaha dealer adjust
the position of the handlebar.
1. Projection
2. Seat holder2 2 2 1
1
1. Handlebar
1
UB7NE1E0.book Page 25 Friday, September 3, 2021 11:25 AM
Page 71 of 110
Periodic maintenance an d a djustment
7-10
7
EAU36113
CanisterThis model is equipped with a canister
to prevent the discharging of fuel vapor
into the atmosphere. Before operating
this vehicle, make sure to check the
following:
Check each hose connection.
Check each hose and canister for
cracks or damage. Replace if
damaged.
Make sure that the canister
breather is not blocked, and if
necessary, clean it.
EAU1990G
Engine oilThe engine oil level should be checked
regularly. In addition, the oil must be
changed and the oil filter cartridge re-
placed at the intervals specified in the
periodic maintenance chart.NOTICE
ECA11621
In or der to prevent clutch slip-
pa ge (since the en gine oil also
lu bricates the clutch), do not
mix any chemical add itives. Do
not use oils with a diesel speci-
fication of “CD” or oils of a hi gh-
er quality than specified . In
a dd ition, do not use oils lab eled
“ENERGY CONSERVING II” or
hi gher.
Make sure that no forei gn mate-
rial enters the crankcase.
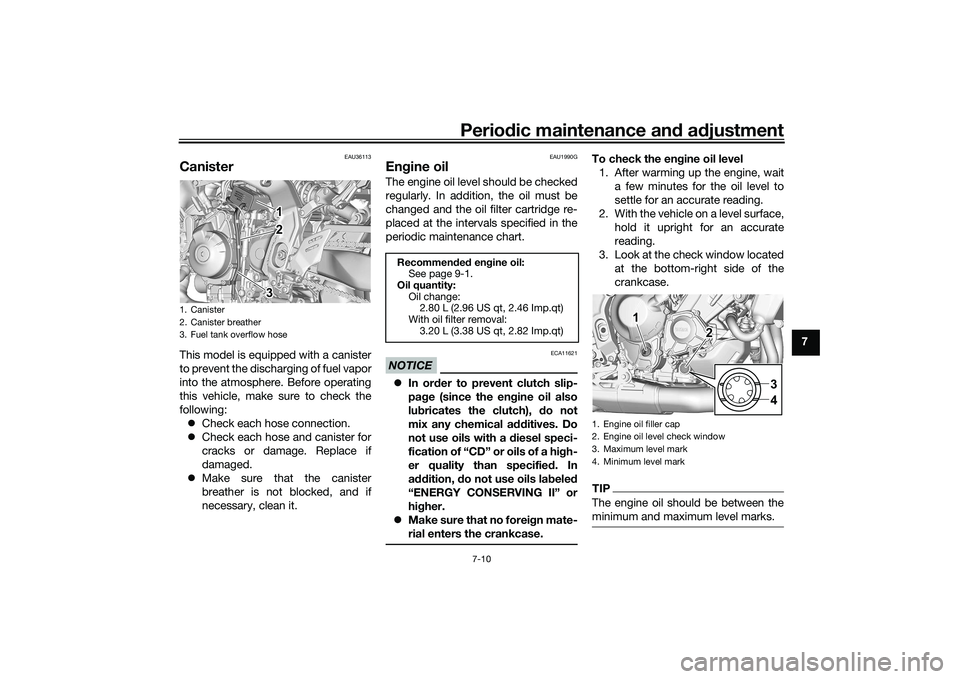
To check the en gine oil level
1. After warming up the engine, wait a few minutes for the oil level to
settle for an accurate reading.
2. With the vehicle on a level surface, hold it upright for an accurate
reading.
3. Look at the check window located at the bottom-right side of the
crankcase.TIPThe engine oil should be between the
minimum and maximum level marks.
1. Canister
2. Canister breather
3. Fuel tank overflow hose
1 1
2
3 123
Recommen
ded en gine oil:
See page 9-1.
Oil quantity: Oil change:2.80 L (2.96 US qt, 2.46 Imp.qt)
With oil filter removal: 3.20 L (3.38 US qt, 2.82 Imp.qt)
1. Engine oil filler cap
2. Engine oil level check window
3. Maximum level mark
4. Minimum level mark
1 1
2
1
2
34
UB7NE1E0.book Page 10 Friday, September 3, 2021 11:25 AM
Page 80 of 110
Periodic maintenance an d a djustment
7-19
7 b
rakin g performance, which may re-
sult in loss of control and an acci-
d ent.
EAU36505
Brake li ght switchesThe brake light should come on just
before braking takes effect. The brake
light is activated by switches connect-
ed to the brake lever and brake pedal.
Since the brake light switches are
components of the anti-lock brake sys-
tem, they should only be serviced by a
Yamaha dealer.
EAU22393
Checkin g the front an d rear
b rake pa dsThe front and rear brake pads must be
checked for wear at the intervals spec-
ified in the periodic maintenance and
lubrication chart.
EAU36891
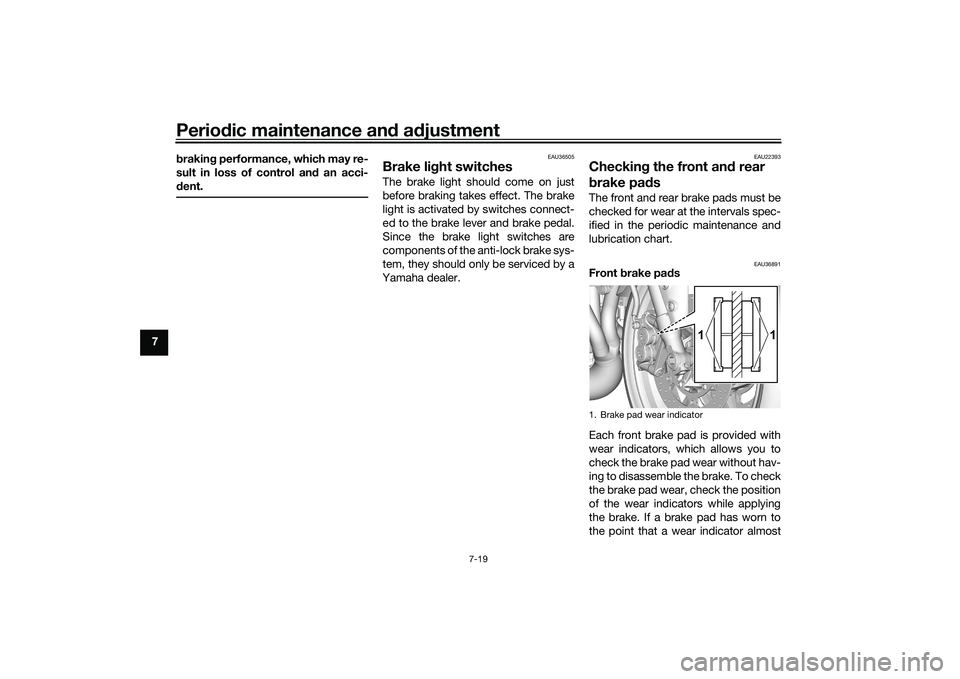
Front brake pa ds
Each front brake pad is provided with
wear indicators, which allows you to
check the brake pad wear without hav-
ing to disassemble the brake. To check
the brake pad wear, check the position
of the wear indicators while applying
the brake. If a brake pad has worn to
the point that a wear indicator almost1. Brake pad wear indicator
1
1
UB7NE1E0.book Page 19 Friday, September 3, 2021 11:25 AM