traction control YAMAHA MT-09 2022 Owners Manual
[x] Cancel search | Manufacturer: YAMAHA, Model Year: 2022, Model line: MT-09, Model: YAMAHA MT-09 2022Pages: 110, PDF Size: 3.8 MB
Page 18 of 110
Special features
3-1
3
EAU91323
“D-MODE”“D-MODE” is an electronically con-
trolled engine performance system.
WARNING
EWA18440
Do not change the d rive mo de while
the vehicle is movin g.The “D-MODE” system consists of 4
different control maps which regulate
engine response and output, thus pro-
viding you with a selection of modes to
fit your preferences and the riding envi-
ronment.
D-MODE 1 - Sporty engine response
D-MODE 2 - Moderate engine re-
sponse
D-MODE 3 - Mild engine response
D-MODE 4 - Mild engine response and
limits engine outputTIP The current “D-MODE” setting is
shown in the MODE display. (See
page 4-11.)
The current “D-MODE” setting is
saved when the vehicle is turned
off.
The “D-MODE” is controlled by
the MODE switches, see page 4-4
for more information.
EAU91434
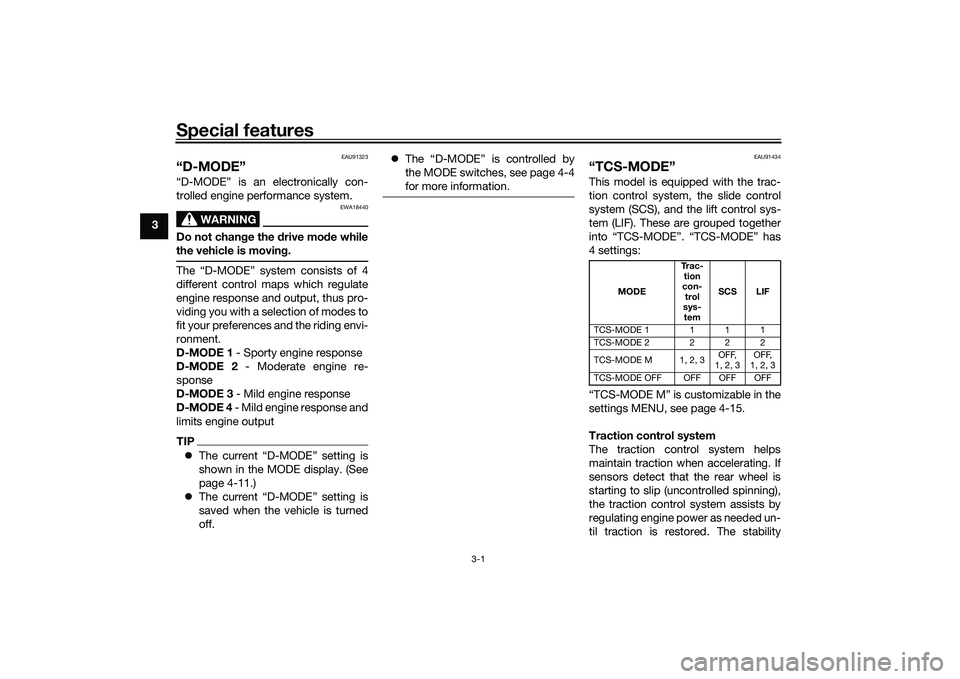
“TCS-MODE”This model is equipped with the trac-
tion control system, the slide control
system (SCS), and the lift control sys-
tem (LIF). These are grouped together
into “TCS-MODE”. “TCS-MODE” has
4 settings:
“TCS-MODE M” is customizable in the
settings MENU, see page 4-15.
Traction control system
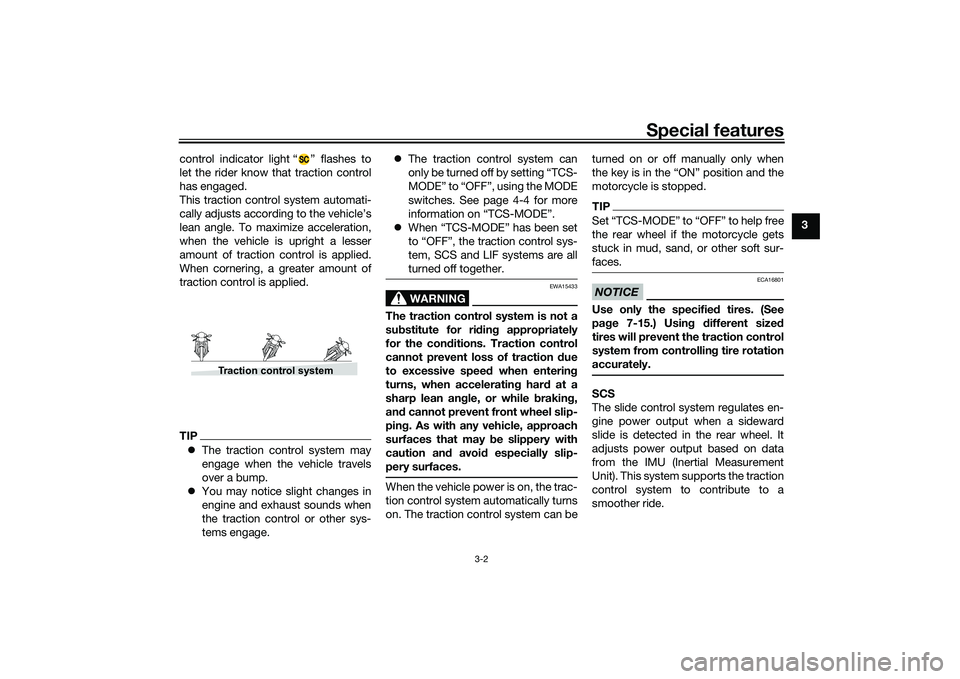
The traction control system helps
maintain traction when accelerating. If
sensors detect that the rear wheel is
starting to slip (uncontrolled spinning),
the traction control system assists by
regulating engine power as needed un-
til traction is restored. The stability
MODE Tr a c -
tion
con- trol
sys- tem SCS LIF
TCS-MODE 1 111
TCS-MODE 2 222
TCS-MODE M 1, 2, 3 OFF,
1, 2, 3 OFF,
1, 2, 3
TCS-MODE OFF OFF OFF OFF
UB7NE1E0.book Page 1 Friday, September 3, 2021 11:25 AM
Page 19 of 110
Special features
3-2
3
control indicator light “ ” flashes to
let the rider know that traction control
has engaged.
This traction control system automati-
cally adjusts according to the vehicle’s
lean angle. To maximize acceleration,
when the vehicle is upright a lesser
amount of traction control is applied.
When cornering, a greater amount of
traction control is applied.
TIP
The traction control system may
engage when the vehicle travels
over a bump.
You may notice slight changes in
engine and exhaust sounds when
the traction control or other sys-
tems engage.
The traction control system can
only be turned off by setting “TCS-
MODE” to “OFF”, using the MODE
switches. See page 4-4 for more
information on “TCS-MODE”.
When “TCS-MODE” has been set
to “OFF”, the traction control sys-
tem, SCS and LIF systems are all
turned off together.
WARNING
EWA15433
The traction control system is not a
substitute for ri din g appropriately
for the con ditions. Traction control
cannot prevent loss of traction d ue
to excessive spee d when enterin g
turns, when acceleratin g har d at a
sharp lean an gle, or while brakin g,
an d cannot prevent front wheel slip-
pin g. As with any vehicle, approach
surfaces that may be slippery with
caution an d avoi d especially slip-
pery surfaces.When the vehicle power is on, the trac-
tion control system automatically turns
on. The traction control system can be turned on or off manually only when
the key is in the “ON” position and the
motorcycle is stopped.
TIP
the rear wheel if the motorcycle gets
stuck in mud, sand, or other soft sur-
faces.NOTICE
ECA16801
Use only the specifie
d tires. (See
pa ge 7-15.) Usin g different size d
tires will prevent the traction control
system from controllin g tire rotation
accurately.SCS
The slide control system regulates en-
gine power output when a sideward
slide is detected in the rear wheel. It
adjusts power output based on data
from the IMU (Inertial Measurement
Unit). This system supports the traction
control system to contribute to a
smoother ride.
Traction control system
UB7NE1E0.book Page 2 Friday, September 3, 2021 11:25 AM
Page 21 of 110
Special features
3-4
3
EAU91350
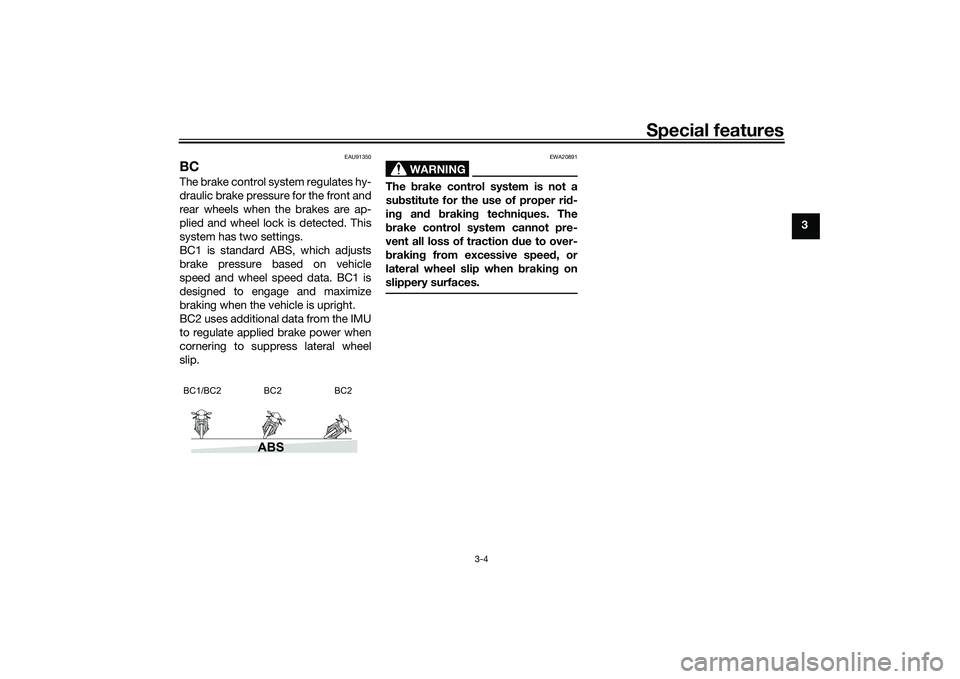
BCThe brake control system regulates hy-
draulic brake pressure for the front and
rear wheels when the brakes are ap-
plied and wheel lock is detected. This
system has two settings.
BC1 is standard ABS, which adjusts
brake pressure based on vehicle
speed and wheel speed data. BC1 is
designed to engage and maximize
braking when the vehicle is upright.
BC2 uses additional data from the IMU
to regulate applied brake power when
cornering to suppress lateral wheel
slip.
WARNING
EWA20891
The brake control system is not a
su bstitute for the use of proper ri d-
in g an d brakin g techniques. The
b rake control system cannot pre-
vent all loss of traction due to over-
b rakin g from excessive spee d, or
lateral wheel slip when brakin g on
slippery surfaces.
ABS
BC1/BC2 BC2 BC2
UB7NE1E0.book Page 4 Friday, September 3, 2021 11:25 AM
Page 26 of 110
Instrument and control functions
4-5
4
The “TCS-MODE” can only be
turned off from the main display.
Select “TCS-MODE” with the
“MODE” switch, then push and
hold the MODE up switch until
“OFF” is displayed.
To turn the traction control system
back on, use the MODE down
switch.
When “TCS-MODE” has been set
to “OFF”, the traction control sys-
tem, SCS and LIF systems are all
turned off together.
See page 4-11 for more informa-
tion on the MODE display.
See page 3-1 for more information
on “TCS-MODE”.
See page 3-1 for more information
on “D-MODE”.
EAU91373
Wheel switch “ ”
When the wheel switch is operated, a
cursor will appear around the previous-
ly selected item on the display.
The wheel switch controls:
Vehicle information displays
Settings MENU
Grip warmer function (Option) Operate the wheel switch as follows:
Rotate up
- rotate the wheel upward to
scroll up or increase a setting value.
Rotate down - rotate the wheel down-
ward to scroll down or decrease a set-
ting value.
Push inwar d - press the wheel switch
in towards the handlebar to select
items indicated by the cursor and con-
firm settings changes. Press and hold
the switch inward to reset selected
items.
TIP If the wheel switch is not operated
for a certain period of time, the
cursor will disappear.
For items that can be reset, leave
the cursor over the item, press
and hold the switch to reset.
See page 4-9 for more information
on the main screen and its func-
tions.
See page 4-14 for more informa-
tion on the MENU screen and how
to make settings changes.
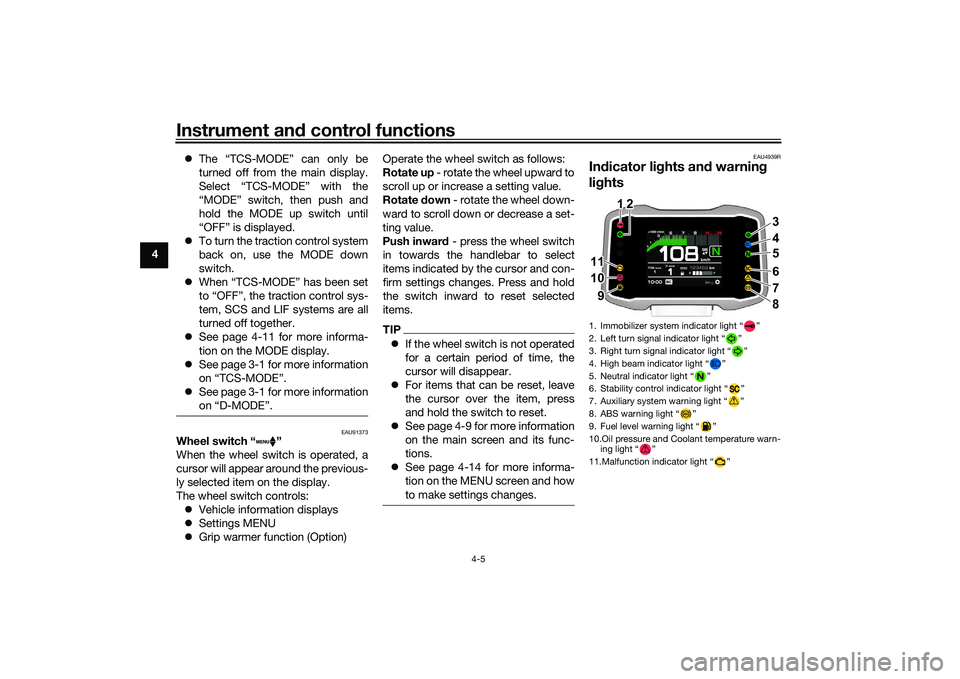
EAU4939R
Indicator li ghts and warning
li g hts1. Immobilizer system indicator light “ ”
2. Left turn signal indicator light “ ”
3. Right turn signal indicator light “ ”
4. High beam indicator light “ ”
5. Neutral indicator light “ ”
6. Stability control indicator light “ ”
7. Auxiliary system warning light “ ”
8. ABS warning light “ ”
9. Fuel level warning light “ ”
10.Oil pressure and Coolant temperature warn-
ing light “ ”
11.Malfunction indicator light “ ”
ABS
3
4
56
7
8
11 11
10 10
9
11 1 12
2 2
10 9 9
UB7NE1E0.book Page 5 Friday, September 3, 2021 11:25 AM
Page 28 of 110
Instrument and control functions
4-7
4
Maintain proper brake pedal
height to prevent rear brake from
dragging.
Do not operate the vehicle in an
extreme manner. For example, re-
peated or excessive opening and
closing of the throttle, racing,
burnouts, wheelies, extended
half-clutch use, etc.
EAU91500
ABS warnin g li ght “ ”
In normal operation, the ABS warning
light comes on when the vehicle is
turned on, and goes off after traveling
at a speed of 5 km/h (3 mi/h) or higher.TIPIf the warning light does not work as
described above, or if the warning light
comes on while riding, the ABS may
not work correctly. Have a Yamaha
dealer check the vehicle as soon as
possible.
WARNING
EWA21120
If the ABS warnin g lig ht does not
turn off after reachin g 5 km/h (3
mi/h), or if the warnin g li ght comes
on while ri din g:
Use extra caution to avoi d pos-
si ble wheel lock durin g emer-
g ency brakin g.
Have a Yamaha dealer check
the vehicle as soon as possi ble.
EAU88350
Immo bilizer system in dicator
li g ht “ ”
When the main switch is turned off and
30 seconds have passed, the indicator
light will flash steadily to indicate the
immobilizer system is enabled. After 24
hours have passed, the indicator light
will stop flashing, however the immobi-
lizer system is still enabled.TIPWhen the vehicle is turned on, this light
should come on for a few seconds and
then go off. If the light does not come
on, or if the light remains on, have a
Yamaha dealer check the vehicle.
Transpon der interference
If the immobilizer system indicator light
flashes in the pattern, slowly 5 times
then quickly 2 times, this could be
caused by transponder interference. If
this occurs, try the following. 1. Make sure there are no other im- mobilizer keys close to the main
switch.
2. Use the code re-registering key to start the engine.
3. If the engine starts, turn it off, and try starting the engine with the
standard keys.
4. If one or both of the standard keys do not start the engine, take the
vehicle and all 3 keys to a Yamaha
dealer to have the standard keys
re-registered.
EAU91472
Sta bility control in dicator li ght “ ”
This indicator light flashes when the
traction control system, SCS, or LIF
systems engage while riding. When
“TCS-MODE” is set to “OFF”, the indi-
cator will come on.
UB7NE1E0.book Page 7 Friday, September 3, 2021 11:25 AM
Page 29 of 110
Instrument and control functions
4-8
4
TIPWhen the vehicle is turned on, this light
should come on for a few seconds and
then go off. If the light does not come
on, or if the light remains on, have a
Yamaha dealer check the vehicle.NOTICE
ECA27222
When turnin g the main switch on,
avoi d any movement or vi bration of
the vehicle as it may interfere with
the initialization of the IMU. If this
occurs, the traction control system
will not operate an d the “TCS-
MODE” display will read “OFF” until
the IMU can initialize.
EAU88362
Oil pressure an d Coolant tempera-
ture warnin g li ght “ ”
This warning light comes on if the en-
gine oil pressure is low or if the coolant
temperature is high. If this occurs, stop
the engine immediately.TIP When the vehicle is first turned on,
this light should come on until the
engine is started.
If a malfunction is detected, this
light will come on and the oil pres-
sure icon will flash.
NOTICE
ECA22441
If the oil pressure an d coolant warn-
in g li ght does not g o off after start-
in g the en gine or if it comes on while
the en gine is runnin g, stop the vehi-
cle an d en gine imme diately.
If the en gine is overheatin g, the
coolant temperature warnin g
icon will come on. Let the en-
g ine cool. Check the coolant
level (see pa ge 7-35).
If the en gine oil pressure is low,
the oil pressure warnin g icon
will come on. Check the oil level
(see pa ge 7-10).
If the warnin g lig ht remains on
after lettin g the en gine cool an d
confirmin g the proper oil level,
have a Yamaha d ealer check
the vehicle. Do not continue to
operate the vehicle!
EAU88370
Auxiliary system warnin g lig ht “ ”
This warning light comes on if a prob-
lem is detected in a non-engine-related
system.TIPWhen the vehicle is turned on, this light
should come on for a few seconds and
then go off. Otherwise, have a Yamaha
dealer check the vehicle.
UB7NE1E0.book Page 8 Friday, September 3, 2021 11:25 AM
Page 32 of 110
Instrument and control functions
4-11
4
If the vehicle coolant temperature
is above 124 °C (255 °F) the cool-
ant temperature display will read
“Hi”
To reset information display items1. Rotate the wheel switch to select
one of the two vehicle information
displays.
2. Press the wheel switch inward to highlight the information display.
3. Rotate the wheel switch to select the desired information display
item.
4. Press and hold the wheel switch inward until the highlighted dis-
play item is reset.
Transmission gear display
This shows which gear the transmis-
sion is in. This model has 6 gears and a
neutral position. The neutral position is
indicated by the neutral indicator
light “ ” and by the transmission gear
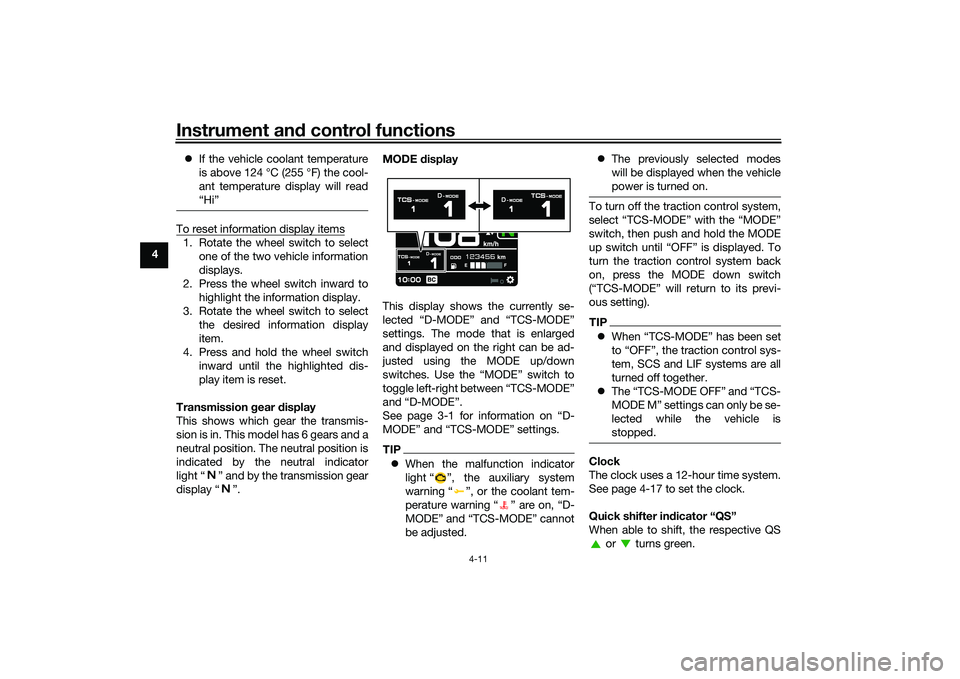
display “ ”. MODE
display
This display shows the currently se-
lected “D-MODE” and “TCS-MODE”
settings. The mode that is enlarged
and displayed on the right can be ad-
justed using the MODE up/down
switches. Use the “MODE” switch to
toggle left-right between “TCS-MODE”
and “D-MODE”.
See page 3-1 for information on “D-
MODE” and “TCS-MODE” settings.
TIP When the malfunction indicator
light “ ”, the auxiliary system
warning “ ”, or the coolant tem-
perature warning “ ” are on, “D-
MODE” and “TCS-MODE” cannot
be adjusted.
The previously selected modes
will be displayed when the vehicle
power is turned on.
To turn off the traction control system,
select “TCS-MODE” with the “MODE”
switch, then push and hold the MODE
up switch until “OFF” is displayed. To
turn the traction control system back
on, press the MODE down switch
(“TCS-MODE” will return to its previ-
ous setting).TIPWhen “TCS-MODE” has been set
to “OFF”, the traction control sys-
tem, SCS and LIF systems are all
turned off together.
The “TCS-MODE OFF” and “TCS-
M OD E M ” se t ti ng s c a n o n l y b e s e -
lected while the vehicle is
stopped.Clock
The clock uses a 12-hour time system.
See page 4-17 to set the clock.
Quick shifter in dicator “QS”
When able to shift, the respective QS or turns green.
UB7NE1E0.book Page 11 Friday, September 3, 2021 11:25 AM
Page 34 of 110
Instrument and control functions
4-13
4 To start the timer, press the pass
switch.
Each press of the pass switch will in-
crease the lap count by 1 and reset the
current lap timer.
To pause the lap timer, press the wheel
switch inward.
To unpause the timer, press the pass
switch and the timer will resume with-
out counting a new lap.
To exit the lap time mode, turn it off in
the settings MENU. (See page 4-14.)
TIP
The engine must be running to
start the lap timer.
The headlight will flash when the
pass switch is pressed.
Whenever the lap timer is paused,
it can be resumed using the pass
switch.Brake control icon “BC”
This icon is replaced by the auxiliary
system warning and coolant tempera-
ture warning indicators when they are
activated.
For more information on the BC sys-
tem see “BC” on page 3-4. Error mo
de warnin g “Err”
When an internal error occurs (e.g.,
communication with a system control-
ler has been cut off), the error mode
warning will appear as follows.
“Err” and “ ” indicator light indicates
an ECU error.
“Err” only indicates an ABS ECU error.
TIPDepending on the nature of the error,
the display may not function properly
and the traction control system set-
tings may be impossible to change.
Additionally, ABS may not function
properly. Use extra care when braking
and have a Yamaha dealer check the
vehicle immediately.Auxiliary system warnin g“”
This icon appears if a problem is de-
tected in a non-engine-related system.
Coolant temperature warnin g“”
This icon appears if the coolant tem-
perature reaches 116 °C (241 °F) or
higher. Stop the vehicle and turn off the
engine. Allow the engine to cool.
NOTICE
ECA10022
Do not continue to operate the en-
g ine if it is overheatin g.Oil pressure warnin g“”
This icon appears when the engine oil
pressure is low. When the vehicle is
first turned on, engine oil pressure has
yet to build, so this icon will come on
and stay on until the engine has been
started.TIPIf a malfunction is detected, the oil
pressure warning icon will flash repeat-
edly.NOTICE
ECA26410
Do not continue to operate the en-
g ine if the oil pressure is low.
UB7NE1E0.book Page 13 Friday, September 3, 2021 11:25 AM
Page 35 of 110
Instrument and control functions
4-14
4
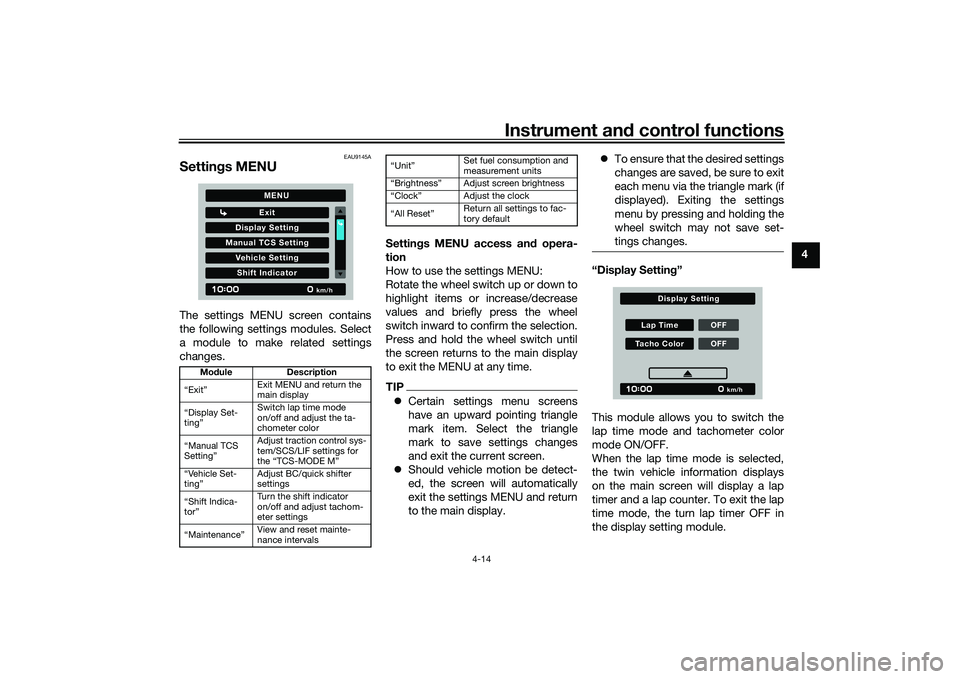
EAU9145A
Settin gs MENUThe settings MENU screen contains
the following settings modules. Select
a module to make related settings
changes. Settin
gs MENU access an d opera-
tion
How to use the settings MENU:
Rotate the wheel switch up or down to
highlight items or increase/decrease
values and briefly press the wheel
switch inward to confirm the selection.
Press and hold the wheel switch until
the screen returns to the main display
to exit the MENU at any time.
TIP Certain settings menu screens
have an upward pointing triangle
mark item. Select the triangle
mark to save settings changes
and exit the current screen.
Should vehicle motion be detect-
ed, the screen will automatically
exit the settings MENU and return
to the main display.
To ensure that the desired settings
changes are saved, be sure to exit
each menu via the triangle mark (if
displayed). Exiting the settings
menu by pressing and holding the
wheel switch may not save set-
tings changes.
“Display Settin g”
This module allows you to switch the
lap time mode and tachometer color
mode ON/OFF.
When the lap time mode is selected,
the twin vehicle information displays
on the main screen will display a lap
timer and a lap counter. To exit the lap
time mode, the turn lap timer OFF in
the display setting module.
Mo dule Description
“Exit” Exit MENU and return the
main display
“Display Set-
ting” Switch lap time mode
on/off and adjust the ta-
chometer color
“Manual TCS
Setting” Adjust traction control sys-
tem/SCS/LIF settings for
the “TCS-MODE M”
“Vehicle Set-
ting” Adjust BC/quick shifter
settings
“Shift Indica-
tor” Turn the shift indicator
on/off and adjust tachom-
eter settings
“Maintenance” View and reset mainte-
nance intervals
Display S
etting
Exit
Manual TCS S ettingVehicle S ettingShift Indicator
km/h
MENU
Page 36 of 110

Instrument and control functions
4-15
4 To change the tachometer to color
mode, select ON.
“Manual TCS Settin
g”
This module allows you to customize
the “TCS-MODE M” which is accessi-
ble on the main display using the
MODE switches.
Traction control system
This model uses a variable traction
control system. For each setting level,
the further the vehicle is leaned over,
the greater the amount of traction con-
trol (system intervention) is applied.
There are 3 setting levels available for
the “TCS-MODE M”. Setting level 1 applies the least amount
of overall system intervention, while
setting level 3 applies the greatest
amount of overall traction control.
TIP
The traction control system can
only be turned on or off via the
main screen using the MODE
switches.
SCS and LIF can be turned off in-
dependently of traction control
system for “TCS-MODE M”.
When “TCS-MODE” has been set
to “OFF” on the main screen: trac-
tion control system, SCS and LIF
are all turned off together.SCSSCS can be set to OFF, 1, 2, and 3.
OFF turns the slide control system off,
setting level 1 provides the least
amount of system intervention, and
setting level 3 provides the greatest
amount of system intervention.
LIFLIF can be set to OFF, 1, 2, and 3. Setting level 1 provides the least
amount of system intervention and set-
ting 3 most strongly reduces the rate of
wheel lift.
OFF turns LIF off.
“Vehicle Setting
”
The vehicle setting module allows you
to adjust setting for the BC and quick
shifter.
TCS 1SC S 1LIF 1
km/h
Manual TCS Setting
BC SettingQS S etting
km/h
Vehicle Setting
UB7NE1E0.book Page 15 Friday, September 3, 2021 11:25 AM