tires YAMAHA MT-25 2016 Owners Manual
[x] Cancel search | Manufacturer: YAMAHA, Model Year: 2016, Model line: MT-25, Model: YAMAHA MT-25 2016Pages: 96, PDF Size: 5.16 MB
Page 6 of 96
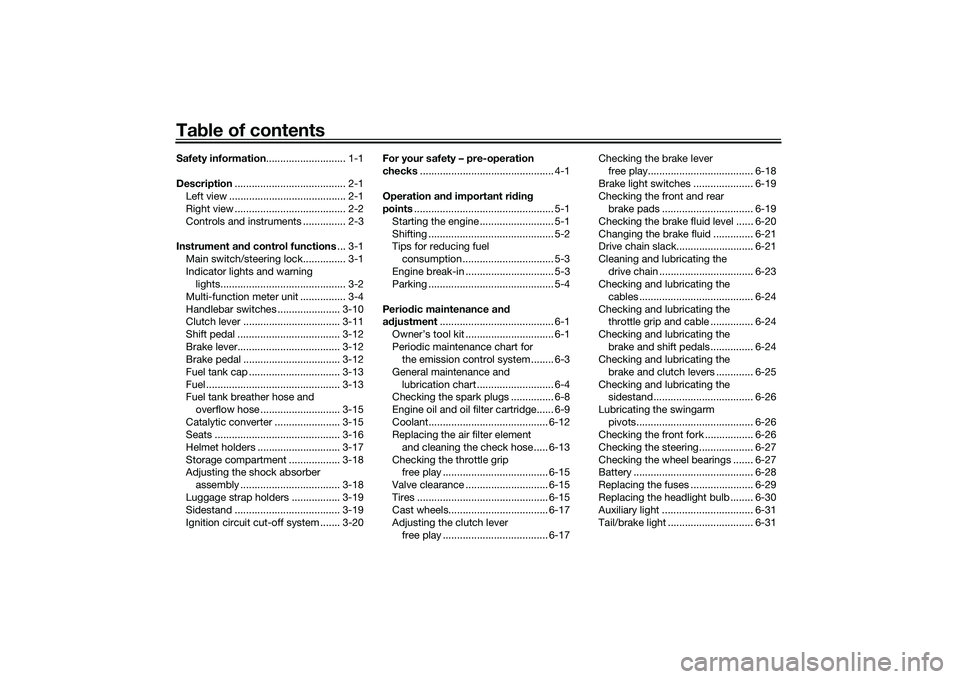
Table of contentsSafety information............................ 1-1
Description....................................... 2-1
Left view ......................................... 2-1
Right view ....................................... 2-2
Controls and instruments ............... 2-3
Instrument and control functions... 3-1
Main switch/steering lock............... 3-1
Indicator lights and warning
lights............................................ 3-2
Multi-function meter unit ................ 3-4
Handlebar switches ...................... 3-10
Clutch lever .................................. 3-11
Shift pedal .................................... 3-12
Brake lever.................................... 3-12
Brake pedal .................................. 3-12
Fuel tank cap ................................ 3-13
Fuel ............................................... 3-13
Fuel tank breather hose and
overflow hose ............................ 3-15
Catalytic converter ....................... 3-15
Seats ............................................ 3-16
Helmet holders ............................. 3-17
Storage compartment .................. 3-18
Adjusting the shock absorber
assembly ................................... 3-18
Luggage strap holders ................. 3-19
Sidestand ..................................... 3-19
Ignition circuit cut-off system ....... 3-20For your safety – pre-operation
checks............................................... 4-1
Operation and important riding
points................................................. 5-1
Starting the engine .......................... 5-1
Shifting ............................................ 5-2
Tips for reducing fuel
consumption ................................ 5-3
Engine break-in ............................... 5-3
Parking ............................................ 5-4
Periodic maintenance and
adjustment........................................ 6-1
Owner’s tool kit ............................... 6-1
Periodic maintenance chart for
the emission control system ........ 6-3
General maintenance and
lubrication chart ........................... 6-4
Checking the spark plugs ............... 6-8
Engine oil and oil filter cartridge...... 6-9
Coolant.......................................... 6-12
Replacing the air filter element
and cleaning the check hose..... 6-13
Checking the throttle grip
free play ..................................... 6-15
Valve clearance ............................. 6-15
Tires .............................................. 6-15
Cast wheels................................... 6-17
Adjusting the clutch lever
free play ..................................... 6-17Checking the brake lever
free play..................................... 6-18
Brake light switches ..................... 6-19
Checking the front and rear
brake pads ................................ 6-19
Checking the brake fluid level ...... 6-20
Changing the brake fluid .............. 6-21
Drive chain slack........................... 6-21
Cleaning and lubricating the
drive chain ................................. 6-23
Checking and lubricating the
cables ........................................ 6-24
Checking and lubricating the
throttle grip and cable ............... 6-24
Checking and lubricating the
brake and shift pedals............... 6-24
Checking and lubricating the
brake and clutch levers ............. 6-25
Checking and lubricating the
sidestand................................... 6-26
Lubricating the swingarm
pivots......................................... 6-26
Checking the front fork ................. 6-26
Checking the steering................... 6-27
Checking the wheel bearings ....... 6-27
Battery .......................................... 6-28
Replacing the fuses ...................... 6-29
Replacing the headlight bulb ........ 6-30
Auxiliary light ................................ 6-31
Tail/brake light .............................. 6-31UB04E0E0.book Page 1 Wednesday, September 2, 2015 3:51 PM
Page 10 of 96
Safety information
1-3
1Avoid Carbon Monoxide Poisoning
All engine exhaust contains carbon
monoxide, a deadly gas. Breathing
carbon monoxide can cause head-
aches, dizziness, drowsiness, nausea,
confusion, and eventually death.
Carbon Monoxide is a colorless, odor-
less, tasteless gas which may be
present even if you do not see or smell
any engine exhaust. Deadly levels of
carbon monoxide can collect rapidly
and you can quickly be overcome and
unable to save yourself. Also, deadly
levels of carbon monoxide can linger
for hours or days in enclosed or poorly
ventilated areas. If you experience any
symptoms of carbon monoxide poi-
soning, leave the area immediately, get
fresh air, and SEEK MEDICAL TREAT-
MENT.
Do not run engine indoors. Even if
you try to ventilate engine exhaust
with fans or open windows and
doors, carbon monoxide can rap-
idly reach dangerous levels.
Do not run engine in poorly venti-
lated or partially enclosed areas
such as barns, garages, or car-
ports.Do not run engine outdoors where
engine exhaust can be drawn into
a building through openings such
as windows and doors.
Loading
Adding accessories or cargo to your
motorcycle can adversely affect stabil-
ity and handling if the weight distribu-
tion of the motorcycle is changed. To
avoid the possibility of an accident, use
extreme caution when adding cargo or
accessories to your motorcycle. Use
extra care when riding a motorcycle
that has added cargo or accessories.
Here, along with the information about
accessories below, are some general
guidelines to follow if loading cargo to
your motorcycle:
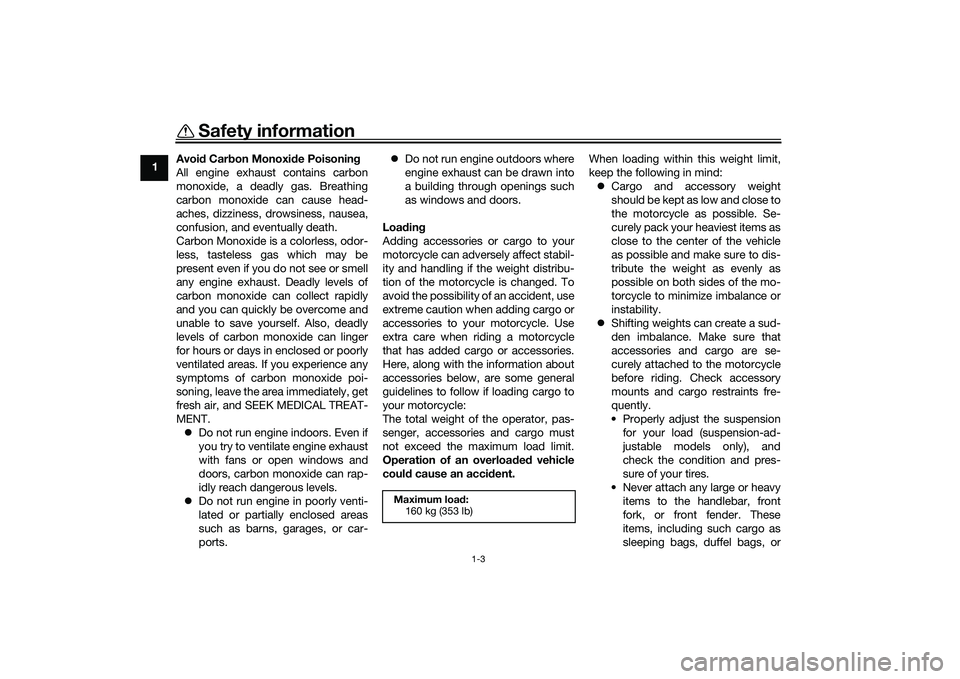
The total weight of the operator, pas-
senger, accessories and cargo must
not exceed the maximum load limit.
Operation of an overloaded vehicle
could cause an accident.When loading within this weight limit,
keep the following in mind:
Cargo and accessory weight
should be kept as low and close to
the motorcycle as possible. Se-
curely pack your heaviest items as
close to the center of the vehicle
as possible and make sure to dis-
tribute the weight as evenly as
possible on both sides of the mo-
torcycle to minimize imbalance or
instability.
Shifting weights can create a sud-
den imbalance. Make sure that
accessories and cargo are se-
curely attached to the motorcycle
before riding. Check accessory
mounts and cargo restraints fre-
quently.
• Properly adjust the suspension
for your load (suspension-ad-
justable models only), and
check the condition and pres-
sure of your tires.
• Never attach any large or heavy
items to the handlebar, front
fork, or front fender. These
items, including such cargo as
sleeping bags, duffel bags, or
Maximum load:
160 kg (353 lb)
UB04E0E0.book Page 3 Wednesday, September 2, 2015 3:51 PM
Page 12 of 96

Safety information
1-5
1operator and may limit control
ability, therefore, such accesso-
ries are not recommended.
Use caution when adding electri-
cal accessories. If electrical ac-
cessories exceed the capacity of
the motorcycle’s electrical sys-
tem, an electric failure could re-
sult, which could cause a
dangerous loss of lights or engine
power.
Aftermarket Tires and Rims
The tires and rims that came with your
motorcycle were designed to match
the performance capabilities and to
provide the best combination of han-
dling, braking, and comfort. Other
tires, rims, sizes, and combinations
may not be appropriate. Refer to page
6-15 for tire specifications and more in-
formation on replacing your tires.
Transporting the Motorcycle
Be sure to observe following instruc-
tions before transporting the motorcy-
cle in another vehicle.
Remove all loose items from the
motorcycle.Check that the fuel cock (if
equipped) is in the “OFF” position
and that there are no fuel leaks.
Point the front wheel straight
ahead on the trailer or in the truck
bed, and choke it in a rail to pre-
vent movement.
Shift the transmission in gear (for
models with a manual transmis-
sion).
Secure the motorcycle with tie-
downs or suitable straps that are
attached to solid parts of the mo-
torcycle, such as the frame or up-
per front fork triple clamp (and not,
for example, to rubber-mounted
handlebars or turn signals, or
parts that could break). Choose
the location for the straps carefully
so the straps will not rub against
painted surfaces during transport.
The suspension should be com-
pressed somewhat by the tie-
downs, if possible, so that the mo-
torcycle will not bounce exces-
sively during transport.
UB04E0E0.book Page 5 Wednesday, September 2, 2015 3:51 PM
Page 38 of 96
For your safety – pre-operation checks
4-2
4
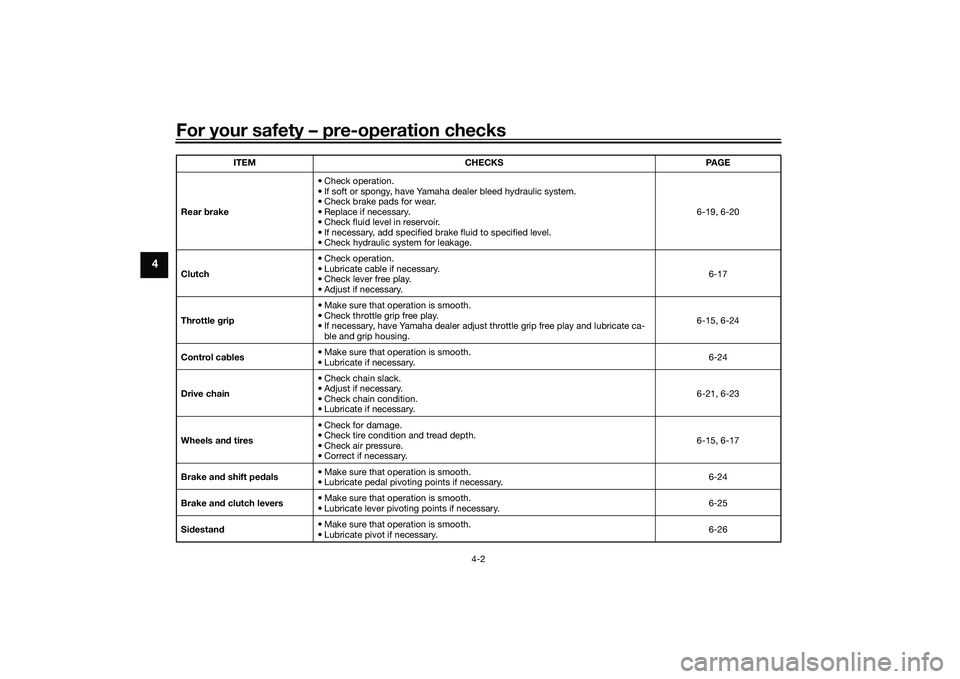
Rear brake• Check operation.
• If soft or spongy, have Yamaha dealer bleed hydraulic system.
• Check brake pads for wear.
• Replace if necessary.
• Check fluid level in reservoir.
• If necessary, add specified brake fluid to specified level.
• Check hydraulic system for leakage.6-19, 6-20
Clutch• Check operation.
• Lubricate cable if necessary.
• Check lever free play.
• Adjust if necessary.6-17
Throttle grip• Make sure that operation is smooth.
• Check throttle grip free play.
• If necessary, have Yamaha dealer adjust throttle grip free play and lubricate ca-
ble and grip housing.6-15, 6-24
Control cables• Make sure that operation is smooth.
• Lubricate if necessary.6-24
Drive chain• Check chain slack.
• Adjust if necessary.
• Check chain condition.
• Lubricate if necessary.6-21, 6-23
Wheels and tires•Check for damage.
• Check tire condition and tread depth.
• Check air pressure.
• Correct if necessary.6-15, 6-17
Brake and shift pedals• Make sure that operation is smooth.
• Lubricate pedal pivoting points if necessary.6-24
Brake and clutch levers• Make sure that operation is smooth.
• Lubricate lever pivoting points if necessary.6-25
Sidestand• Make sure that operation is smooth.
• Lubricate pivot if necessary.6-26 ITEM CHECKS PAGE
UB04E0E0.book Page 2 Wednesday, September 2, 2015 3:51 PM
Page 47 of 96
Periodic maintenance and adjustment
6-4
6
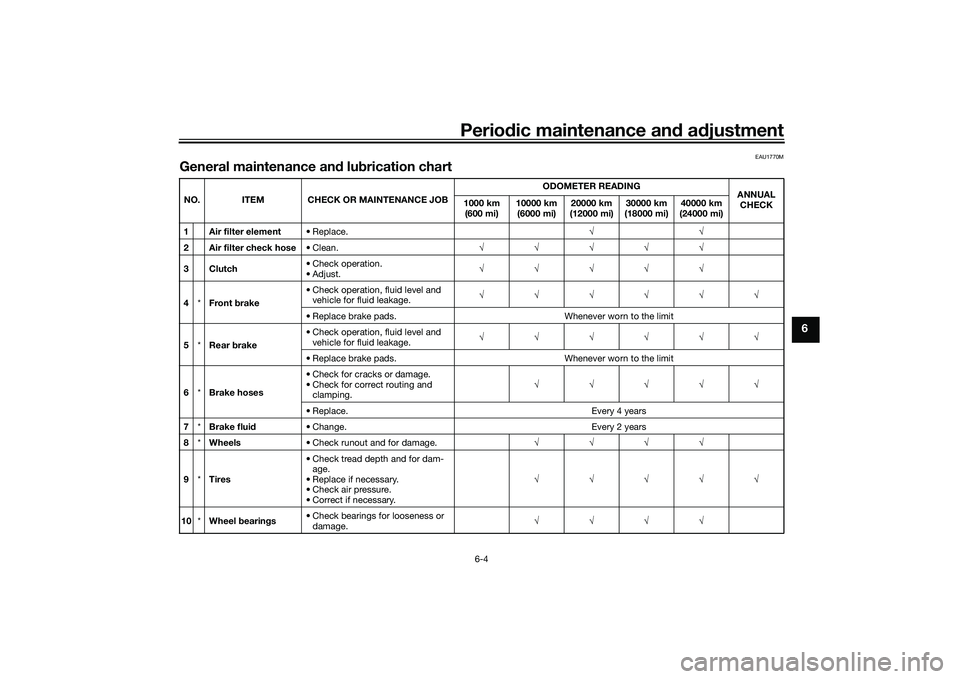
EAU1770M
General maintenance and lubrication chartNO. ITEM CHECK OR MAINTENANCE JOBODOMETER READING
ANNUAL
CHECK 1000 km
(600 mi)10000 km
(6000 mi)20000 km
(12000 mi)30000 km
(18000 mi)40000 km
(24000 mi)
1 Air filter element•Replace.√√
2 Air filter check hose• Clean.√√√√√
3Clutch• Check operation.
•Adjust.√√√√√
4*Front brake• Check operation, fluid level and
vehicle for fluid leakage.√√√√√√
• Replace brake pads. Whenever worn to the limit
5*Rear brake• Check operation, fluid level and
vehicle for fluid leakage.√√√√√√
• Replace brake pads. Whenever worn to the limit
6*Brake hoses• Check for cracks or damage.
• Check for correct routing and
clamping.√√√√√
• Replace. Every 4 years
7*Brake fluid• Change. Every 2 years
8*Wheels• Check runout and for damage.√√√√
9*Tires• Check tread depth and for dam-
age.
• Replace if necessary.
• Check air pressure.
• Correct if necessary.√√√√√
10*Wheel bearings• Check bearings for looseness or
damage.√√√√
UB04E0E0.book Page 4 Wednesday, September 2, 2015 3:51 PM
Page 58 of 96
Periodic maintenance and adjustment
6-15
6
EAU21386
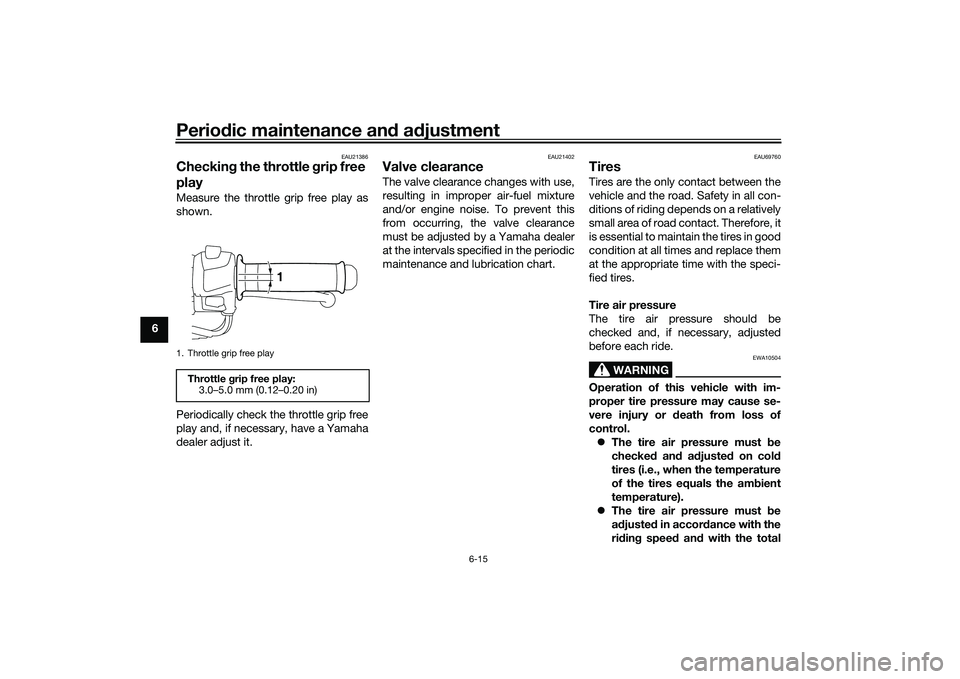
Checking the throttle grip free
playMeasure the throttle grip free play as
shown.
Periodically check the throttle grip free
play and, if necessary, have a Yamaha
dealer adjust it.
EAU21402
Valve clearanceThe valve clearance changes with use,
resulting in improper air-fuel mixture
and/or engine noise. To prevent this
from occurring, the valve clearance
must be adjusted by a Yamaha dealer
at the intervals specified in the periodic
maintenance and lubrication chart.
EAU69760
TiresTires are the only contact between the
vehicle and the road. Safety in all con-
ditions of riding depends on a relatively
small area of road contact. Therefore, it
is essential to maintain the tires in good
condition at all times and replace them
at the appropriate time with the speci-
fied tires.
Tire air pressure
The tire air pressure should be
checked and, if necessary, adjusted
before each ride.
WARNING
EWA10504
Operation of this vehicle with im-
proper tire pressure may cause se-
vere injury or death from loss of
control.
The tire air pressure must be
checked and adjusted on cold
tires (i.e., when the temperature
of the tires equals the ambient
temperature).
The tire air pressure must be
adjusted in accordance with the
riding speed and with the total
1. Throttle grip free playThrottle grip free play:
3.0–5.0 mm (0.12–0.20 in)
1
UB04E0E0.book Page 15 Wednesday, September 2, 2015 3:51 PM
Page 59 of 96
Periodic maintenance and adjustment
6-16
6 weight of rider, passenger, car-
go, and accessories approved
for this model.
WARNING
EWA10512
Never overload your vehicle. Opera-
tion of an overloaded vehicle could
cause an accident.
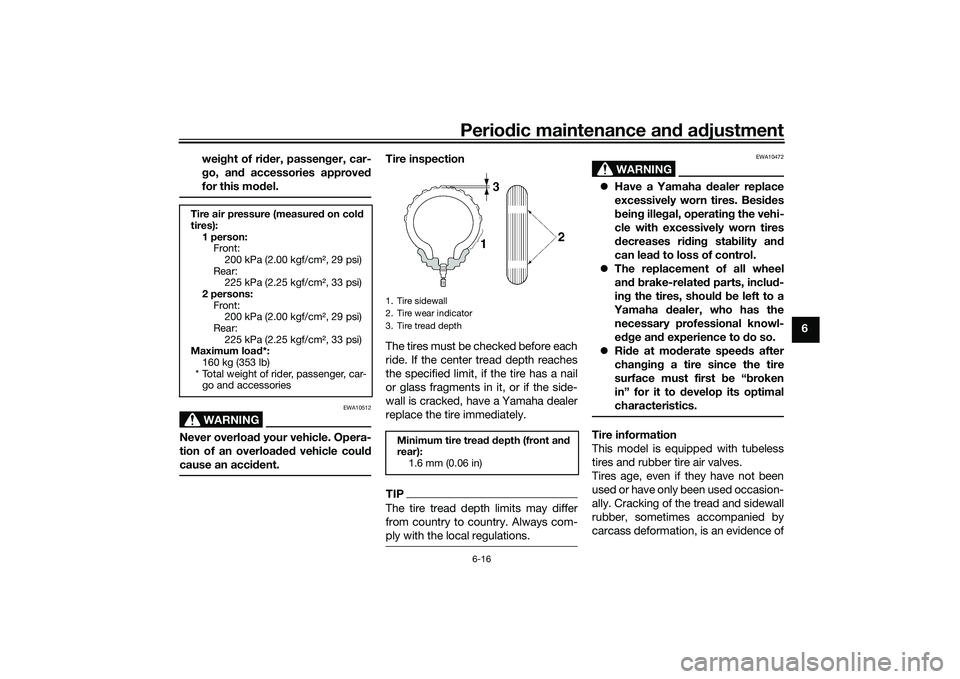
Tire inspection
The tires must be checked before each
ride. If the center tread depth reaches
the specified limit, if the tire has a nail
or glass fragments in it, or if the side-
wall is cracked, have a Yamaha dealer
replace the tire immediately.TIPThe tire tread depth limits may differ
from country to country. Always com-
ply with the local regulations.
WARNING
EWA10472
Have a Yamaha dealer replace
excessively worn tires. Besides
being illegal, operating the vehi-
cle with excessively worn tires
decreases riding stability and
can lead to loss of control.
The replacement of all wheel
and brake-related parts, includ-
ing the tires, should be left to a
Yamaha dealer, who has the
necessary professional knowl-
edge and experience to do so.
Ride at moderate speeds after
changing a tire since the tire
surface must first be “broken
in” for it to develop its optimal
characteristics.Tire information
This model is equipped with tubeless
tires and rubber tire air valves.
Tires age, even if they have not been
used or have only been used occasion-
ally. Cracking of the tread and sidewall
rubber, sometimes accompanied by
carcass deformation, is an evidence of
Tire air pressure (measured on cold
tires):
1 person:
Front:
200 kPa (2.00 kgf/cm2, 29 psi)
Rear:
225 kPa (2.25 kgf/cm2, 33 psi)
2 persons:
Front:
200 kPa (2.00 kgf/cm2, 29 psi)
Rear:
225 kPa (2.25 kgf/cm2, 33 psi)
Maximum load*:
160 kg (353 lb)
* Total weight of rider, passenger, car-
go and accessories
1. Tire sidewall
2. Tire wear indicator
3. Tire tread depth
Minimum tire tread depth (front and
rear):
1.6 mm (0.06 in)
UB04E0E0.book Page 16 Wednesday, September 2, 2015 3:51 PM
Page 60 of 96
Periodic maintenance and adjustment
6-17
6ageing. Old and aged tires shall be
checked by tire specialists to ascertain
their suitability for further use.
WARNING
EWA10462
The front and rear tires should be of
the same make and design, other-
wise the handling characteristics of
the vehicle may be different, which
could lead to an accident.After extensive tests, only the tires list-
ed below have been approved for this
model by Yamaha.
EAU21963
Cast wheelsTo maximize the performance, durabil-
ity, and safe operation of your vehicle,
note the following points regarding the
specified wheels.
The wheel rims should be
checked for cracks, bends, warp-
age or other damage before each
ride. If any damage is found, have
a Yamaha dealer replace the
wheel. Do not attempt even the
smallest repair to the wheel. A de-
formed or cracked wheel must be
replaced.
The wheel should be balanced
whenever either the tire or wheel
has been changed or replaced. An
unbalanced wheel can result in
poor performance, adverse han-
dling characteristics, and a short-
ened tire life.
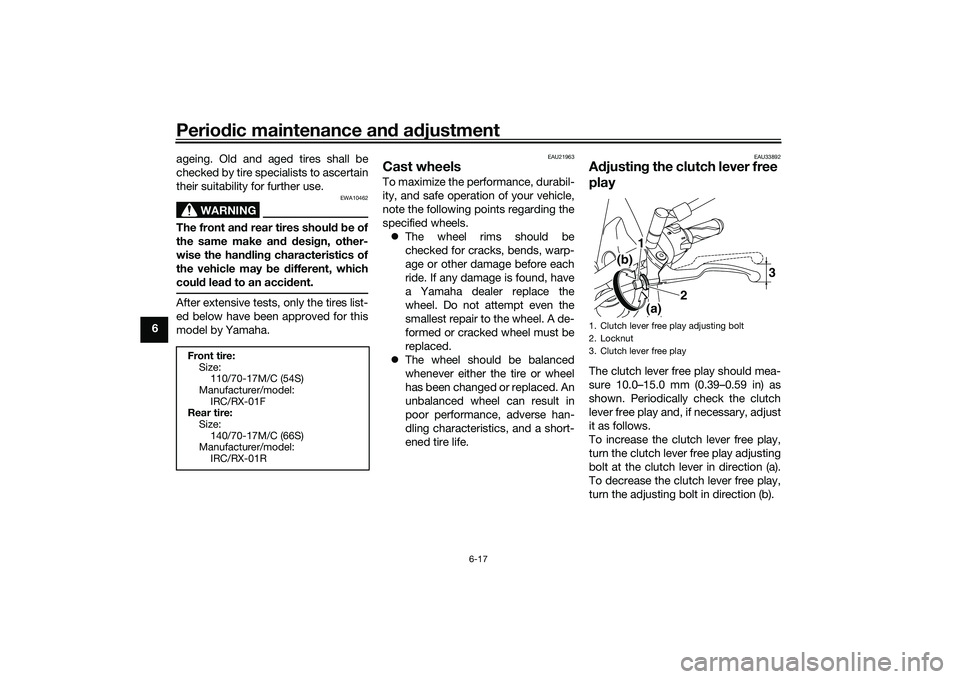
EAU33892
Adjusting the clutch lever free
playThe clutch lever free play should mea-
sure 10.0–15.0 mm (0.39–0.59 in) as
shown. Periodically check the clutch
lever free play and, if necessary, adjust
it as follows.
To increase the clutch lever free play,
turn the clutch lever free play adjusting
bolt at the clutch lever in direction (a).
To decrease the clutch lever free play,
turn the adjusting bolt in direction (b).
Front tire:
Size:
110/70-17M/C (54S)
Manufacturer/model:
IRC/RX-01F
Rear tire:
Size:
140/70-17M/C (66S)
Manufacturer/model:
IRC/RX-01R
1. Clutch lever free play adjusting bolt
2. Locknut
3. Clutch lever free play
3
(a) 1
2 (b)
UB04E0E0.book Page 17 Wednesday, September 2, 2015 3:51 PM
Page 85 of 96
Motorcycle care and storage
7-3
7 windshield which does not affect your
visibility and which cannot be easily
recognized.
After cleaning
1. Dry the motorcycle with a chamois
or an absorbing cloth.
2. Immediately dry the drive chain
and lubricate it to prevent it from
rusting.
3. Use a chrome polish to shine
chrome, aluminum and stainless-
steel parts, including the exhaust
system. (Even the thermally in-
duced discoloring of stainless-
steel exhaust systems can be re-
moved through polishing.)
4. To prevent corrosion, it is recom-
mended to apply a corrosion pro-
tection spray on all metal,
including chrome- and nickel-plat-
ed, surfaces.
5. Use spray oil as a universal clean-
er to remove any remaining dirt.
6. Touch up minor paint damage
caused by stones, etc.
7. Wax all painted surfaces.
8. Let the motorcycle dry completely
before storing or covering it.
WARNING
EWA11132
Contaminants on the brakes or tires
can cause loss of control.
Make sure that there is no oil or
wax on the brakes or tires.
If necessary, clean the brake
discs and brake linings with a
regular brake disc cleaner or
acetone, and wash the tires with
warm water and a mild deter-
gent. Before riding at higher
speeds, test the motorcycle’s
braking performance and cor-
nering behavior.NOTICE
ECA10801
Apply spray oil and wax spar-
ingly and make sure to wipe off
any excess.
Never apply oil or wax to any
rubber and plastic parts, but
treat them with a suitable care
product.
Avoid using abrasive polishing
compounds as they will wear
away the paint.
TIPConsult a Yamaha dealer for ad-
vice on what products to use.
Washing, rainy weather or humid
climates can cause the headlight
lens to fog. Turning the headlight
on for a short period of time will
help remove the moisture from the
lens.
UB04E0E0.book Page 3 Wednesday, September 2, 2015 3:51 PM
Page 86 of 96
Motorcycle care and storage
7-4
7
EAU26183
StorageShort-term
Always store your motorcycle in a cool,
dry place and, if necessary, protect it
against dust with a porous cover. Be
sure the engine and the exhaust sys-
tem are cool before covering the mo-
torcycle.NOTICE
ECA10811
Storing the motorcycle in a
poorly ventilated room or cover-
ing it with a tarp, while it is still
wet, will allow water and humid-
ity to seep in and cause rust.
To prevent corrosion, avoid
damp cellars, stables (because
of the presence of ammonia)
and areas where strong chemi-
cals are stored.Long-term
Before storing your motorcycle for sev-
eral months:
1. Follow all the instructions in the
“Care” section of this chapter.2. Fill up the fuel tank and add fuel
stabilizer (if available) to prevent
the fuel tank from rusting and the
fuel from deteriorating.
3. Perform the following steps to
protect the cylinders, piston rings,
etc. from corrosion.
a. Remove the spark plug caps
and spark plugs.
b. Pour a teaspoonful of engine
oil into each spark plug bore.
c. Install the spark plug caps onto
the spark plugs, and then
place the spark plugs on the
cylinder head so that the elec-
trodes are grounded. (This will
limit sparking during the next
step.)
d. Turn the engine over several
times with the starter. (This will
coat the cylinder walls with oil.)
WARNING! To prevent dam-
age or injury from sparking,
make sure to ground the
spark plug electrodes while
turning the engine over.
[EWA10952]
e. Remove the spark plug caps
from the spark plugs, and then
install the spark plugs and the
spark plug caps.
4. Lubricate all control cables and
the pivoting points of all levers and
pedals as well as of the side-
stand/centerstand.
5. Check and, if necessary, correct
the tire air pressure, and then lift
the motorcycle so that both of its
wheels are off the ground. Alterna-
tively, turn the wheels a little every
month in order to prevent the tires
from becoming degraded in one
spot.
6. Cover the muffler outlet with a
plastic bag to prevent moisture
from entering it.
7. Remove the battery and fully
charge it. Store it in a cool, dry
place and charge it once a month.
Do not store the battery in an ex-
cessively cold or warm place [less
than 0 °C (30 °F) or more than 30
°C (90 °F)]. For more information
on storing the battery, see page
6-28.
UB04E0E0.book Page 4 Wednesday, September 2, 2015 3:51 PM