engine YAMAHA NMAX 2015 User Guide
[x] Cancel search | Manufacturer: YAMAHA, Model Year: 2015, Model line: NMAX, Model: YAMAHA NMAX 2015Pages: 90, PDF Size: 3.56 MB
Page 24 of 90
Instrument and control functions
3-8
3
“km/L”: The average distance that
can be traveled on 1.0 L of fuel is
shown.
“L/100 km”: The average amount
of fuel necessary to travel 100 km
is shown.
“MPG”: The average distance that
can be traveled on 1.0 lmp. gal of
fuel under the current riding condi-
tions is shown.
To switch between the average fuel
consumption display settings, push
the “SELECT” button for one second.
To reset the average fuel consumption,
push the “RESET” button for at least
one second.
TIP After resetting the average fuel
consumption, “_ _._” will be
shown until the vehicle has trav-
eled 0.1 km (0.06 mi).
When MPG is selected, no units
indicator will be displayed.
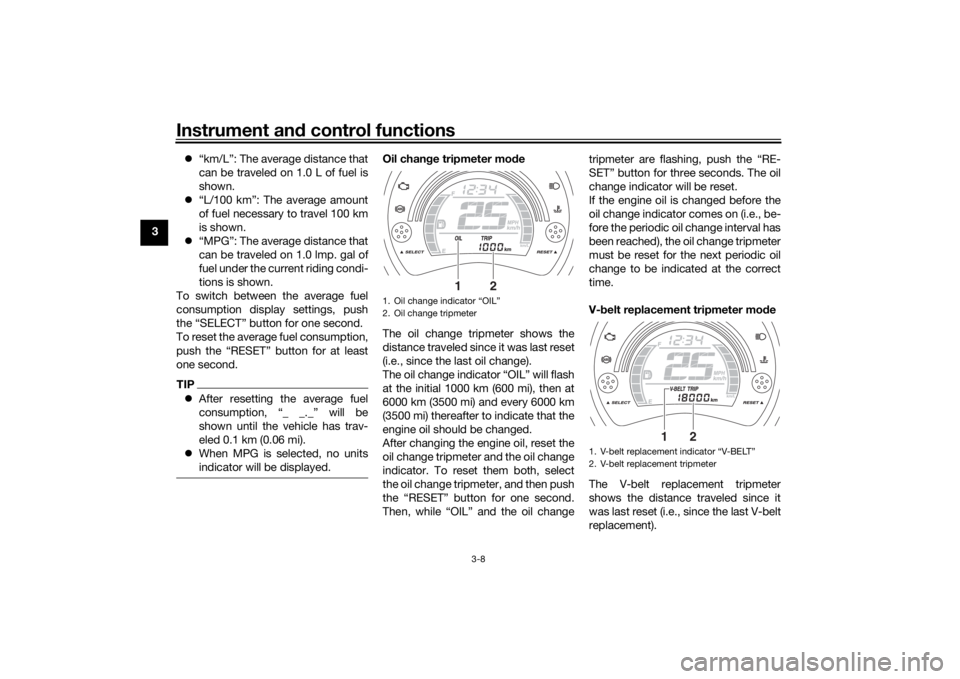
Oil chan ge tripmeter mo de
The oil change tripmeter shows the
distance traveled since it was last reset
(i.e., since the last oil change).
The oil change indicator “OIL” will flash
at the initial 1000 km (600 mi), then at
6000 km (3500 mi) and every 6000 km
(3500 mi) thereafter to indicate that the
engine oil should be changed.
After changing the engine oil, reset the
oil change tripmeter and the oil change
indicator. To reset them both, select
the oil change tripmeter, and then push
the “RESET” button for one second.
Then, while “OIL” and the oil change tripmeter are flashing, push the “RE-
SET” button for three seconds. The oil
change indicator will be reset.
If the engine oil is changed before the
oil change indicator comes on (i.e., be-
fore the periodic oil change interval has
been reached), the oil change tripmeter
must be reset for the next periodic oil
change to be indicated at the correct
time.
V-
belt replacement tripmeter mod e
The V-belt replacement tripmeter
shows the distance traveled since it
was last reset (i.e., since the last V-belt
replacement).1. Oil change indicator “OIL”
2. Oil change tripmeter
2
1
1. V-belt replacement indicator “V-BELT”
2. V-belt replacement tripmeter
2
1
U2DSE0E0.book Page 8 Thursday, March 19, 2015 10:34 AM
Page 25 of 90
Instrument and control functions
3-9
3
The V-belt replacement indicator “V-
BELT” will flash at every 18000 km
(10500 mi) thereafter to indicate that
the V-belt should be replaced.
After replacing the V-belt, reset the V-
belt replacement tripmeter and the V-
belt replacement indicator. To reset
them both, select the V-belt replace-
ment tripmeter, and then push the
“RESET” button for one second. Then,
while “V-BELT” and the V-belt replace-
ment tripmeter are flashing, push the
“RESET” button for three seconds. The
V-belt replacement indicator will be re-
set.
If the V-belt is replaced before the V-
belt replacement indicator comes on
(i.e., before the periodic V-belt replace-
ment interval has been reached), the V-
belt replacement tripmeter must be re-
set for the next periodic V-belt replace-
ment to be indicated at the correct
time. Self-d
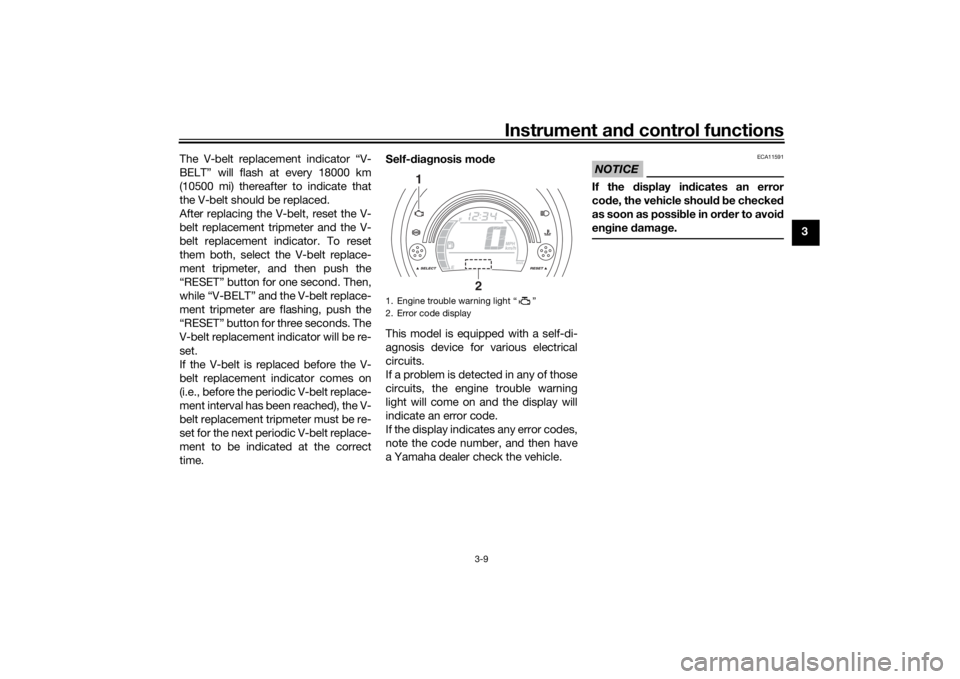
iagnosis mo de
This model is equipped with a self-di-
agnosis device for various electrical
circuits.
If a problem is detected in any of those
circuits, the engine trouble warning
light will come on and the display will
indicate an error code.
If the display indicates any error codes,
note the code number, and then have
a Yamaha dealer check the vehicle.
NOTICE
ECA11591
If the display in dicates an error
co de, the vehicle shoul d b e checked
as soon as possi ble in or der to avoi d
en gine damag e.
1. Engine trouble warning light “ ”
2. Error code display
1
2
U2DSE0E0.book Page 9 Thursday, March 19, 2015 10:34 AM
Page 26 of 90
Instrument and control functions
3-10
3
EAU1234H
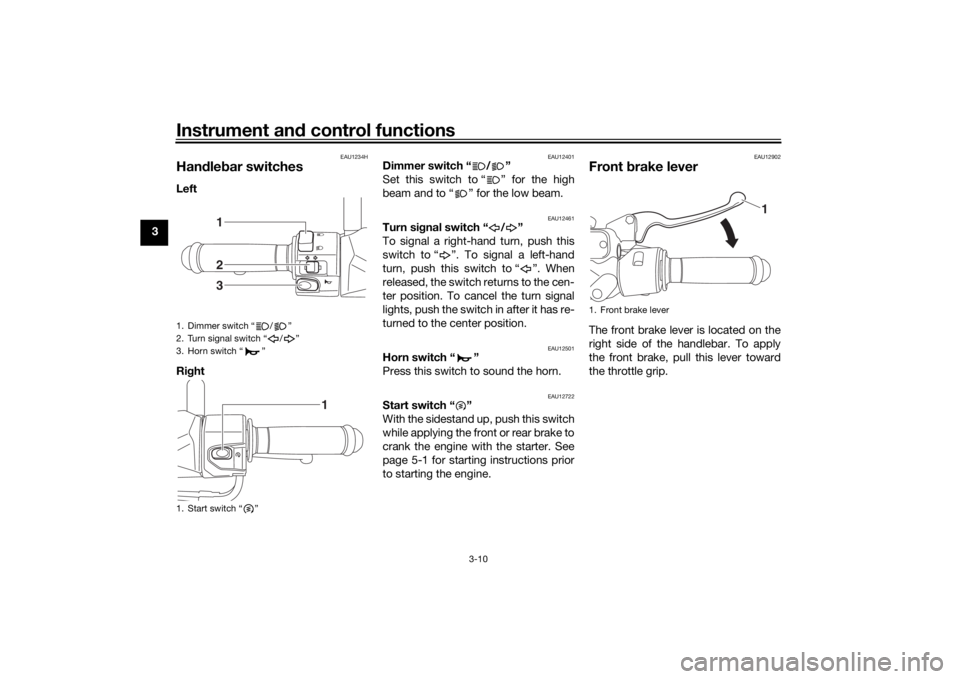
Han dle bar switchesLeft
Ri ght
EAU12401
Dimmer switch “ / ”
Set this switch to “ ” for the high
beam and to “ ” for the low beam.
EAU12461
Turn si gnal switch “ / ”
To signal a right-hand turn, push this
switch to “ ”. To signal a left-hand
turn, push this switch to “ ”. When
released, the switch returns to the cen-
ter position. To cancel the turn signal
lights, push the switch in after it has re-
turned to the center position.
EAU12501
Horn switch “ ”
Press this switch to sound the horn.
EAU12722
Start switch “ ”
With the sidestand up, push this switch
while applying the front or rear brake to
crank the engine with the starter. See
page 5-1 for starting instructions prior
to starting the engine.
EAU12902
Front brake leverThe front brake lever is located on the
right side of the handlebar. To apply
the front brake, pull this lever toward
the throttle grip.
1. Dimmer switch “ / ”
2. Turn signal switch “ / ”
3. Horn switch “ ”
1. Start switch “ ”
123
1
1. Front brake lever
1
U2DSE0E0.book Page 10 Thursday, March 19, 2015 10:34 AM
Page 29 of 90
Instrument and control functions
3-13
3
EAU13213
FuelMake sure there is sufficient gasoline in
the tank.
WARNING
EWA10882
Gasoline an d gasoline vapors are
extremely flammab le. To avoid fires
an d explosions an d to re duce the
risk of injury when refuelin g, follow
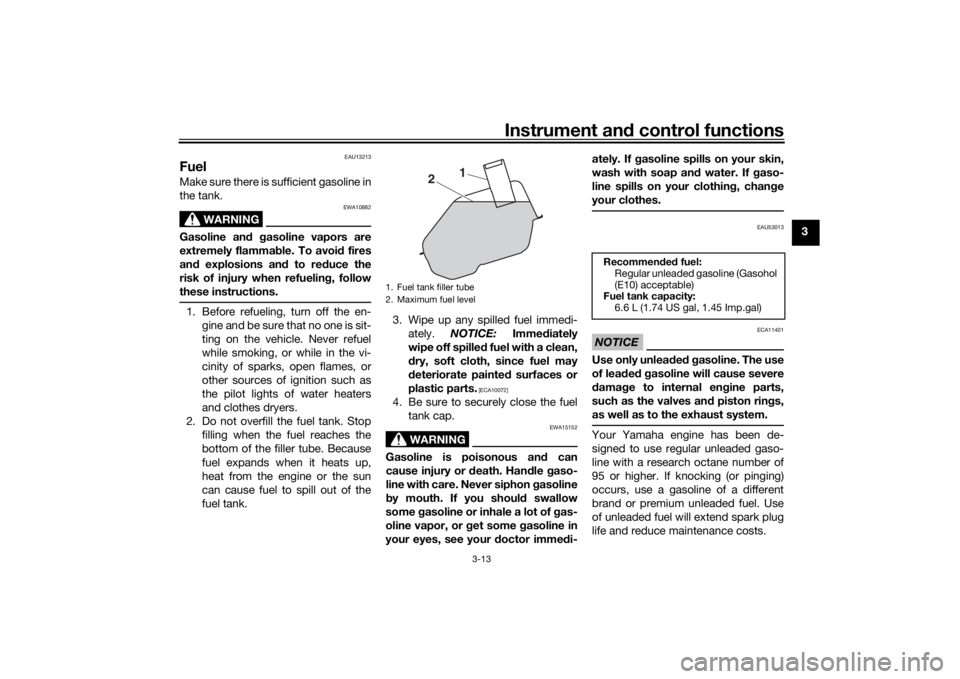
these instructions.1. Before refueling, turn off the en- gine and be sure that no one is sit-
ting on the vehicle. Never refuel
while smoking, or while in the vi-
cinity of sparks, open flames, or
other sources of ignition such as
the pilot lights of water heaters
and clothes dryers.
2. Do not overfill the fuel tank. Stop filling when the fuel reaches the
bottom of the filler tube. Because
fuel expands when it heats up,
heat from the engine or the sun
can cause fuel to spill out of the
fuel tank. 3. Wipe up any spilled fuel immedi-
ately. NOTICE: Immediately
wipe off spille d fuel with a clean,
d ry, soft cloth, since fuel may
d eteriorate painte d surfaces or
plastic parts.
[ECA10072]
4. Be sure to securely close the fuel tank cap.
WARNING
EWA15152
Gasoline is poisonous an d can
cause injury or d eath. Handle gaso-
line with care. Never siphon gasoline
b y mouth. If you shoul d swallow
some gasoline or inhale a lot of gas-
oline vapor, or g et some gasoline in
your eyes, see your doctor imme di- ately. If g
asoline spills on your skin,
wash with soap an d water. If gaso-
line spills on your clothin g, chan ge
your clothes.
EAU53013
NOTICE
ECA11401
Use only unlea ded g asoline. The use
of lead ed g asoline will cause severe
d amag e to internal en gine parts,
such as the valves an d piston rin gs,
as well as to the exhaust system.Your Yamaha engine has been de-
signed to use regular unleaded gaso-
line with a research octane number of
95 or higher. If knocking (or pinging)
occurs, use a gasoline of a different
brand or premium unleaded fuel. Use
of unleaded fuel will extend spark plug
life and reduce maintenance costs.
1. Fuel tank filler tube
2. Maximum fuel level
2 1
Recommen
ded fuel:
Regular unleaded gasoline (Gasohol
(E10) acceptable)
Fuel tank capacity:
6.6 L (1.74 US gal, 1.45 Imp.gal)
U2DSE0E0.book Page 13 Thursday, March 19, 2015 10:34 AM
Page 34 of 90

Instrument and control functions
3-18
3
Turn the key on.
Put the sidestand up.Push the start switch while applying
either of the brake levers. The engine will
start.Put the sidestand down.
If the engine stalls:
The sidestand switch is OK.
• The vehicle must be placed on the center-
stand during this inspection.• If a malfunction is noted, have a Yamaha
dealer check the system before riding.
WARNING
U2DSE0E0.book Page 18 Thursday, March 19, 2015 10:34 AM
Page 35 of 90
For your safety – pre-operation checks
4-1
4
EAU15599
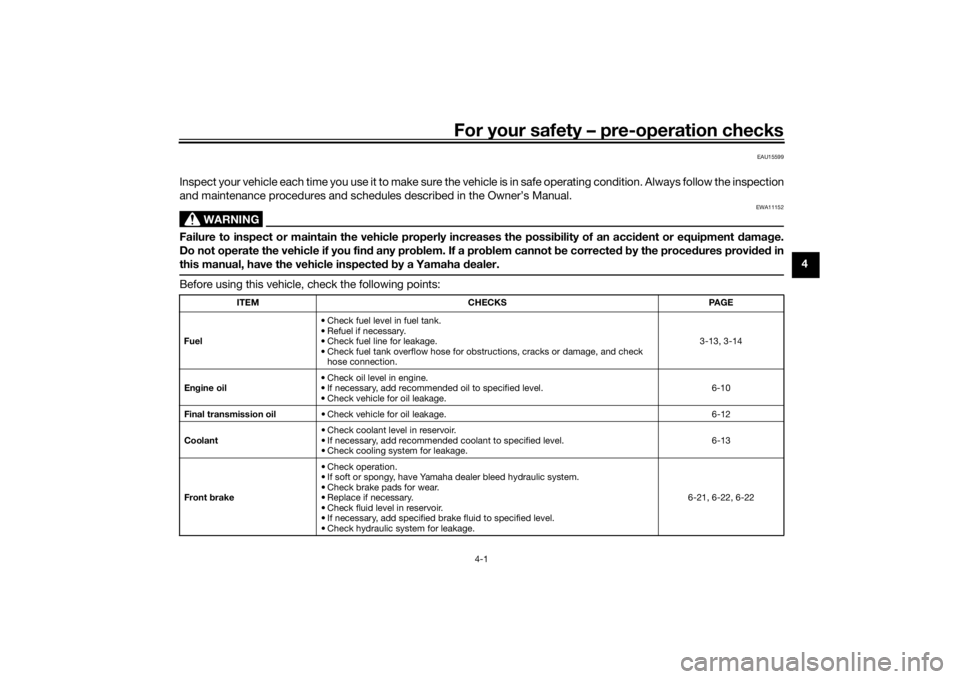
Inspect your vehicle each time you use it to make sure the vehicle is in safe operating condition. Always follow the inspection
and maintenance procedures and schedules described in the Owner’s Manual.
WARNING
EWA11152
Failure to inspect or maintain the vehicle properly increases the possibility of an acci dent or equipment damag e.
Do not operate the vehicle if you fin d any pro blem. If a pro blem cannot be corrected b y the proce dures provi ded in
this manual, have the vehicle inspecte d b y a Yamaha dealer.Before using this vehicle, check the following points:
ITEM CHECKS PAGE
Fuel • Check fuel level in fuel tank.
• Refuel if necessary.
• Check fuel line for leakage.
• Check fuel tank overflow hose for obstructions, cracks or damage, and check
hose connection. 3-13, 3-14
En gine oil • Check oil level in engine.
• If necessary, add recommended oil to specified level.
• Check vehicle for oil leakage. 6-10
Final transmission oil • Check vehicle for oil leakage. 6-12
Coolant • Check coolant level in reservoir.
• If necessary, add recommended coolant to specified level.
• Check cooling system for leakage. 6-13
Front brake • Check operation.
• If soft or spongy, have Yamaha dealer bleed hydraulic system.
• Check brake pads for wear.
• Replace if necessary.
• Check fluid level in reservoir.
• If necessary, add specified brake fluid to specified level.
• Check hydraulic system for leakage. 6-21, 6-22, 6-22
U2DSE0E0.book Page 1 Thursday, March 19, 2015 10:34 AM
Page 37 of 90
Operation and important ri din g points
5-1
5
EAU15952
Read the Owner’s Manual carefully to
become familiar with all controls. If
there is a control or function you do not
understand, ask your Yamaha dealer.
WARNING
EWA10272
Failure to familiarize yourself with
the controls can lead to loss of con-
trol, which coul d cause an acci dent
or injury.
EAU66720
Startin g the en gineNOTICE
ECA10251
See pag e 5-3 for en gine break-in in-
structions prior to operatin g the ve-
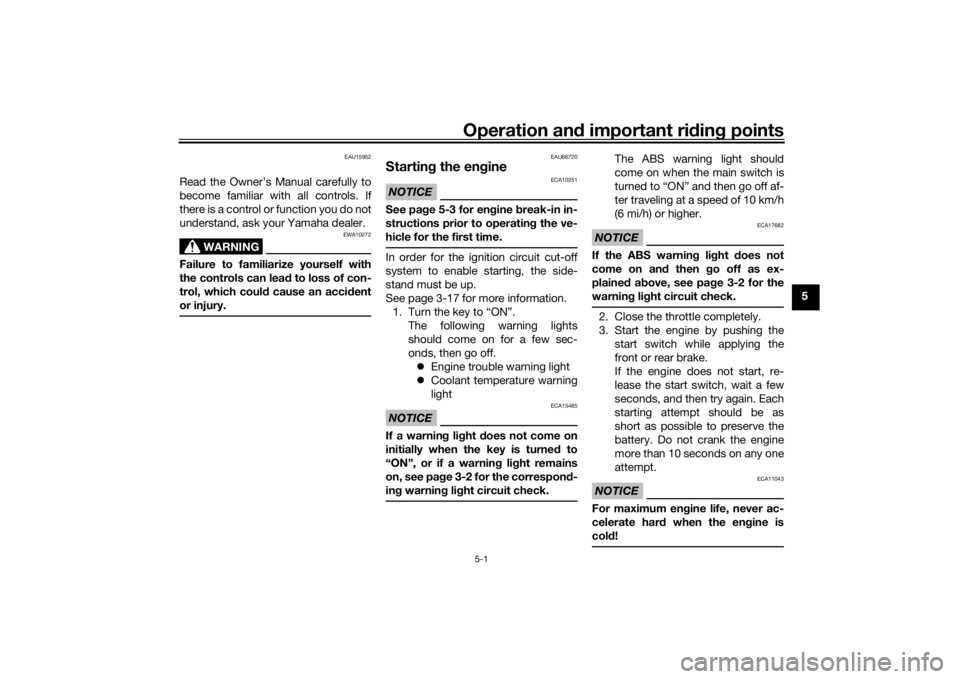
hicle for the first time.In order for the ignition circuit cut-off
system to enable starting, the side-
stand must be up.
See page 3-17 for more information. 1. Turn the key to “ON”. The following warning lights
should come on for a few sec-
onds, then go off. Engine trouble warning light
Coolant temperature warning
lightNOTICE
ECA15485
If a warnin g lig ht does not come on
initially when the key is turne d to
“ON”, or if a warnin g lig ht remains
on, see pa ge 3-2 for the correspon d-
in g warnin g lig ht circuit check.
The ABS warning light should
come on when the main switch is
turned to “ON” and then go off af-
ter traveling at a speed of 10 km/h
(6 mi/h) or higher.
NOTICE
ECA17682
If the ABS warnin g li ght does not
come on an d then g o off as ex-
plained above, see pag e 3-2 for the
warnin g li ght circuit check.2. Close the throttle completely.
3. Start the engine by pushing the
start switch while applying the
front or rear brake.
If the engine does not start, re-
lease the start switch, wait a few
seconds, and then try again. Each
starting attempt should be as
short as possible to preserve the
battery. Do not crank the engine
more than 10 seconds on any one
attempt.NOTICE
ECA11043
For maximum en gine life, never ac-
celerate har d when the en gine is
col d!
U2DSE0E0.book Page 1 Thursday, March 19, 2015 10:34 AM
Page 39 of 90
Operation and important ri din g points
5-3
5
EAU16821
Tips for re ducin g fuel con-
sumptionFuel consumption depends largely on
your riding style. Consider the follow-
ing tips to reduce fuel consumption:
Avoid high engine speeds during
acceleration.
Avoid high engine speeds with no
load on the engine.
Turn the engine off instead of let-
ting it idle for an extended length
of time (e.g., in traffic jams, at traf-
fic lights or at railroad crossings).
EAU16842
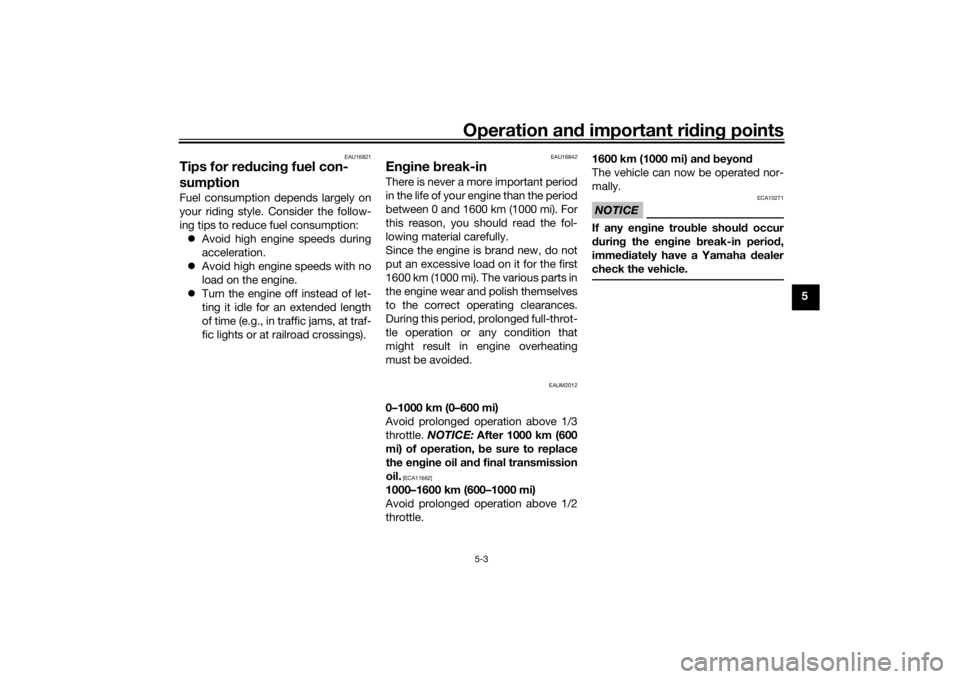
Engine break-inThere is never a more important period
in the life of your engine than the period
between 0 and 1600 km (1000 mi). For
this reason, you should read the fol-
lowing material carefully.
Since the engine is brand new, do not
put an excessive load on it for the first
1600 km (1000 mi). The various parts in
the engine wear and polish themselves
to the correct operating clearances.
During this period, prolonged full-throt-
tle operation or any condition that
might result in engine overheating
must be avoided.
EAUM2012
0–1000 km (0–600 mi)
Avoid prolonged operation above 1/3
throttle. NOTICE: After 1000 km (600
mi) of operation, be sure to replace
the en gine oil an d final transmission
oil.
[ECA11662]
1000–1600 km (600–1000 mi)
Avoid prolonged operation above 1/2
throttle. 1600 km (1000 mi) an
d b eyon d
The vehicle can now be operated nor-
mally.
NOTICE
ECA10271
If any en gine trou ble shoul d occur
d urin g the en gine break-in perio d,
imme diately have a Yamaha dealer
check the vehicle.
U2DSE0E0.book Page 3 Thursday, March 19, 2015 10:34 AM
Page 40 of 90
Operation and important rid ing points
5-4
5
EAU17214
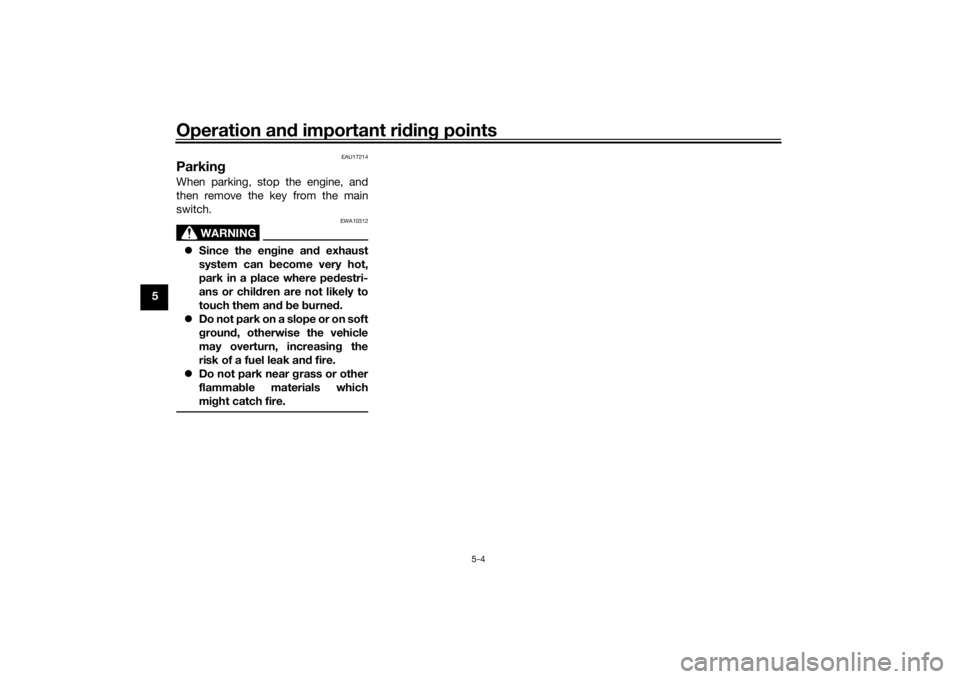
Parkin gWhen parking, stop the engine, and
then remove the key from the main
switch.
WARNING
EWA10312
Since the en gine an d exhaust
system can become very hot,
park in a place where pe destri-
ans or chil dren are not likely to
touch them and b e burne d.
Do not park on a slope or on soft
groun d, otherwise the vehicle
may overturn, increasin g the
risk of a fuel leak an d fire.
Do not park near g rass or other
flammab le materials which
mi ght catch fire.
U2DSE0E0.book Page 4 Thursday, March 19, 2015 10:34 AM
Page 42 of 90
Periodic maintenance an d a djustment
6-2
6
EAU46872
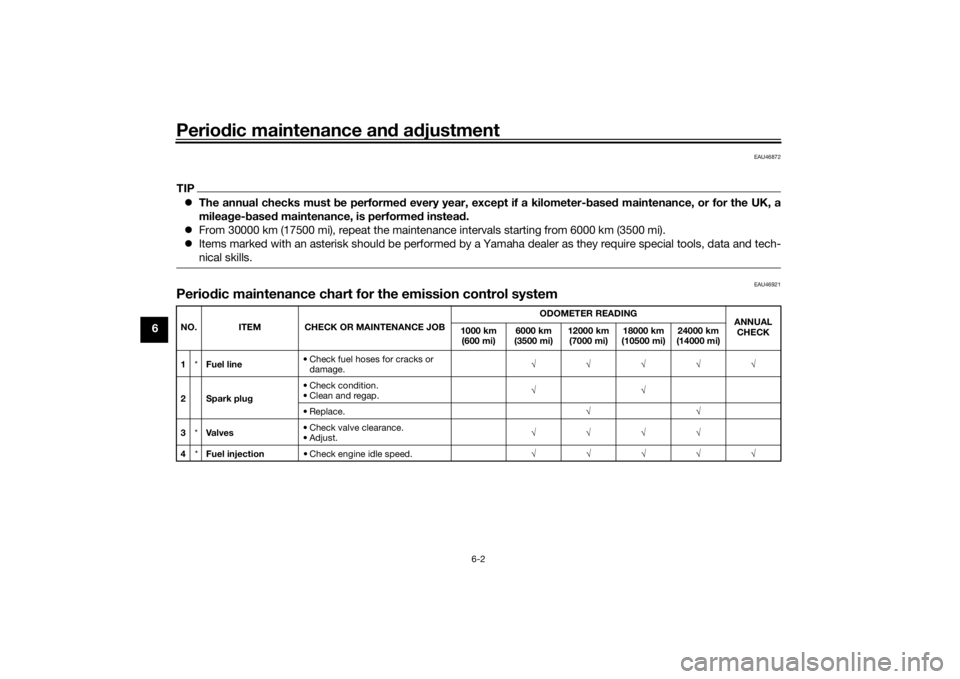
TIP The annual checks must b e performed every year, except if a kilometer- based maintenance, or for the UK, a
milea ge- base d maintenance, is performe d instead .
From 30000 km (17500 mi), repeat the maintenance intervals starting from 6000 km (3500 mi).
Items marked with an asterisk should be performed by a Yamaha dealer as they require special tools, data and tech-
nical skills.
EAU46921
Perio dic maintenance chart for the emission control systemNO. ITEM CHECK OR MAINTENANCE JOB ODOMETER READING
ANNUAL
CHECK
1000 km
(600 mi) 6000 km
(3500 mi) 12000 km
(7000 mi) 18000 km
(10500 mi) 24000 km
(14000 mi)
1 *Fuel line • Check fuel hoses for cracks or
damage. √√√√√
2Spark plu g• Check condition.
• Clean and regap.
√√
• Replace. √√
3 *Va l ve s • Check valve clearance.
•Adjust.
√√√√
4 *Fuel injection • Check engine idle speed. √√√√√
U2DSE0E0.book Page 2 Thursday, March 19, 2015 10:34 AM