oil YAMAHA PW50 2015 Owners Manual
[x] Cancel search | Manufacturer: YAMAHA, Model Year: 2015, Model line: PW50, Model: YAMAHA PW50 2015Pages: 76, PDF Size: 1.74 MB
Page 9 of 76

TABLE OF CONTENTS
LOCATION OF IMPORTANT
LABELS..............................................1-1
SAFETY INFORMATION ...................2-1
DESCRIPTION ...................................3-1
Left view ..........................................3-1
Right view ........................................3-2
Controls and instruments ................3-3
INSTRUMENT AND CONTROL
FUNCTIONS .......................................4-1
Handlebar switch ............................4-1
Speed limiter and power reduction plate .............................................4-1
Front brake lever .............................4-2
Rear brake lever ..............................4-3
Fuel tank cap ...................................4-3
Fuel ..................................................4-3
Fuel tank breather hose...................4-5
2-stroke engine oil ...........................4-6
Fuel cock .........................................4-6
Starter (choke) lever .......................4-7
Kickstarter .......................................4-7
Seat .................................................4-7
Cable lock (for Europe) ....................4-8 FOR YOUR SAFETY –
PRE-OPERATION CHECKS
............. 5-1
OPERATION AND IMPORTANT
RIDING POINTS ................................ 6-1
Starting and warming up a cold engine .......................................... 6-1
Starting a warm engine................... 6-1
Starting off ...................................... 6-2
Acceleration and deceleration ........ 6-2
Braking............................................ 6-2
Engine break-in............................... 6-3
Parking ............................................ 6-4
PERIODIC MAINTENANCE AND
ADJUSTMENT .................................. 7-1
Owner’s tool kit............................... 7-2
Periodic maintenance chart for the
emission control system ............. 7-3
General maintenance and
lubrication chart .......................... 7-4
Checking the spark plug................. 7-6
Removing the power reduction plate............................................. 7-7
Transmission oil .............................. 7-8
Middle and final gear cases ............ 7-9
Cleaning the air filter element ......... 7-9
Cleaning the spark arrester .......... 7-10
Adjusting the carburetor ............... 7-11
Adjusting the engine idling speed......................................... 7-11 Checking the throttle grip free
play ............................................ 7-12
Tires .............................................. 7-12
Panel wheels ................................. 7-14
Adjusting the front and rear brake lever free play ............................ 7-14
Checking the front and rear brake shoes ......................................... 7-15
Checking and lubricating the cables ........................................ 7-16
Checking and lubricating the
throttle grip and cable ............... 7-16
Adjusting the Autolube pump ....... 7-16
Lubricating the front and rear brake levers ............................... 7-17
Checking and lubricating the centerstand ................................ 7-17
Checking the front fork ................. 7-17
Checking the steering ................... 7-18
Checking the wheel bearings ........ 7-18
Front wheel ................................... 7-19
Rear wheel .................................... 7-20
Troubleshooting ............................ 7-23
Troubleshooting chart ................... 7-24
MOTORCYCLE CARE AND
STORAGE .......................................... 8-1
Matte color caution ......................... 8-1
Care................................................. 8-1
Storage............................................ 8-3
U2SA81E0.book Page 1 Monday, June 2, 2014 2:00 PM
Page 26 of 76
DESCRIPTION
3-2
3
EAU10421
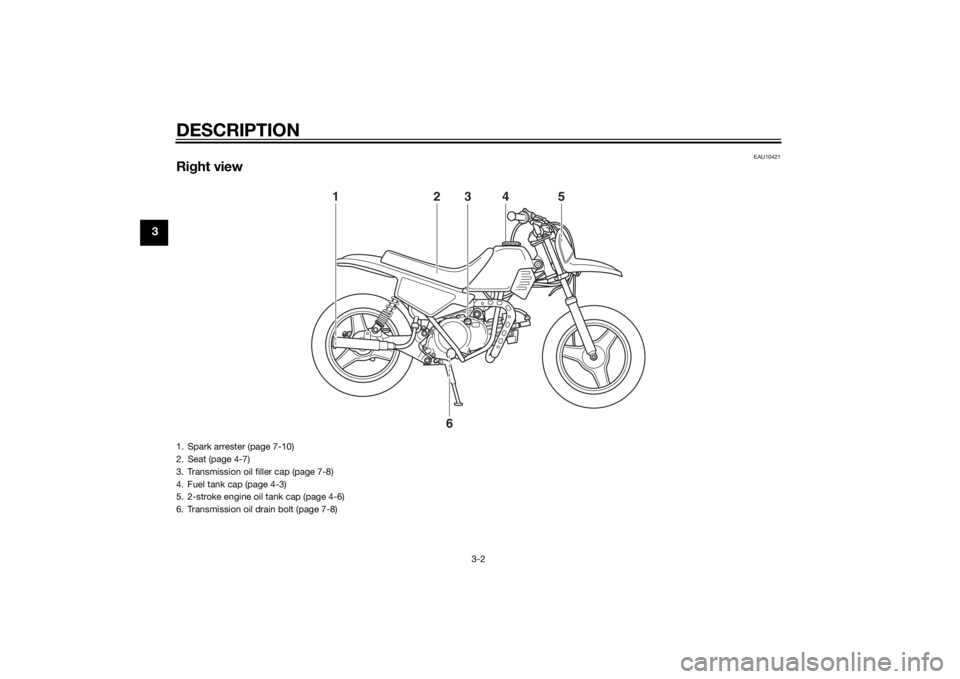
Right view
1
2
3
4
5
6
1. Spark arrester (page 7-10)
2. Seat (page 4-7)
3. Transmission oil filler cap (page 7-8)
4. Fuel tank cap (page 4-3)
5. 2-stroke engine oil tank cap (page 4-6)
6. Transmission oil drain bolt (page 7-8)U2SA81E0.book Page 2 Monday, June 2, 2014 2:00 PM
Page 33 of 76
INSTRUMENT AND CONTROL FUNCTIONS
4-6
4
EAU13454
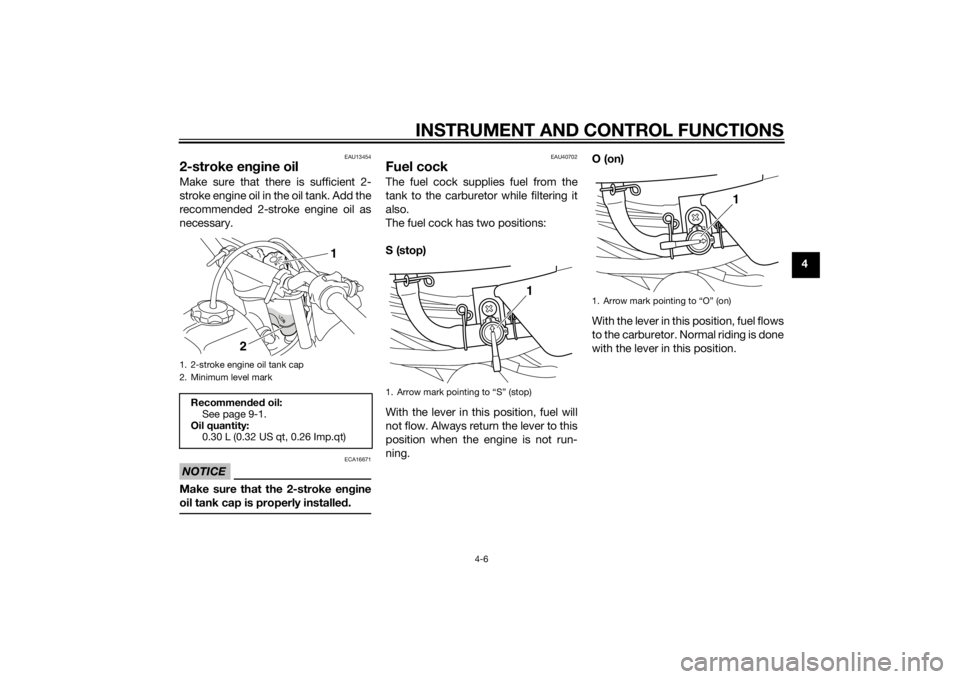
2-stroke engine oilMake sure that there is sufficient 2-
stroke engine oil in the oil tank. Add the
recommended 2-stroke engine oil as
necessary.NOTICE
ECA16671
Make sure that the 2-stroke en gine
oil tank cap is properly installe d.
EAU40702
Fuel cockThe fuel cock supplies fuel from the
tank to the carburetor while filtering it
also.
The fuel cock has two positions:
S (stop)
With the lever in this position, fuel will
not flow. Always return the lever to this
position when the engine is not run-
ning. O (on)
With the lever in this position, fuel flows
to the carburetor. Normal riding is done
with the lever in this position.
1. 2-stroke engine oil tank cap
2. Minimum level markRecommen
ded oil:
See page 9-1.
Oil quantity: 0.30 L (0.32 US qt, 0.26 Imp.qt)
2 1
1. Arrow mark pointing to “S” (stop)
1
1. Arrow mark pointing to “O” (on)
1
U2SA81E0.book Page 6 Monday, June 2, 2014 2:00 PM
Page 36 of 76
FOR YOUR SAFETY – PRE-OPERATION CHECKS
5-1
5
EAU15598
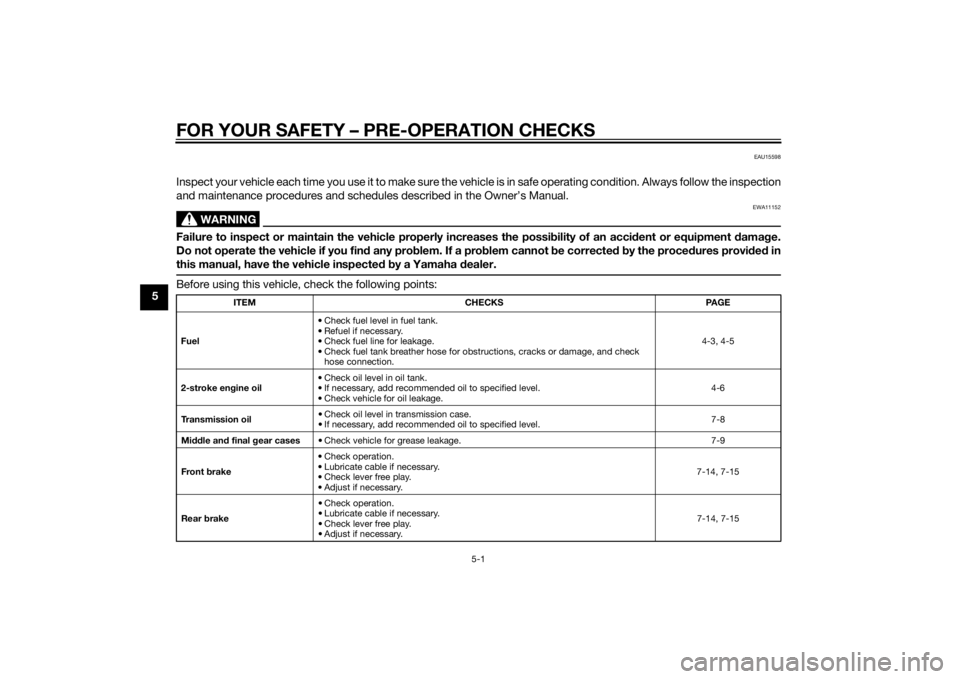
Inspect your vehicle each time you use it to make sure the vehicle is in safe operating condition. Always follow the inspection
and maintenance procedures and schedules described in the Owner’s Manual.
WARNING
EWA11152
Failure to inspect or maintain the vehicle properly increases the possibility of an acci dent or equipment damag e.
Do not operate the vehicle if you fin d any pro blem. If a pro blem cannot be corrected b y the proce dures provi ded in
this manual, have the vehicle inspecte d b y a Yamaha dealer.Before using this vehicle, check the following points:
ITEM CHECKS PAGE
Fuel • Check fuel level in fuel tank.
• Refuel if necessary.
• Check fuel line for leakage.
• Check fuel tank breather hose for obstructions, cracks or damage, and check
hose connection. 4-3, 4-5
2-stroke en gine oil • Check oil level in oil tank.
• If necessary, add recommended oil to specified level.
• Check vehicle for oil leakage. 4-6
Tr a n s m i s s i o n o i l • Check oil level in transmission case.
• If necessary, add recommended oil to specified level.
7-8
Mi dd le an d final g ear cases • Check vehicle for grease leakage. 7-9
Front brake • Check operation.
• Lubricate cable if necessary.
• Check lever free play.
• Adjust if necessary. 7-14, 7-15
Rear brake • Check operation.
• Lubricate cable if necessary.
• Check lever free play.
• Adjust if necessary.
7-14, 7-15
U2SA81E0.book Page 1 Monday, June 2, 2014 2:00 PM
Page 40 of 76
OPERATION AND IMPORTANT RIDING POINTS
6-3
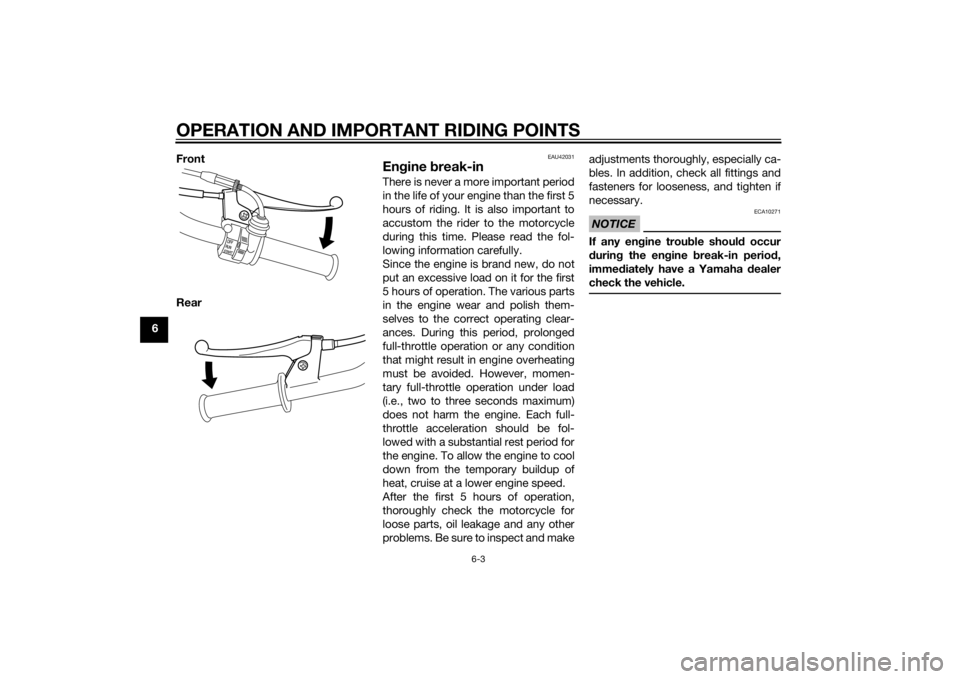
6Front
Rear
EAU42031
En
gine break-inThere is never a more important period
in the life of your engine than the first 5
hours of riding. It is also important to
accustom the rider to the motorcycle
during this time. Please read the fol-
lowing information carefully.
Since the engine is brand new, do not
put an excessive load on it for the first
5 hours of operation. The various parts
in the engine wear and polish them-
selves to the correct operating clear-
ances. During this period, prolonged
full-throttle operation or any condition
that might result in engine overheating
must be avoided. However, momen-
tary full-throttle operation under load
(i.e., two to three seconds maximum)
does not harm the engine. Each full-
throttle acceleration should be fol-
lowed with a substantial rest period for
the engine. To allow the engine to cool
down from the temporary buildup of
heat, cruise at a lower engine speed.
After the first 5 hours of operation,
thoroughly check the motorcycle for
loose parts, oil leakage and any other
problems. Be sure to inspect and make adjustments thoroughly, especially ca-
bles. In addition, check all fittings and
fasteners for looseness, and tighten if
necessary.
NOTICE
ECA10271
If any en
gine trou ble shoul d occur
d urin g the en gine break-in perio d,
imme diately have a Yamaha dealer
check the vehicle.
U2SA81E0.book Page 3 Monday, June 2, 2014 2:00 PM
Page 46 of 76
PERIODIC MAINTENANCE AND ADJUSTMENT
7-5
7
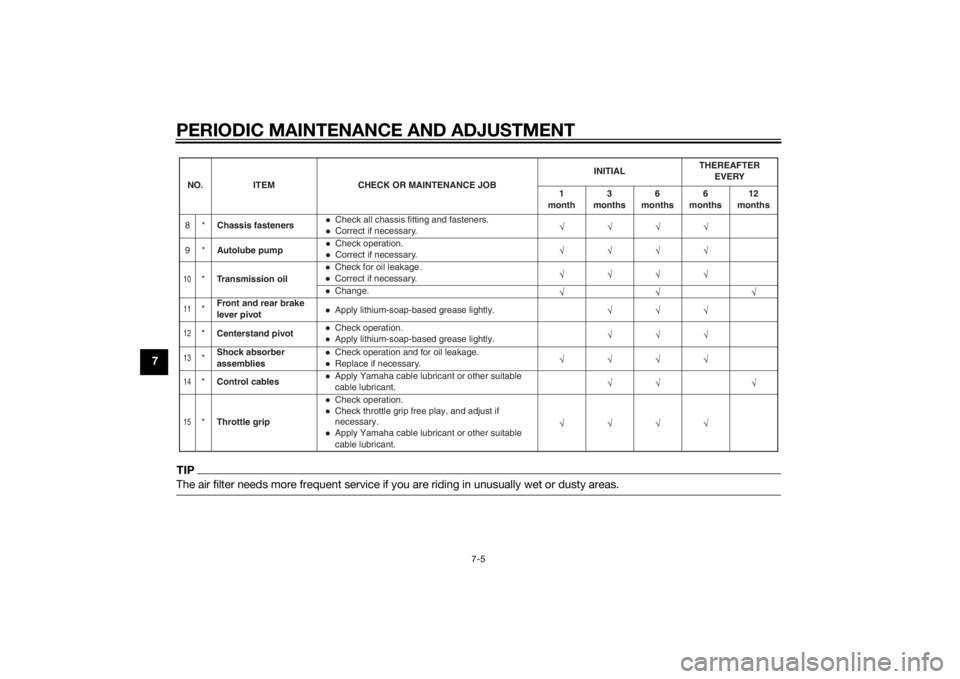
TIPThe air filter needs more frequent service if you are riding in unusually wet or dusty areas.10
*Transmission oil
Check for oil leakage .Correct if necessary.Change.
11
*Front and rear brake
lever pivot
Apply lithium-soap-based grease lightly.
12
*
Centerstand pivot
Check operation.Apply lithium-soap-based grease lightly.
13
*Shock absorber
assemblies
Check operation and for oil leakage.Replace if necessary.
14
*
Control cables
Apply Yamaha cable lubricant or other suitable
cable lubricant.
15
*Throttle grip
Check operation.Check throttle grip free play, and adjust if
necessary.Apply Yamaha cable lubricant or other suitable
cable lubricant.
NO. ITEM CHECK OR MAINTENANCE JOB
INITIAL
THEREAFTER
EVERY
1
month 3
months 6
months 6
months 12
months
8* Chassis fastenersCorrect if necessary.
A
9* utolube pumpCheck operation.Correct if necessary. Check all chassis fitting and fasteners.
U2SA81E0.book Page 5 Monday, June 2, 2014 2:00 PM
Page 49 of 76
PERIODIC MAINTENANCE AND ADJUSTMENT
7-8
7
EAU40894
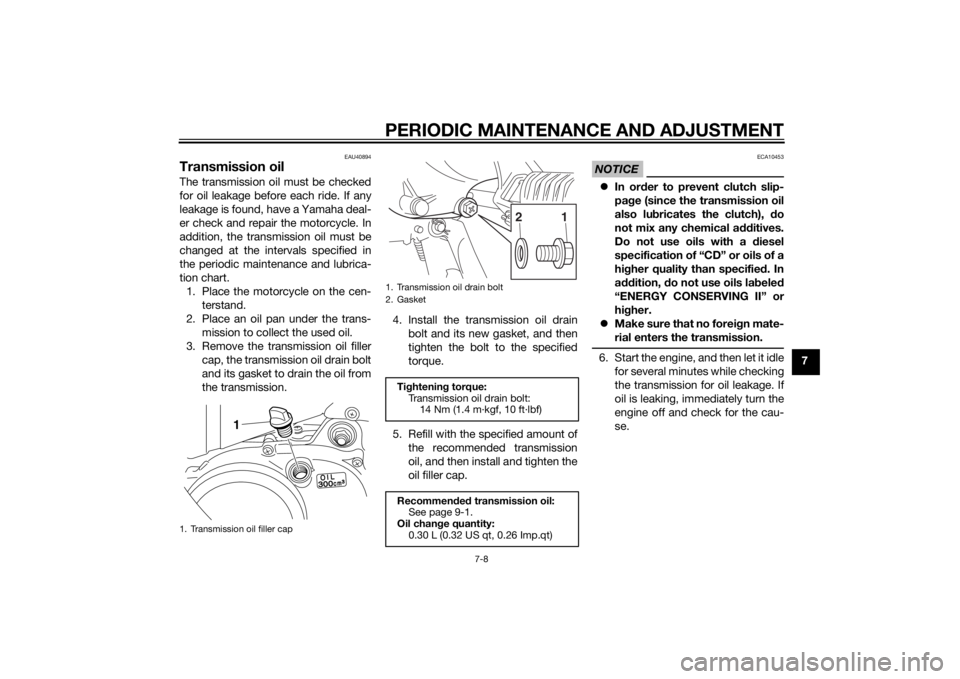
Transmission oilThe transmission oil must be checked
for oil leakage before each ride. If any
leakage is found, have a Yamaha deal-
er check and repair the motorcycle. In
addition, the transmission oil must be
changed at the intervals specified in
the periodic maintenance and lubrica-
tion chart.1. Place the motorcycle on the cen- terstand.
2. Place an oil pan under the trans- mission to collect the used oil.
3. Remove the transmission oil filler cap, the transmission oil drain bolt
and its gasket to drain the oil from
the transmission. 4. Install the transmission oil drain
bolt and its new gasket, and then
tighten the bolt to the specified
torque.
5. Refill with the specified amount of the recommended transmission
oil, and then install and tighten the
oil filler cap.
NOTICE
ECA10453
In or der to prevent clutch slip-
pa ge (since the transmission oil
also lu bricates the clutch), do
not mix any chemical additives.
Do not use oils with a diesel
specification of “CD” or oils of a
hi gher quality than specifie d. In
a dd ition, do not use oils la bele d
“ENERGY CONSERVING II” or
hi gher.
Make sure that no forei gn mate-
rial enters the transmission.6. Start the engine, and then let it idle for several minutes while checking
the transmission for oil leakage. If
oil is leaking, immediately turn the
engine off and check for the cau-
se.
1. Transmission oil filler cap
1
1. Transmission oil drain bolt
2. Gasket
Tightenin g torque:
Transmission oil drain bolt: 14 Nm (1.4 m·kgf, 10 ft·lbf)
Recommen ded transmission oil:
See page 9-1.
Oil chan ge quantity:
0.30 L (0.32 US qt, 0.26 Imp.qt)
1
2
U2SA81E0.book Page 8 Monday, June 2, 2014 2:00 PM
Page 50 of 76
PERIODIC MAINTENANCE AND ADJUSTMENT
7-9
7
EAU41712
Middle an d final g ear casesThe middle and final gear cases must
be checked for grease leakage before
each ride. If any leakage is found, have
a Yamaha dealer check and repair the
motorcycle. In addition, have a
Yamaha dealer check and lubricate the middle and final gears at the intervals
specified in the periodic maintenance
and lubrication chart.
EAU40904
Cleanin g the air filter elementThe air filter element should be cleaned
at the intervals specified in the periodic
maintenance and lubrication chart.
Clean or, if necessary, replace the air
filter element more frequently if you are
riding in unusually wet or dusty areas.
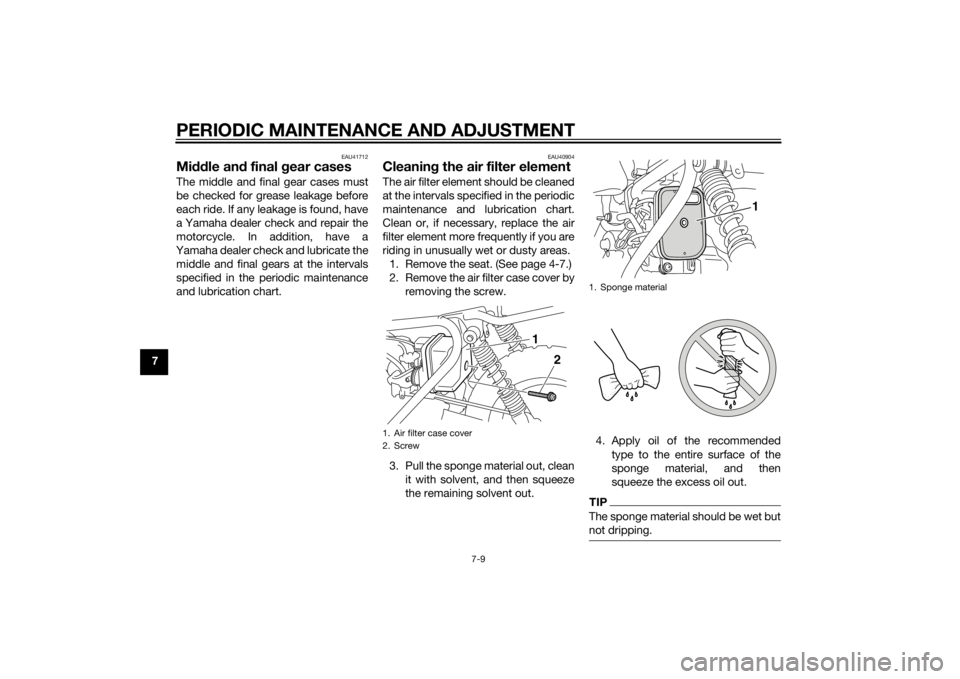
1. Remove the seat. (See page 4-7.)
2. Remove the air filter case cover by removing the screw.
3. Pull the sponge material out, clean it with solvent, and then squeeze
the remaining solvent out. 4. Apply oil of the recommended
type to the entire surface of the
sponge material, and then
squeeze the excess oil out.
TIPThe sponge material should be wet but
not dripping.
1. Air filter case cover
2. Screw
2
1
1. Sponge material
1
U2SA81E0.book Page 9 Monday, June 2, 2014 2:00 PM
Page 51 of 76
PERIODIC MAINTENANCE AND ADJUSTMENT
7-10
7
5. Insert the sponge material into the
air filter case. NOTICE: Make
sure that the spon ge material is
properly seate d in the air filter
case. The en gine should never
b e operated without the spon ge
material installe d, otherwise the
piston(s) an d/or cylin der(s) may
b ecome excessively worn.
[ECA15622]
6. Install the air filter case cover by
installing the screw.
7. Install the seat.
EAU41222
Cleanin g the spark arresterThe spark arrester should be cleaned
at the intervals specified in the periodic
maintenance and lubrication chart.
WARNING
EWA10981
Always let the exhaust system
cool prior to touching exhaust
components.
Do not start the en gine when
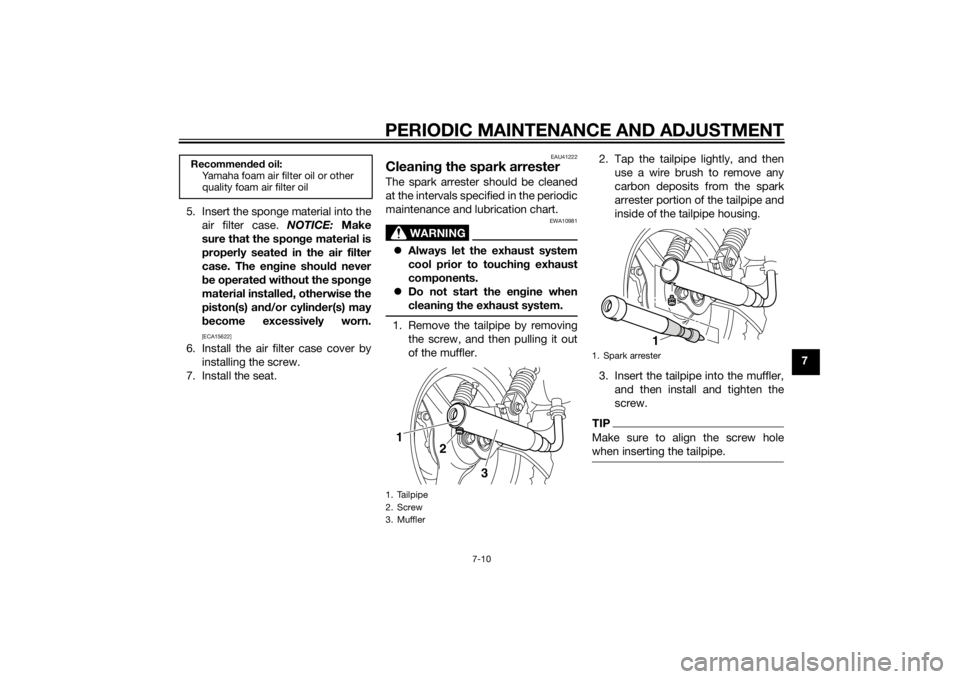
cleanin g the exhaust system.1. Remove the tailpipe by removing
the screw, and then pulling it out
of the muffler. 2. Tap the tailpipe lightly, and then
use a wire brush to remove any
carbon deposits from the spark
arrester portion of the tailpipe and
inside of the tailpipe housing.
3. Insert the tailpipe into the muffler, and then install and tighten the
screw.
TIPMake sure to align the screw hole
when inserting the tailpipe.
Recommen ded oil:
Yamaha foam air filter oil or other
quality foam air filter oil
1. Tailpipe
2. Screw
3. Muffler1
2
3
1. Spark arrester
1
U2SA81E0.book Page 10 Monday, June 2, 2014 2:00 PM
Page 66 of 76
MOTORCYCLE CARE AND STORAGE
8-1
8
EAU37834
Matte color cautionNOTICE
ECA15193
Some models are equipped with
matte colore d finishe d parts. Be
sure to consult a Yamaha d ealer for
a d vice on what prod ucts to use be-
fore cleanin g the vehicle. Usin g a
b rush, harsh chemical prod ucts or
cleanin g compoun ds when cleanin g
these parts will scratch or damag e
their surface. Wax also shoul d not
b e applied to any matte colore d fin-
ishe d parts.
EAU40636
CareWhile the open design of a motorcycle
reveals the attractiveness of the tech-
nology, it also makes it more vulnera-
ble. Rust and corrosion can develop
even if high-quality components are
used. A rusty exhaust pipe may go un-
noticed on a car, however, it detracts
from the overall appearance of a mo-
torcycle. Frequent and proper care
does not only comply with the terms of
the warranty, but it will also keep your
motorcycle looking good, extend its
life and optimize its performance.
Before cleanin g
1. Cover the muffler outlet with a plastic bag after the engine has
cooled down.
2. Make sure that all caps and cov- ers as well as all electrical cou-
plers and connectors, including
the spark plug cap, are tightly in-
stalled.
3. Remove extremely stubborn dirt, like oil burnt onto the crankcase,
with a degreasing agent and a
brush, but never apply such prod- ucts onto seals, gaskets and
wheel axles. Always rinse the dirt
and degreaser off with water.
Cleanin g
NOTICE
ECA17111
Avoi d usin g stron g aci dic wheel
cleaners, especially on spoke d
wheels. If such pro ducts are
use d on har d-to-remove dirt, do
not leave the cleaner on the af-
fected area any lon ger than in-
structe d. Also, thorou ghly rinse
the area off with water, imme di-
ately dry it, an d then apply a cor-
rosion protection spray.
Improper cleanin g can d amage
plastic parts (such as cowlin gs,
panels, etc.) an d the mufflers.
Use only a soft, clean cloth or
spon ge with water to clean
plastic. However, if the plastic
parts cannot be thorou ghly
cleaned with water, dilute d mil d
d eter gent with water may b e
use d. Be sure to rinse off any
U2SA81E0.book Page 1 Monday, June 2, 2014 2:00 PM