YAMAHA T105 2004 Workshop Manual
T105 2004
YAMAHA
YAMAHA
https://www.carmanualsonline.info/img/51/51342/w960_51342-0.png
YAMAHA T105 2004 Workshop Manual
Trending: transmission, ECU, oil change, steering, light, parking brake, suspension
Page 51 of 76
EAH85201
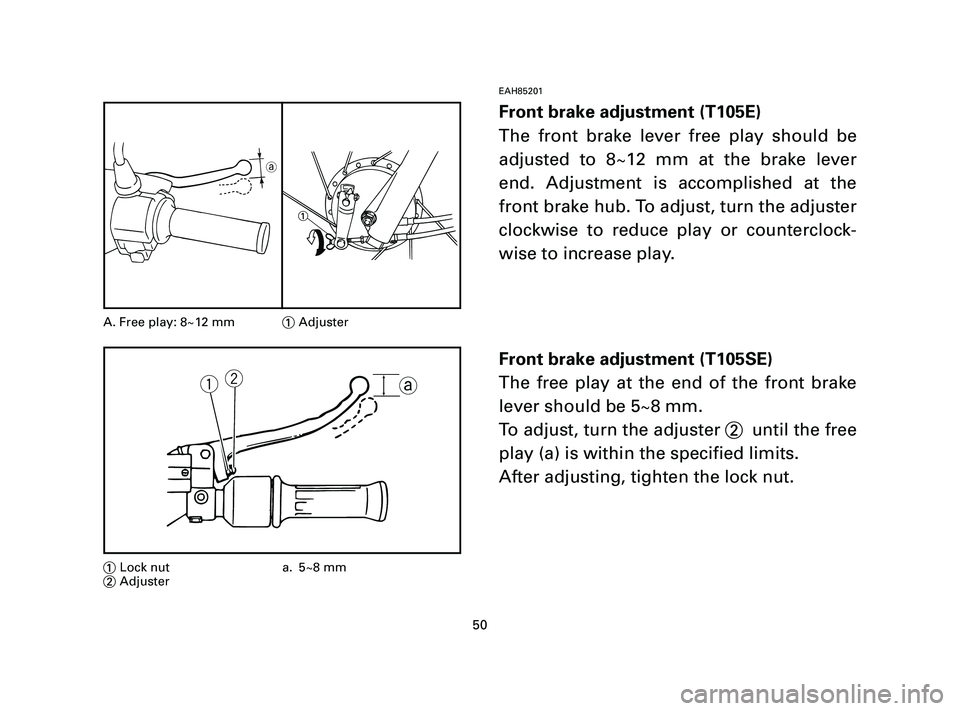
Front brake adjustment (T105E)
The front brake lever free play should be
adjusted to 8~12 mm at the brake lever
end. Adjustment is accomplished at the
front brake hub. To adjust, turn the adjuster
clockwise to reduce play or counterclock-
wise to increase play.
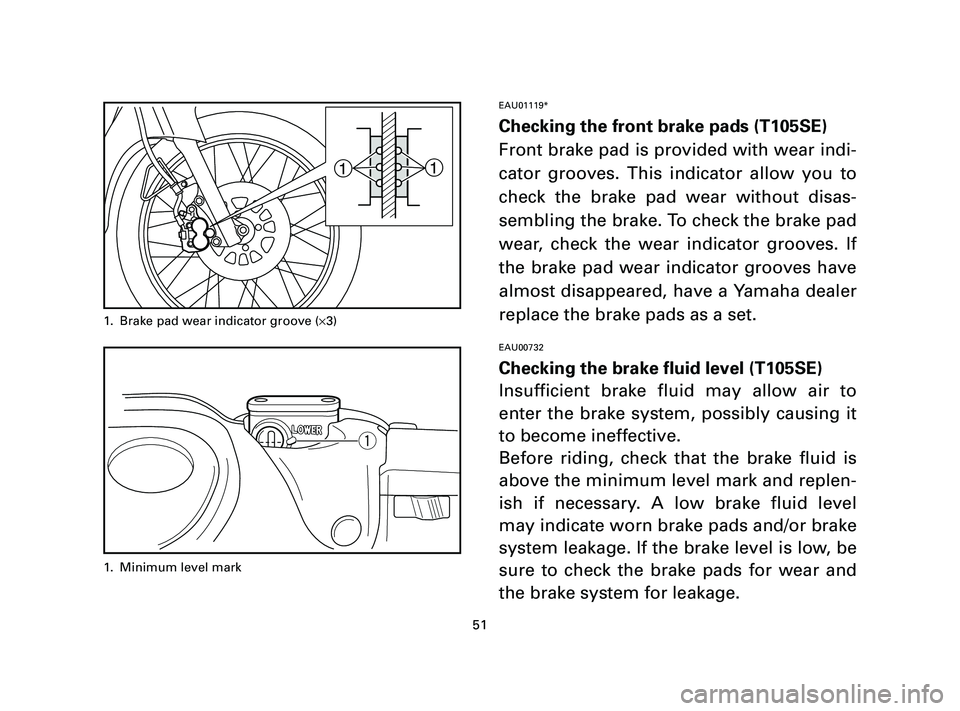
Front brake adjustment (T105SE)
The free play at the end of the front brake
lever should be 5~8 mm.
To adjust, turn the adjuster 2 until the free
play (a) is within the specified limits.
After adjusting, tighten the lock nut.
50
A. Free play: 8~12 mm1Adjuster
qwa
1Lock nut a. 5~8 mm
2Adjuster
a
1
5AV-F8199-E1-3 8/1/03 1:48 PM Page 50
Page 52 of 76
51
EAU01119*
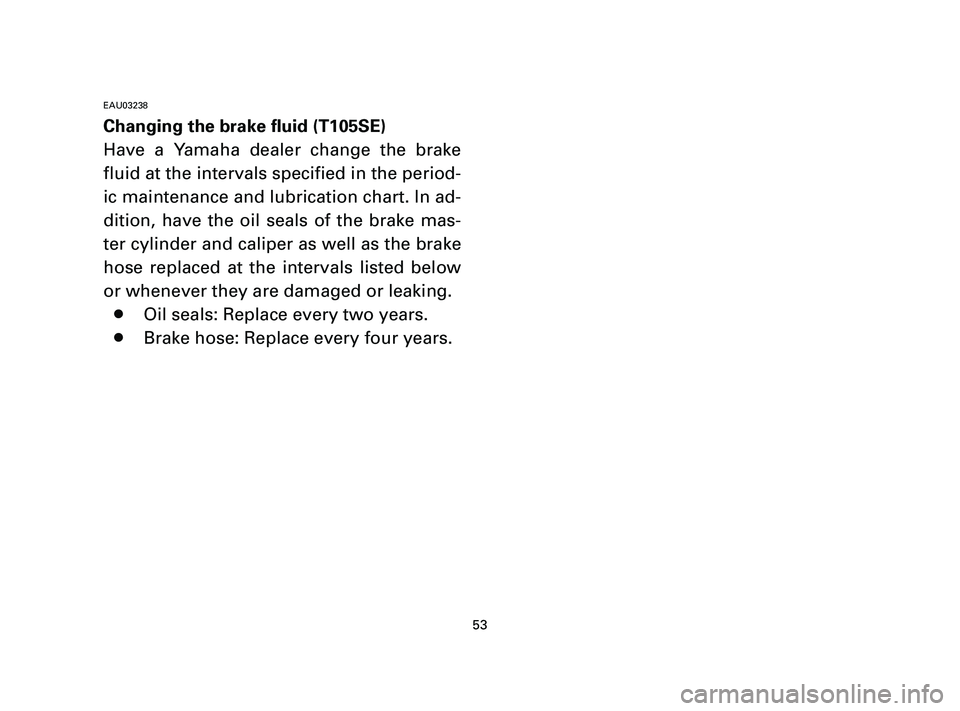
Checking the front brake pads (T105SE)
Front brake pad is provided with wear indi-
cator grooves. This indicator allow you to
check the brake pad wear without disas-
sembling the brake. To check the brake pad
wear, check the wear indicator grooves. If
the brake pad wear indicator grooves have
almost disappeared, have a Yamaha dealer
replace the brake pads as a set.
EAU00732
Checking the brake fluid level (T105SE)
Insufficient brake fluid may allow air to
enter the brake system, possibly causing it
to become ineffective.
Before riding, check that the brake fluid is
above the minimum level mark and replen-
ish if necessary. A low brake fluid level
may indicate worn brake pads and/or brake
system leakage. If the brake level is low, be
sure to check the brake pads for wear and
the brake system for leakage.
11
1. Brake pad wear indicator groove (×3)
q
1. Minimum level mark
5AV-F8199-E1-3 8/1/03 1:48 PM Page 51
Page 53 of 76
52
Observe these precautions:
8When checking the fluid level, make
sure that the top of the master cylin-
der is level by turning the handlebars.
8Use only the recommended quality
brake fluid, otherwise the rubber seals
may deteriorate, causing leakage and
poor braking performance.
NOTE:
If DOT 4 is not available, DOT 3 can be
used.
8Refill with the same type of brake
fluid. Mixing fluids may result in a
harmful chemical reaction and lead to
poor braking performance.8Be careful that water does not enter
the master cylinder when refilling.
Water will significantly lower the boil-
ing point of the fluid and may result in
vapor lock.
8Brake fluid may deteriorate painted
surfaces or plastic parts. Always clean
up spilled fluid immediately.
8As the brake pads wear, it is normal
for the brake fluid level to gradually
go down. However, if the brake fluid
level goes down suddenly, have a
Yamaha dealer check the cause. Recommended brake fluid: DOT 4
5AV-F8199-E1-3 8/1/03 1:48 PM Page 52
Page 54 of 76
53
EAU03238
Changing the brake fluid (T105SE)
Have a Yamaha dealer change the brake
fluid at the intervals specified in the period-
ic maintenance and lubrication chart. In ad-
dition, have the oil seals of the brake mas-
ter cylinder and caliper as well as the brake
hose replaced at the intervals listed below
or whenever they are damaged or leaking.
8Oil seals: Replace every two years.
8Brake hose: Replace every four years.
5AV-F8199-E1-3 8/1/03 1:48 PM Page 53
Page 55 of 76
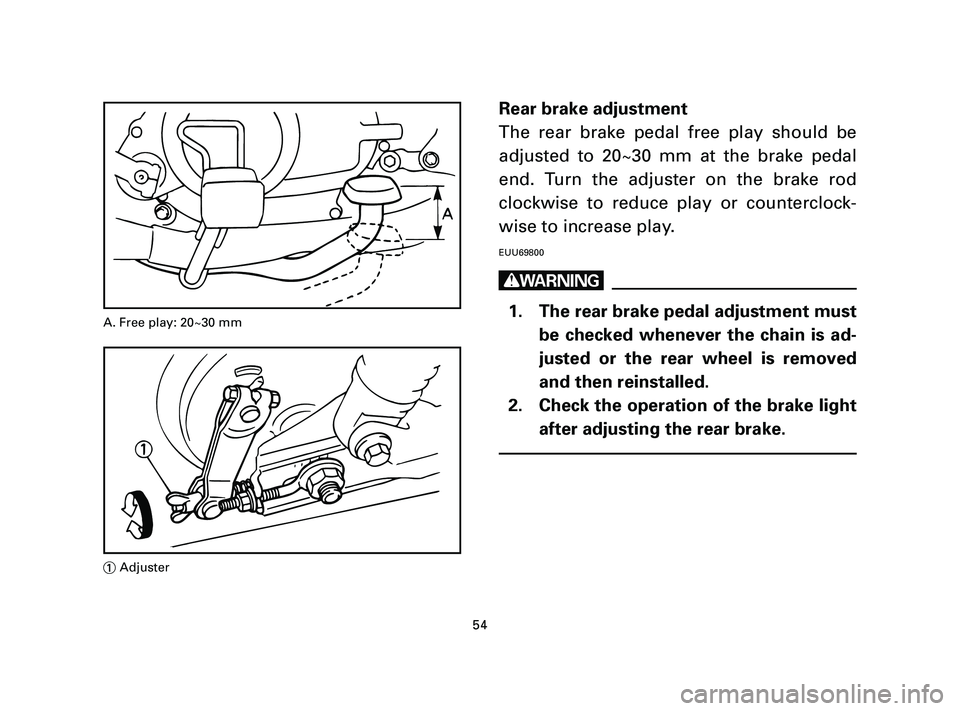
Rear brake adjustment
The rear brake pedal free play should be
adjusted to 20~30 mm at the brake pedal
end. Turn the adjuster on the brake rod
clockwise to reduce play or counterclock-
wise to increase play.
EUU69800
w
1. The rear brake pedal adjustment must
be checked whenever the chain is ad-
justed or the rear wheel is removed
and then reinstalled.
2. Check the operation of the brake light
after adjusting the rear brake.
54
A. Free play: 20~30 mm
1Adjuster
5AV-F8199-E1-3 8/1/03 1:48 PM Page 54
Page 56 of 76
EAH83301
Brake light switch adjustment
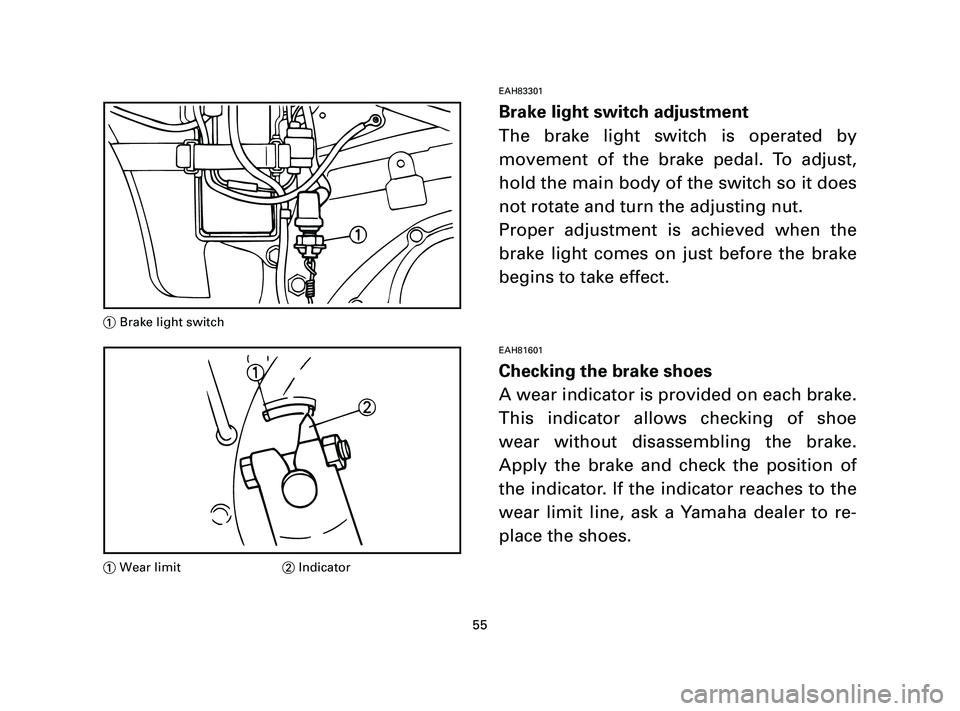
The brake light switch is operated by
movement of the brake pedal. To adjust,
hold the main body of the switch so it does
not rotate and turn the adjusting nut.
Proper adjustment is achieved when the
brake light comes on just before the brake
begins to take effect.
EAH81601
Checking the brake shoes
A wear indicator is provided on each brake.
This indicator allows checking of shoe
wear without disassembling the brake.
Apply the brake and check the position of
the indicator. If the indicator reaches to the
wear limit line, ask a Yamaha dealer to re-
place the shoes.
55
1Brake light switch
1Wear limit2Indicator
5AV-F8199-E1-3 8/1/03 1:48 PM Page 55
Page 57 of 76
EAI40001
Drive chain slack check
EUU04801
NOTE:
Spin the wheel several times and find the
tightest position of the chain. Check and/or
adjust the chain slack while it’s in this tight-
est position.
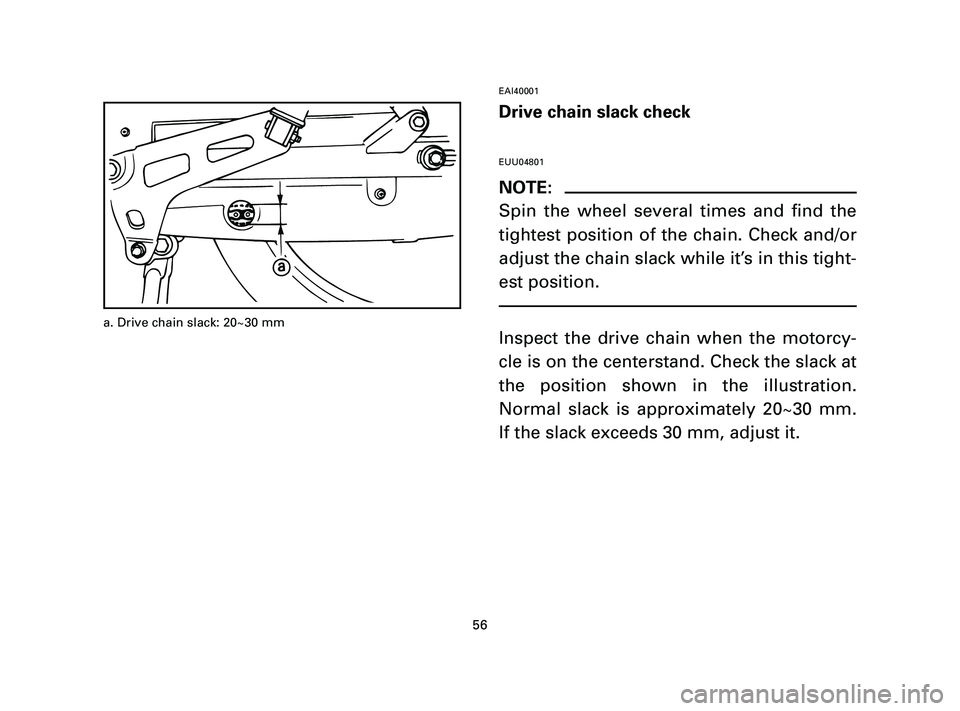
Inspect the drive chain when the motorcy-
cle is on the centerstand. Check the slack at
the position shown in the illustration.
Normal slack is approximately 20~30 mm.
If the slack exceeds 30 mm, adjust it.
56
a. Drive chain slack: 20~30 mm
5AV-F8199-E1-3 8/1/03 1:48 PM Page 56
Page 58 of 76
Drive chain slack adjustment
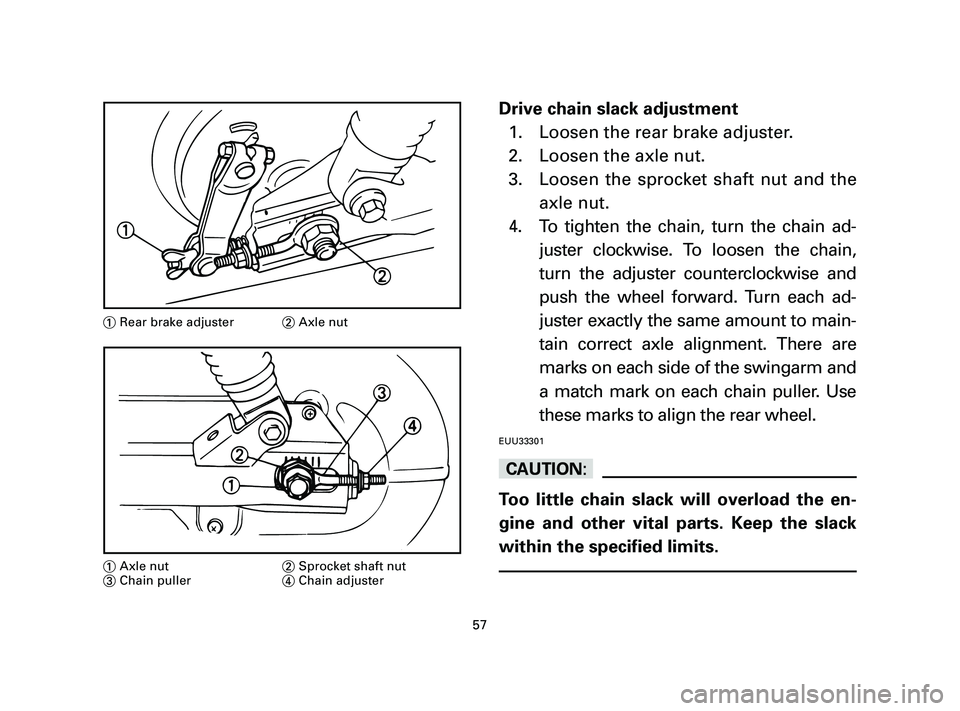
1. Loosen the rear brake adjuster.
2. Loosen the axle nut.
3. Loosen the sprocket shaft nut and the
axle nut.
4. To tighten the chain, turn the chain ad-
juster clockwise. To loosen the chain,
turn the adjuster counterclockwise and
push the wheel forward. Turn each ad-
juster exactly the same amount to main-
tain correct axle alignment. There are
marks on each side of the swingarm and
a match mark on each chain puller. Use
these marks to align the rear wheel.
EUU33301
cC
Too little chain slack will overload the en-
gine and other vital parts. Keep the slack
within the specified limits.
57
1Rear brake adjuster2Axle nut
1Axle nut2Sprocket shaft nut
3Chain puller4Chain adjuster
5AV-F8199-E1-3 8/1/03 1:48 PM Page 57
Page 59 of 76
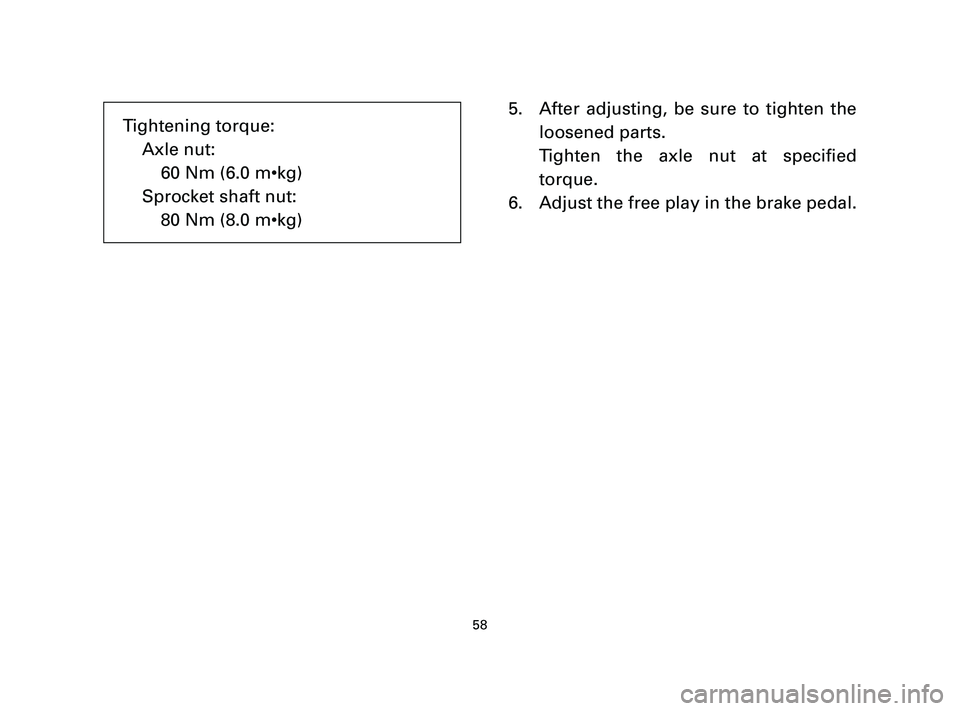
5. After adjusting, be sure to tighten the
loosened parts.
Tighten the axle nut at specified
torque.
6. Adjust the free play in the brake pedal.
58
Tightening torque:
Axle nut:
60 Nm (6.0 m•kg)
Sprocket shaft nut:
80 Nm (8.0 m•kg)
5AV-F8199-E1-3 8/1/03 1:48 PM Page 58
Page 60 of 76
EAI40601
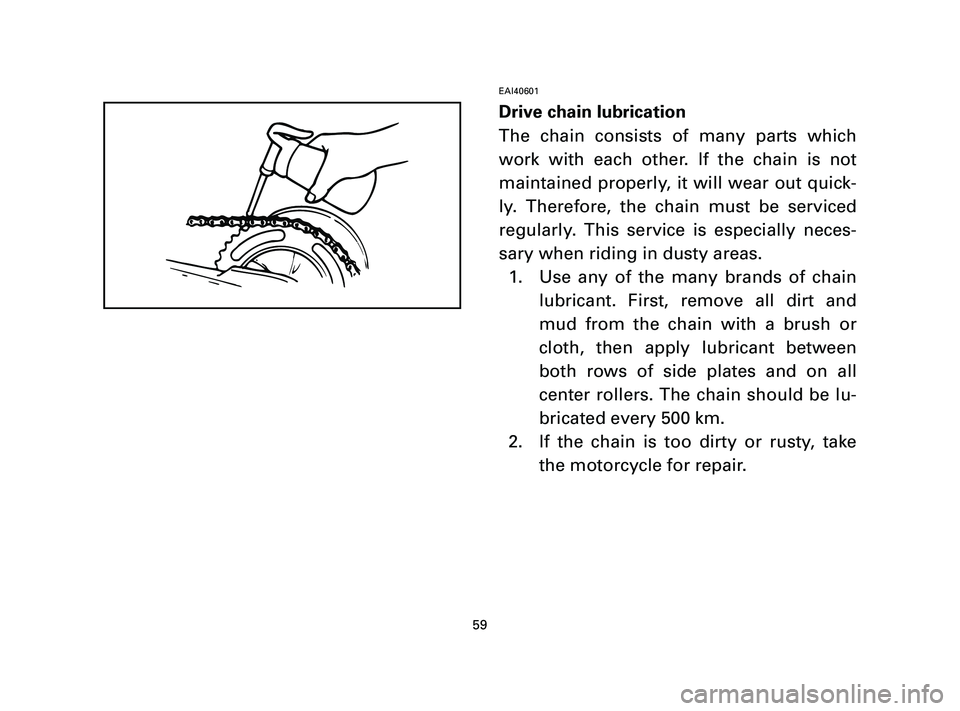
Drive chain lubrication
The chain consists of many parts which
work with each other. If the chain is not
maintained properly, it will wear out quick-
ly. Therefore, the chain must be serviced
regularly. This service is especially neces-
sary when riding in dusty areas.
1. Use any of the many brands of chain
lubricant. First, remove all dirt and
mud from the chain with a brush or
cloth, then apply lubricant between
both rows of side plates and on all
center rollers. The chain should be lu-
bricated every 500 km.
2. If the chain is too dirty or rusty, take
the motorcycle for repair.
59
5AV-F8199-E1-3 8/1/03 1:48 PM Page 59
Trending: clutch, mileage, fuel, clock, engine, transmission, maintenance schedule
