check engine light YAMAHA TDM 850 2000 Owners Manual
[x] Cancel search | Manufacturer: YAMAHA, Model Year: 2000, Model line: TDM 850, Model: YAMAHA TDM 850 2000Pages: 99, PDF Size: 10.69 MB
Page 16 of 99
INSTRUMENT AND CONTROL FUNCTIONS
3-2
3
EAU00048
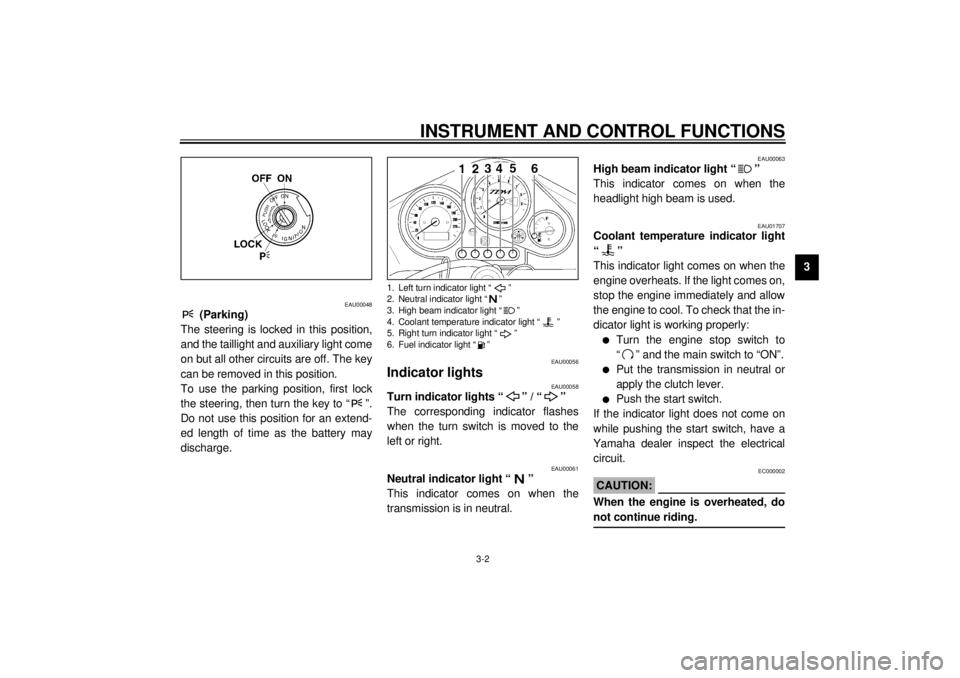
(Parking)
The steering is locked in this position,
and the taillight and auxiliary light come
on but all other circuits are off. The key
can be removed in this position.
To use the parking position, first lock
the steering, then turn the key to “ ”.
Do not use this position for an extend-
ed length of time as the battery may
discharge.
EAU00056
Indicator lights
EAU00058
Turn indicator lights “ ” / “ ”
The corresponding indicator flashes
when the turn switch is moved to the
left or right.
EAU00061
Neutral indicator light “ ”
This indicator comes on when the
transmission is in neutral.
EAU00063
High beam indicator light “ ”
This indicator comes on when the
headlight high beam is used.
EAU01707
Coolant temperature indicator light
“”
This indicator light comes on when the
engine overheats. If the light comes on,
stop the engine immediately and allow
the engine to cool. To check that the in-
dicator light is working properly:l
Turn the engine stop switch to
“ ” and the main switch to “ON”.
l
Put the transmission in neutral or
apply the clutch lever.
l
Push the start switch.
If the indicator light does not come on
while pushing the start switch, have a
Yamaha dealer inspect the electrical
circuit.
EC000002
CAUTION:@ When the engine is overheated, do
not continue riding. @
1. Left turn indicator light “ ”
2. Neutral indicator light “ ”
3. High beam indicator light “ ”
4. Coolant temperature indicator light “ ”
5. Right turn indicator light “ ”
6. Fuel indicator light “ ”
E_4tx_Functions.fm Page 2 Saturday, October 16, 1999 9:36 AM
Page 17 of 99
INSTRUMENT AND CONTROL FUNCTIONS
3-3
3
EAU01666
Fuel indicator light “ ”
When the fuel level drops below ap-
proximately 3,1 L, this light will come
on. When this light comes on, fill the
tank at the first opportunity.
To check that the indicator light is work-
ing properly:l
Turn the engine stop switch to
“ ” and the main switch to “ON”.
l
Put the transmission in neutral or
apply the clutch lever.
l
Push the start switch.
If the indicator light does not come on
while pushing the start switch, have a
Yamaha dealer inspect the electrical
circuit.
EAU01667*
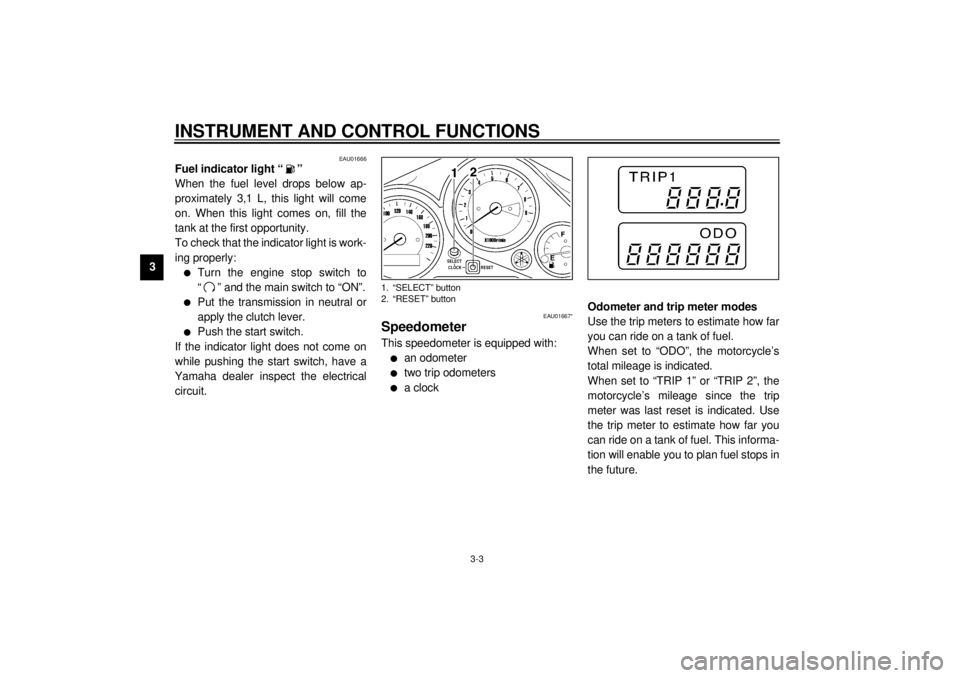
SpeedometerThis speedometer is equipped with:l
an odometer
l
two trip odometers
l
a clockOdometer and trip meter modes
Use the trip meters to estimate how far
you can ride on a tank of fuel.
When set to “ODO”, the motorcycle’s
total mileage is indicated.
When set to “TRIP 1” or “TRIP 2”, the
motorcycle’s mileage since the trip
meter was last reset is indicated. Use
the trip meter to estimate how far you
can ride on a tank of fuel. This informa-
tion will enable you to plan fuel stops in
the future.
1. “SELECT” button
2. “RESET” button
E_4tx_Functions.fm Page 3 Saturday, October 16, 1999 9:36 AM
Page 41 of 99
OPERATION AND IMPORTANT RIDING POINTS
5-3
51. Turn the main switch to “ON” and
the engine stop switch to “ ”.
EC000035
CAUTION:@ If the fuel indicator light comes on,
check the fuel level. If necessary, fill
the tank with fuel. @2. Shift the transmission into neutral.NOTE:@ When the transmission is in neutral, the
neutral indicator light should be on. If
the light does not come on, ask a
Yamaha dealer to inspect it. @3. Turn on the starter (choke) and
completely close the throttle grip.
4. Start the engine by pushing the
start switch.
NOTE:@ If the engine fails to start, release the
start switch, wait a few seconds, then
try again. Each attempt should be as
short as possible to preserve the bat-
tery. Do not crank the engine more
than 10 seconds on any one attempt. @
ECA00022
CAUTION:@ The coolant temperature indicator
light and the fuel indicator light
should come on when the start
switch is pushed and should go off
when the start switch is released. If
the coolant temperature indicator
light remains on, immediately stop
the engine and have a Yamaha deal-
er check the monitoring circuits. If
the fuel indicator light remains on,
add sufficient fuel. @
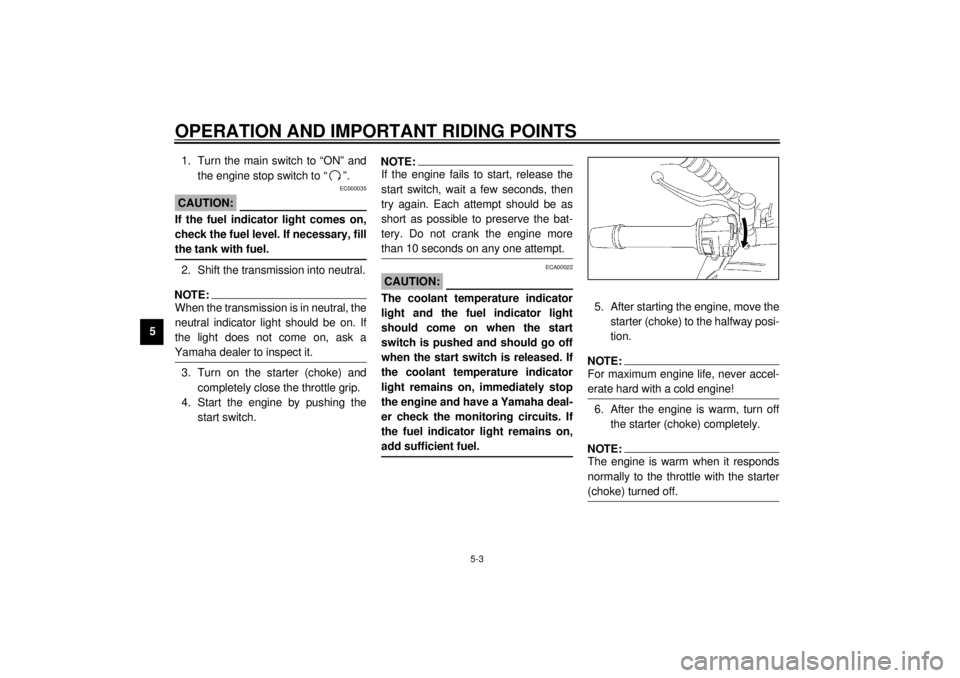
5. After starting the engine, move the
starter (choke) to the halfway posi-
tion.NOTE:@ For maximum engine life, never accel-
erate hard with a cold engine! @6. After the engine is warm, turn off
the starter (choke) completely.NOTE:@ The engine is warm when it responds
normally to the throttle with the starter
(choke) turned off. @
E_4tx_Operation.fm Page 3 Saturday, October 16, 1999 9:37 AM
Page 46 of 99
6
PERIODIC MAINTENANCE AND MINOR REPAIR
Tool kit................................................................... 6-1
Periodic maintenance and lubrication ................... 6-2
Cowling and panel removal and installation.......... 6-5
Cowlings A and B ................................................. 6-5
Panels A and B ..................................................... 6-6
Spark plugs........................................................... 6-6
Engine oil .............................................................. 6-8
Cooling system ................................................... 6-10
Changing the coolant .......................................... 6-11
Air filter ............................................................... 6-13
Carburetor adjustment ........................................ 6-15
Idle speed adjustment ........................................ 6-15
Throttle cable free play inspection ...................... 6-16
Valve clearance adjustment ................................ 6-16
Tires .................................................................... 6-17
Clutch lever free play adjustment........................ 6-19
Rear brake pedal height adjustment ................... 6-20
Brake light switch adjustment ............................. 6-21
Checking the front and rear brake pads.............. 6-21
Inspecting the brake fluid level............................ 6-22
Brake fluid replacement ...................................... 6-23Drive chain slack check ...................................... 6-23
Drive chain slack adjustment ............................. 6-23
Drive chain lubrication........................................ 6-24
Cable inspection and lubrication ........................ 6-24
Throttle cable and grip lubrication ...................... 6-25
Brake and shift pedal lubrication ........................ 6-25
Brake and clutch lever lubrication ...................... 6-25
Sidestand lubrication.......................................... 6-26
Rear suspension lubrication............................... 6-26
Front fork inspection ........................................... 6-27
Steering inspection ............................................ 6-27
Wheel bearings .................................................. 6-28
Battery................................................................ 6-28
Fuse replacement .............................................. 6-29
Headlight bulb replacement ............................... 6-30
Tail/brake light bulb replacement ........................ 6-31
Turn signal light bulb replacement...................... 6-32
Troubleshooting .................................................. 6-32
Troubleshooting chart ......................................... 6-33
Engine overheating ............................................ 6-34
E_4tx_PeriodicTOC.fm Page 1 Saturday, October 16, 1999 9:37 AM
Page 54 of 99

PERIODIC MAINTENANCE AND MINOR REPAIR
6-8
6
EAU01692
Engine oilOil level inspection
1. Place the motorcycle on a level
place. Warm up the engine at idle
for 15 minutes.NOTE:@ Be sure the motorcycle is positioned
straight up when checking the oil level.
A slight tilt toward the side can result in
false readings. @
2. The oil tank is located behind the
engine cylinders. With the engine
stopped, check the oil level
through the level window located
on the right side of the oil tank.
3. The oil level should be between
the maximum and minimum
marks. If the level is low, fill engine
with sufficient oil to raise it to the
specified level.Engine oil and oil filter element re-
placement
1. Warm up the engine for a few min-
utes.
2. Stop the engine. Place an oil pan
under the engine and remove the
oil filler cap.
3. Remove the drain bolts and drain
the oil.
4. Remove the oil filter cover bolts
and oil filter.
1. Oil level window
2. Minimum level mark
3. Maximum level mark
1. Engine oil filler cap
1. Engine oil drain bolt a
E_4tx_Periodic.fm Page 8 Saturday, October 16, 1999 9:37 AM
Page 97 of 99

10-INDEXAAir filter .................................................. 6-13
Antitheft alarm (optional) ..........................3-5BBattery ................................................... 6-28
Brake and clutch lever lubrication........... 6-25
Brake and shift pedal lubrication ............ 6-25
Brake fluid replacement ......................... 6-23
Brake light switch adjustment ................. 6-21CCable inspection and lubrication ............ 6-24
Carburetor adjustment ........................... 6-15
Care.........................................................7-1
Changing the coolant ............................. 6-11
Checking the front and
rear brake pads ................................... 6-21
Clutch lever ..............................................3-8
Clutch lever free play adjustment ........... 6-19
Controls/Instruments ................................2-3
Coolant temperature indicator light...........3-2
Cooling system ...................................... 6-10
Cowling and panel removal and
installation .............................................6-5
Cowlings A and B ....................................6-5DDiagnosis device......................................3-5
Dimmer switch .........................................3-6
Drive chain lubrication ............................ 6-24
Drive chain slack adjustment.................. 6-23
Drive chain slack check.......................... 6-23
EEngine break-in ....................................... 5-5
Engine oil ................................................ 6-8
Engine overheating ................................. 6-34
Engine stop switch................................... 3-7FFront brake lever ..................................... 3-9
Front fork adjustment............................. 3-14
Front fork inspection .............................. 6-27
Fuel ....................................................... 3-11
Fuel gauge .............................................. 3-5
Fuel indicator light ................................... 3-3
Fuel tank breather hose
(for Germany only) .............................. 3-12
Fuel tank cap ......................................... 3-10
Fuse replacement.................................. 6-29GGive safety the right of way ..................... 1-1HHandlebar switches ................................. 3-6
Dimmer switch ................................... 3-6
Engine stop switch ............................. 3-7
Hazard switch .................................... 3-6
Horn switch ........................................ 3-6
Lights switch ...................................... 3-7
Pass switch ........................................ 3-6
Start switch ........................................ 3-7
Turn signal switch .............................. 3-6
Hazard switch .......................................... 3-6
Headlight bulb replacement ................... 6-30
Helmet holder ........................................ 3-13
High beam indicator light ..........................3-2
Horn switch ..............................................3-6IIdentification number records ...................9-1
Idle speed adjustment ............................6-15
Indicator lights ..........................................3-2
Coolant temperature indicator light .....3-2
Fuel indicator light...............................3-3
High beam indicator light ....................3-2
Neutral indicator light ..........................3-2
Turn indicator lights ............................3-2
Inspecting the brake fluid level ...............6-22KKey identification number .........................9-1LLeft view...................................................2-1
Lights switch ............................................3-7
Luggage strap holders ...........................3-17MMain switch/steering lock .........................3-1
Model label ..............................................9-2NNeutral indicator light ...............................3-2PPanels A and B ........................................6-6
Parking.....................................................5-6
Pass switch ..............................................3-6
Periodic maintenance and lubrication .......6-2
Pre-operation check list ............................4-1
E_4txIX.fm Page 1 Saturday, October 16, 1999 9:38 AM
Page 98 of 99
INDEX
RRear brake pedal ..................................... 3-9
Rear brake pedal height adjustment ...... 6-20
Rear shock absorber adjustment ........... 3-15
Rear suspension lubrication................... 6-26
Right view................................................ 2-2SSeat....................................................... 3-12
Shifting .................................................... 5-4
Shift pedal ............................................... 3-8
Sidestand .............................................. 3-17
Sidestand/clutch switch operation
check .................................................. 3-17
Sidestand lubrication ............................. 6-26
Spark plugs ............................................. 6-6
Specifications .......................................... 8-1
Speedometer ........................................... 3-3
Starter (choke) “ ”................................ 3-7
Starting a warm engine ............................ 5-4
Starting the engine .................................. 5-1
Start switch .............................................. 3-7
Steering inspection ................................ 6-27
Storage.................................................... 7-4
Storage compartment ............................ 3-13TTachometer ............................................. 3-4
Tail/brake light bulb replacement ........... 6-31
Throttle cable and grip lubrication .......... 6-25
Throttle cable free play inspection ......... 6-16
Tips for reducing fuel consumption .......... 5-5
Tires ...................................................... 6-17
Tool kit..................................................... 6-1
Troubleshooting .................................... 6-32
Troubleshooting chart ........................... 6-33
Turn indicator lights ................................. 3-2
Turn signal light bulb replacement ......... 6-32
Turn signal switch ................................... 3-6VValve clearance adjustment .................. 6-16
Vehicle identification number................... 9-1WWheel bearings ..................................... 6-28
E_4txIX.fm Page 2 Saturday, October 16, 1999 9:38 AM