check engine light YAMAHA TENERE 700 2020 Owners Manual
[x] Cancel search | Manufacturer: YAMAHA, Model Year: 2020, Model line: TENERE 700, Model: YAMAHA TENERE 700 2020Pages: 102, PDF Size: 10.31 MB
Page 6 of 102

Table of contentsSafety information............................ 1-1
Description....................................... 2-1
Left view ......................................... 2-1
Right view ....................................... 2-2
Controls and instruments ............... 2-3
Instrument and control functions... 3-1
Immobilizer system......................... 3-1
Main switch/steering lock............... 3-2
Indicator lights and warning
lights............................................ 3-3
Multi-function meter unit ................ 3-5
Handlebar switches ...................... 3-12
Clutch lever .................................. 3-14
Shift pedal .................................... 3-14
Brake lever.................................... 3-15
Brake pedal .................................. 3-15
ABS .............................................. 3-15
Fuel tank cap ................................ 3-16
Fuel ............................................... 3-17
Fuel tank overflow hose ............... 3-19
Catalytic converter ....................... 3-19
Seats ............................................ 3-19
Adjusting the headlight beams ..... 3-21
Adjusting the front fork ................. 3-21
Front fork bleeding ....................... 3-23
Adjusting the shock absorber
assembly ................................... 3-23
Luggage strap holders ................. 3-25
Front fender ................................. 3-26DC power outlets .......................... 3-26
Sidestand ...................................... 3-27
Ignition circuit cut-off system ....... 3-28
For your safety – pre-operation
checks............................................... 4-1
Operation and important riding
points................................................. 5-1
Engine break-in ............................... 5-1
Starting the engine .......................... 5-2
Shifting ............................................ 5-3
Tips for reducing fuel
consumption ................................ 5-4
Parking ............................................ 5-4
Periodic maintenance and
adjustment........................................ 6-1
Tool kit ............................................ 6-2
Periodic maintenance charts .......... 6-3
Periodic maintenance chart for the
emission control system .............. 6-3
General maintenance and
lubrication chart ........................... 6-5
Removing and installing cowlings... 6-9
Checking the spark plugs ............... 6-9
Canister ......................................... 6-10
Engine oil and oil filter cartridge.... 6-11
Why Yamalube .............................. 6-14
Coolant.......................................... 6-14Replacing the air filter element
and cleaning the check hose .... 6-15
Checking the throttle grip free
play ............................................ 6-17
Valve clearance............................. 6-17
Tires .............................................. 6-17
Spoke wheels ............................... 6-19
Adjusting the clutch lever free
play ............................................ 6-19
Checking the brake lever free
play ............................................ 6-20
Brake light switches ..................... 6-21
Checking the front and rear brake
pads .......................................... 6-21
Checking the brake fluid level ...... 6-22
Changing the brake fluid .............. 6-23
Drive chain slack........................... 6-23
Cleaning and lubricating the drive
chain.......................................... 6-25
Checking and lubricating the
cables ........................................ 6-26
Checking and lubricating the
throttle grip and cable ............... 6-26
Checking and lubricating the
brake and shift pedals............... 6-26
Checking and lubricating the
brake and clutch levers ............. 6-27
Checking and lubricating the
sidestand................................... 6-28
Lubricating the rear suspension ... 6-28UBW3E0E0.book Page 1 Friday, May 24, 2019 11:01 AM
Page 18 of 102

Instrument and control functions
3-3
3To unlock the steering
From the “LOCK” position, push the
key in and turn it to “OFF”.
EAU59680
(Parking)
The hazard lights and turn signal lights
can be turned on, but all other electri-
cal systems are off. The key can be re-
moved.
The steering must be locked before the
key can be turned to “ ”.
NOTICE
ECA20760
Using the hazard or turn signal lights
for an extended length of time may
cause the battery to discharge.
EAU4939H
Indicator lights and warning
lights
EAU11032
Turn signal indicator lights “ ”
and“”
Each indicator light will flash when its
corresponding turn signal lights are
flashing.
EAU11061
Neutral indicator light “ ”
This indicator light comes on when the
transmission is in the neutral position.
EAU11081
High beam indicator light “ ”
This indicator light comes on when the
high beam of the headlight is switched
on.
EAU59963
Oil pressure warning light “ ”
This warning light comes on if the en-
gine oil pressure is low.TIPWhen the vehicle is turned on, the light
should come on, go off briefly, and
then remain on until the engine is start-
ed. Otherwise, have a Yamaha dealer
check the vehicle.
1. Push.
2. Turn.12
1. Left turn signal indicator light Ž
2. Anti-lock Brake System (ABS) warning
light Ž
3. Engine trouble warning light Ž
4. Oil pressure warning light Ž
5. Coolant temperature warning light Ž
6.
7. Right turn signal indicator light Ž
8. Neutral indicator light Ž
9. High beam indicator light Ž
10.Immobilizer system indicator light Ž
11.Anti-lock Brake System (ABS OFF) warning
light Ž
1
2
3
4
57
8
9
10
11
6
ABSABS
UBW3E0E0.book Page 3 Friday, May 24, 2019 11:01 AM
Page 19 of 102

Instrument and control functions
3-4
3
NOTICE
ECA21211
If the warning light comes on when
the engine is running, stop the en-
gine and check the oil level. If the oil
level is low, add sufficient oil of the
recommended type. If the warning
light remains on after adding oil,
stop the engine and have a Yamaha
dealer check the vehicle.
EAU11449
Coolant temperature warning
light “ ”
This warning light comes on when the
engine is overheating. If this occurs,
stop the engine immediately and allow
the engine to cool. (See page 6-37.)
For vehicles with a radiator fan, the ra-
diator fan(s) automatically switch on or
off according to the coolant tempera-
ture.TIPWhen the vehicle is turned on, the light
will come on for a few seconds, and
then go off. If the light does not come
on, or if the light remains on, have a
Yamaha dealer check the vehicle.
NOTICE
ECA10022
Do not continue to operate the en-
gine if it is overheating.
EAU73172
Engine trouble warning light “ ”
This warning light comes on if a prob-
lem is detected in the engine or other
vehicle control system. If this occurs,
have a Yamaha dealer check the on-
board diagnostic system.TIPWhen the vehicle is turned on, the light
will come on for a few seconds and
then go off. If the light does not come
on, or if the light remains on, have a
Yamaha dealer check the vehicle.
EAU69895
ABS warning light “ ”
This warning light comes on when the
vehicle is first turned on, and goes off
after starting riding. If the warning light
comes on while riding, the anti-lock
brake system may not work correctly.
WARNING
EWA16043
If the ABS warning light does not
turn off after reaching 10 km/h (6
mi/h), or if the warning light comes
on while riding:
Use extra caution to avoid pos-
sible wheel lock during emer-
gency braking.
Have a Yamaha dealer check
the vehicle as soon as possible.
EAUM4080
ABS warning light “ ”
This warning light comes on when the
anti-lock brake system has been man-
ually disabled, the “OFF-ROAD” indi-
cator comes on at the same time.
WARNING
EWAM1050
Always ride on paved roads with the
ABS turned on. Riding on public
roads with the ABS disabled may be
illegal and void your insurance. Turn
the ABS off only when riding on non-
paved surfaces.
ABS
ABS
UBW3E0E0.book Page 4 Friday, May 24, 2019 11:01 AM
Page 20 of 102
Instrument and control functions
3-5
3
EAUM3622
Immobilizer system indicator
light “ ”
When the vehicle is turned off and 30
seconds have passed, the indicator
light will flash steadily to indicate the
immobilizer system is enabled. After 24
hours have passed, the indicator light
will stop flashing, however the immobi-
lizer system is still enabled.TIPWhen the vehicle is turned on, the light
will come on for a few seconds, and go
off. Otherwise, have a Yamaha dealer
check the vehicle.Troubleshooting
If a problem is detected in the immobi-
lizer system, the light will flash in a pat-
tern. If the immobilizer system
indicator light flashes in the pattern,
slowly 5 times then quickly 2 times, this
could be caused by transponder inter-
ference. If this occurs, try the following.
1. Make sure there are no other im-
mobilizer keys close to the main
switch. Other immobilizer systemkeys may cause signal interfer-
ence and prevent the engine from
starting.
2. Use the code re-registering key to
start the engine.
3. If the engine starts, turn it off, and
try starting the engine with the
standard keys.
4. If one or more of the standard
keys do not start the engine, take
the vehicle and all keys to a
Yamaha dealer to have the stan-
dard keys re-registered.
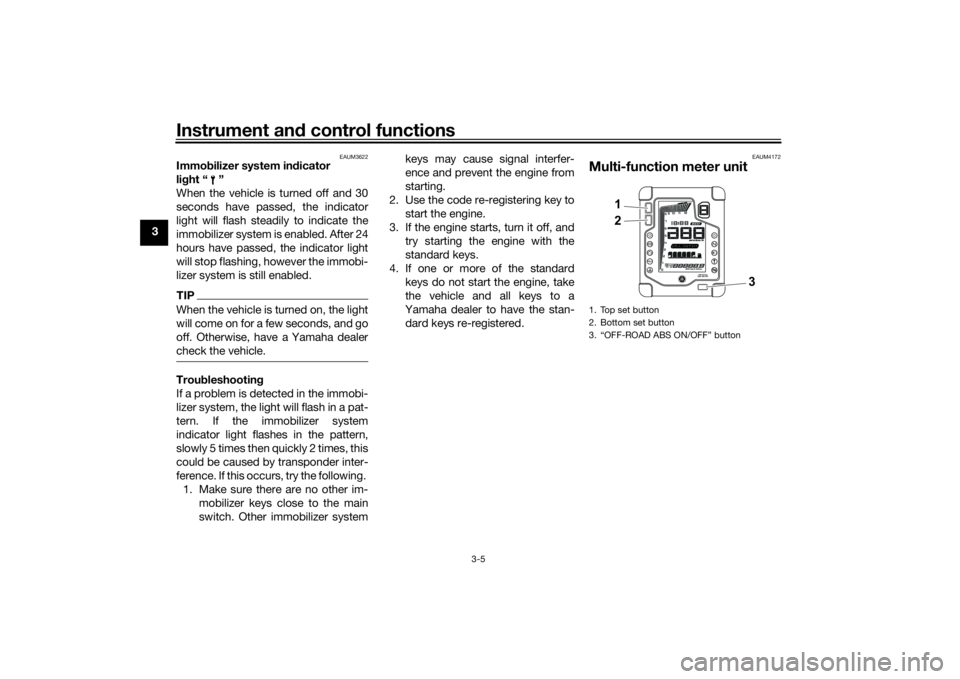
EAUM4172
Multi-function meter unit1. Top set button
2. Bottom set button
3. “OFF-ROAD ABS ON/OFF” button
1
2
3
UBW3E0E0.book Page 5 Friday, May 24, 2019 11:01 AM
Page 22 of 102
Instrument and control functions
3-7
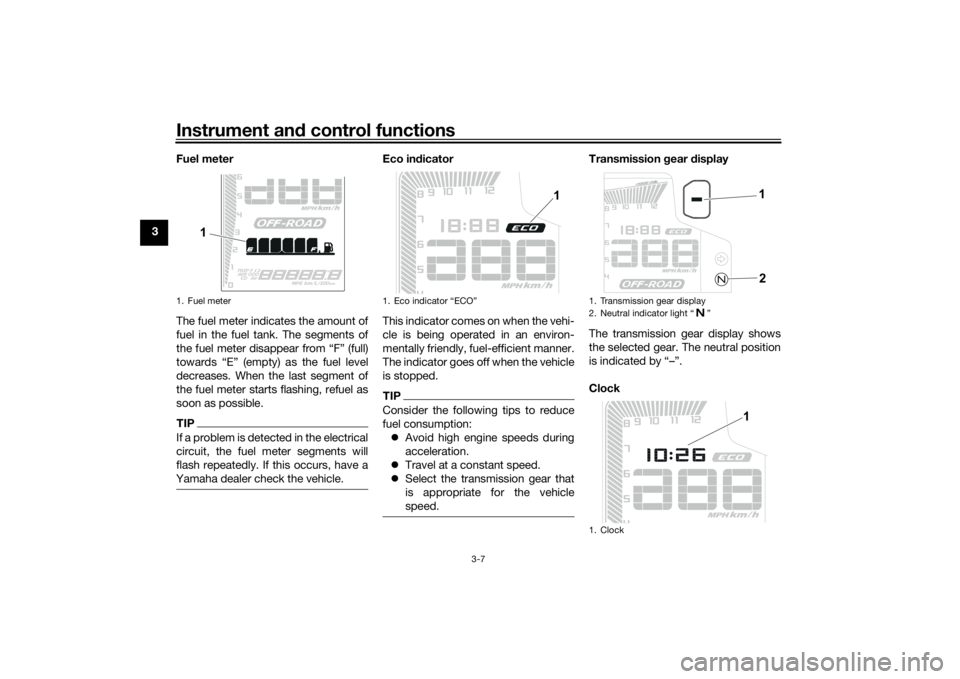
3Fuel meter
The fuel meter indicates the amount of
fuel in the fuel tank. The segments of
the fuel meter disappear from “F” (full)
towards “E” (empty) as the fuel level
decreases. When the last segment of
the fuel meter starts flashing, refuel as
soon as possible.
TIPIf a problem is detected in the electrical
circuit, the fuel meter segments will
flash repeatedly. If this occurs, have a
Yamaha dealer check the vehicle.
Eco indicator
This indicator comes on when the vehi-
cle is being operated in an environ-
mentally friendly, fuel-efficient manner.
The indicator goes off when the vehicle
is stopped.TIPConsider the following tips to reduce
fuel consumption:
Avoid high engine speeds during
acceleration.
Travel at a constant speed.
Select the transmission gear that
is appropriate for the vehicle
speed.
Transmission gear display
The transmission gear display shows
the selected gear. The neutral position
is indicated by “–”.
Clock
1. Fuel meter
1
1.
1
1. Transmission gear display
2. Neutral indicator light Ž
1. Clock
1
2
1
UBW3E0E0.book Page 7 Friday, May 24, 2019 11:01 AM
Page 49 of 102

Operation and important riding points
5-2
5
EAU86620
Starting the engineThe ignition circuit cut-off system will
enable starting when:
the transmission is in the neutral
position or
the transmission is in gear, the
sidestand is up, and the clutch le-
ver is pulled.
To start the engine1. Turn the main switch on and set
the engine stop switch to the run
position.
2. Confirm the indicator and warning
light(s) come on for a few sec-
onds, and the go off. (See page
3-3.)TIPDo not start the engine if the en-
gine trouble warning light remains
on.
The oil pressure warning light
should come on and stay on until
the engine is started.The ABS warning light should
come on and stay on until the ve-
hicle reaches a speed of 10 km/h
(6 mi/h).
NOTICE
ECA24110
If a warning or indicator light does
not work as described above, have a
Yamaha dealer check the vehicle.3. Shift the transmission into the
neutral position.
4. Start the engine by pushing the
start switch.
5. Release the start switch when the
engine starts, or after 5 seconds.
Wait 10 seconds before pressing
the switch again to allow battery
voltage to restore.NOTICE
ECA11043
For maximum engine life, never ac-
celerate hard when the engine is
cold!
EAUM3632
TIPThis model is equipped with:
a lean angle sensor. This sensor
stops the engine in case of a vehi-
cle turnover. If this happens, the
engine trouble warning light will
come on, but this is not a malfunc-
tion. Turn the vehicle power off
and then back on again to cancel
the warning light. Failing to do so
will prevent the engine from start-
ing even though the engine will
crank when pushing the start
switch.
an engine auto-stop system. The
engine stops automatically if left
idling for 20 minutes. If the engine
stops, simply push the start
switch to restart the engine.
UBW3E0E0.book Page 2 Friday, May 24, 2019 11:01 AM
Page 60 of 102
Periodic maintenance and adjustment
6-9
6
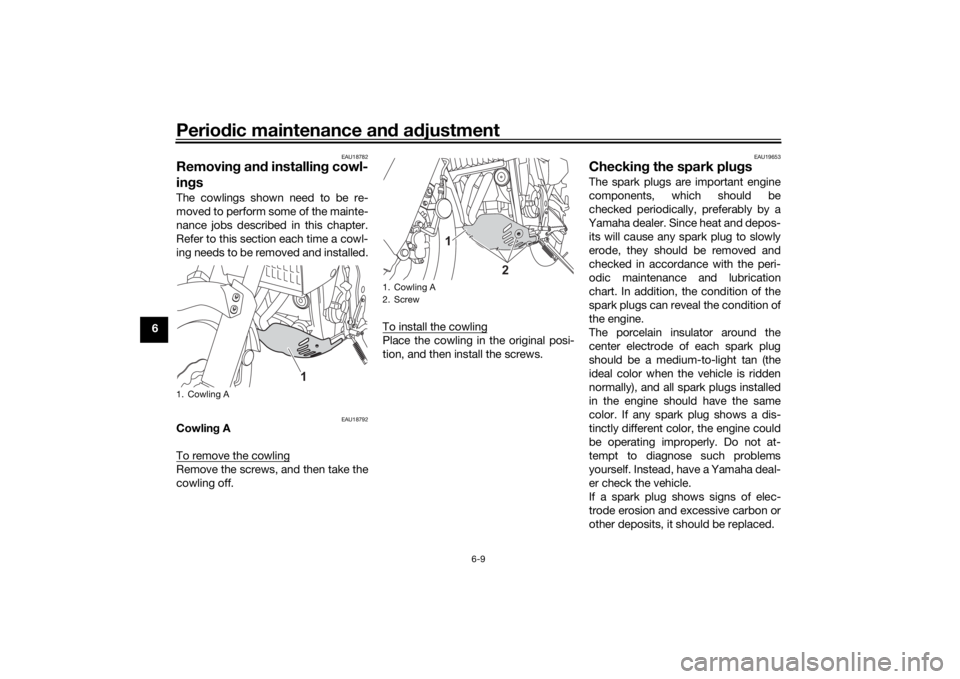
EAU18782
Removing and installing cowl-
ingsThe cowlings shown need to be re-
moved to perform some of the mainte-
nance jobs described in this chapter.
Refer to this section each time a cowl-
ing needs to be removed and installed.
EAU18792
Cowling A
To remove the cowlingRemove the screws, and then take the
cowling off.To install the cowling
Place the cowling in the original posi-
tion, and then install the screws.
EAU19653
Checking the spark plugsThe spark plugs are important engine
components, which should be
checked periodically, preferably by a
Yamaha dealer. Since heat and depos-
its will cause any spark plug to slowly
erode, they should be removed and
checked in accordance with the peri-
odic maintenance and lubrication
chart. In addition, the condition of the
spark plugs can reveal the condition of
the engine.
The porcelain insulator around the
center electrode of each spark plug
should be a medium-to-light tan (the
ideal color when the vehicle is ridden
normally), and all spark plugs installed
in the engine should have the same
color. If any spark plug shows a dis-
tinctly different color, the engine could
be operating improperly. Do not at-
tempt to diagnose such problems
yourself. Instead, have a Yamaha deal-
er check the vehicle.
If a spark plug shows signs of elec-
trode erosion and excessive carbon or
other deposits, it should be replaced.
1. Cowling A
1
1. Cowling A
2. Screw
1
2
UBW3E0E0.book Page 9 Friday, May 24, 2019 11:01 AM
Page 62 of 102
Periodic maintenance and adjustment
6-11
6
EAUM4151
Engine oil and oil filter car-
tridgeThe engine oil level should be checked
before each ride. In addition, the oil
must be changed and the oil filter car-
tridge replaced at the intervals speci-
fied in the periodic maintenance chart.
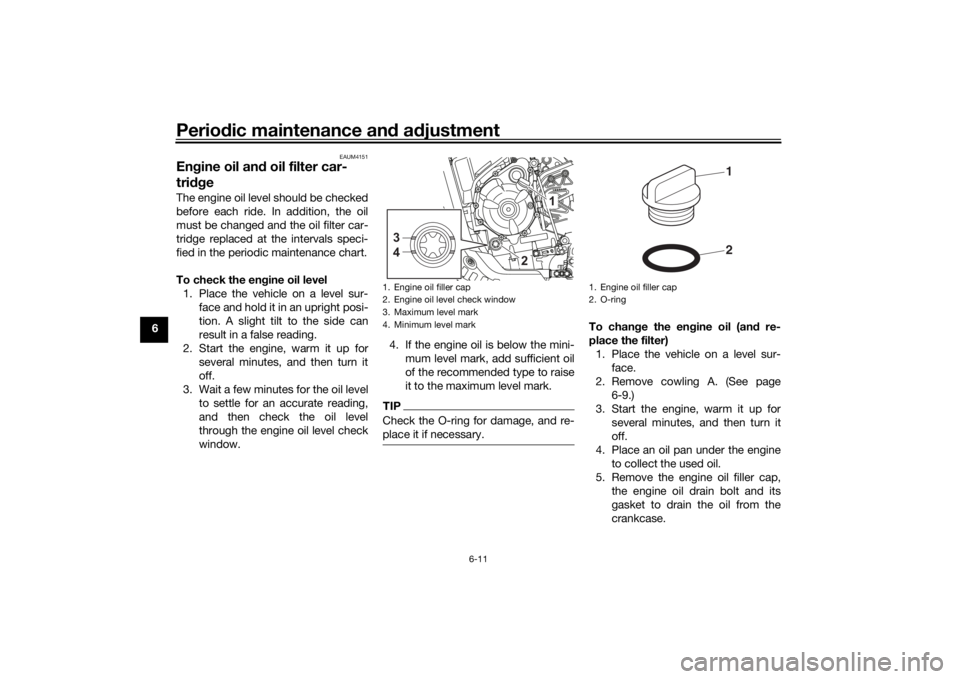
To check the engine oil level
1. Place the vehicle on a level sur-
face and hold it in an upright posi-
tion. A slight tilt to the side can
result in a false reading.
2. Start the engine, warm it up for
several minutes, and then turn it
off.
3. Wait a few minutes for the oil level
to settle for an accurate reading,
and then check the oil level
through the engine oil level check
window.4. If the engine oil is below the mini-
mum level mark, add sufficient oil
of the recommended type to raise
it to the maximum level mark.
TIPCheck the O-ring for damage, and re-
place it if necessary.
To change the engine oil (and re-
place the filter)
1. Place the vehicle on a level sur-
face.
2. Remove cowling A. (See page
6-9.)
3. Start the engine, warm it up for
several minutes, and then turn it
off.
4. Place an oil pan under the engine
to collect the used oil.
5. Remove the engine oil filler cap,
the engine oil drain bolt and its
gasket to drain the oil from the
crankcase.
1. Engine oil filler cap
2. Engine oil level check window
3. Maximum level mark
4. Minimum level mark3
4
2
1
1. Engine oil filler cap
2. O-ring
21
UBW3E0E0.book Page 11 Friday, May 24, 2019 11:01 AM
Page 64 of 102
Periodic maintenance and adjustment
6-13
6
TIPBe sure to wipe off spilled oil on any
parts after the engine and exhaust sys-
tem have cooled down.NOTICE
ECA11621
In order to prevent clutch slip-
page (since the engine oil also
lubricates the clutch), do not
mix any chemical additives. Do
not use oils with a diesel speci-
fication of “CD” or oils of a high-
er quality than specified. In
addition, do not use oils labeled
“ENERGY CONSERVING II” or
higher.
Make sure that no foreign mate-
rial enters the crankcase.
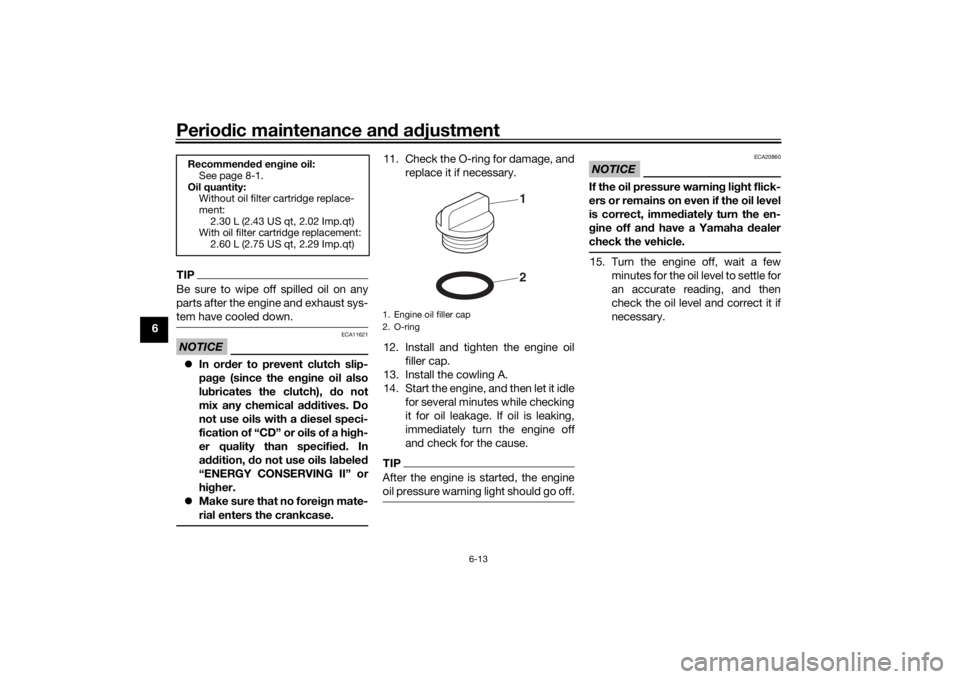
11. Check the O-ring for damage, and
replace it if necessary.
12. Install and tighten the engine oil
filler cap.
13. Install the cowling A.
14. Start the engine, and then let it idle
for several minutes while checking
it for oil leakage. If oil is leaking,
immediately turn the engine off
and check for the cause.TIPAfter the engine is started, the engine
oil pressure warning light should go off.
NOTICE
ECA20860
If the oil pressure warning light flick-
ers or remains on even if the oil level
is correct, immediately turn the en-
gine off and have a Yamaha dealer
check the vehicle.15. Turn the engine off, wait a few
minutes for the oil level to settle for
an accurate reading, and then
check the oil level and correct it if
necessary.
Recommended engine oil:
See page 8-1.
Oil quantity:
Without oil filter cartridge replace-
ment:
2.30 L (2.43 US qt, 2.02 Imp.qt)
With oil filter cartridge replacement:
2.60 L (2.75 US qt, 2.29 Imp.qt)
1. Engine oil filler cap
2. O-ring
21
UBW3E0E0.book Page 13 Friday, May 24, 2019 11:01 AM
Page 85 of 102
Periodic maintenance and adjustment
6-34
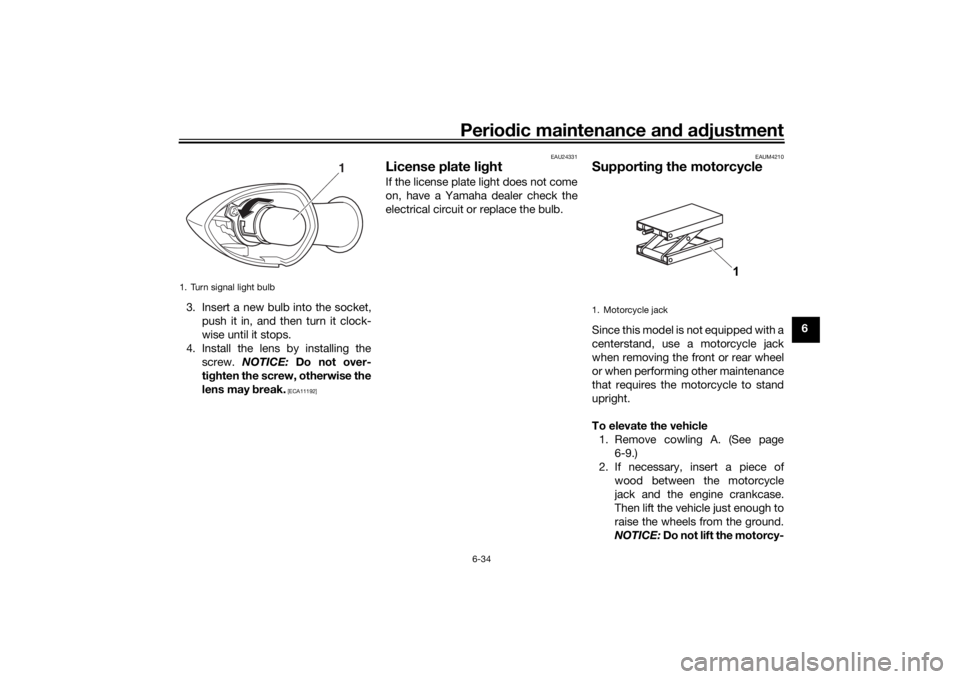
6 3. Insert a new bulb into the socket,
push it in, and then turn it clock-
wise until it stops.
4. Install the lens by installing the
screw. NOTICE: Do not over-
tighten the screw, otherwise the
lens may break.
[ECA11192]EAU24331
License plate lightIf the license plate light does not come
on, have a Yamaha dealer check the
electrical circuit or replace the bulb.
EAUM4210
Supporting the motorcycleSince this model is not equipped with a
centerstand, use a motorcycle jack
when removing the front or rear wheel
or when performing other maintenance
that requires the motorcycle to stand
upright.
To elevate the vehicle
1. Remove cowling A. (See page
6-9.)
2. If necessary, insert a piece of
wood between the motorcycle
jack and the engine crankcase.
Then lift the vehicle just enough to
raise the wheels from the ground.
NOTICE: Do not lift the motorcy-
1. Turn signal light bulb
1
1. Motorcycle jack
1
UBW3E0E0.book Page 34 Friday, May 24, 2019 11:01 AM