stop start YAMAHA TENERE 700 2020 Owners Manual
[x] Cancel search | Manufacturer: YAMAHA, Model Year: 2020, Model line: TENERE 700, Model: YAMAHA TENERE 700 2020Pages: 102, PDF Size: 10.31 MB
Page 19 of 102

Instrument and control functions
3-4
3
NOTICE
ECA21211
If the warning light comes on when
the engine is running, stop the en-
gine and check the oil level. If the oil
level is low, add sufficient oil of the
recommended type. If the warning
light remains on after adding oil,
stop the engine and have a Yamaha
dealer check the vehicle.
EAU11449
Coolant temperature warning
light “ ”
This warning light comes on when the
engine is overheating. If this occurs,
stop the engine immediately and allow
the engine to cool. (See page 6-37.)
For vehicles with a radiator fan, the ra-
diator fan(s) automatically switch on or
off according to the coolant tempera-
ture.TIPWhen the vehicle is turned on, the light
will come on for a few seconds, and
then go off. If the light does not come
on, or if the light remains on, have a
Yamaha dealer check the vehicle.
NOTICE
ECA10022
Do not continue to operate the en-
gine if it is overheating.
EAU73172
Engine trouble warning light “ ”
This warning light comes on if a prob-
lem is detected in the engine or other
vehicle control system. If this occurs,
have a Yamaha dealer check the on-
board diagnostic system.TIPWhen the vehicle is turned on, the light
will come on for a few seconds and
then go off. If the light does not come
on, or if the light remains on, have a
Yamaha dealer check the vehicle.
EAU69895
ABS warning light “ ”
This warning light comes on when the
vehicle is first turned on, and goes off
after starting riding. If the warning light
comes on while riding, the anti-lock
brake system may not work correctly.
WARNING
EWA16043
If the ABS warning light does not
turn off after reaching 10 km/h (6
mi/h), or if the warning light comes
on while riding:
Use extra caution to avoid pos-
sible wheel lock during emer-
gency braking.
Have a Yamaha dealer check
the vehicle as soon as possible.
EAUM4080
ABS warning light “ ”
This warning light comes on when the
anti-lock brake system has been man-
ually disabled, the “OFF-ROAD” indi-
cator comes on at the same time.
WARNING
EWAM1050
Always ride on paved roads with the
ABS turned on. Riding on public
roads with the ABS disabled may be
illegal and void your insurance. Turn
the ABS off only when riding on non-
paved surfaces.
ABS
ABS
UBW3E0E0.book Page 4 Friday, May 24, 2019 11:01 AM
Page 20 of 102
Instrument and control functions
3-5
3
EAUM3622
Immobilizer system indicator
light “ ”
When the vehicle is turned off and 30
seconds have passed, the indicator
light will flash steadily to indicate the
immobilizer system is enabled. After 24
hours have passed, the indicator light
will stop flashing, however the immobi-
lizer system is still enabled.TIPWhen the vehicle is turned on, the light
will come on for a few seconds, and go
off. Otherwise, have a Yamaha dealer
check the vehicle.Troubleshooting
If a problem is detected in the immobi-
lizer system, the light will flash in a pat-
tern. If the immobilizer system
indicator light flashes in the pattern,
slowly 5 times then quickly 2 times, this
could be caused by transponder inter-
ference. If this occurs, try the following.
1. Make sure there are no other im-
mobilizer keys close to the main
switch. Other immobilizer systemkeys may cause signal interfer-
ence and prevent the engine from
starting.
2. Use the code re-registering key to
start the engine.
3. If the engine starts, turn it off, and
try starting the engine with the
standard keys.
4. If one or more of the standard
keys do not start the engine, take
the vehicle and all keys to a
Yamaha dealer to have the stan-
dard keys re-registered.
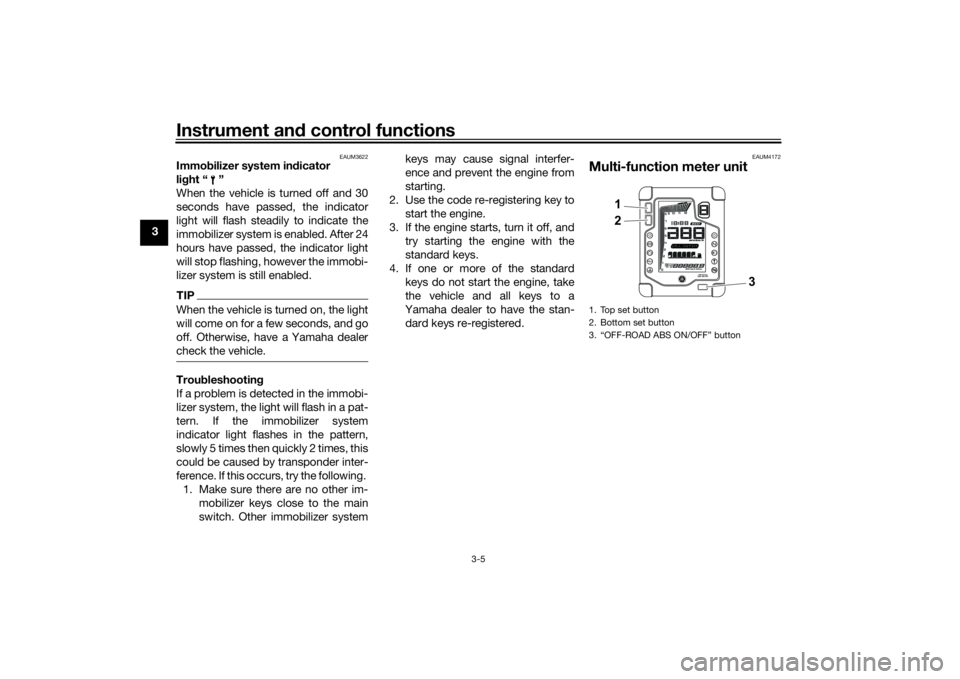
EAUM4172
Multi-function meter unit1. Top set button
2. Bottom set button
3. “OFF-ROAD ABS ON/OFF” button
1
2
3
UBW3E0E0.book Page 5 Friday, May 24, 2019 11:01 AM
Page 22 of 102
Instrument and control functions
3-7
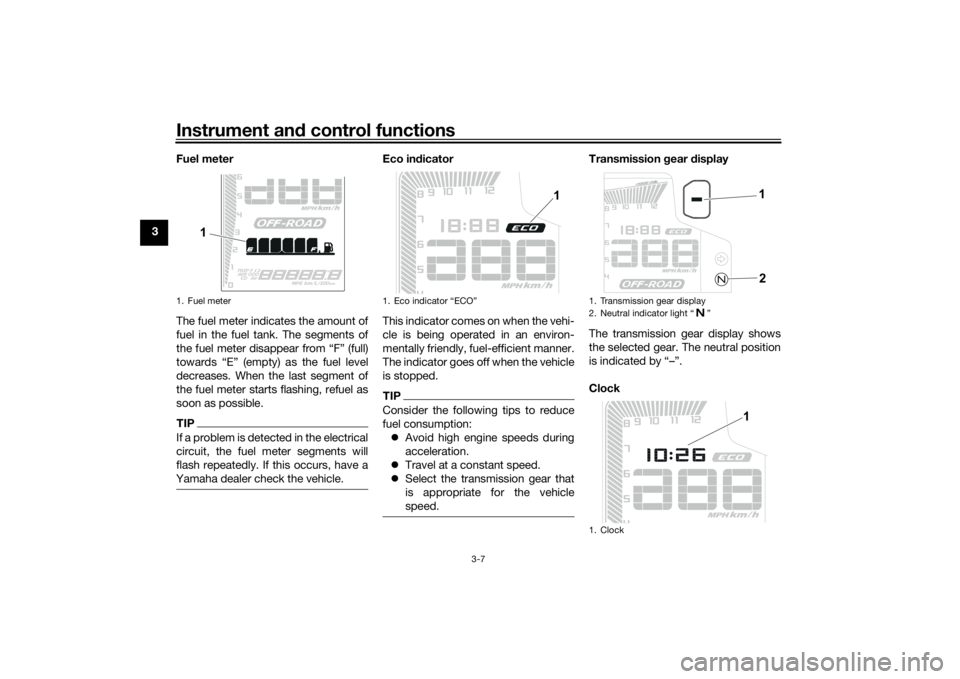
3Fuel meter
The fuel meter indicates the amount of
fuel in the fuel tank. The segments of
the fuel meter disappear from “F” (full)
towards “E” (empty) as the fuel level
decreases. When the last segment of
the fuel meter starts flashing, refuel as
soon as possible.
TIPIf a problem is detected in the electrical
circuit, the fuel meter segments will
flash repeatedly. If this occurs, have a
Yamaha dealer check the vehicle.
Eco indicator
This indicator comes on when the vehi-
cle is being operated in an environ-
mentally friendly, fuel-efficient manner.
The indicator goes off when the vehicle
is stopped.TIPConsider the following tips to reduce
fuel consumption:
Avoid high engine speeds during
acceleration.
Travel at a constant speed.
Select the transmission gear that
is appropriate for the vehicle
speed.
Transmission gear display
The transmission gear display shows
the selected gear. The neutral position
is indicated by “–”.
Clock
1. Fuel meter
1
1.
1
1. Transmission gear display
2. Neutral indicator light Ž
1. Clock
1
2
1
UBW3E0E0.book Page 7 Friday, May 24, 2019 11:01 AM
Page 23 of 102
Instrument and control functions
3-8
3 The clock uses a 12-hour time system.
TIPWhen the main switch is turned off, the
clock can be viewed by pushing the
top set button.To set the clock1.
2. Push the bottom set button and
top set button together until the
hour digits start flashing.
3. Push the bottom set button to set
the hours.
4. Push the top set button and the
minute digits will start flashing.
5. Push the bottom set button to set
the minutes.
6. Push the top set button to confirm
settings and start the clock.TIPWhen setting the hours and minutes,
push the bottom set button briefly to
increase the increment value one by
one, or push and hold the button to in-
crease the increment value continu-
ously.
OFF-ROAD Indicator
This indicator comes on when the ABS
has been manually disabled.
To switch off the ABS1. Turn the key to “ON”.
2. The vehicle being stationary, push
the “OFF-ROAD ABS ON/OFF”
button until the “ABS OFF” warn-
ing light starts flashing, then re-
lease the button.
3. The “ABS OFF” warning light and
“OFF-ROAD” indicator will come
on simultaneously.TIPThe ABS will be disabled until the key
switch is turned to Ž (stop) when
the engine is running or you stop the
ROADŽ indicator will turn off.
WARNING
EWAM1050
Always ride on paved roads with the
ABS turned on. Riding on public
roads with the ABS disabled may beillegal and void your insurance. Turn
the ABS off only when riding on non-
paved surfaces.
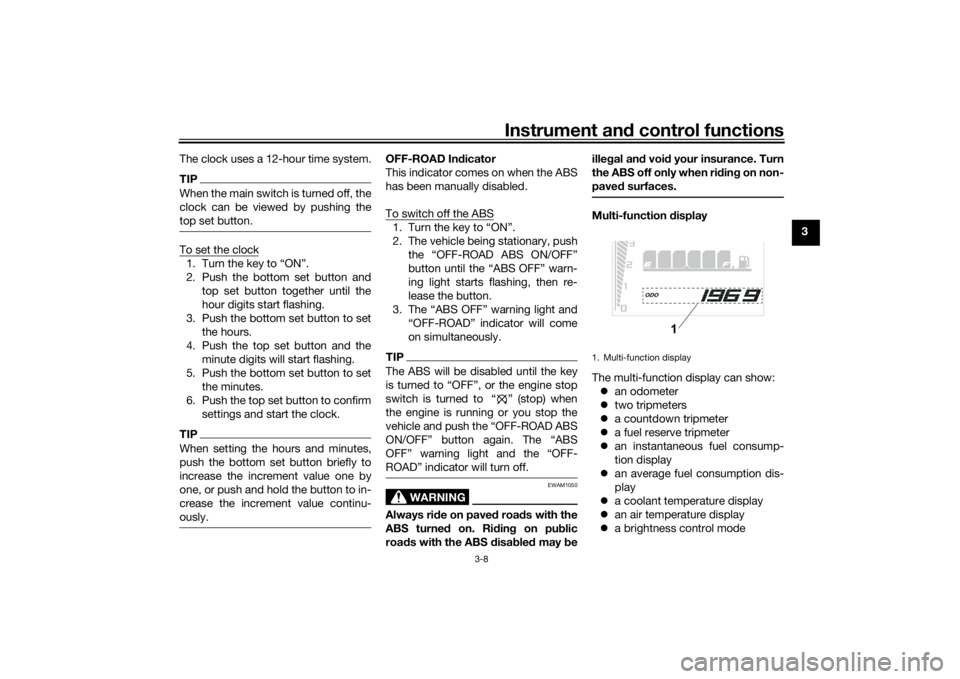
Multi-function display
The multi-function display can show:
an odometer
two tripmeters
a countdown tripmeter
a fuel reserve tripmeter
an instantaneous fuel consump-
tion display
an average fuel consumption dis-
play
a coolant temperature display
an air temperature display
a brightness control mode1. Multi-function display
1
UBW3E0E0.book Page 8 Friday, May 24, 2019 11:01 AM
Page 24 of 102
Instrument and control functions
3-9
3The odometer shows the total distance
the vehicle has traveled. The standard
tripmeters show the distance traveled
since they were last reset. The count-
down tripmeter shows the remaining
distance to travel since it was last set.
The fuel reserve tripmeter shows the
distance traveled since the last seg-
ment of the fuel meter began flashing.
TIPThe odometer will lock at 999999
and cannot be reset.
The tripmeter will reset to 0 and
continue counting after 9999.9 is
reached.
The countdown tripmeter does
not automatically reset.Push the top set button to switch the
display in the following order:
ODO → TRIP 1 → TRIP 2 → TRIP CD
→ TRIP F → km/L or L/100 km or MPG
→ AVE_ _._ km/L or AVE_ _._ L/100 km
or AVE_ _._ MPG → _ _ °C → Air_ _ °C
→ ODO
TIPPush the bottom set button to
switch the display in the reverse
order.
The display changes to fuel re-
serve tripmeter “TRIP F” when the
last segment of the fuel meter
starts flashing.
To reset a tripmeter, select it by
pushing the top set button, and
while the digits flash, push the
bottom set button until it is reset.
If you do not reset the fuel reserve
tripmeter manually, it will reset au-
tomatically and disappear from
the display after refueling and
traveling 5 km (3 mi).Fuel reserve tripmeter
When the fuel level becomes low, the
last segment of the fuel meter will start
flashing. The fuel reserve tripmeter
“TRIP F” will automatically appear and
start counting the distance traveled
from that point. In this case, push the
top set button to switch the display in
the following order:TRIP F → km/L or L/100 km → AVE_
_._ km/L or AVE_ _._ L/100 km → _ _
°C → Air_ _ °C → ODO → TRIP 1 →
TRIP 2 → TRIP CD → TRIP F
For the UK:
TRIP F → km/L, L/100 km or MPG →
AVE_ _._ km/L, AVE_ _._ L/100 km or
AVE_ _._ MPG → _ _ °C → Air_ _ °C →
ODO → TRIP 1 → TRIP 2 → TRIP CD
→ TRIP F
TIPPush the bottom set button to
change the display in the reverse
order.
You can manually reset the fuel re-
serve tripmeter, or after refueling
and traveling 5 km (3 mi) it will re-
set automatically and disappear
from the display.Countdown tripmeter settings
To set the countdown tripmeter, select
it by pushing the top set button. When
the units stop flashing, push the top
and bottom set buttons simultaneously
until the first digit starts flashing. A
UBW3E0E0.book Page 9 Friday, May 24, 2019 11:01 AM
Page 28 of 102
Instrument and control functions
3-13
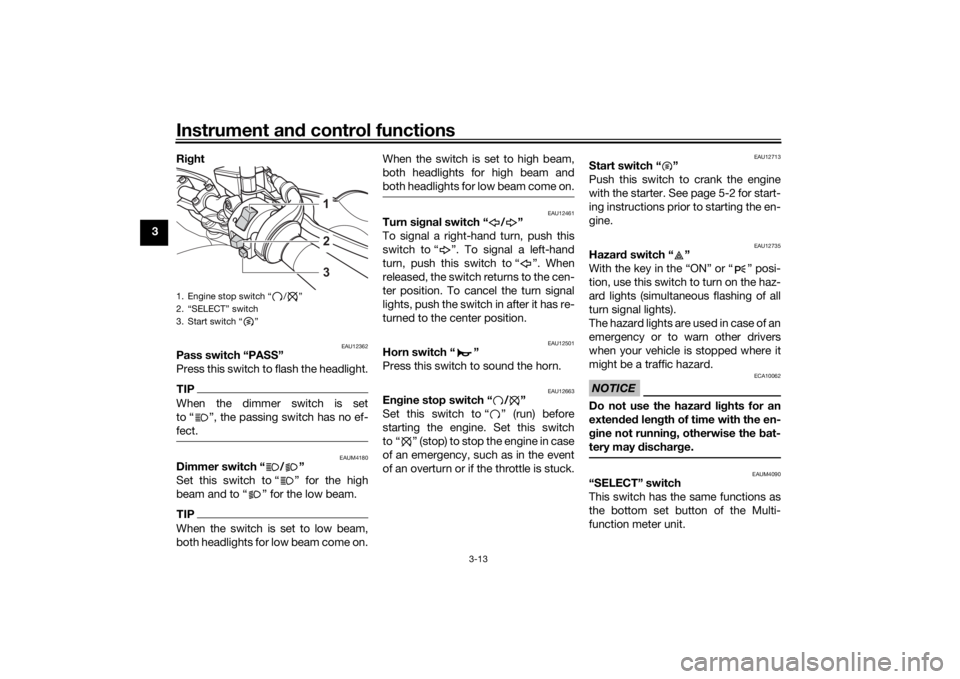
3Right
EAU12362
Pass switch “PASS”
Press this switch to flash the headlight.TIPWhen the dimmer switch is set
to Ž, the passing switch has no ef-
fect.
EAUM4180
Dimmer switch “ / ”
Set this switch to “ ” for the high
beam and to “ ” for the low beam.TIPWhen the switch is set to low beam,
both headlights for low beam come on.When the switch is set to high beam,
both headlights for high beam and
both headlights for low beam come on.
EAU12461
Turn signal switch “ / ”
To signal a right-hand turn, push this
switch to “ ”. To signal a left-hand
turn, push this switch to “ ”. When
released, the switch returns to the cen-
ter position. To cancel the turn signal
lights, push the switch in after it has re-
turned to the center position.
EAU12501
Horn switch “ ”
Press this switch to sound the horn.
EAU12663
Engine stop switch “ / ”
Set this switch to “ ” (run) before
starting the engine. Set this switch
to “ ” (stop) to stop the engine in case
of an emergency, such as in the event
of an overturn or if the throttle is stuck.
EAU12713
Start switch “ ”
Push this switch to crank the engine
with the starter. See page 5-2 for start-
ing instructions prior to starting the en-
gine.
EAU12735
Hazard switch “ ”
With the key in the “ON” or “ ” posi-
tion, use this switch to turn on the haz-
ard lights (simultaneous flashing of all
turn signal lights).
The hazard lights are used in case of an
emergency or to warn other drivers
when your vehicle is stopped where it
might be a traffic hazard.NOTICE
ECA10062
Do not use the hazard lights for an
extended length of time with the en-
gine not running, otherwise the bat-
tery may discharge.
EAUM4090
“SELECT” switch
This switch has the same functions as
the bottom set button of the Multi-
function meter unit.
1. Engine stop switch “ / ”
2. “SELECT” switch
3. Start switch “ ”
231
UBW3E0E0.book Page 13 Friday, May 24, 2019 11:01 AM
Page 43 of 102

Instrument and control functions
3-28
3 this system regularly and have a
Yamaha dealer repair it if it does not
function properly.
EAU44895
Ignition circuit cut-off systemThis system prevents in-gear engine
starts unless the clutch lever is pulled
and the sidestand is up. Also, it will
stop the running engine should the
sidestand be lowered while the trans-
mission is in gear.
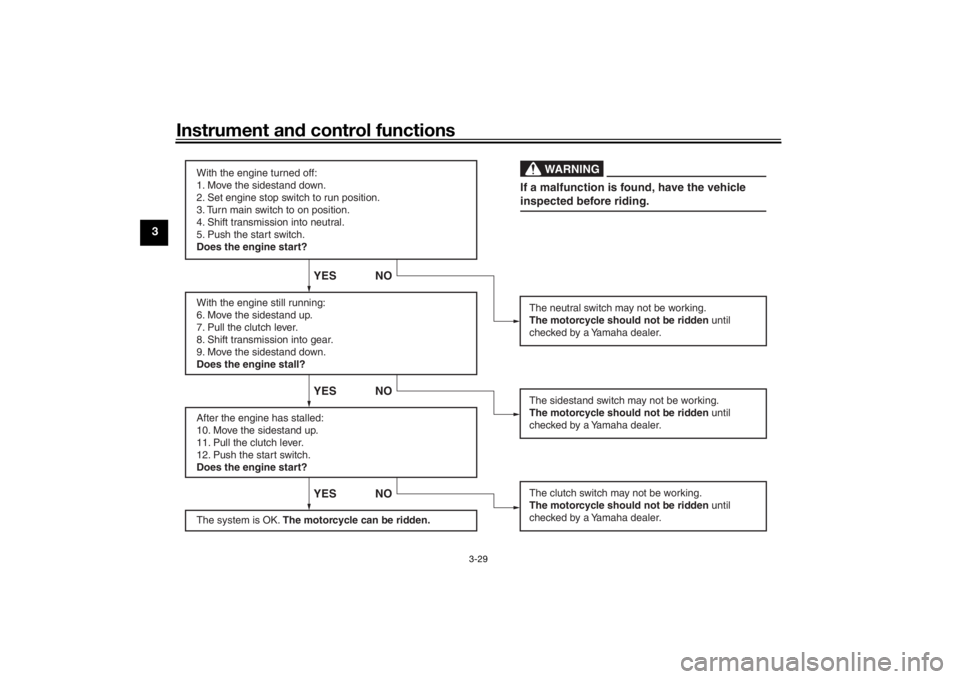
Periodically check the system via the
following procedure.TIPThis check is most reliable if per-
formed with a warmed-up engine.
See pages 3-2 and 3-12 for switch
operation information.
UBW3E0E0.book Page 28 Friday, May 24, 2019 11:01 AM
Page 44 of 102
Instrument and control functions
3-29
3
With the engine turned off:
1. Move the sidestand down.
2. Set engine stop switch to run position.
3. Turn main switch to on position.
4. Shift transmission into neutral.
5. Push the start switch.
Does the engine start?
With the engine still running:
6. Move the sidestand up.
7. Pull the clutch lever.
8. Shift transmission into gear.
9. Move the sidestand down.
Does the engine stall?
After the engine has stalled:
10. Move the sidestand up.
11. Pull the clutch lever.
12. Push the start switch.
Does the engine start?
The system is OK. The motorcycle can be ridden.
YES NO YES NO YES NO
The neutral switch may not be working.
The motorcycle should not be ridden until
checked by a Yamaha dealer.
The clutch switch may not be working.
The motorcycle should not be ridden until
checked by a Yamaha dealer.The sidestand switch may not be working.
The motorcycle should not be ridden until
checked by a Yamaha dealer.If a malfunction is found, have the vehicle
inspected before riding.
WARNING
UBW3E0E0.book Page 29 Friday, May 24, 2019 11:01 AM
Page 49 of 102

Operation and important riding points
5-2
5
EAU86620
Starting the engineThe ignition circuit cut-off system will
enable starting when:
the transmission is in the neutral
position or
the transmission is in gear, the
sidestand is up, and the clutch le-
ver is pulled.
To start the engine1. Turn the main switch on and set
the engine stop switch to the run
position.
2. Confirm the indicator and warning
light(s) come on for a few sec-
onds, and the go off. (See page
3-3.)TIPDo not start the engine if the en-
gine trouble warning light remains
on.
The oil pressure warning light
should come on and stay on until
the engine is started.The ABS warning light should
come on and stay on until the ve-
hicle reaches a speed of 10 km/h
(6 mi/h).
NOTICE
ECA24110
If a warning or indicator light does
not work as described above, have a
Yamaha dealer check the vehicle.3. Shift the transmission into the
neutral position.
4. Start the engine by pushing the
start switch.
5. Release the start switch when the
engine starts, or after 5 seconds.
Wait 10 seconds before pressing
the switch again to allow battery
voltage to restore.NOTICE
ECA11043
For maximum engine life, never ac-
celerate hard when the engine is
cold!
EAUM3632
TIPThis model is equipped with:
a lean angle sensor. This sensor
stops the engine in case of a vehi-
cle turnover. If this happens, the
engine trouble warning light will
come on, but this is not a malfunc-
tion. Turn the vehicle power off
and then back on again to cancel
the warning light. Failing to do so
will prevent the engine from start-
ing even though the engine will
crank when pushing the start
switch.
an engine auto-stop system. The
engine stops automatically if left
idling for 20 minutes. If the engine
stops, simply push the start
switch to restart the engine.
UBW3E0E0.book Page 2 Friday, May 24, 2019 11:01 AM
Page 50 of 102
Operation and important riding points
5-3
5
EAU16674
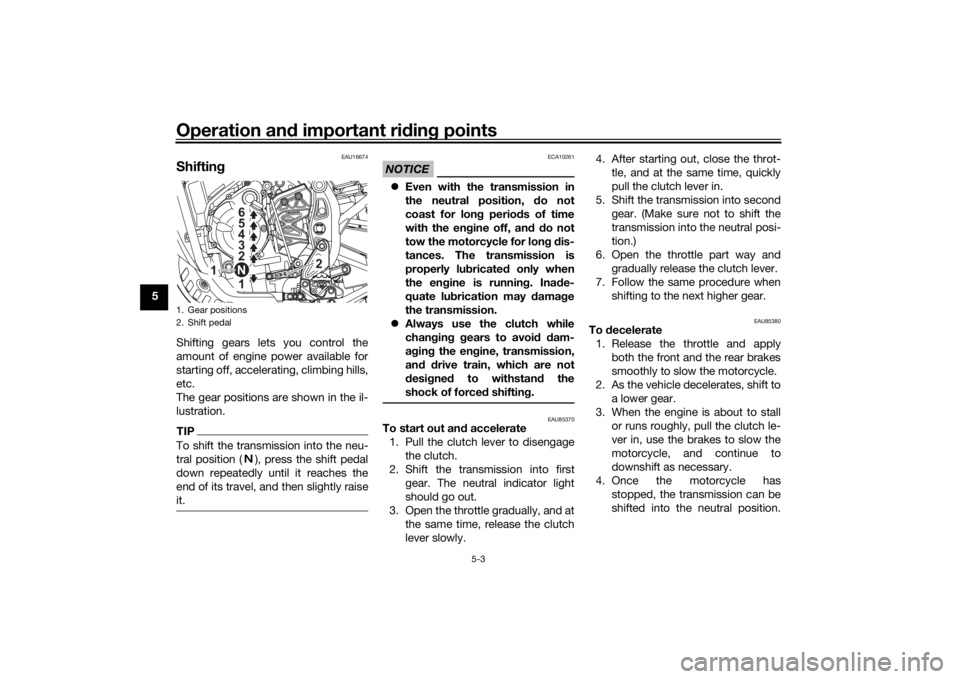
ShiftingShifting gears lets you control the
amount of engine power available for
starting off, accelerating, climbing hills,
etc.
The gear positions are shown in the il-
lustration.TIPTo shift the transmission into the neu-
tral position ( ), press the shift pedal
down repeatedly until it reaches the
end of its travel, and then slightly raise
it.
NOTICE
ECA10261
Even with the transmission in
the neutral position, do not
coast for long periods of time
with the engine off, and do not
tow the motorcycle for long dis-
tances. The transmission is
properly lubricated only when
the engine is running. Inade-
quate lubrication may damage
the transmission.
Always use the clutch while
changing gears to avoid dam-
aging the engine, transmission,
and drive train, which are not
designed to withstand the
shock of forced shifting.
EAU85370
To start out and accelerate
1. Pull the clutch lever to disengage
the clutch.
2. Shift the transmission into first
gear. The neutral indicator light
should go out.
3. Open the throttle gradually, and at
the same time, release the clutch
lever slowly.4. After starting out, close the throt-
tle, and at the same time, quickly
pull the clutch lever in.
5. Shift the transmission into second
gear. (Make sure not to shift the
transmission into the neutral posi-
tion.)
6. Open the throttle part way and
gradually release the clutch lever.
7. Follow the same procedure when
shifting to the next higher gear.
EAU85380
To decelerate
1. Release the throttle and apply
both the front and the rear brakes
smoothly to slow the motorcycle.
2. As the vehicle decelerates, shift to
a lower gear.
3. When the engine is about to stall
or runs roughly, pull the clutch le-
ver in, use the brakes to slow the
motorcycle, and continue to
downshift as necessary.
4. Once the motorcycle has
stopped, the transmission can be
shifted into the neutral position.
1. Gear positions
2. Shift pedal
1 2 3 4 5
6
12
N
UBW3E0E0.book Page 3 Friday, May 24, 2019 11:01 AM