torque YAMAHA TENERE 700 2020 Owners Manual
[x] Cancel search | Manufacturer: YAMAHA, Model Year: 2020, Model line: TENERE 700, Model: YAMAHA TENERE 700 2020Pages: 102, PDF Size: 10.31 MB
Page 41 of 102
Instrument and control functions
3-26
3
EAUM4130
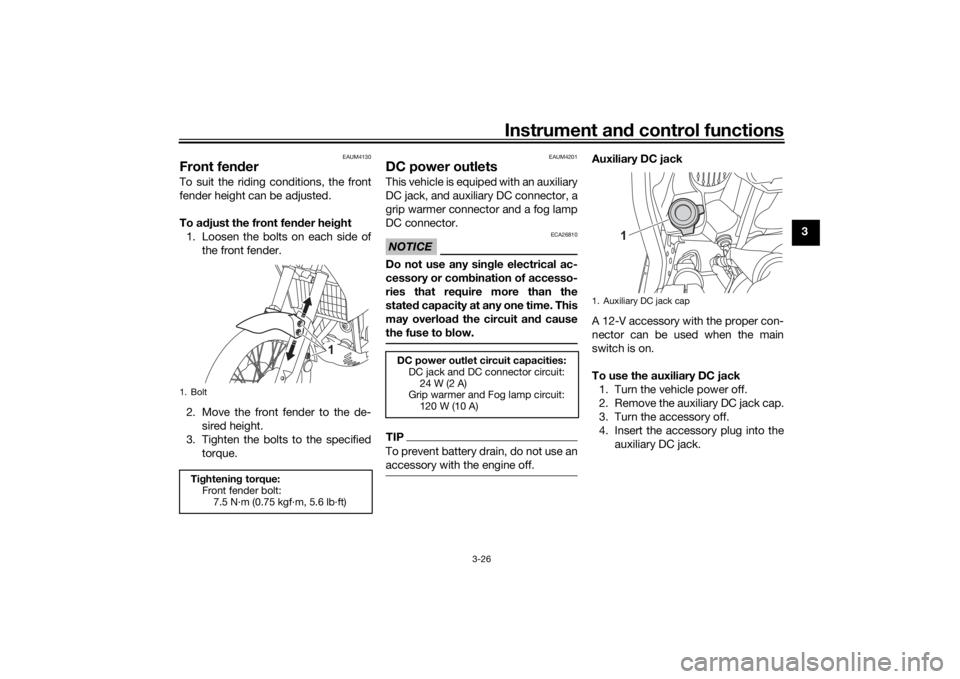
Front fender To suit the riding conditions, the front
fender height can be adjusted.
To adjust the front fender height
1. Loosen the bolts on each side of
the front fender.
2. Move the front fender to the de-
sired height.
3. Tighten the bolts to the specified
torque.
EAUM4201
DC power outletsThis vehicle is equiped with an auxiliary
DC jack, and auxiliary DC connector, a
grip warmer connector and a fog lamp
DC connector.NOTICE
ECA26810
Do not use any single electrical ac-
cessory or combination of accesso-
ries that require more than the
stated capacity at any one time. This
may overload the circuit and cause
the fuse to blow.TIPTo prevent battery drain, do not use an
accessory with the engine off.
Auxiliary DC jack
A 12-V accessory with the proper con-
nector can be used when the main
switch is on.
To use the auxiliary DC jack
1. Turn the vehicle power off.
2. Remove the auxiliary DC jack cap.
3. Turn the accessory off.
4. Insert the accessory plug into the
auxiliary DC jack.
1. BoltTightening torque:
Front fender bolt:
7.5 N·m (0.75 kgf·m, 5.6 lb·ft)
1
DC power outlet circuit capacities:
DC jack and DC connector circuit:
24 W (2 A)
Grip warmer and Fog lamp circuit:
120 W (10 A)
1. Auxiliary DC jack cap
1
UBW3E0E0.book Page 26 Friday, May 24, 2019 11:01 AM
Page 53 of 102
Periodic maintenance and adjustment
6-2
6
EAUM4190
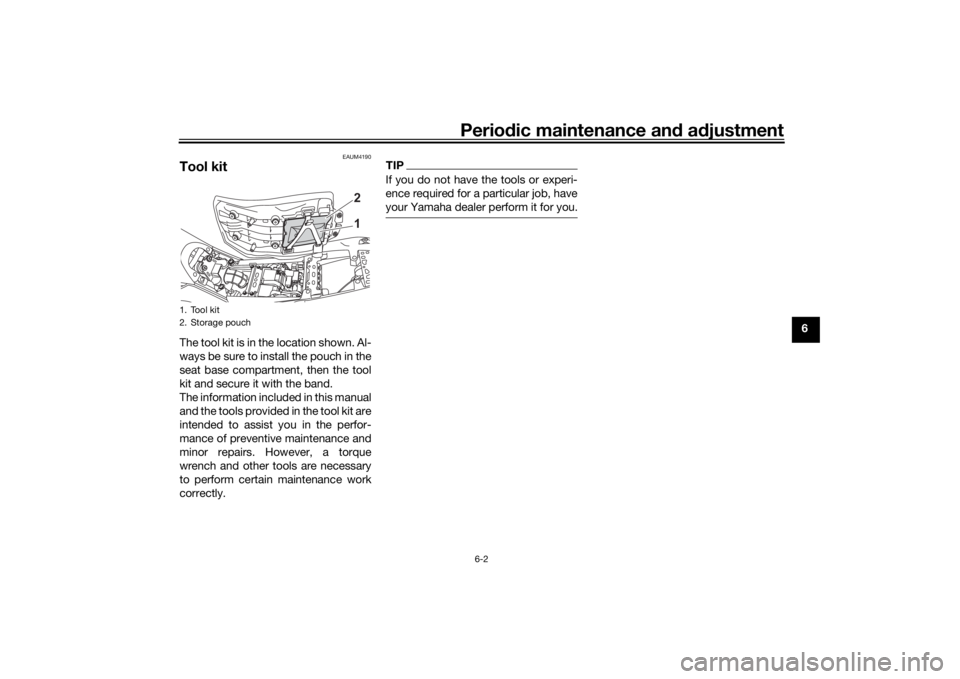
Tool kitThe tool kit is in the location shown. Al-
ways be sure to install the pouch in the
seat base compartment, then the tool
kit and secure it with the band.
The information included in this manual
and the tools provided in the tool kit are
intended to assist you in the perfor-
mance of preventive maintenance and
minor repairs. However, a torque
wrench and other tools are necessary
to perform certain maintenance work
correctly.
TIPIf you do not have the tools or experi-
ence required for a particular job, have
your Yamaha dealer perform it for you.
1. Tool kit
2. Storage pouch
12
UBW3E0E0.book Page 2 Friday, May 24, 2019 11:01 AM
Page 61 of 102
Periodic maintenance and adjustment
6-10
6 Before installing a spark plug, the
spark plug gap should be measured
with a wire thickness gauge and, if
necessary, adjusted to specification.
Clean the surface of the spark plug
gasket and its mating surface, and
then wipe off any grime from the spark
plug threads.
TIPIf a torque wrench is not available
when installing a spark plug, a good
estimate of the correct torque is 1/4…
1/2 turn past finger tight. However, the
spark plug should be tightened to the
specified torque as soon as possible.NOTICE
ECA10841
Do not use any tools to remove or in-
stall the spark plug cap, otherwise
the ignition coil coupler may get
damaged. The spark plug cap may
be difficult to remove because the
rubber seal on the end of the cap fits
tightly. To remove the spark plug
cap, simply twist it back and forth
while pulling it out; to install it, twist
it back and forth while pushing it in.
EAU36112
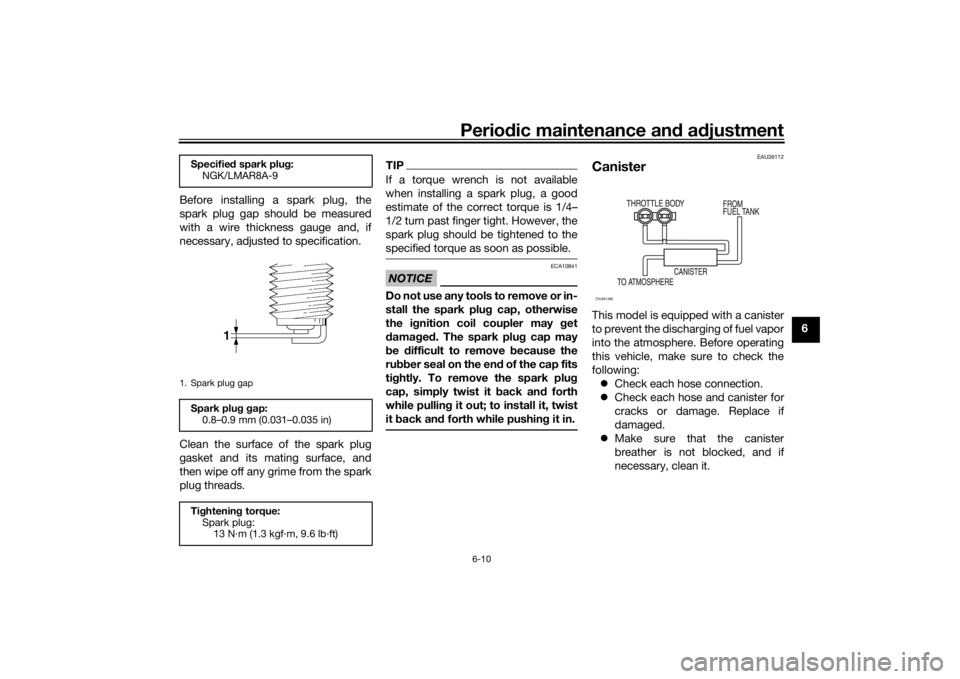
CanisterThis model is equipped with a canister
to prevent the discharging of fuel vapor
into the atmosphere. Before operating
this vehicle, make sure to check the
following:
Check each hose connection.
Check each hose and canister for
cracks or damage. Replace if
damaged.
Make sure that the canister
breather is not blocked, and if
necessary, clean it.
Specified spark plug:
NGK/LMAR8A-91. Spark plug gapSpark plug gap:
0.8–0.9 mm (0.031–0.035 in)
Tightening torque:
Spark plug:
13 N·m (1.3 kgf·m, 9.6 lb·ft)
ZAUM1386
UBW3E0E0.book Page 10 Friday, May 24, 2019 11:01 AM
Page 63 of 102
Periodic maintenance and adjustment
6-12
6
TIPSkip steps 5–7 if the oil filter cartridge
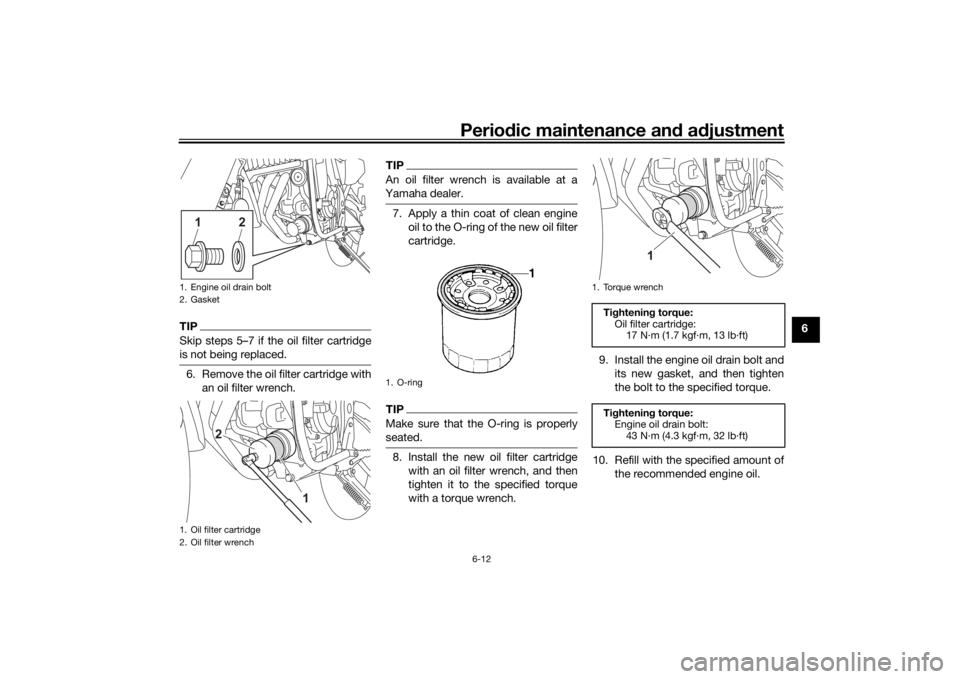
is not being replaced.6. Remove the oil filter cartridge with
an oil filter wrench.
TIPAn oil filter wrench is available at a
Yamaha dealer.7. Apply a thin coat of clean engine
oil to the O-ring of the new oil filter
cartridge.TIPMake sure that the O-ring is properly
seated.8. Install the new oil filter cartridge
with an oil filter wrench, and then
tighten it to the specified torque
with a torque wrench.9. Install the engine oil drain bolt and
its new gasket, and then tighten
the bolt to the specified torque.
10. Refill with the specified amount of
the recommended engine oil.
1. Engine oil drain bolt
2. Gasket
1. Oil filter cartridge
2. Oil filter wrench
12
1
2
1. O-ring
1. Torque wrench
Tightening torque:
Oil filter cartridge:
17 N·m (1.7 kgf·m, 13 lb·ft)
Tightening torque:
Engine oil drain bolt:
43 N·m (4.3 kgf·m, 32 lb·ft)
1
UBW3E0E0.book Page 12 Friday, May 24, 2019 11:01 AM
Page 76 of 102
Periodic maintenance and adjustment
6-25
6
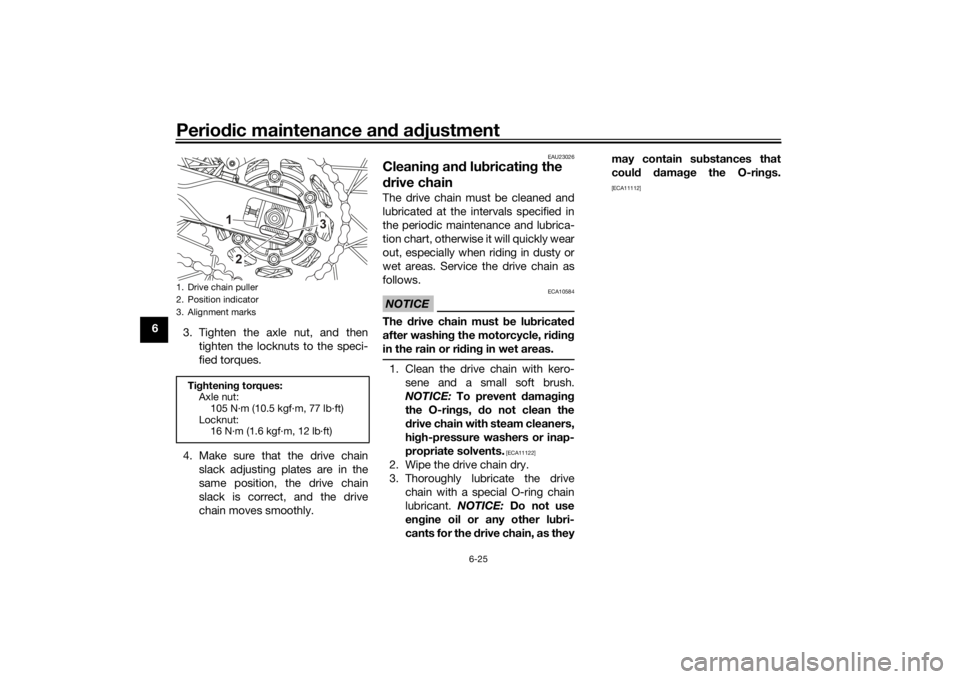
3. Tighten the axle nut, and then
tighten the locknuts to the speci-
fied torques.
4. Make sure that the drive chain
slack adjusting plates are in the
same position, the drive chain
slack is correct, and the drive
chain moves smoothly.
EAU23026
Cleaning and lubricating the
drive chainThe drive chain must be cleaned and
lubricated at the intervals specified in
the periodic maintenance and lubrica-
tion chart, otherwise it will quickly wear
out, especially when riding in dusty or
wet areas. Service the drive chain as
follows.NOTICE
ECA10584
The drive chain must be lubricated
after washing the motorcycle, riding
in the rain or riding in wet areas.1. Clean the drive chain with kero-
sene and a small soft brush.
NOTICE: To prevent damaging
the O-rings, do not clean the
drive chain with steam cleaners,
high-pressure washers or inap-
propriate solvents.
[ECA11122]
2. Wipe the drive chain dry.
3. Thoroughly lubricate the drive
chain with a special O-ring chain
lubricant. NOTICE: Do not use
engine oil or any other lubri-
cants for the drive chain, as theymay contain substances that
could damage the O-rings.
[ECA11112]
1. Drive chain puller
2. Position indicator
3. Alignment marksTightening torques:
Axle nut:
105 N·m (10.5 kgf·m, 77 lb·ft)
Locknut:
16 N·m (1.6 kgf·m, 12 lb·ft)
2
3
1
UBW3E0E0.book Page 25 Friday, May 24, 2019 11:01 AM