check oil YAMAHA TENERE 700 RALLY EDITION 2021 User Guide
[x] Cancel search | Manufacturer: YAMAHA, Model Year: 2021, Model line: TENERE 700 RALLY EDITION, Model: YAMAHA TENERE 700 RALLY EDITION 2021Pages: 102, PDF Size: 6.31 MB
Page 62 of 102
Periodic maintenance an d a djustment
6-11
6
EAUM4152
En gine oil an d oil filter car-
tri dgeThe engine oil level should be checked
before each ride. In addition, the oil
must be changed and the oil filter car-
tridge replaced at the intervals speci-
fied in the periodic maintenance chart.
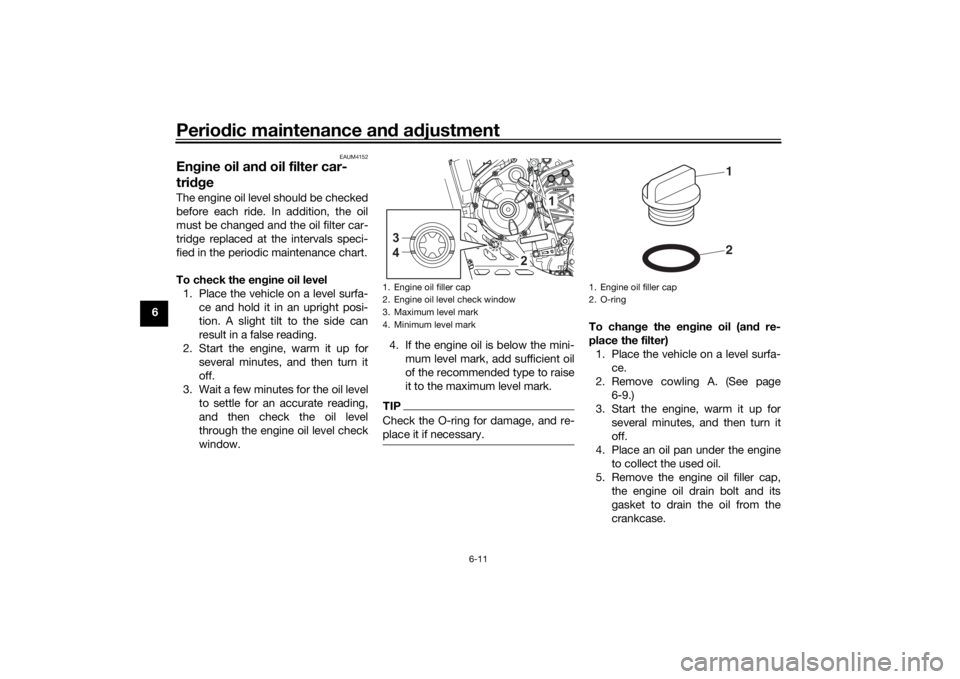
To check the en gine oil level
1. Place the vehicle on a level surfa- ce and hold it in an upright posi-
tion. A slight tilt to the side can
result in a false reading.
2. Start the engine, warm it up for several minutes, and then turn it
off.
3. Wait a few minutes for the oil level to settle for an accurate reading,
and then check the oil level
through the engine oil level check
window. 4. If the engine oil is below the mini-
mum level mark, add sufficient oil
of the recommended type to raise
it to the maximum level mark.
TIPCheck the O-ring for damage, and re-
place it if necessary.
To chan ge the en gine oil (an d re-
place the filter) 1. Place the vehicle on a level surfa- ce.
2. Remove cowling A. (See page 6-9.)
3. Start the engine, warm it up for several minutes, and then turn it
off.
4. Place an oil pan under the engine to collect the used oil.
5. Remove the engine oil filler cap, the engine oil drain bolt and its
gasket to drain the oil from the
crankcase.
1. Engine oil filler cap
2. Engine oil level check window
3. Maximum level mark
4. Minimum level mark3
4
2
1
1. Engine oil filler cap
2. O-ring
21
UBEHEAE0.book Page 11 Thursday, January 21, 2021 5:45 PM
Page 64 of 102
Periodic maintenance an d a djustment
6-13
6
TIPBe sure to wipe off spilled oil on any
parts after the engine and exhaust sys-
tem have cooled down.NOTICE
ECA11621
In or der to prevent clutch slip-
pa ge (since the en gine oil also
lu bricates the clutch), do not
mix any chemical additives. Do
not use oils with a d iesel speci-
fication of “CD” or oils of a hi gh-
er quality than specifie d. In
a ddition, do not use oils la beled
“ENERGY CONSERVING II” or
hi gher.
Make sure that no forei gn mate-
rial enters the crankcase.
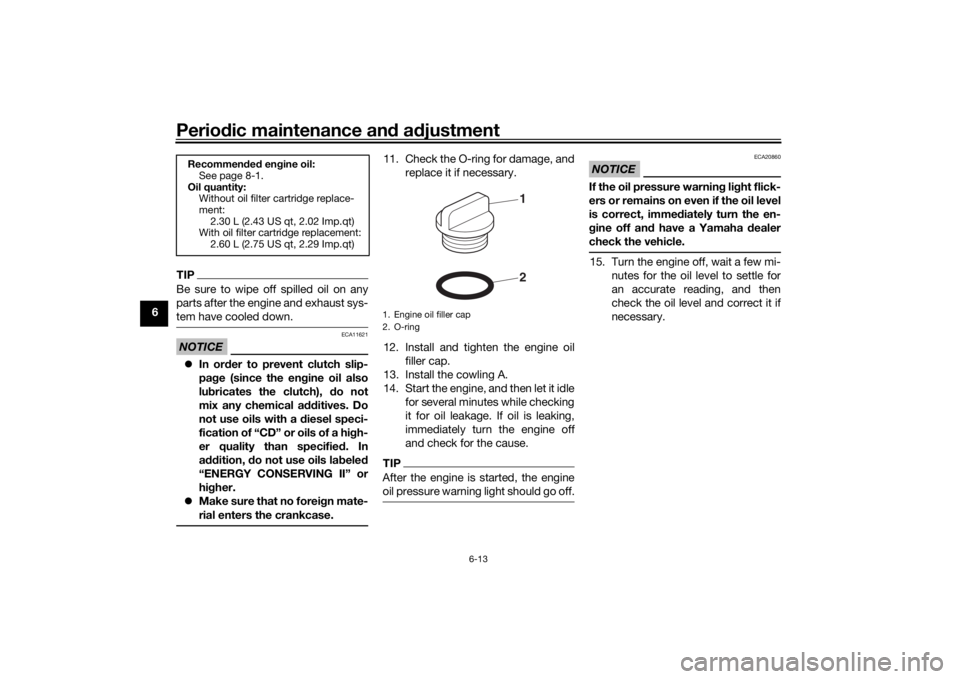
11. Check the O-ring for damage, and replace it if necessary.
12. Install and tighten the engine oil filler cap.
13. Install the cowling A.
14. Start the engine, and then let it idle for several minutes while checking
it for oil leakage. If oil is leaking,
immediately turn the engine off
and check for the cause.TIPAfter the engine is started, the engine
oil pressure warning light should go off.
NOTICE
ECA20860
If the oil pressure warnin g lig ht flick-
ers or remains on even if the oil level
is correct, imme diately turn the en-
g ine off an d have a Yamaha d ealer
check the vehicle.15. Turn the engine off, wait a few mi- nutes for the oil level to settle for
an accurate reading, and then
check the oil level and correct it if
necessary.
Recommen ded en gine oil:
See page 8-1.
Oil quantity: Without oil filter cartridge replace-
ment:2.30 L (2.43 US qt, 2.02 Imp.qt)
With oil filter cartridge replacement:
2.60 L (2.75 US qt, 2.29 Imp.qt)
1. Engine oil filler cap
2. O-ring
21
UBEHEAE0.book Page 13 Thursday, January 21, 2021 5:45 PM
Page 65 of 102
Periodic maintenance an d a djustment
6-14
6
EAU85450
Why Yamalu beYAMALUBE oil is a Genuine YAMAHA
Part born of the engineers’ passion
and belief that engine oil is an impor-
tant liquid engine component. We form
teams of specialists in the fields of me-
chanical engineering, chemistry, elec-
tronics and track testing, and have
them develop the engine together with
the oil it will use. Yamalube oils take full
advantage of the base oil’s qualities
and blend in the ideal balance of addi-
tives to make sure the final oil clears
our performance standards. Thus,
Yamalube mineral, semisynthetic and synthetic oils have their own distinct
characters and value. Yamaha’s expe-
rience gained over many years of re-
search and development into oil since
the 1960’s helps make Yamalube the
best choice for your Yamaha engine.
EAUS1203
CoolantThe coolant level should be checked
regularly. In addition, the coolant must
be changed at the intervals specified in
the periodic maintenance chart.TIPIf genuine Yamaha coolant is not avail-
able, use an ethylene glycol antifreeze
containing corrosion inhibitors for alu-
minum engines and mix with distilled
water at a 1:1 ratio.
EAU20097
To check the coolant level
Since the coolant level varies with en-
gine temperature, check when the en-
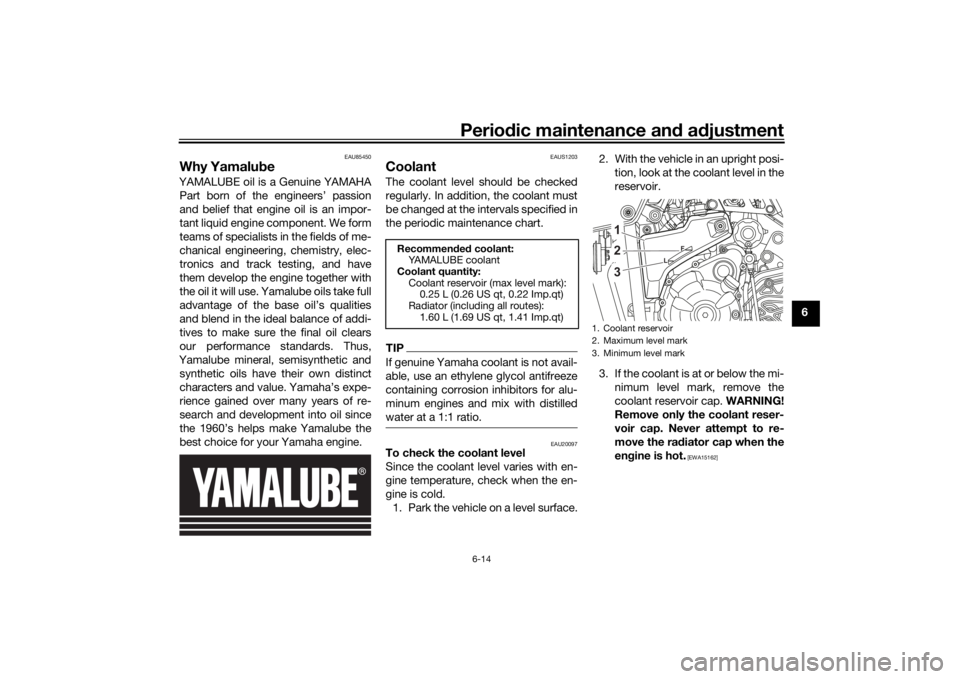
gine is cold. 1. Park the vehicle on a level surface. 2. With the vehicle in an upright posi-
tion, look at the coolant level in the
reservoir.
3. If the coolant is at or below the mi- nimum level mark, remove the
coolant reservoir cap. WARNING!
Remove only the coolant reser-
voir cap. Never attempt to re-
move the ra diator cap when the
en gine is hot.
[EWA15162]
Recommen ded coolant:
YAMALUBE coolant
Coolant quantity: Coolant reservoir (max level mark):0.25 L (0.26 US qt, 0.22 Imp.qt)
Radiator (including all routes): 1.60 L (1.69 US qt, 1.41 Imp.qt)
1. Coolant reservoir
2. Maximum level mark
3. Minimum level mark
L F
231
UBEHEAE0.book Page 14 Thursday, January 21, 2021 5:45 PM
Page 74 of 102
Periodic maintenance an d a djustment
6-23
6 Rear
brake
WARNING
EWA16011
Improper maintenance can result in
loss of brakin g a bility. O bserve
these precautions: Insufficient brake flui d may al-
low air to enter the b rake sys-
tem, re ducin g brakin g
performance.
Clean the filler cap before re-
moving . Use only DOT 4 b rake
flui d from a seale d container.
Use only the specified b rake flu-
i d ; otherwise, the ru bber seals
may deteriorate, causin g leak-
a g e.
Refill with the same type of
brake flui d. A ddin g a brake flui d
other than DOT 4 may result in a
harmful chemical reaction.
Be careful that water or dust
d oes not enter the brake flui d
reservoir when refillin g. Water
will si gnificantly lower the boil-
in g point of the flui d an d may re-
sult in vapor lock, an d d ir
t may
clo g the ABS hy draulic unit
valves.
NOTICE
ECA17641
Brake flui d may damag e painted
surfaces or plastic parts. Always
clean up spille d flui d imme diately.As the brake pads wear, it is normal for
the brake fluid level to gradually go
down. A low brake fluid level may indi-
cate worn brake pads and/or brake
system leakage; therefore, be sure to
check the brake pads for wear and the
brake system for leakage. If the brake fluid level goes down suddenly, have a
Yamaha dealer check the cause before further riding.
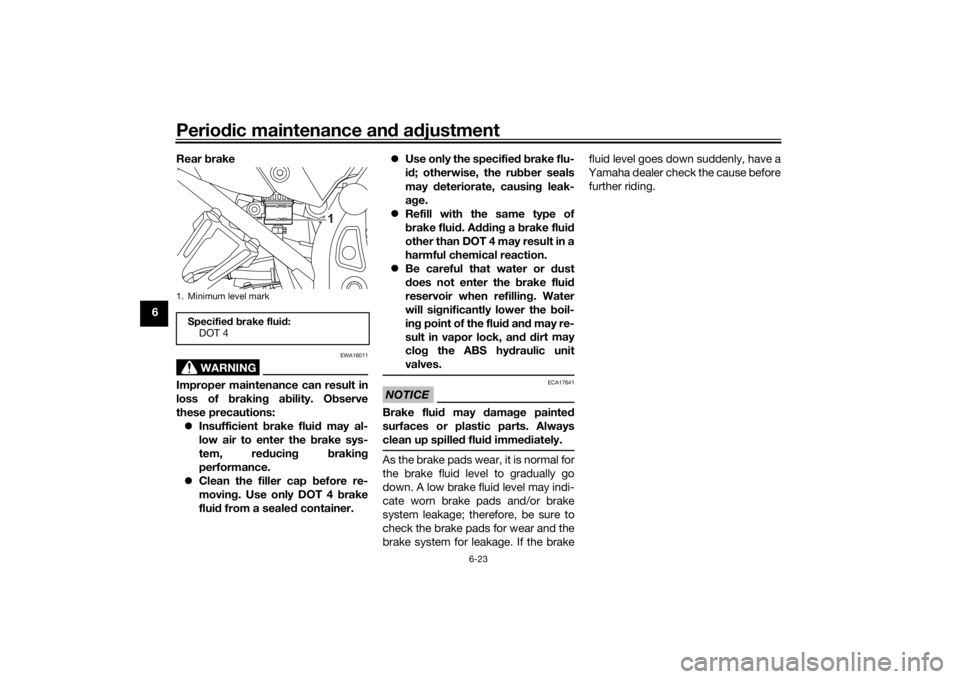
1. Minimum level markSpecifie d b rake flui d:
DOT 4
1
UBEHEAE0.book Page 23 Thursday, January 21, 2021 5:45 PM
Page 77 of 102
Periodic maintenance an d a djustment
6-26
6
EAU23027
Cleanin g an d lu bricatin g the
d rive chainThe drive chain must be cleaned and
lubricated at the intervals specified in
the periodic maintenance and lubrica-
tion chart, otherwise it will quickly wear
out, especially when riding in dusty or
wet areas. Service the drive chain as
follows.NOTICE
ECA10584
The drive chain must b e lubricate d
after washin g the motorcycle, ri din g
in the rain or ri din g in wet areas.1. Clean the drive chain with a drive
chain cleaner and a small soft
brush. NOTICE: To prevent dam-
a g in g the O-rin gs, do not clean
the drive chain with steam
cleaners, hi gh-pressure wash-
ers or inappropriate solvents.
[ECA11122]
2. Wipe the drive chain dry.
3. Thoroughly lubricate the drive chain with a special O-ring chain
lubricant. NOTICE: Do not use
en gine oil or any other lu bri- cants for the d
rive chain, as they
may contain su bstances that
coul d damag e the O-rin gs.
[ECA11112] EAU23098
Checkin
g an d lu bricatin g the
ca blesThe operation of all control cables and
the condition of the cables should be
checked before each ride, and the ca-
bles and cable ends should be lubri-
cated if necessary. If a cable is
damaged or does not move smoothly,
have a Yamaha dealer check or re-
place it. WARNING! Dama ge to the
outer housin g of cab les may result
in internal rustin g an d cause inter-
ference with ca ble movement. Re-
place damag ed cab les as soon as
possi ble to prevent unsafe con di-
tions.
[EWA10712]
Recommen ded lu bricant:
Yamaha cable lubricant or other
suitable cable lubricant
UBEHEAE0.book Page 26 Thursday, January 21, 2021 5:45 PM
Page 80 of 102
Periodic maintenance an d a djustment
6-29
6
EAU23252
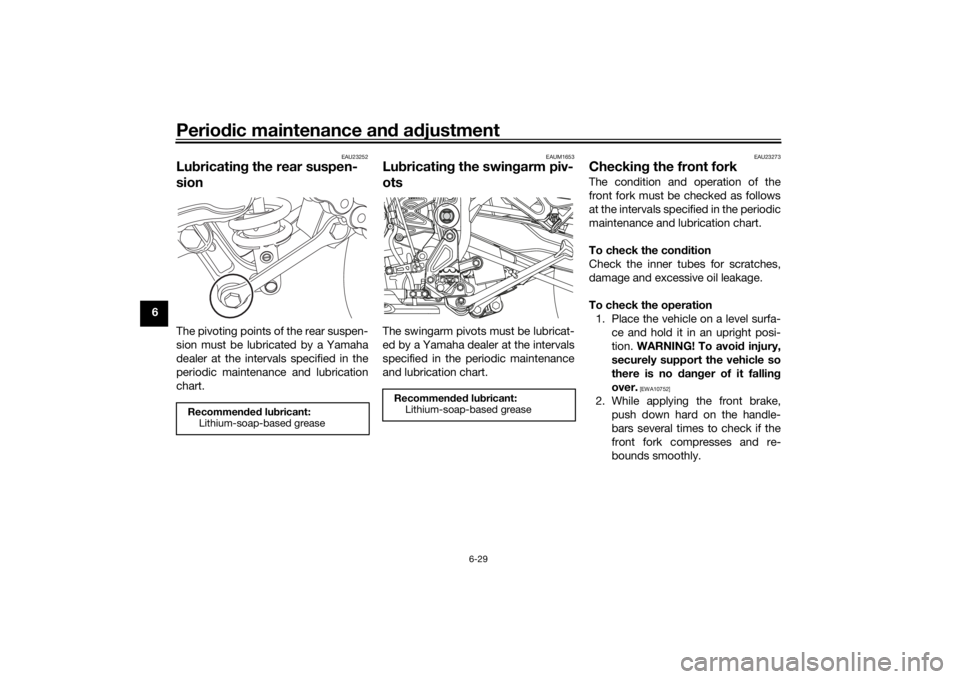
Lub ricatin g the rear suspen-
sionThe pivoting points of the rear suspen-
sion must be lubricated by a Yamaha
dealer at the intervals specified in the
periodic maintenance and lubrication
chart.
EAUM1653
Lub ricatin g the swing arm piv-
otsThe swingarm pivots must be lubricat-
ed by a Yamaha dealer at the intervals
specified in the periodic maintenance
and lubrication chart.
EAU23273
Checkin g the front forkThe condition and operation of the
front fork must be checked as follows
at the intervals specified in the periodic
maintenance and lubrication chart.
To check the con dition
Check the inner tubes for scratches,
damage and excessive oil leakage.
To check the operation 1. Place the vehicle on a level surfa- ce and hold it in an upright posi-
tion. WARNING! To avoi d injury,
securely support the vehicle so
there is no dan ger of it fallin g
over.
[EWA10752]
2. While applying the front brake, push down hard on the handle-
bars several times to check if the
front fork compresses and re-
bounds smoothly.
Recommen ded lu bricant:
Lithium-soap-based grease
Recommen ded lu bricant:
Lithium-soap-based grease
UBEHEAE0.book Page 29 Thursday, January 21, 2021 5:45 PM
Page 93 of 102
Motorcycle care and stora ge
7-4
7
1. Make all necessary repairs and
perform any outstanding mainte-
nance.
2. Follow all instructions in the Care section of this chapter.
3. Fill up the fuel tank, adding fuel stabilizer according to product in-
structions. Run the engine for 5
minutes to distribute treated fuel
through the fuel system.
4. For vehicles equipped with a fuel cock: Turn the fuel cock lever to
the off position.
5. For vehicles with a carburetor: To prevent fuel deposits from build-
ing up, drain the fuel in the carbu-
retor float chamber into a clean
container. Retighten the drain bolt
and pour the fuel back into the fuel
tank.
6. Use a quality engine fogging oil according to product instructions
to protect internal engine compo-
nents from corrosion. If engine
fogging oil is not available, per-
form the following steps for each
cylinder:a. Remove the spark plug cap and spark plug. b. Pour a teaspoonful of engine
oil into the spark plug bore.
c. Install the spark plug cap onto the spark plug, and then place
the spark plug on the cylinder
head so that the electrodes are
grounded. (This will limit spark-
ing during the next step.)
d. Turn the engine over several times with the starter. (This will
coat the cylinder wall with oil.)
WARNING! To prevent dam-
a g e or injury from sparkin g,
make sure to groun d the
spark plu g electro des while
turnin g the en gine over.
[EWA10952]
e. Remove the spark plug cap
from the spark plug, and then
install the spark plug and the
spark plug cap.
7. Lubricate all control cables, piv- ots, levers and pedals, as well as
the sidestand and centerstand (if
equipped).
8. Check and correct the tire air pressure, and then lift the vehicle
so that all wheels are off the
ground. Otherwise, turn the wheels a little once a month in or-
der to prevent the tires from be-
coming degraded in one spot.
9. Cover the muffler outlet with a plastic bag to prevent moisture
from entering it.
10. Remove the battery and fully char- ge it, or attach a maintenance
charger to keep the battery opti-
mally charged. NOTICE: Confirm
that the battery an d its char ger
are compati ble. Do not char ge a
VRLA battery with a convention-
al char ger.
[ECA26330]
TIP If the battery will be removed,
charge it once a month and store
it in a temperate location between
0-30 °C (32-90 °F).
See page 6-31 for more informa-
tion on charging and storing the
battery.
UBEHEAE0.book Page 4 Thursday, January 21, 2021 5:45 PM
Page 99 of 102
10-1
10
Index
AABS....................................................... 3-16
ABS off warning light .............................. 3-5
ABS warning light ................................... 3-5
Air filter element and check hose,
replacing and cleaning ....................... 6-15BBattery .................................................. 6-31
Brake and clutch levers, checking and
lubricating........................................... 6-28
Brake and shift pedals, checking and lubricating........................................... 6-27
Brake fluid, changing............................ 6-24
Brake fluid level, checking.................... 6-22
Brake lever............................................ 3-15
Brake lever free play, checking ............ 6-21
Brake light switches ............................. 6-21
Brake pedal .......................................... 3-16CCables, checking and lubricating ......... 6-26
Canister ................................................ 6-10
Care ........................................................ 7-1
Catalytic converter ............................... 3-20
Clutch lever........................................... 3-15
Clutch lever free play, adjusting ........... 6-20
Coolant ................................................. 6-14
Coolant temperature warning light ......... 3-4
Cowlings, removing and installing.......... 6-9DData recording, vehicle........................... 9-2
DC power outlets.................................. 3-26
Diagnostic connector ............................. 9-2
Dimmer switch...................................... 3-13
Drive chain, cleaning and lubricating ... 6-26 Drive chain slack .................................. 6-24
EEngine break-in ...................................... 5-1
Engine oil and oil filter cartridge........... 6-11
Engine overheating .............................. 6-38
Engine serial number ............................. 9-1
Engine stop switch............................... 3-14FFront and rear brake pads, checking ... 6-22
Front fender.......................................... 3-26
Front fork, adjusting ............................. 3-21
Front fork, bleeding .............................. 3-23
Front fork, checking ............................. 6-29
Fuel ...................................................... 3-18
Fuel consumption, tips for reducing ...... 5-4
Fuel tank cap........................................ 3-17
Fuel tank overflow hose ....................... 3-19
Fuses, replacing ................................... 6-32HHandlebar switches ............................. 3-13
Hazard switch ...................................... 3-14
Headlight beams, adjusting ................. 3-21
High beam indicator light ....................... 3-3
Horn switch .......................................... 3-14IIdentification numbers ........................... 9-1
Ignition circuit cut-off system .............. 3-28
Immobilizer system ................................ 3-1
Immobilizer system indicator light ......... 3-5
Indicator lights and warning lights ......... 3-3LLicense plate light ................................ 6-35
Luggage strap holders ......................... 3-26
MMain switch/steering lock ....................... 3-2
Maintenance and lubrication, periodic ... 6-5
Maintenance, emission control
system .................................................. 6-3
Malfunction indicator light (MIL) ............. 3-4
Matte color, caution................................ 7-1
Model label ............................................. 9-1
Multi-function meter unit ........................ 3-6NNeutral indicator light ............................. 3-3OOil pressure warning light ....................... 3-3PParking.................................................... 5-4
Part locations.......................................... 2-1
Pass switch........................................... 3-13RRear suspension, lubricating ................ 6-29SSafety information................................... 1-1
Seat....................................................... 3-20
SELECT switch ..................................... 3-14
Shifting.................................................... 5-3
Shift pedal............................................. 3-15
Shock absorber assembly, adjusting ... 3-23
Sidestand.............................................. 3-28
Sidestand, checking and lubricating .... 6-28
Spark plugs, checking ............................ 6-9
Specifications ......................................... 8-1
Starting the engine ................................. 5-2
Start switch ........................................... 3-14
Steering, checking ................................ 6-30
Storage ................................................... 7-3
UBEHEAE0.book Page 1 Thursday, January 21, 2021 5:45 PM