engine YAMAHA TRACER 7 2022 User Guide
[x] Cancel search | Manufacturer: YAMAHA, Model Year: 2022, Model line: TRACER 7, Model: YAMAHA TRACER 7 2022Pages: 100, PDF Size: 3.93 MB
Page 28 of 100
Instrument and control functions
3-11
3 If the message “Hi” flashes, stop the
vehicle, then stop the engine, and let it
cool. (See page 6-36.)
TIP
When the coolant temperature is
below 40 °C, “Lo” will be dis-
played.
The coolant temperature varies
with changes in the weather and
engine load.Air temperature
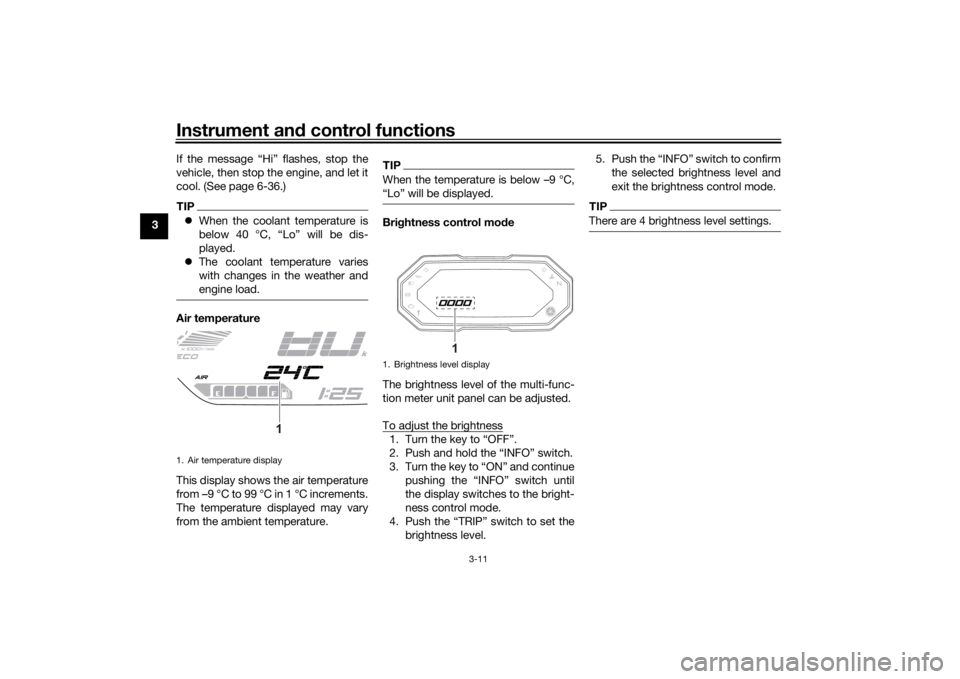
This display shows the air temperature
from –9 °C to 99 °C in 1 °C increments.
The temperature displayed may vary
from the ambient temperature.
TIPWhen the temperature is below –9 °C,
“Lo” will be displayed.Brig htness control mo de
The brightness level of the multi-func-
tion meter unit panel can be adjusted.
To adjust the brightness1. Turn the key to “OFF”.
2. Push and hold the “INFO” switch.
3. Turn the key to “ON” and continue pushing the “INFO” switch until
the display switches to the bright-
ness control mode.
4. Push the “TRIP” switch to set the brightness level. 5. Push the “INFO” switch to confirm
the selected brightness level and
exit the brightness control mode.
TIPThere are 4 brightness level settings.
1. Air temperature display
1
1. Brightness level display
1
UB4TEAE0.book Page 11 Tuesday, October 26, 2021 4:00 PM
Page 29 of 100
Instrument and control functions
3-12
3
EAU1234R
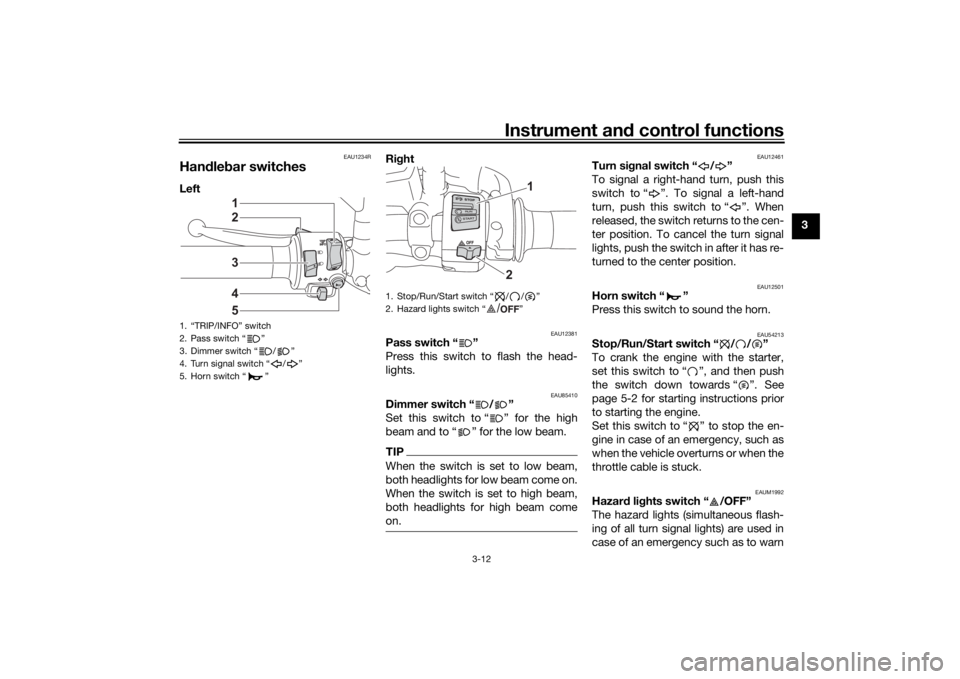
Han dle bar switchesLeft Ri
ght
EAU12381
Pass switch “ ”
Press this switch to flash the head-
lights.
EAU85410
Dimmer switch “ / ”
Set this switch to “ ” for the high
beam and to “ ” for the low beam.TIPWhen the switch is set to low beam,
both headlights for low beam come on.
When the switch is set to high beam,
both headlights for high beam come
on.
EAU12461
Turn si gnal switch “ / ”
To signal a right-hand turn, push this
switch to “ ”. To signal a left-hand
turn, push this switch to “ ”. When
released, the switch returns to the cen-
ter position. To cancel the turn signal
lights, push the switch in after it has re-
turned to the center position.
EAU12501
Horn switch “ ”
Press this switch to sound the horn.
EAU54213
Stop/Run/Start switch “ / / ”
To crank the engine with the starter,
set this switch to “ ”, and then push
the switch down towards “ ”. See
page 5-2 for starting instructions prior
to starting the engine.
Set this switch to “ ” to stop the en-
gine in case of an emergency, such as
when the vehicle overturns or when the
throttle cable is stuck.
EAUM1992
Hazar d lig hts switch “ /OFF”
The hazard lights (simultaneous flash-
ing of all turn signal lights) are used in
case of an emergency such as to warn
1. “TRIP/INFO” switch
2. Pass switch “ ”
3. Dimmer switch “ / ”
4. Turn signal switch “ / ”
5. Horn switch “ ”
34521
1. Stop/Run/Start switch “ / / ”
2. Hazard lights switch “ ”
1
2/
UB4TEAE0.book Page 12 Tuesday, October 26, 2021 4:00 PM
Page 30 of 100
Instrument and control functions
3-13
3 other drivers when your vehicle is
stopped where it might be a traffic haz-
ard.
With the main switch in the on position,
set the hazard lights switch to “ ” to
turn on the hazard lights. The main
switch can then be turned to the off po-
sition or lock position, however the
hazard lights will continue flash. To
turn off the hazard lighs, turn the main
switch to the on position and set this
switch to “OFF”.
NOTICE
ECA10062
Do not use the hazard
lights for an
exten ded len gth of time with the en-
g ine not runnin g, otherwise the bat-
tery may dischar ge.
EAUM3720
Trip/info switch “TRIP/INFO”
This switch is used to make setting and
display changes in the multi-function
meter unit. See page 3-6 for more in-
formation.
EAU12823
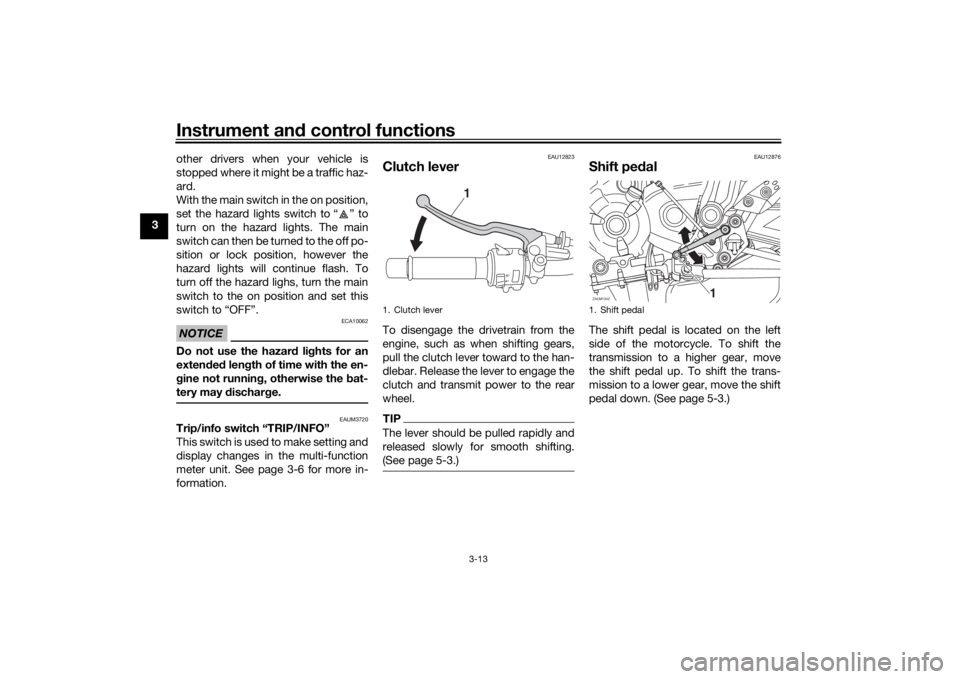
Clutch leverTo disengage the drivetrain from the
engine, such as when shifting gears,
pull the clutch lever toward to the han-
dlebar. Release the lever to engage the
clutch and transmit power to the rear
wheel.TIPThe lever should be pulled rapidly and
released slowly for smooth shifting.
(See page 5-3.)
EAU12876
Shift pe dalThe shift pedal is located on the left
side of the motorcycle. To shift the
transmission to a higher gear, move
the shift pedal up. To shift the trans-
mission to a lower gear, move the shift
pedal down. (See page 5-3.)
1. Clutch lever
1
1. Shift pedalZAUM1342
1
UB4TEAE0.book Page 13 Tuesday, October 26, 2021 4:00 PM
Page 33 of 100
Instrument and control functions
3-16
3
TIPThe fuel tank cap cannot be closed un-
less the key is in the lock. In addition,
the key cannot be removed if the cap is
not properly closed and locked.
WARNING
EWA11092
Make sure that the fuel tank cap is
properly closed after filling fuel.
Leakin g fuel is a fire hazar d.
EAU13222
FuelMake sure there is sufficient gasoline in
the tank.
WARNING
EWA10882
Gasoline an d gasoline vapors are
extremely flammab le. To avoid fires
an d explosions an d to re duce the
risk of injury when refueling , follow
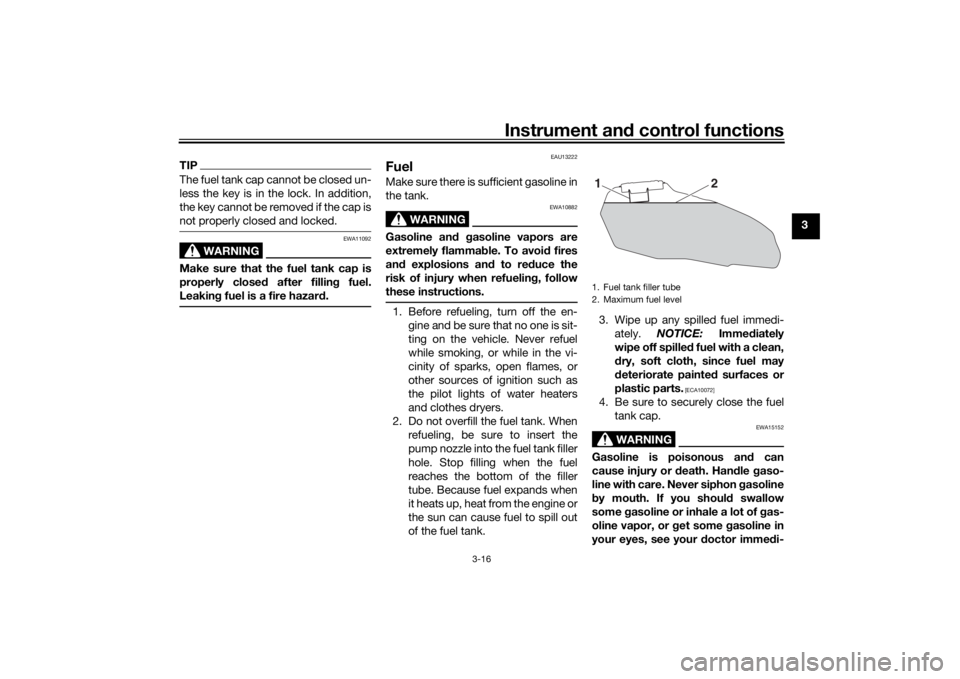
these instructions.1. Before refueling, turn off the en- gine and be sure that no one is sit-
ting on the vehicle. Never refuel
while smoking, or while in the vi-
cinity of sparks, open flames, or
other sources of ignition such as
the pilot lights of water heaters
and clothes dryers.
2. Do not overfill the fuel tank. When refueling, be sure to insert the
pump nozzle into the fuel tank filler
hole. Stop filling when the fuel
reaches the bottom of the filler
tube. Because fuel expands when
it heats up, heat from the engine or
the sun can cause fuel to spill out
of the fuel tank. 3. Wipe up any spilled fuel immedi-
ately. NOTICE: Immediately
wipe off spille d fuel with a clean,
d ry, soft cloth, since fuel may
d eteriorate painte d surfaces or
plastic parts.
[ECA10072]
4. Be sure to securely close the fuel tank cap.
WARNING
EWA15152
Gasoline is poisonous an d can
cause injury or death. Han dle gaso-
line with care. Never siphon gasoline
b y mouth. If you shoul d swallow
some gasoline or inhale a lot of g as-
oline vapor, or get some gasoline in
your eyes, see your doctor imme di-1. Fuel tank filler tube
2. Maximum fuel level
2
1
UB4TEAE0.book Page 16 Tuesday, October 26, 2021 4:00 PM
Page 34 of 100
Instrument and control functions
3-17
3 ately. If
gasoline spills on your skin,
wash with soap an d water. If gaso-
line spills on your clothin g, chan ge
your clothes.
EAU86072
Your Yamaha engine was designed to
use unleaded gasoline with a research
octane number of 90 or higher. If en-
gine knocking or pinging occurs, use a
gasoline of a different brand or higher
octane rating.
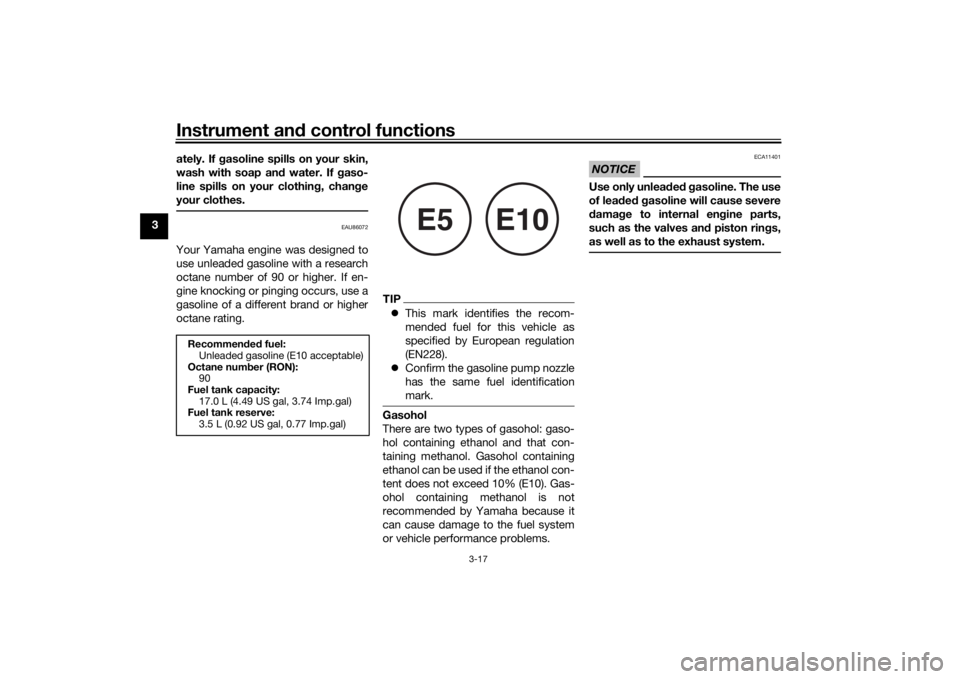
TIP This mark identifies the recom-
mended fuel for this vehicle as
specified by European regulation
(EN228).
Confirm the gasoline pump nozzle
has the same fuel identification
mark.Gasohol
There are two types of gasohol: gaso-
hol containing ethanol and that con-
taining methanol. Gasohol containing
ethanol can be used if the ethanol con-
tent does not exceed 10% (E10). Gas-
ohol containing methanol is not
recommended by Yamaha because it
can cause damage to the fuel system
or vehicle performance problems.
NOTICE
ECA11401
Use only unlea ded g asoline. The use
of lea ded g asoline will cause severe
d amag e to internal en gine parts,
such as the valves an d piston rin gs,
as well as to the exhaust system.
Recommen ded fuel:
Unleaded gasoline (E10 acceptable)
Octane num ber (RON):
90
Fuel tank capacity: 17.0 L (4.49 US gal, 3.74 Imp.gal)
Fuel tank reserve:
3.5 L (0.92 US gal, 0.77 Imp.gal)
E5
E10
UB4TEAE0.book Page 17 Tuesday, October 26, 2021 4:00 PM
Page 42 of 100
Instrument and control functions
3-25
3 this system reg
ularly and have a
Yamaha dealer repair it if it does not
function properly.
EAU44895
I g nition circuit cut-off systemThis system prevents in-gear engine
starts unless the clutch lever is pulled
and the sidestand is up. Also, it will
stop the running engine should the
sidestand be lowered while the trans-
mission is in gear.
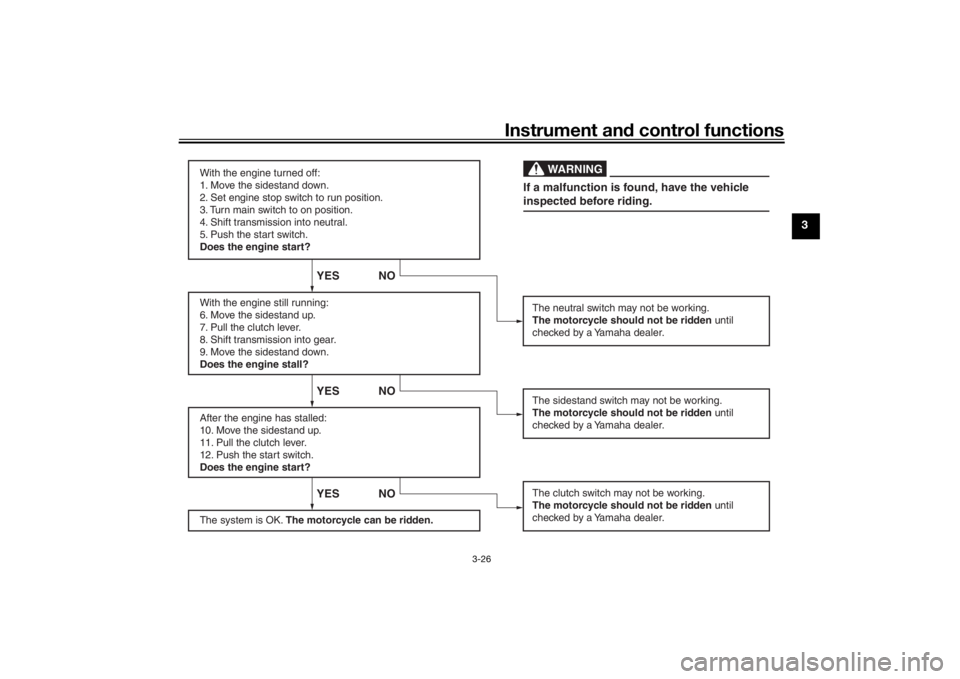
Periodically check the system via the
following procedure.TIP This check is most reliable if per-
formed with a warmed-up engine.
See pages 3-2 and 3-12 for switch
operation information.
UB4TEAE0.book Page 25 Tuesday, October 26, 2021 4:00 PM
Page 43 of 100
Instrument and control functions
3-26
3
With the engine turned off:
1. Move the sidestand down.
2. Set engine stop switch to run position.
3. Turn main switch to on position.
4. Shift transmission into neutral.
5. Push the start switch.
Does the engine start?
With the engine still running:
6. Move the sidestand up.
7. Pull the clutch lever.
8. Shift transmission into gear.
9. Move the sidestand down.
Does the engine stall?
After the engine has stalled:
10. Move the sidestand up.
11. Pull the clutch lever.
12. Push the start switch.
Does the engine start?
The system is OK. The motorcycle can be ridden.
YES NO YES NO YES NO
The neutral switch may not be working.
The motorcycle should not be ridden until
checked by a Yamaha dealer.
The clutch switch may not be working.
The motorcycle should not be ridden until
checked by a Yamaha dealer.The sidestand switch may not be working.
The motorcycle should not be ridden until
checked by a Yamaha dealer.If a malfunction is found, have the vehicle
inspected before riding.
WARNING
UB4TEAE0.book Page 26 Tuesday, October 26, 2021 4:00 PM
Page 44 of 100
For your safety – pre-operation checks
4-1
4
EAU1559B
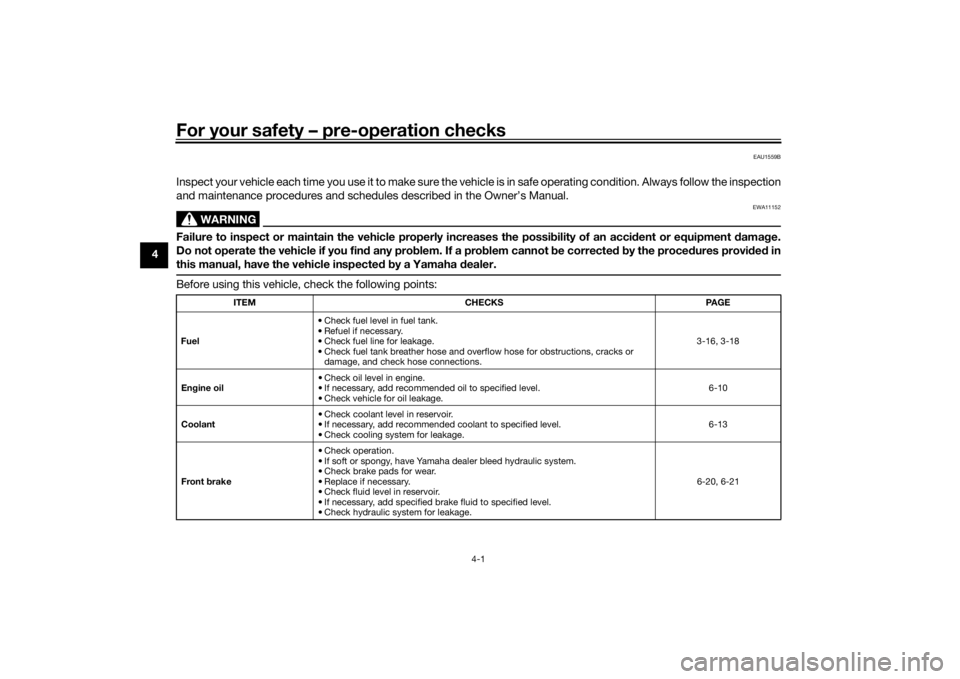
Inspect your vehicle each time you use it to make sure the vehicle is in safe operating condition. Always follow the inspection
and maintenance procedures and schedules described in the Owner’s Manual.
WARNING
EWA11152
Failure to inspect or maintain the vehicle properly increases the possibility of an acci dent or equipment damag e.
Do not operate the vehicle if you fin d any pro blem. If a pro blem cannot be corrected b y the proce dures provi ded in
this manual, have the vehicle inspecte d b y a Yamaha dealer.Before using this vehicle, check the following points:
ITEM CHECKS PAGE
Fuel • Check fuel level in fuel tank.
• Refuel if necessary.
• Check fuel line for leakage.
• Check fuel tank breather hose and overflow hose for obstructions, cracks or
damage, and check hose connections. 3-16, 3-18
En gine oil • Check oil level in engine.
• If necessary, add recommended oil to specified level.
• Check vehicle for oil leakage. 6-10
Coolant • Check coolant level in reservoir.
• If necessary, add recommended coolant to specified level.
• Check cooling system for leakage. 6-13
Front brake • Check operation.
• If soft or spongy, have Yamaha dealer bleed hydraulic system.
• Check brake pads for wear.
• Replace if necessary.
• Check fluid level in reservoir.
• If necessary, add specified brake fluid to specified level.
• Check hydraulic system for leakage. 6-20, 6-21
UB4TEAE0.book Page 1 Tues
day, October 26, 2021 4:00 PM
Page 47 of 100
Operation and important ri din g points
5-1
5
EAU15952
Read the Owner’s Manual carefully to
become familiar with all controls. If
there is a control or function you do not
understand, ask your Yamaha dealer.
WARNING
EWA10272
Failure to familiarize yourself with
the controls can lead to loss of con-
trol, which coul d cause an acci dent
or injury.
EAU16842
En gine break-inThere is never a more important period
in the life of your engine than the period
between 0 and 1600 km (1000 mi). For
this reason, you should read the fol-
lowing material carefully.
Since the engine is brand new, do not
put an excessive load on it for the first
1600 km (1000 mi). The various parts in
the engine wear and polish themselves
to the correct operating clearances.
During this period, prolonged full-throt-
tle operation or any condition that
might result in engine overheating
must be avoided.
EAU17094
0–1000 km (0–600 mi)
Avoid prolonged operation above 5000
r/min. NOTICE: After 1000 km (600
mi) of operation, the en gine oil must
b e chan ged an d the oil filter car-
tri dge or element replace d.
[ECA10303]
1000–1600 km (600–1000 mi)
Avoid prolonged operation above 6000
r/min. 1600 km (1000 mi) an
d b eyon d
The vehicle can now be operated nor-
mally.
NOTICE
ECA10311
Keep the en gine spee d out of
the tachometer red zone.
If any en gine trou ble shoul d oc-
cur during the en gine break-in
perio d, imme diately have a
Yamaha dealer check the vehi-
cle.
UB4TEAE0.book Page 1 Tues day, October 26, 2021 4:00 PM
Page 48 of 100
Operation and important rid ing points
5-2
5
EAU91880
Startin g the eng ineThe ignition circuit cut-off system will
enable starting when:
the transmission is in the neutral
position or
the transmission is in gear, the
sidestand is up, and the clutch le-
ver is pulled.
To start the engine1. Turn the main switch on and set the engine stop switch to the run
position.
2. Confirm the indicator and warning light(s) come on for a few sec-
onds, and then go off. (See page
3-3.)TIPDo not start the engine if the mal-
function indicator light remains on.
The oil pressure warning light
should come on and stay on until
the engine is started.
The ABS warning light should
come on and stay on until the ve-
hicle reaches a speed of 10 km/h
(6 mi/h).
NOTICE
ECA24110
If a warnin g or in dicator li ght does
not work as d escribed a bove, have a
Yamaha dealer check the vehicle.3. Shift the transmission into the
neutral position.
4. Start the engine by pushing the start switch.
5. Release the start switch when the engine starts, or after 5 seconds.
Wait 10 seconds before pressing
the switch again to allow battery
voltage to restore.NOTICE
ECA11043
For maximum en gine life, never ac-
celerate har d when the en gine is
col d!
EAU88780
TIPThis model is equipped with:
a lean angle sensor. This sensor
stops the engine in case of a vehi-
cle turnover. If this happens, the
malfunction indicator light will
come on, but this is not a malfunc-
tion. Turn the vehicle power off
and then back on again to cancel
the indicator light. Failing to do so
will prevent the engine from start-
ing even though the engine will
crank when pushing the start
switch.
an engine auto-stop system. The
engine stops automatically if left
idling for 20 minutes. If the engine
stops, simply push the start
switch to restart the engine.
UB4TEAE0.book Page 2 Tues day, October 26, 2021 4:00 PM