wheel torque YAMAHA TT-R110E 2020 Owners Manual
[x] Cancel search | Manufacturer: YAMAHA, Model Year: 2020, Model line: TT-R110E, Model: YAMAHA TT-R110E 2020Pages: 88, PDF Size: 2.26 MB
Page 64 of 88

Periodic maintenance an d a djustment
7-22
7
TIP
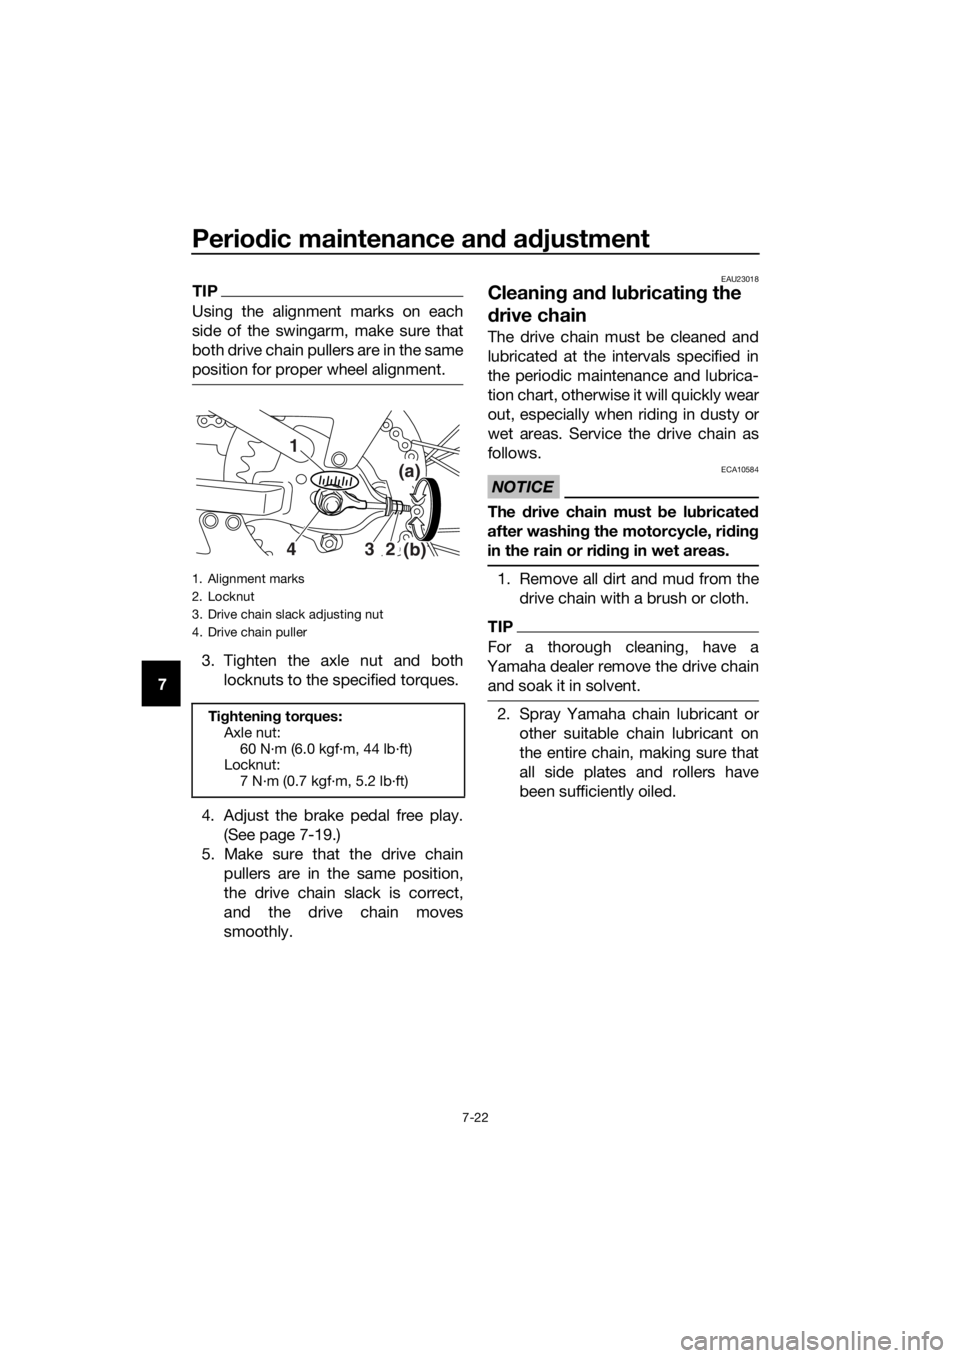
Using the alignment marks on each
side of the swingarm, make sure that
both drive chain pullers are in the same
position for proper wheel alignment.
3. Tighten the axle nut and both
locknuts to the specified torques.
4. Adjust the brake pedal free play. (See page 7-19.)
5. Make sure that the drive chain pullers are in the same position,
the drive chain slack is correct,
and the drive chain moves
smoothly.
EAU23018
Cleanin g an d lu bricatin g the
d rive chain
The drive chain must be cleaned and
lubricated at the intervals specified in
the periodic maintenance and lubrica-
tion chart, otherwise it will quickly wear
out, especially when riding in dusty or
wet areas. Service the drive chain as
follows.
NOTICE
ECA10584
The drive chain must be lu bricate d
after washin g the motorcycle, ri din g
in the rain or ri din g in wet areas.
1. Remove all dirt and mud from the
drive chain with a brush or cloth.
TIP
For a thorough cleaning, have a
Yamaha dealer remove the drive chain and soak it in solvent.
2. Spray Yamaha chain lubricant or other suitable chain lubricant on
the entire chain, making sure that
all side plates and rollers have
been sufficiently oiled.
1. Alignment marks
2. Locknut
3. Drive chain slack adjusting nut
4. Drive chain puller
Tightenin g torques:
Axle nut:
60 N·m (6.0 kgf·m, 44 lb·ft)
Locknut: 7 N·m (0.7 kgf·m, 5.2 lb·ft)
(a)
(b)
432 1
UB5185E0.book Page 22 Monday, June 17, 2019 9:04 AM
Page 73 of 88

Periodic maintenance an d a djustment
7-31
7
3. Insert the wheel axle from the right
side, and then install the washer
and the axle nut.
4. Lower the front wheel so that it is on the ground, and then put the
sidestand down.
5. Tighten the axle nut to the speci- fied torque.
6. Adjust the brake lever free play. (See page 7-18.)
7. While applying the front brake, push down hard on the handlebar
several times to check for proper
fork operation.
EAU25081
Rear wheel
EAU56801
To remove the rear wheel
WARNING
EWA10822
To avoi d injury, securely support the
vehicle so there is no dan ger of it
fallin g over.
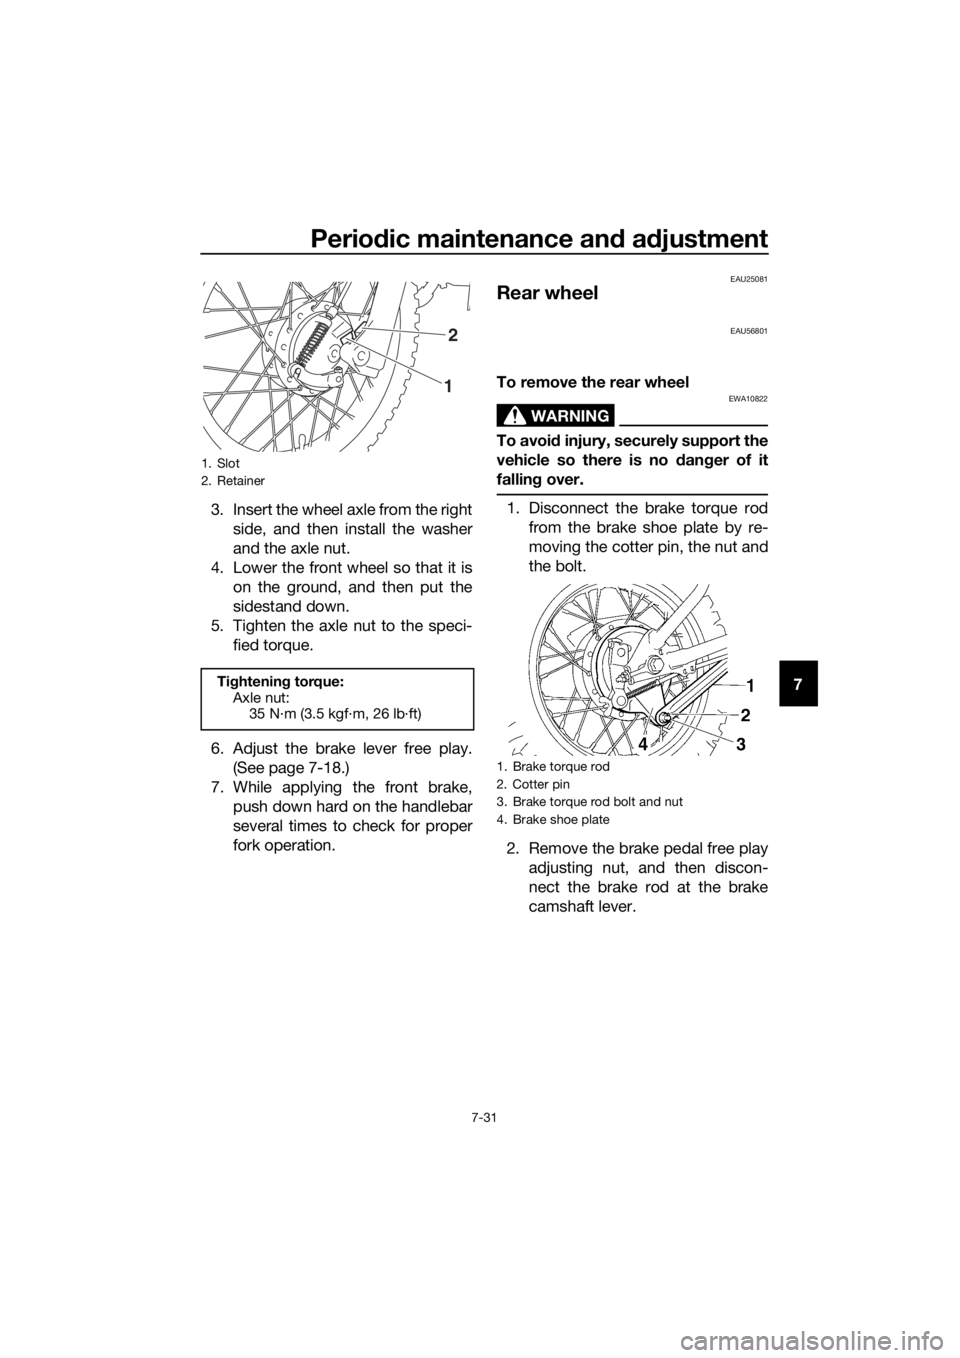
1. Disconnect the brake torque rod
from the brake shoe plate by re-
moving the cotter pin, the nut and
the bolt.
2. Remove the brake pedal free play adjusting nut, and then discon-
nect the brake rod at the brake
camshaft lever.
1. Slot
2. Retainer
Tightening torque:
Axle nut: 35 N·m (3.5 kgf·m, 26 lb·ft)
2
1
1. Brake torque rod
2. Cotter pin
3. Brake torque rod bolt and nut
4. Brake shoe plate
UB5185E0.book Page 31 Monday, June 17, 2019 9:04 AM
Page 74 of 88

Periodic maintenance an d a djustment
7-32
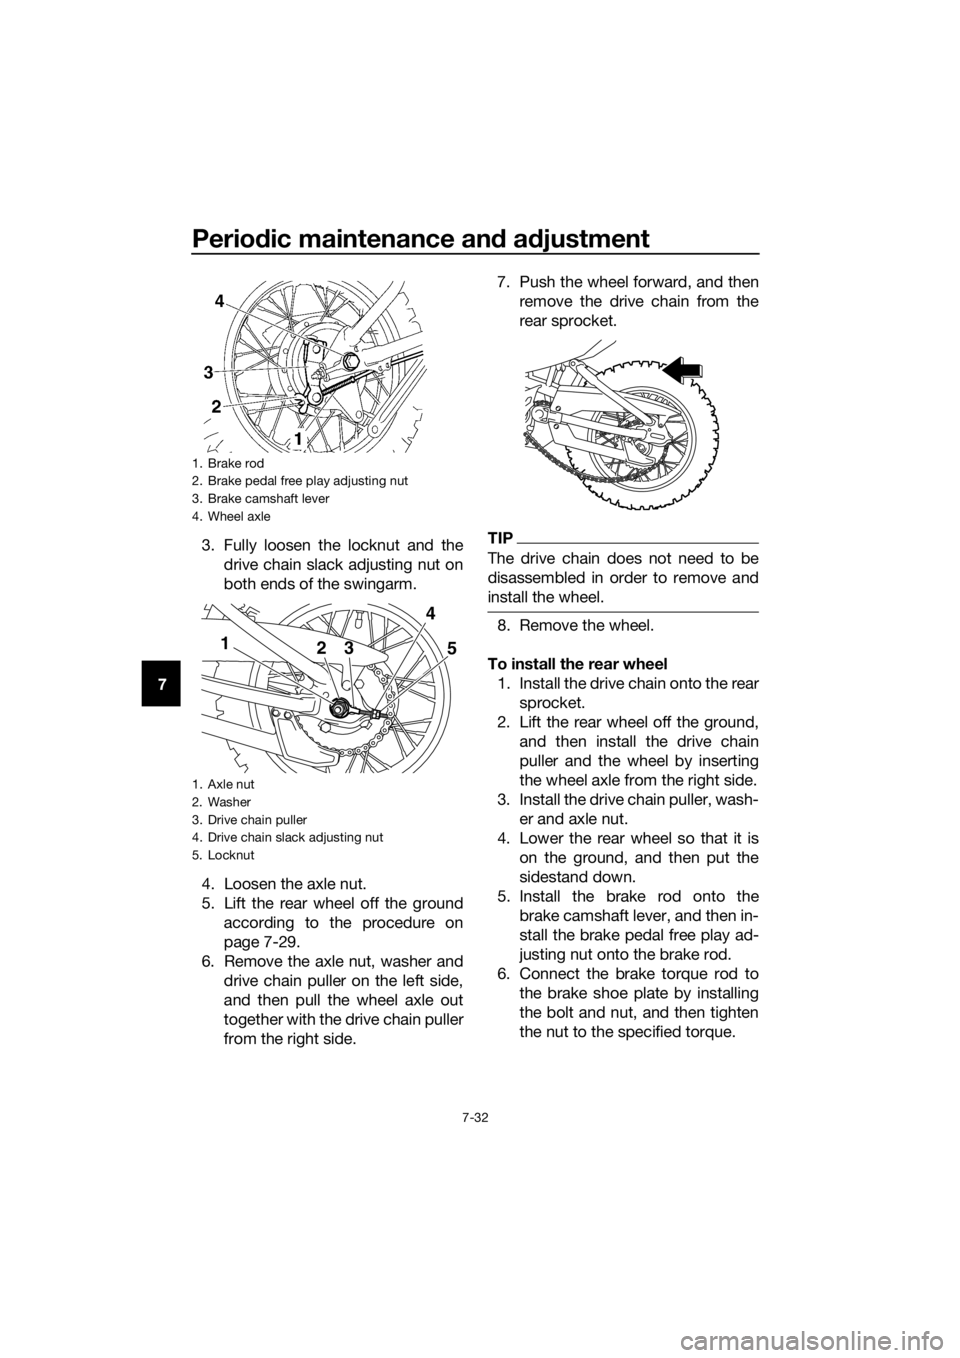
7 3. Fully loosen the locknut and the
drive chain slack adjusting nut on
both ends of the swingarm.
4. Loosen the axle nut.
5. Lift the rear wheel off the ground according to the procedure on
page 7-29.
6. Remove the axle nut, washer and drive chain puller on the left side,
and then pull the wheel axle out
together with the drive chain puller
from the right side. 7. Push the wheel forward, and then
remove the drive chain from the
rear sprocket.
TIP
The drive chain does not need to be
disassembled in order to remove and
install the wheel.
8. Remove the wheel.
To install the rear wheel 1. Install the drive chain onto the rear sprocket.
2. Lift the rear wheel off the ground, and then install the drive chain
puller and the wheel by inserting
the wheel axle from the right side.
3. Install the drive chain puller, wash- er and axle nut.
4. Lower the rear wheel so that it is on the ground, and then put the
sidestand down.
5. Install the brake rod onto the brake camshaft lever, and then in-
stall the brake pedal free play ad-
justing nut onto the brake rod.
6. Connect the brake torque rod to the brake shoe plate by installing
the bolt and nut, and then tighten
the nut to the specified torque.
1. Brake rod
2. Brake pedal free play adjusting nut
3. Brake camshaft lever
4. Wheel axle
1. Axle nut
2. Washer
3. Drive chain puller
4. Drive chain slack adjusting nut
5. Locknut
1 23 5
4
UB5185E0.book Page 32 Monday, June 17, 2019 9:04 AM