stop start YAMAHA TTR90 2002 User Guide
[x] Cancel search | Manufacturer: YAMAHA, Model Year: 2002, Model line: TTR90, Model: YAMAHA TTR90 2002Pages: 288, PDF Size: 15.07 MB
Page 105 of 288

SPEC
CHEMINEMENT DES CABLES
KABELFÜHRUNG
1Kabelführung
2Bremszug
3Gaszug
4Kraftstofftank-Belüftungsschlauch
5Motorstoppschalter-Kabel
6Entlüftungsschlauch
7Lufteinlaßkanal
8Zündspulle
9Kabelführung
0Kabelbaum
ADämpfer
BZündbox-Kabel
CCDI-Zündbox
DGleichrichter/Reguler-Kabel
EGleichrichter/Regler
FKurbelgehäuse-Entlüftungsschlauch
GVergaser-Entlüftungsschlauch
HZündkabel
IKraftstoffschlauch
JChokezug
KLichtmaschinen-Kabel
LThermoschalter 1Guide de câble
2Câble de frein
3Câble des gaz
4Reniflard de réservoir de carburant
5Fil de coupe-circuit du moteur
6Reniflard
7Conduit d’admission d’air
8Bobine d’allumage
9Guide de câble
0Faisceau de fils
ASilentbloc
BFil de bloc CDI
CBloc CDI
DFil de redresseur/régulateur
ERedresseur/régulateur
FReniflard de carter
GReniflard de carburateur
HFil de bougie
IFlexible de carburant
JCâble de starter
KFil de magnéto CDI
LThermocontact
2 - 17
Page 124 of 288

3 - 8
INSP
ADJIDLE SPEED ADJUSTMENT/
VALVE CLEARANCE ADJUSTMENT
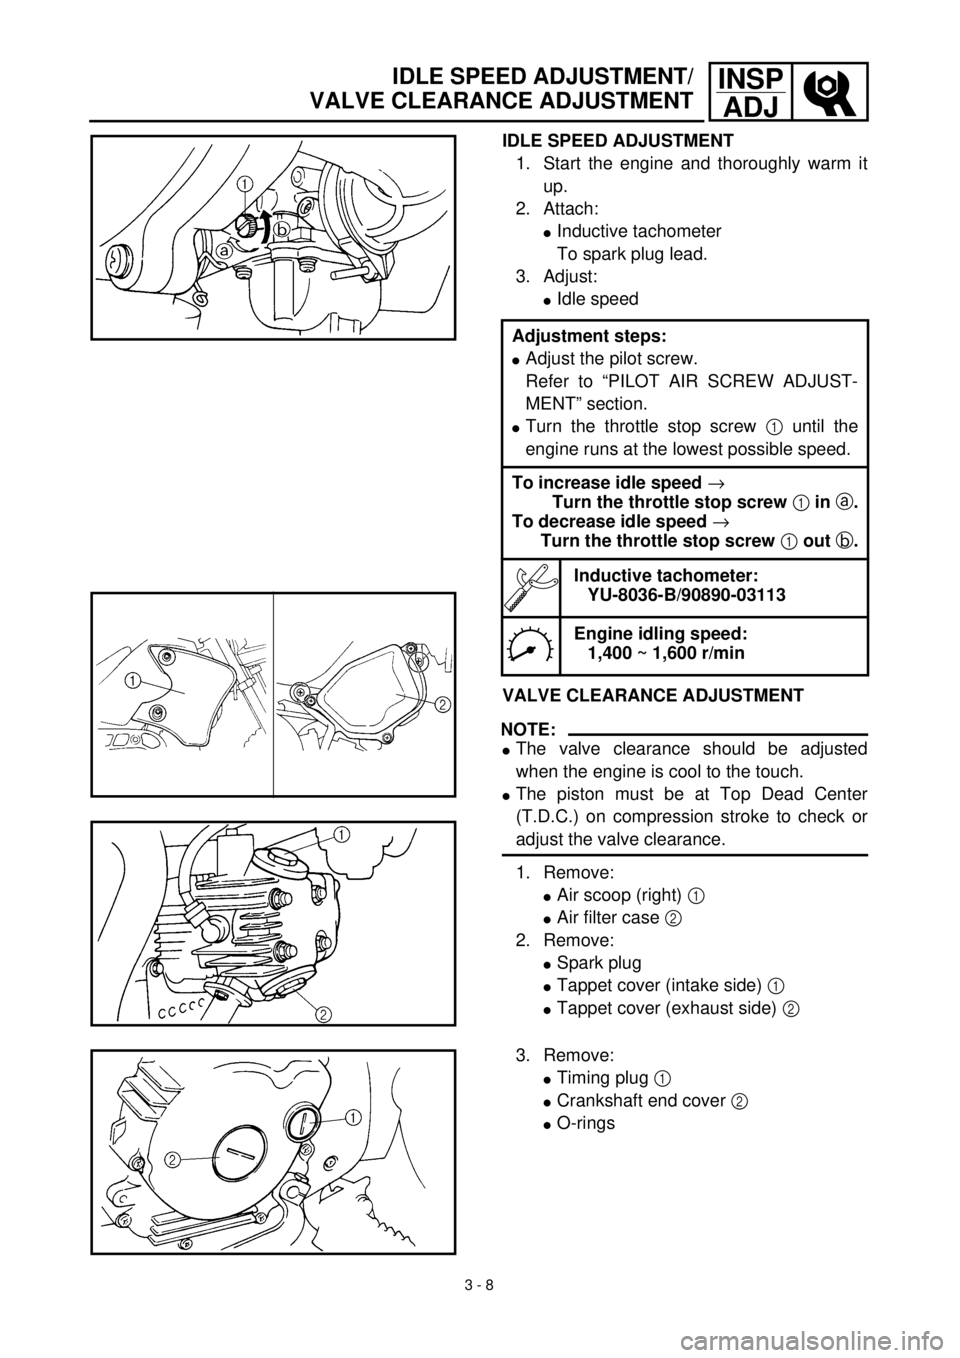
IDLE SPEED ADJUSTMENT
1. Start the engine and thoroughly warm it
up.
2. Attach:
lInductive tachometer
To spark plug lead.
3. Adjust:
lIdle speed
VALVE CLEARANCE ADJUSTMENT
NOTE:
lThe valve clearance should be adjusted
when the engine is cool to the touch.
lThe piston must be at Top Dead Center
(T.D.C.) on compression stroke to check or
adjust the valve clearance.
1. Remove:
lAir scoop (right) 1
lAir filter case 2
2. Remove:
lSpark plug
lTappet cover (intake side) 1
lTappet cover (exhaust side) 2 Adjustment steps:
lAdjust the pilot screw.
Refer to “PILOT AIR SCREW ADJUST-
MENT” section.
lTurn the throttle stop screw 1 until the
engine runs at the lowest possible speed.
To increase idle speed ®
Turn the throttle stop screw 1 in a.
To decrease idle speed ®
Turn the throttle stop screw 1 out b.
Inductive tachometer:
YU-8036-B/90890-03113
Engine idling speed:
1,400 ~ 1,600 r/min
3. Remove:
lTiming plug 1
lCrankshaft end cover 2
lO-rings
Page 150 of 288

4 - 2
ENGCARBURETOR
EC468000
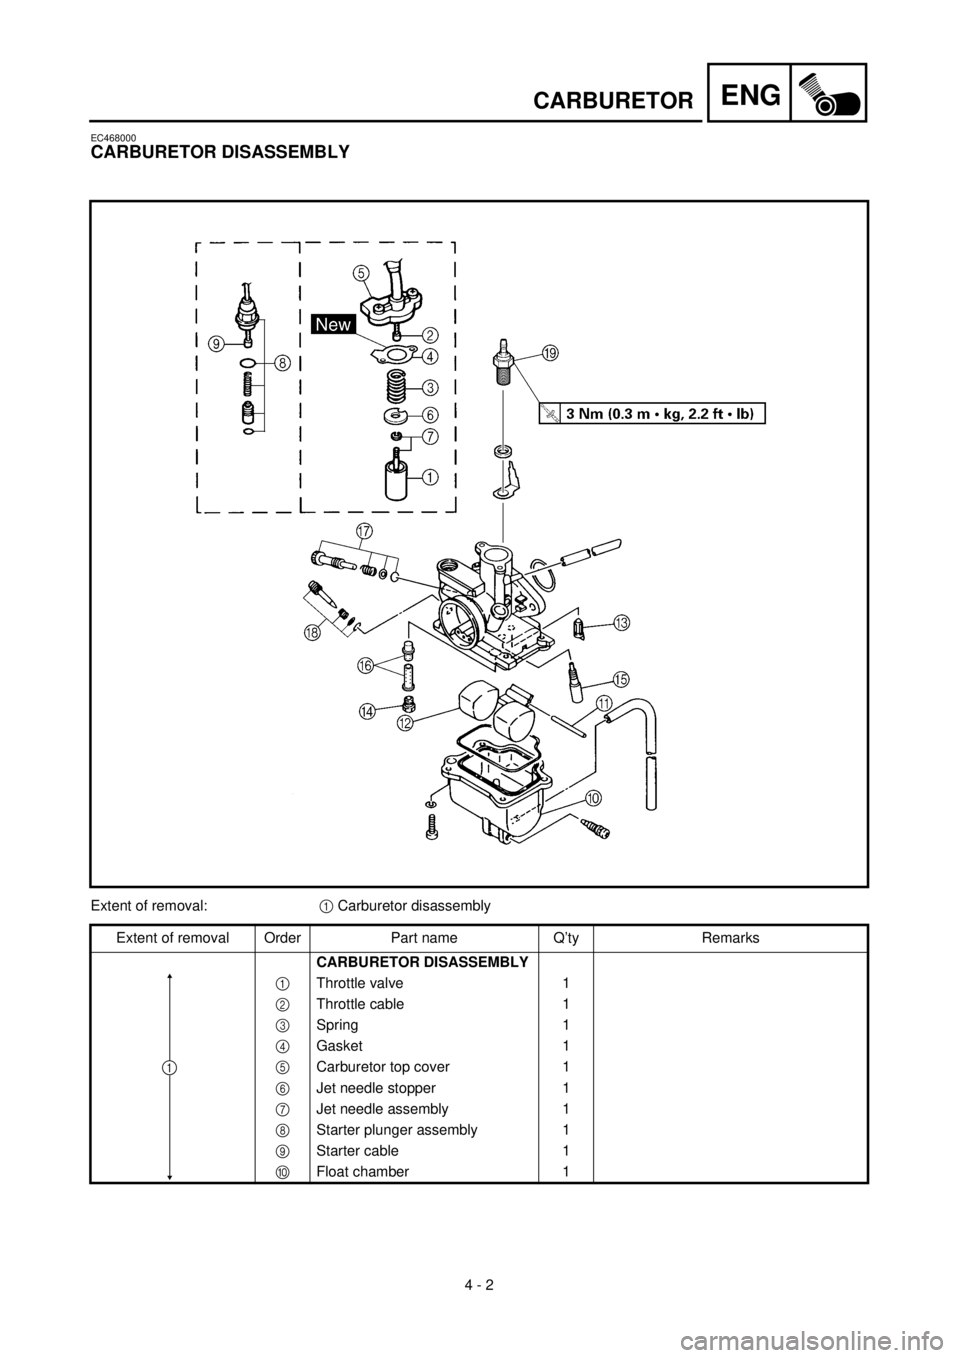
CARBURETOR DISASSEMBLY
Extent of removal:1 Carburetor disassembly
Extent of removal Order Part name Q’ty Remarks
CARBURETOR DISASSEMBLY
1Throttle valve 1
2Throttle cable 1
3Spring 1
4Gasket 1
5Carburetor top cover 1
6Jet needle stopper 1
7Jet needle assembly 1
8Starter plunger assembly 1
9Starter cable 1
0Float chamber 1
1
Page 270 of 288

6 - 3
–+ELECIGNITION SYSTEM
EC622001
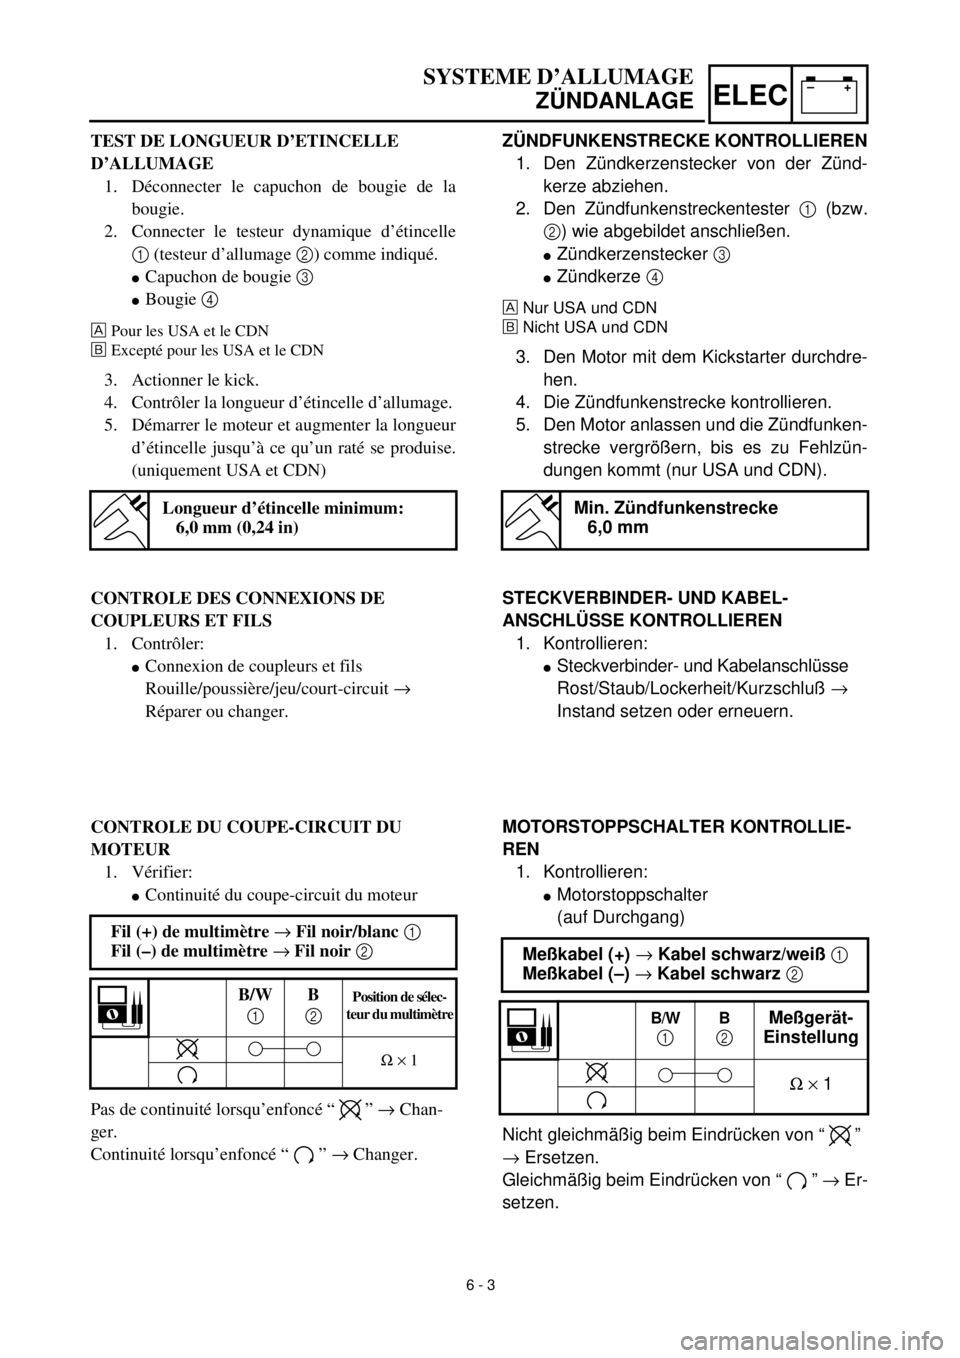
SPARK GAP TEST
1. Disconnect the spark plug cap from spark
plug.
2. Connect the dynamic spark tester 1
(ignition checker 2) as shown.
lSpark plug cap 3
lSpark plug 4
For USA and CDN
õExcept for USA and CDN
3. Kick the kick starter.
4. Check the ignition spark gap.
5. Start engine, and increase spark gap until
misfire occurs. (for USA and CDN only)
Minimum spark gap:
6.0 mm (0.24 in)
õ
EC624000
COUPLERS AND LEADS CONNECTION
INSPECTION
1. Check:
lCouplers and leads connection
Rust/dust/looseness/short-circuit ®
Repair or replace.
“ENGINE STOP” SWITCH INSPECTION
1. Inspect:
l“ENGINE STOP” switch continuity
No continuous while being pushed “ ” ®
Replace.
Continuous while being pushed “ ” ®
Replace.Tester (+) lead ® Black/White lead 1
Tester (–) lead ® Black lead 2
B/W
1B
2Tester selec-
tor position
W ´ 1
Page 271 of 288

–+ELEC
SYSTEME D’ALLUMAGE
ZÜNDANLAGE
ZÜNDFUNKENSTRECKE KONTROLLIEREN
1. Den Zündkerzenstecker von der Zünd-
kerze abziehen.
2. Den Zündfunkenstreckentester 1 (bzw.
2) wie abgebildet anschließen.
lZündkerzenstecker 3
lZündkerze 4
Nur USA und CDN
õNicht USA und CDN
3. Den Motor mit dem Kickstarter durchdre-
hen.
4. Die Zündfunkenstrecke kontrollieren.
5. Den Motor anlassen und die Zündfunken-
strecke vergrößern, bis es zu Fehlzün-
dungen kommt (nur USA und CDN).
Min. Zündfunkenstrecke
6,0 mm
MOTORSTOPPSCHALTER KONTROLLIE-
REN
1. Kontrollieren:
lMotorstoppschalter
(auf Durchgang)
Nicht gleichmäßig beim Eindrücken von “ ”
® Ersetzen.
Gleichmäßig beim Eindrücken von “ ” ® Er-
setzen.Meßkabel (+) ® Kabel schwarz/weiß 1
Meßkabel (–) ® Kabel schwarz 2
B/W
1 B2
Meßgerät-
Einstellung
W ´ 1
TEST DE LONGUEUR D’ETINCELLE
D’ALLUMAGE
1. Déconnecter le capuchon de bougie de la
bougie.
2. Connecter le testeur dynamique d’étincelle
1 (testeur d’allumage 2) comme indiqué.
lCapuchon de bougie 3
lBougie 4
Pour les USA et le CDN
õExcepté pour les USA et le CDN
3. Actionner le kick.
4. Contrôler la longueur d’étincelle d’allumage.
5. Démarrer le moteur et augmenter la longueur
d’étincelle jusqu’à ce qu’un raté se produise.
(uniquement USA et CDN)
Longueur d’étincelle minimum:
6,0 mm (0,24 in)
CONTROLE DES CONNEXIONS DE
COUPLEURS ET FILS
1. Contrôler:
lConnexion de coupleurs et fils
Rouille/poussière/jeu/court-circuit ®
Réparer ou changer.
CONTROLE DU COUPE-CIRCUIT DU
MOTEUR
1. Vérifier:
lContinuité du coupe-circuit du moteur
Pas de continuité lorsqu’enfoncé “ ” ® Chan-
ger.
Continuité lorsqu’enfoncé “ ” ® Changer. Fil (+) de multimètre ® Fil noir/blanc 1
Fil (–) de multimètre ® Fil noir 2
B/W
1B
2Position de sélec-
teur du multimètre
W ´ 1
6 - 3
STECKVERBINDER- UND KABEL-
ANSCHLÜSSE KONTROLLIEREN
1. Kontrollieren:
lSteckverbinder- und Kabelanschlüsse
Rost/Staub/Lockerheit/Kurzschluß ®
Instand setzen oder erneuern.