check engine light YAMAHA TW125 2000 Owners Manual
[x] Cancel search | Manufacturer: YAMAHA, Model Year: 2000, Model line: TW125, Model: YAMAHA TW125 2000Pages: 86, PDF Size: 3.94 MB
Page 7 of 86

EAU00009
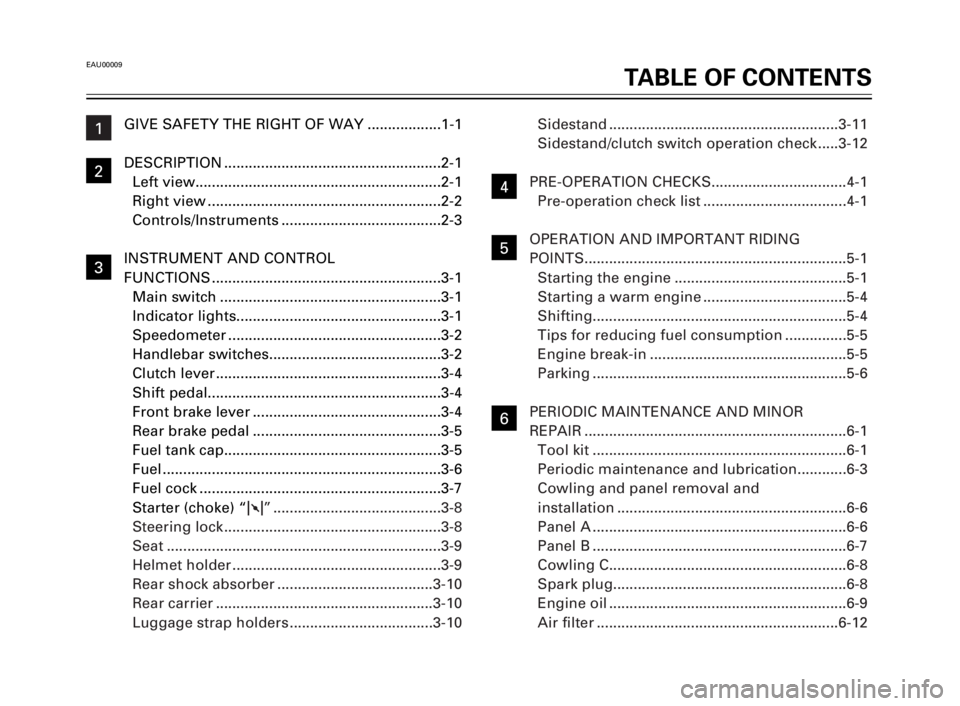
TABLE OF CONTENTS
1
2
3
4
5
6
7
8
9
1
5
GIVE SAFETY THE RIGHT OF WAY ..................1-1
DESCRIPTION .....................................................2-1
Left view............................................................2-1
Right view .........................................................2-2
Controls/Instruments .......................................2-3
INSTRUMENT AND CONTROL
FUNCTIONS ........................................................3-1
Main switch ......................................................3-1
Indicator lights..................................................3-1
Speedometer ....................................................3-2
Handlebar switches..........................................3-2
Clutch lever .......................................................3-4
Shift pedal.........................................................3-4
Front brake lever ..............................................3-4
Rear brake pedal ..............................................3-5
Fuel tank cap.....................................................3-5
Fuel ....................................................................3-6
Fuel cock ...........................................................3-7
Starter (choke) “1” .........................................3-8
Steering lock .....................................................3-8
Seat ...................................................................3-9
Helmet holder ...................................................3-9
Rear shock absorber ......................................3-10
Rear carrier .....................................................3-10
Luggage strap holders ...................................3-10Sidestand ........................................................3-11
Sidestand/clutch switch operation check .....3-12
PRE-OPERATION CHECKS.................................4-1
Pre-operation check list ...................................4-1
OPERATION AND IMPORTANT RIDING
POINTS................................................................5-1
Starting the engine ..........................................5-1
Starting a warm engine ...................................5-4
Shifting..............................................................5-4
Tips for reducing fuel consumption ...............5-5
Engine break-in ................................................5-5
Parking ..............................................................5-6
PERIODIC MAINTENANCE AND MINOR
REPAIR ................................................................6-1
Tool kit ..............................................................6-1
Periodic maintenance and lubrication............6-3
Cowling and panel removal and
installation ........................................................6-6
Panel A ..............................................................6-6
Panel B ..............................................................6-7
Cowling C..........................................................6-8
Spark plug.........................................................6-8
Engine oil ..........................................................6-9
Air filter ...........................................................6-121
2
3
4
6
5EK-9-E1 (TW125)<3.1> 4/6/0 11:50 PM Page 5
Page 20 of 86

3-8
INSTRUMENT AND CONTROL FUNCTIONS
1
2
3
4
5
6
7
8
9
EAU02976Starter (choke) “1”
Starting a cold engine requires a
richer air-fuel mixture. A separate
starter circuit supplies this mixture.
Move in direction ato turn on the
starter (choke).
Move in direction bto turn off the
starter (choke).
1. Starter (choke) “1”
EAU02934Steering lock
To lock the steering
Turn the handlebars all the way to
the right and open the steering
lock cover.
Insert the key and turn it 1/8 turn
counterclockwise. Then, push the
key in while turning the handlebars
slightly to the left and turn the key
1/8 turn clockwise.
Check that the steering is locked,
remove the key and close the lock
cover.
1. Steering lock
2. Cover
To unlock the steering
Insert the key, push it in and turn it
1/8 turn counterclockwise so that it
moves out. Then, release and
remove the key.
a
b
1
12
5EK-9-E1 (TW125)<3.1> 4/6/0 11:50 PM Page 18
Page 41 of 86

6-9
PERIODIC MAINTENANCE AND MINOR REPAIR
1
2
3
4
5
6
7
8
9
1
Installation
1. Measure the electrode gap
with a wire thickness gauge
and, if necessary, adjust the
gap to specification.
2. Clean the gasket surface. Wipe
off any grime from the
threads.
3. Install the spark plug and tight-
en it to the specified torque.
1. Spark plug gap
NOTE:
If a torque wrench is not available
when you are installing a spark
plug, a good estimate of the cor-
rect torque is 1/4 to 1/2 turn past
finger tight. Have the spark plug
tightened to the specified torque as
soon as possible.
4. Install the spark plug cap.
EAU00517*
Engine oil
Oil level measurement
1. Place the motorcycle on a level
place and hold it in an upright
position. Warm up the engine
for several minutes.
NOTE:
Be sure the motorcycle is posi-
tioned straight up when checking
the oil level. A slight tilt toward the
side can result in false readings.
Spark plug gap:
0.6 ~ 0.7 mm
Tightening torque:
Spark plug:
17.5 Nm (1.75 m·kg)
5EK-9-E1 (TW125)<3.1> 4/6/0 11:50 PM Page 39
Page 57 of 86

6-25
PERIODIC MAINTENANCE AND MINOR REPAIR
1
2
3
4
5
6
7
8
9
EC000096
cC
Too little chain slack will overload
the engine and other vital parts.
Keep the slack within the specified
limits.
4. Tighten the wheel axle nut to
the specified torque.
5. Adjust the brake pedal free
play.
EW000103
w
Check the operation of the brake
light after adjusting the rear brake.
EAU01106*Drive chain lubrication
The chain consists of many parts
which work with each other. If the
chain is not maintained properly, it
will wear out quickly. Therefore,
the chain must be serviced regular-
ly. This service is especially neces-
sary when riding in dusty areas.
The drive chain should be lubri-
cated every 500 km. First, remove
all dirt and mud from the chain
with a brush or cloth. Then, spray
any of the many brands of spray-
type chain lubricant between
both rows of side plates and on
all center rollers.
To clean the chain thoroughly,
remove it from the motorcycle,
dip it in solvent, and clean out as
much dirt as possible. Then, take
the chain out of the solvent to
dry it, and immediately lubricate
it to prevent it from rusting.
EC000097
cC
Be sure to oil the chain after wash-
ing the motorcycle or riding in the
rain.
Tightening torque:
Wheel axle nut:
90 Nm (9.0 m·kg)
5EK-9-E1 (TW125)<3.1> 4/6/0 11:50 PM Page 55