lock YAMAHA TW125 2003 User Guide
[x] Cancel search | Manufacturer: YAMAHA, Model Year: 2003, Model line: TW125, Model: YAMAHA TW125 2003Pages: 88, PDF Size: 1.71 MB
Page 56 of 88

6-24
PERIODIC MAINTENANCE AND MINOR REPAIR
6
EAU04856
Checking the brake fluid
level
Insufficient brake fluid may allow air
to enter the brake system, possibly
causing it to become ineffective.
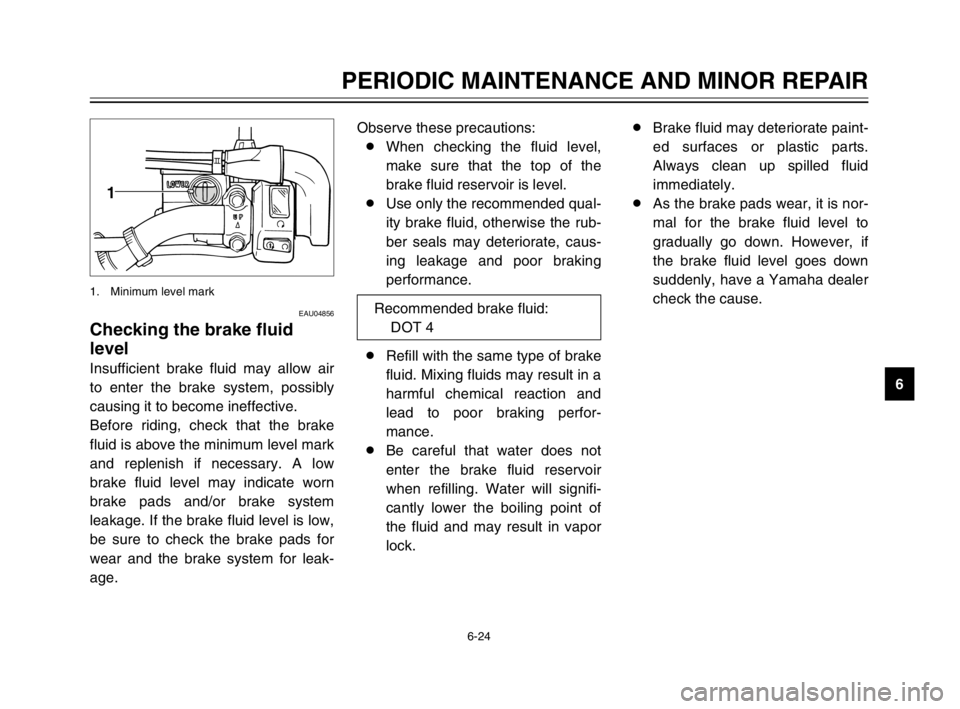
Before riding, check that the brake
fluid is above the minimum level mark
and replenish if necessary. A low
brake fluid level may indicate worn
brake pads and/or brake system
leakage. If the brake fluid level is low,
be sure to check the brake pads for
wear and the brake system for leak-
age.
1
1. Minimum level mark
Observe these precautions:
8When checking the fluid level,
make sure that the top of the
brake fluid reservoir is level.
8Use only the recommended qual-
ity brake fluid, otherwise the rub-
ber seals may deteriorate, caus-
ing leakage and poor braking
performance.
8Refill with the same type of brake
fluid. Mixing fluids may result in a
harmful chemical reaction and
lead to poor braking perfor-
mance.
8Be careful that water does not
enter the brake fluid reservoir
when refilling. Water will signifi-
cantly lower the boiling point of
the fluid and may result in vapor
lock.8Brake fluid may deteriorate paint-
ed surfaces or plastic parts.
Always clean up spilled fluid
immediately.
8As the brake pads wear, it is nor-
mal for the brake fluid level to
gradually go down. However, if
the brake fluid level goes down
suddenly, have a Yamaha dealer
check the cause.
Recommended brake fluid:
DOT 4
5RS-9-E1 (TW125) 8/23/02 11:37 AM Page 55
Page 68 of 88

6-36
PERIODIC MAINTENANCE AND MINOR REPAIR
6
EAU03497
Replacing a turn signal light
bulb
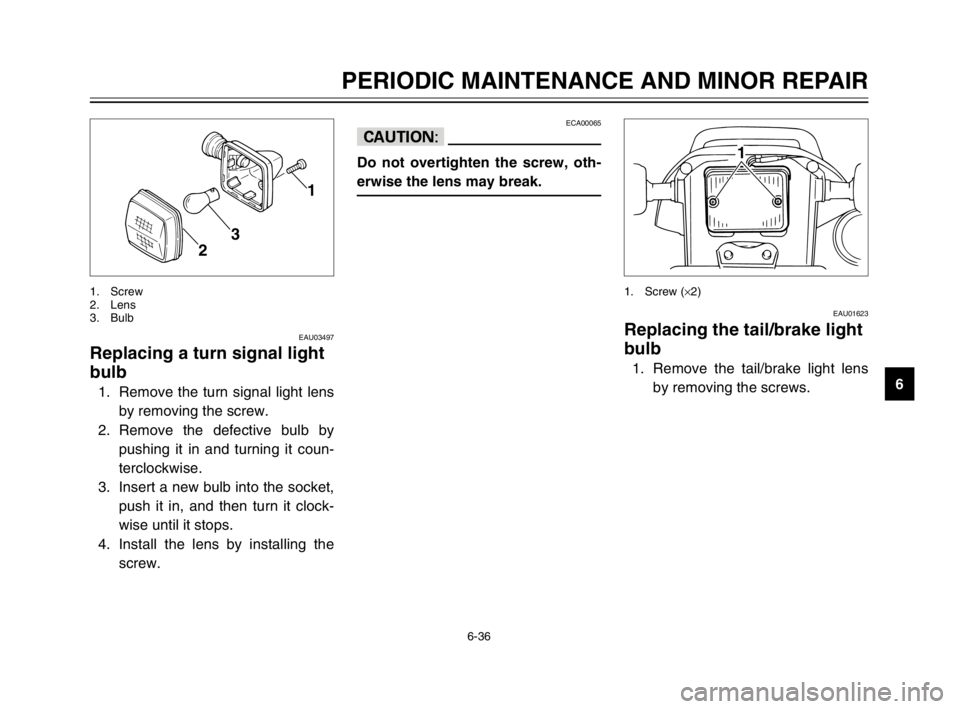
1. Remove the turn signal light lens
by removing the screw.
2. Remove the defective bulb by
pushing it in and turning it coun-
terclockwise.
3. Insert a new bulb into the socket,
push it in, and then turn it clock-
wise until it stops.
4. Install the lens by installing the
screw.
1
2
3
1. Screw
2. Lens
3. Bulb
ECA00065
cC
Do not overtighten the screw, oth-
erwise the lens may break.
EAU01623
Replacing the tail/brake light
bulb
1. Remove the tail/brake light lens
by removing the screws.
1
1. Screw (×2)
5RS-9-E1 (TW125) 8/23/02 11:37 AM Page 67
Page 69 of 88

6-37
PERIODIC MAINTENANCE AND MINOR REPAIR
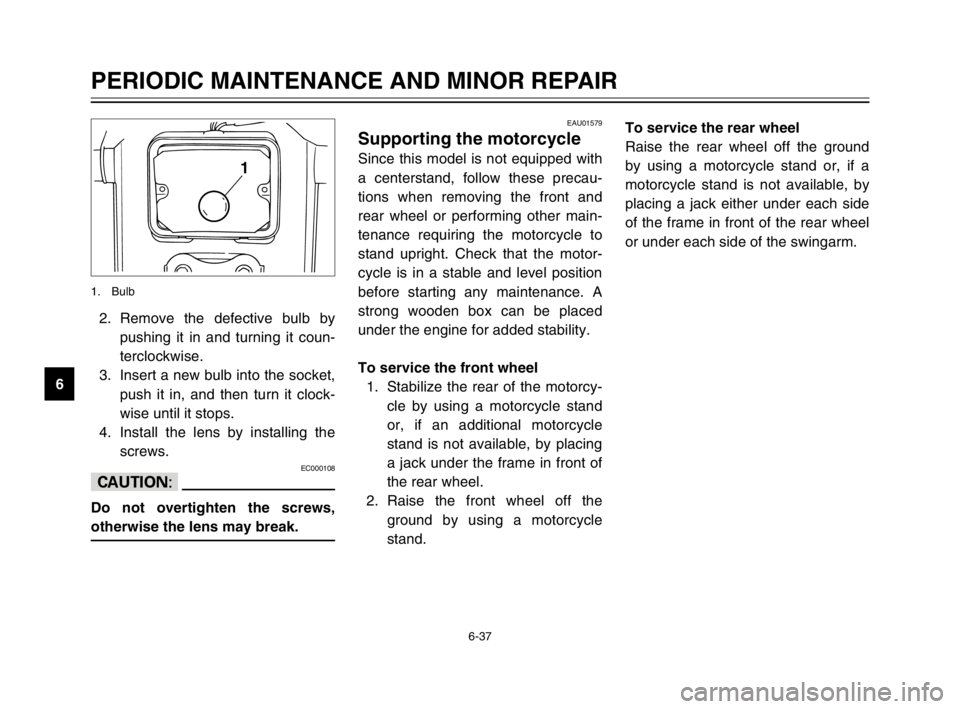
62. Remove the defective bulb by
pushing it in and turning it coun-
terclockwise.
3. Insert a new bulb into the socket,
push it in, and then turn it clock-
wise until it stops.
4. Install the lens by installing the
screws.
EC000108
cC
Do not overtighten the screws,
otherwise the lens may break.
1
1. Bulb
EAU01579
Supporting the motorcycle
Since this model is not equipped with
a centerstand, follow these precau-
tions when removing the front and
rear wheel or performing other main-
tenance requiring the motorcycle to
stand upright. Check that the motor-
cycle is in a stable and level position
before starting any maintenance. A
strong wooden box can be placed
under the engine for added stability.
To service the front wheel
1. Stabilize the rear of the motorcy-
cle by using a motorcycle stand
or, if an additional motorcycle
stand is not available, by placing
a jack under the frame in front of
the rear wheel.
2. Raise the front wheel off the
ground by using a motorcycle
stand.To service the rear wheel
Raise the rear wheel off the ground
by using a motorcycle stand or, if a
motorcycle stand is not available, by
placing a jack either under each side
of the frame in front of the rear wheel
or under each side of the swingarm.
5RS-9-E1 (TW125) 8/23/02 11:37 AM Page 68