odometer YAMAHA VIKING 2014 Owners Manual
[x] Cancel search | Manufacturer: YAMAHA, Model Year: 2014, Model line: VIKING, Model: YAMAHA VIKING 2014Pages: 180, PDF Size: 3.78 MB
Page 38 of 180

4-6
4
5
6
7
8
9
10
11
12
13
14
Helmet indicator light “ ”
The indicator light comes on and stays on
while the key is turned to “ ” (on) to remind
the occupants to always wear a helmet. If the
indicator light does not come on when the key
is turned to “ ” (on), have a Yamaha dealer
check the electrical circuit.
Seat belt indicator light “ ”
The indicator light comes on when the key is
turned to “ ” (on) to remind the occupants to
fasten their seat belt. The indicator light stays
on until the driver seat belt is properly latched.
If the indicator light does not come on when
the key is turned to “ ” (on), or if the indica-
tor light remains on after the driver seat belt is
properly latched, have a Yamaha dealer
check the electrical circuit.
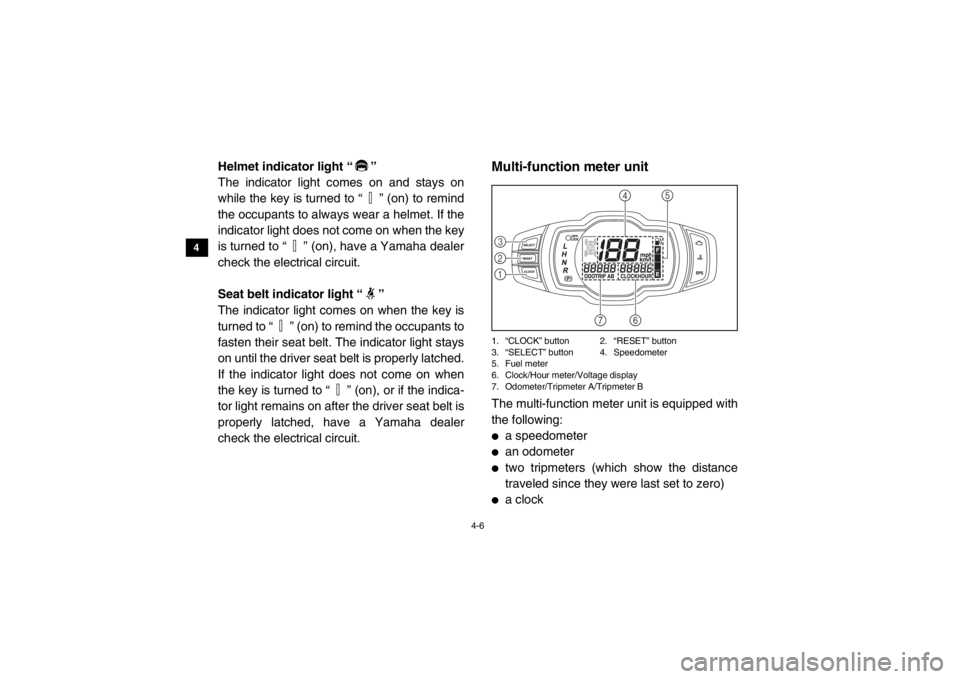
5B410004Multi-function meter unit1. “CLOCK” button 2. “RESET” button
3. “SELECT” button 4. Speedometer
5. Fuel meter
6. Clock/Hour meter/Voltage display
7. Odometer/Tripmeter A/Tripmeter BThe multi-function meter unit is equipped with
the following:●
a speedometer
●
an odometer
●
two tripmeters (which show the distance
traveled since they were last set to zero)
●
a clock321
4
5
6
7
1XP7B_EE.book Page 6 Tuesday, February 4, 2014 3:40 PM
Page 39 of 180

4-7
1
2
34
5
6
7
8
9
10
11
12
13
14
●
an hour meter (which shows the total time
the engine has been running)
●
a voltage display (which shows the battery
voltage)
●
a fuel meter
●
a self-diagnosis deviceOdometer and tripmeter modes
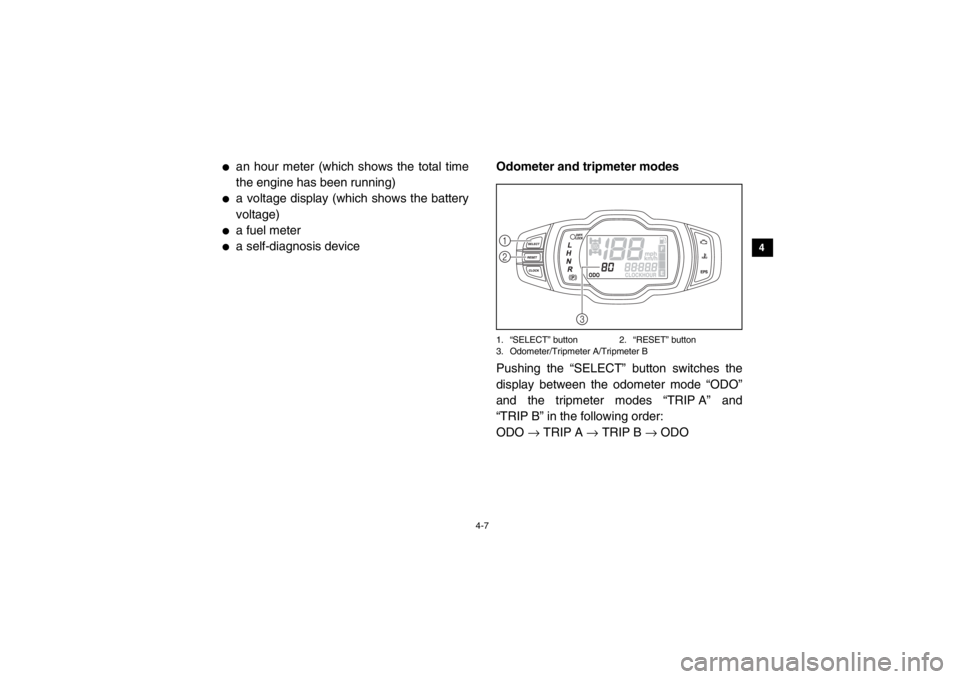
1. “SELECT” button 2. “RESET” button
3. Odometer/Tripmeter A/Tripmeter BPushing the “SELECT” button switches the
display between the odometer mode “ODO”
and the tripmeter modes “TRIP A” and
“TRIP B” in the following order:
ODO
→ TRIP A → TRIP B → ODO12
3
1XP7B_EE.book Page 7 Tuesday, February 4, 2014 3:40 PM
Page 114 of 180

8-4
8
9
10
11
12
13
14
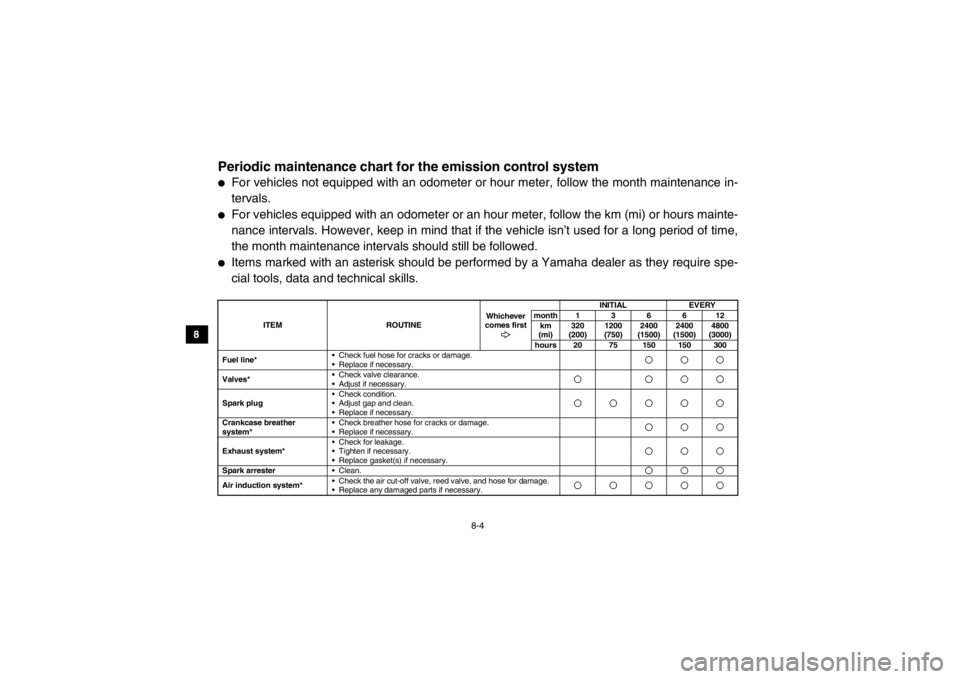
EVU01640Periodic maintenance chart for the emission control system●
For vehicles not equipped with an odometer or hour meter, follow the month maintenance in-
tervals.
●
For vehicles equipped with an odometer or an hour meter, follow the km (mi) or hours mainte-
nance intervals. However, keep in mind that if the vehicle isn’t used for a long period of time,
the month maintenance intervals should still be followed.
●
Items marked with an asterisk should be performed by a Yamaha dealer as they require spe-
cial tools, data and technical skills.
ITEM ROUTINEWhichever
comes first INITIAL
EVERY
month136612 km
(mi) 320
(200) 1200
(750) 2400
(1500) 2400
(1500) 4800
(3000)
hours 20 75 150 150 300
Fuel line* Check fuel hose for cracks or damage.
Replace if necessary.
Valves*
Check valve clearance.
Adjust if necessary.Spark plug Check condition.
Adjust gap and clean.
Replace if necessary.Crankcase breather
system* Check breather hose for cracks or damage.
Replace if necessary.Exhaust system*
Check for leakage.
Tighten if necessary.
Replace gasket(s) if necessary.Spark arrester
Clean.Air induction system* Check the air cut-off valve, reed valve, and hose for damage.
Replace any damaged parts if necessary.1XP7B_EE.book Page 4 Tuesday, February 4, 2014 4:19 PM