check engine light YAMAHA VITY 125 2010 Owners Manual
[x] Cancel search | Manufacturer: YAMAHA, Model Year: 2010, Model line: VITY 125, Model: YAMAHA VITY 125 2010Pages: 74, PDF Size: 2.04 MB
Page 6 of 74
TABLE OF CONTENTSSAFETY INFORMATION ..................1-1
Further safe-riding points ................1-5
DESCRIPTION ..................................2-1
Left view ..........................................2-1
Right view ........................................2-2
Controls and instruments.................2-3
INSTRUMENT AND CONTROL
FUNCTIONS.......................................3-1
Main switch/steering lock ................3-1
Keyhole cover .................................3-2
Indicator, indicator lights and
warning light ................................3-2
Speedometer unit ...........................3-3
Self-diagnosis device ......................3-4
Fuel gauge ......................................3-4
Anti-theft alarm (optional) ...............3-4
Handlebar switches ........................3-5
Front brake lever ............................3-5
Rear brake lever .............................3-6
Fuel tank cap ..................................3-6
Fuel .................................................3-7
Catalytic converters ........................3-8
Seat ................................................3-8
Helmet holders ...............................3-9
Storage compartments .................3-10
Carrier ...........................................3-11
Luggage hook ...............................3-11
Sidestand ......................................3-11
Ignition circuit cut-off system ........3-12FOR YOUR SAFETY –
PRE-OPERATION CHECKS............. 4-1
OPERATION AND IMPORTANT
RIDING POINTS................................. 5-1
Starting the engine ......................... 5-1
Starting off ...................................... 5-2
Acceleration and deceleration ........ 5-2
Braking ........................................... 5-3
Tips for reducing fuel
consumption ............................... 5-3
Engine break-in .............................. 5-4
Parking ........................................... 5-4
PERIODIC MAINTENANCE AND
ADJUSTMENT................................... 6-1
Periodic maintenance chart for
the emission control system ....... 6-2
General maintenance and
lubrication chart .......................... 6-3
Removing and installing cowlings
and panels .................................. 6-6
Checking the spark plug ................. 6-8
Engine oil ....................................... 6-9
Final transmission oil .................... 6-11
Air filter and V-belt case air filter
elements ................................... 6-12
Checking the throttle cable free
play ........................................... 6-14
Valve clearance ............................ 6-15
Tires ............................................. 6-15Cast wheels ................................. 6-17
Checking the front brake lever
free play .................................... 6-17
Adjusting the rear brake lever
free play .................................... 6-17
Checking the front brake pads
and rear brake shoes ............... 6-18
Checking the front brake fluid
level .......................................... 6-19
Changing the brake fluid .............. 6-20
Checking and lubricating
the cables ................................. 6-20
Checking and lubricating
the throttle grip and cable ......... 6-20
Lubricating the front and rear
brake levers .............................. 6-21
Checking and lubricating the
centerstand and sidestand ....... 6-21
Checking the front fork ................. 6-22
Checking the steering .................. 6-23
Checking the wheel bearings ....... 6-23
Battery ......................................... 6-23
Replacing the fuse ....................... 6-25
Replacing the headlight bulb ....... 6-25
Replacing a front turn signal light
bulb ........................................... 6-26
Rear turn signal light and tail/brake
light ........................................... 6-27
Replacing the auxiliary light
bulb ........................................... 6-27
Troubleshooting ........................... 6-28U4P7E2E0.book Page 1 Thursday, August 20, 2009 9:44 AM
Page 18 of 74
INSTRUMENT AND CONTROL FUNCTIONS
3-3
3
EAU45401
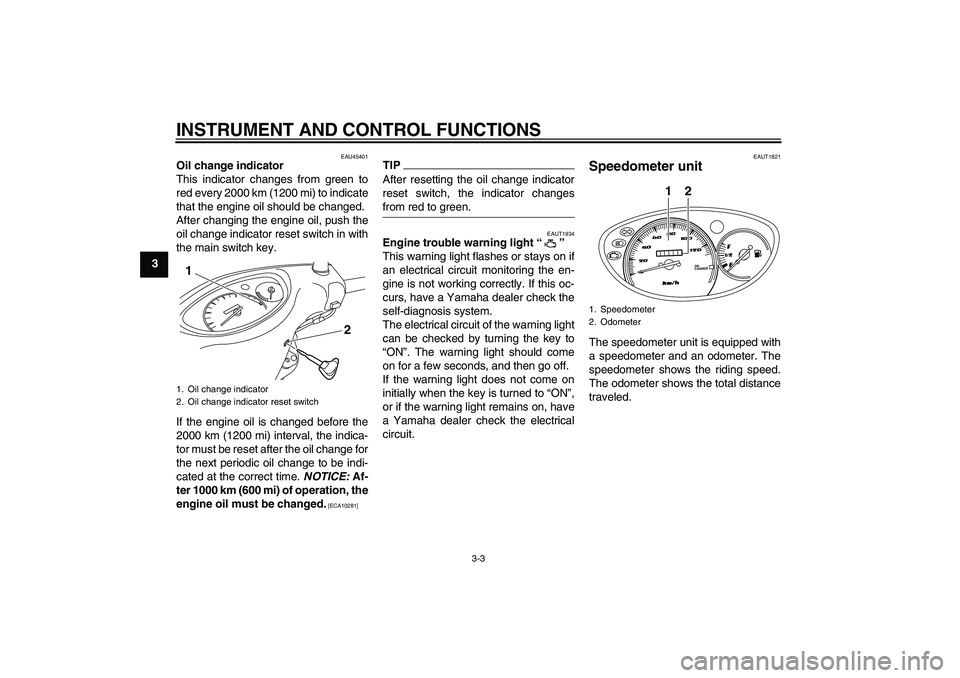
Oil change indicator
This indicator changes from green to
red every 2000 km (1200 mi) to indicate
that the engine oil should be changed.
After changing the engine oil, push the
oil change indicator reset switch in with
the main switch key.
If the engine oil is changed before the
2000 km (1200 mi) interval, the indica-
tor must be reset after the oil change for
the next periodic oil change to be indi-
cated at the correct time. NOTICE: Af-
ter 1000 km (600 mi) of operation, the
engine oil must be changed.
[ECA10281]
TIPAfter resetting the oil change indicator
reset switch, the indicator changes
from red to green.
EAUT1934
Engine trouble warning light“”
This warning light flashes or stays on if
an electrical circuit monitoring the en-
gine is not working correctly. If this oc-
curs, have a Yamaha dealer check the
self-diagnosis system.
The electrical circuit of the warning light
can be checked by turning the key to
“ON”. The warning light should come
on for a few seconds, and then go off.
If the warning light does not come on
initially when the key is turned to “ON”,
or if the warning light remains on, have
a Yamaha dealer check the electrical
circuit.
EAUT1821
Speedometer unit The speedometer unit is equipped with
a speedometer and an odometer. The
speedometer shows the riding speed.
The odometer shows the total distance
traveled.
1. Oil change indicator
2. Oil change indicator reset switch1
2
1. Speedometer
2. Odometer
OIL
CHANGE2 1
U4P7E2E0.book Page 3 Thursday, August 20, 2009 9:44 AM
Page 19 of 74
INSTRUMENT AND CONTROL FUNCTIONS
3-4
3
EAU12092
Self-diagnosis device This model is equipped with a self-diag-
nosis device for various electrical cir-
cuits.
If a problem is detected in any of those
circuits, the engine trouble warning light
will come on or flash. If this occurs,
have a Yamaha dealer check the vehi-
cle.NOTICE
ECA11170
To prevent engine damage, be sure
to consult a Yamaha dealer as soon
as possible if this occurs.
EAU45630
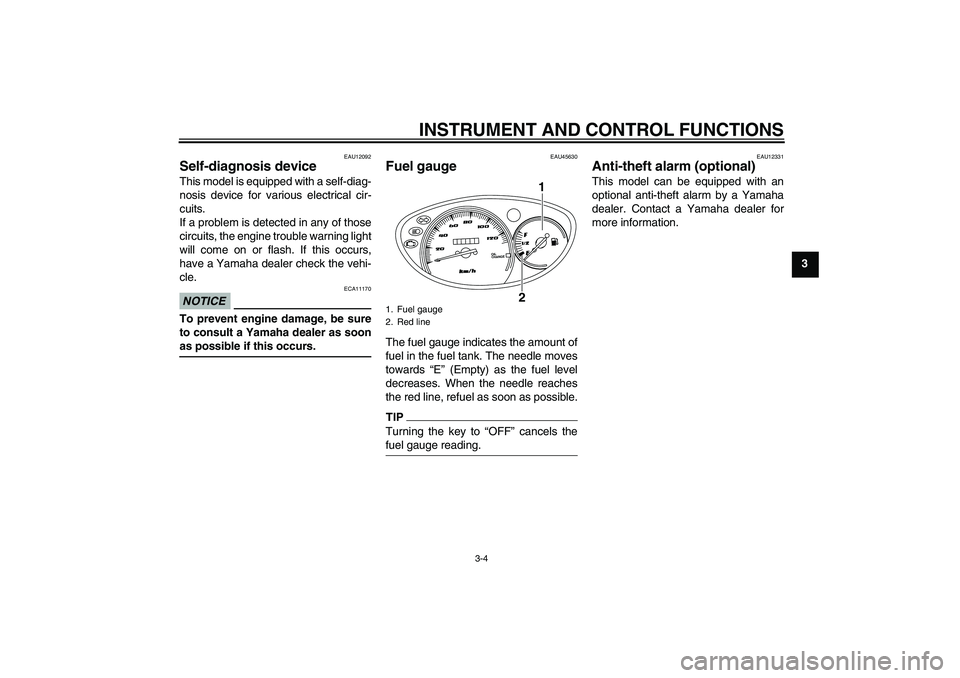
Fuel gauge The fuel gauge indicates the amount of
fuel in the fuel tank. The needle moves
towards “E” (Empty) as the fuel level
decreases. When the needle reaches
the red line, refuel as soon as possible.TIPTurning the key to “OFF” cancels the
fuel gauge reading.
EAU12331
Anti-theft alarm (optional) This model can be equipped with an
optional anti-theft alarm by a Yamaha
dealer. Contact a Yamaha dealer for
more information.
1. Fuel gauge
2. Red line
OIL
CHANGE
1
2
U4P7E2E0.book Page 4 Thursday, August 20, 2009 9:44 AM
Page 42 of 74
PERIODIC MAINTENANCE AND ADJUSTMENT
6-8
6
EAU45590
Checking the spark plug The spark plug is an important engine
component, which is easy to check.
Since heat and deposits will cause any
spark plug to slowly erode, the spark
plug should be removed and checked
in accordance with the periodic mainte-
nance and lubrication chart. In addition,
the condition of the spark plug can re-
veal the condition of the engine.
To remove the spark plug
1. Place the vehicle on the center-
stand.
2. Remove panel A. (See page 6-6.)
3. Remove the spark plug cap.
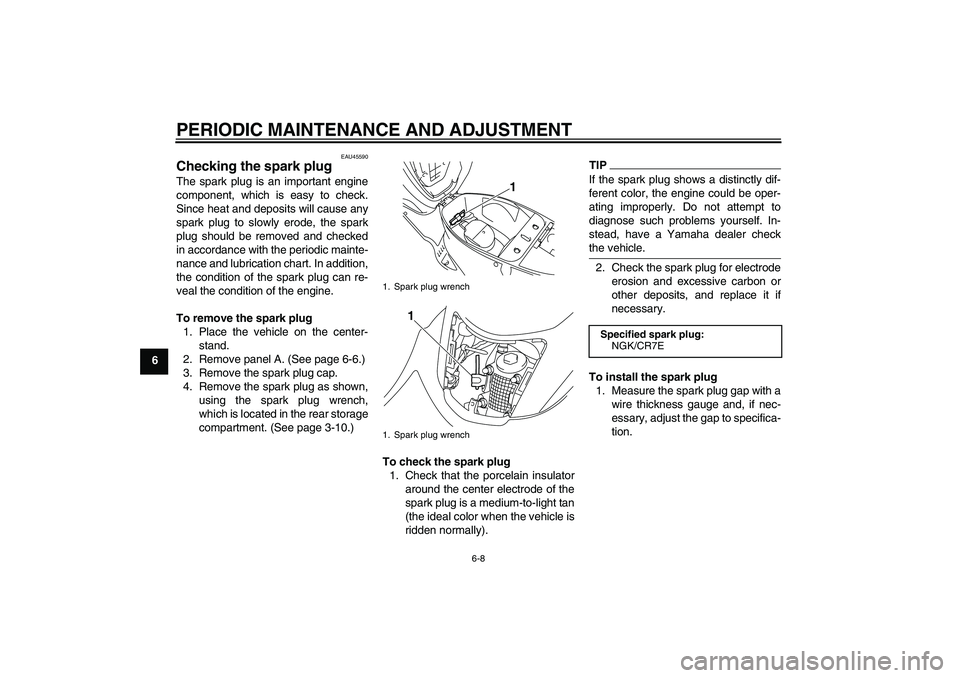
4. Remove the spark plug as shown,
using the spark plug wrench,
which is located in the rear storage
compartment. (See page 3-10.)
To check the spark plug
1. Check that the porcelain insulator
around the center electrode of the
spark plug is a medium-to-light tan
(the ideal color when the vehicle is
ridden normally).
TIPIf the spark plug shows a distinctly dif-
ferent color, the engine could be oper-
ating improperly. Do not attempt to
diagnose such problems yourself. In-
stead, have a Yamaha dealer check
the vehicle.2. Check the spark plug for electrode
erosion and excessive carbon or
other deposits, and replace it if
necessary.
To install the spark plug
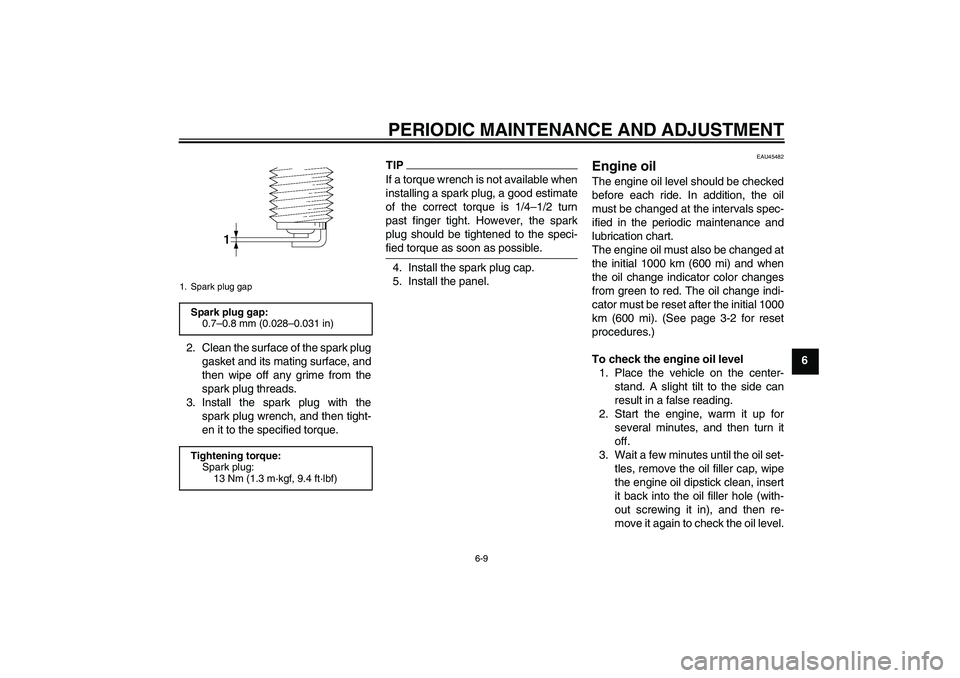
1. Measure the spark plug gap with a
wire thickness gauge and, if nec-
essary, adjust the gap to specifica-
tion.
1. Spark plug wrench
1. Spark plug wrench
1
1
Specified spark plug:
NGK/CR7E
U4P7E2E0.book Page 8 Thursday, August 20, 2009 9:44 AM
Page 43 of 74
PERIODIC MAINTENANCE AND ADJUSTMENT
6-9
6 2. Clean the surface of the spark plug
gasket and its mating surface, and
then wipe off any grime from the
spark plug threads.
3. Install the spark plug with the
spark plug wrench, and then tight-
en it to the specified torque.
TIPIf a torque wrench is not available when
installing a spark plug, a good estimate
of the correct torque is 1/4–1/2 turn
past finger tight. However, the spark
plug should be tightened to the speci-
fied torque as soon as possible.4. Install the spark plug cap.
5. Install the panel.
EAU45482
Engine oil The engine oil level should be checked
before each ride. In addition, the oil
must be changed at the intervals spec-
ified in the periodic maintenance and
lubrication chart.
The engine oil must also be changed at
the initial 1000 km (600 mi) and when
the oil change indicator color changes
from green to red. The oil change indi-
cator must be reset after the initial 1000
km (600 mi). (See page 3-2 for reset
procedures.)
To check the engine oil level
1. Place the vehicle on the center-
stand. A slight tilt to the side can
result in a false reading.
2. Start the engine, warm it up for
several minutes, and then turn it
off.
3. Wait a few minutes until the oil set-
tles, remove the oil filler cap, wipe
the engine oil dipstick clean, insert
it back into the oil filler hole (with-
out screwing it in), and then re-
move it again to check the oil level.
1. Spark plug gapSpark plug gap:
0.7–0.8 mm (0.028–0.031 in)
Tightening torque:
Spark plug:
13 Nm (1.3 m·kgf, 9.4 ft·lbf)
U4P7E2E0.book Page 9 Thursday, August 20, 2009 9:44 AM
Page 72 of 74
INDEXAAcceleration and deceleration................. 5-2
Air filter and V-belt case air filter
elements ............................................. 6-12
Anti-theft alarm (optional)........................ 3-4
Auxiliary light bulb, replacing ................ 6-27BBattery................................................... 6-23
Brake fluid, changing ............................ 6-20
Brake fluid level, checking .................... 6-19
Brake lever, front..................................... 3-5
Brake lever, rear ..................................... 3-6
Brake levers, lubricating........................ 6-21
Brake pads and shoes, checking .......... 6-18
Braking .................................................... 5-3CCables, checking and lubricating .......... 6-20
Care ........................................................ 7-1
Carrier ................................................... 3-11
Catalytic converters ................................ 3-8
Centerstand and sidestand,
checking and lubricating ..................... 6-21
Cowlings and panels,
removing and installing ......................... 6-6DDimmer switch ........................................ 3-5EEngine break-in ....................................... 5-4
Engine oil ................................................ 6-9
Engine trouble warning light.................... 3-3FFinal transmission oil ............................ 6-11
Front brake lever free play, checking .... 6-17
Front fork, checking .............................. 6-22Fuel......................................................... 3-7
Fuel consumption, tips for reducing........ 5-3
Fuel gauge.............................................. 3-4
Fuel tank cap .......................................... 3-6
Fuse, replacing ..................................... 6-25
HHandlebar switches ................................ 3-5
Headlight bulb, replacing ...................... 6-25
Helmet holders ....................................... 3-9
High beam indicator light ........................ 3-2
Horn switch ............................................. 3-5IIdentification numbers ............................ 9-1
Ignition circuit cut-off system ................ 3-12
Indicator, indicator lights and
warning light ......................................... 3-2KKeyhole cover ......................................... 3-2LLuggage hook ....................................... 3-11MMain switch/steering lock........................ 3-1
Maintenance and lubrication, periodic .... 6-3
Maintenance, emission control system... 6-2
Matte color, caution ................................ 7-1
Model label ............................................. 9-1PParking ................................................... 5-4
Part locations .......................................... 2-1RRear brake lever free play, adjusting .... 6-17
Rear turn signal light and tail/brake
light..................................................... 6-27
SSafe-riding points .................................... 1-5
Safety information ................................... 1-1
Seat ......................................................... 3-8
Self-diagnosis device .............................. 3-4
Sidestand .............................................. 3-11
Spark plug, checking ............................... 6-8
Specifications .......................................... 8-1
Speedometer unit .................................... 3-3
Starting off ............................................... 5-2
Starting the engine .................................. 5-1
Start switch.............................................. 3-5
Steering, checking................................. 6-23
Storage.................................................... 7-3
Storage compartments .......................... 3-10TThrottle cable free play, checking ......... 6-14
Throttle grip and cable,
checking and lubricating ..................... 6-20
Tires ...................................................... 6-15
Troubleshooting .................................... 6-28
Troubleshooting chart ........................... 6-29
Turn signal indicator light ........................ 3-2
Turn signal light bulb (front),
replacing ............................................. 6-26
Turn signal switch ................................... 3-5VValve clearance..................................... 6-15
Vehicle identification number .................. 9-1WWheel bearings, checking ..................... 6-23
Wheels .................................................. 6-17
U4P7E2E0.book Page 1 Thursday, August 20, 2009 9:44 AM