clock YAMAHA WHY 50 2003 Owners Manual
[x] Cancel search | Manufacturer: YAMAHA, Model Year: 2003, Model line: WHY 50, Model: YAMAHA WHY 50 2003Pages: 80, PDF Size: 1.18 MB
Page 22 of 80

3
INSTRUMENT AND CONTROL FUNCTIONS
1
ZAUM0084
1
ZAUM0085
EAU03882
Front brake lever
The front brake lever is located on the
right handlebar grip. To apply the front
brake, pull this lever toward the
handlebar grip.
EAU00163
Rear brake lever
The rear brake lever is located on the
left handlebar grip. To apply the rear
brake, pull this lever toward the
handlebar grip.
1. Front brake lever
1. Rear brake lever
12
ZAUM0361
1. Oil tank cap
2. Fuel tank cap
EAU03463
Fuel and 2-stroke engine oil
tank caps
The fuel tank cap and the 2-stroke
engine oil tank cap are located under
the seat. (See page 3-8 for seat opening
and closing procedures.)
Fuel tank cap
To remove the fuel tank cap, turn it
counterclockwise, and then pull it off.
To install the fuel tank cap, turn it
clockwise.
3-5
Page 25 of 80

INSTRUMENT AND CONTROL FUNCTIONS
3
EAU03091
Rider seat
To open the rider seat
1. Place the scooter on the
centerstand.
2. Insert the key into the main switch,
and then turn it counterclockwise.
NOTE :
Do not push inward when turning the
key.
3. Fold the rider seat up.To close the rider seat
1. Fold the rider seat down, and then
push it down to lock it in place.
2. Remove the key from the main
switch if the scooter will be left
unattended.
NOTE :
Make sure that the seat is properly
secured before riding.
PUSH
OPEN
ZAUM0253ZAUM0363
OPEN
OPEN
UNLOCKLOCK
OPEN
OPEN
UNLOCKLOCK
OPENOPEN
UNLOCKLOCK
ZAUM0364
3-8
EAUM0096
Storage compartment
To unlock the storage compartment
Insert the key in the lock and turn it 1/4
turn clockwise.
To open the storage compartment
when it is unlocked
Turn the knob 1/4 turn clockwise. The
knob will return to its original position
after released.
To close the storage compartment
Push the lid into the original position
To lock the storage compartment
Insert the key in the lock and turn it 1/4
turn counterclockwise, and then
remove the key.
Page 57 of 80

PERIODIC MAINTENANCE AND MINOR REPAIR
6
EW000119
Headlight bulbs get very hot.
Therefore, keep flammable products
away from a lit headlight bulb, and
do not touch the bulb until it has
cooled down.
4. Place a new bulb into position,
and then secure it with the bulb
holder.
5. Connect the lead connectors, and
then install the headlight unit by
installing the screws.
6. Have a Yamaha dealer adjust the
headlight beam if necessary.
6-20
EAU00846
Replacing the headlight bulb
If the headlight bulb burns out, replace
it as follows.
1. Remove the headlight unit by
removing the screws.
2. Disconnect the headlight lead
connectors.
3. Remove the headlight bulb holder
by pushing it inward and turning it
counterclockwise, and then
remove the defective bulb.
1
ZAUM0381
1. Headlight bulb holder
EC000103
Do not use a fuse of a higher amperage
rating than recommended to avoid
causing extensive damage to the
electrical system and possibly a fire.
3. Turn the key to "
" and turn on
the electrical circuits to check if the
devices operate.
4. If the fuse immediately blows
again, have a Yamaha dealer
check the electrical system.
Page 58 of 80

PERIODIC MAINTENANCE AND MINOR REPAIR
6
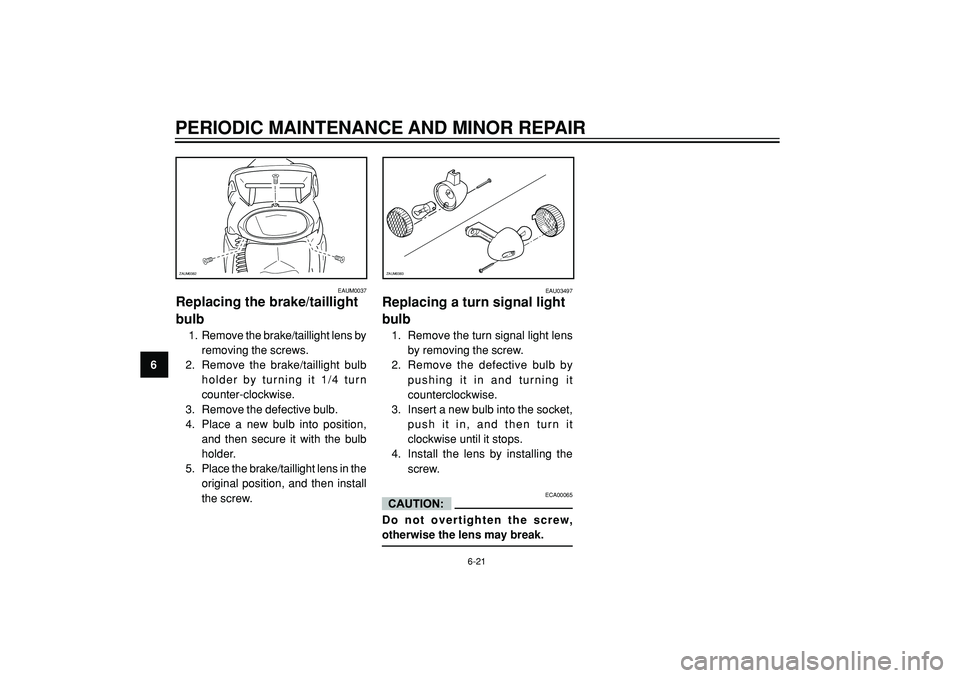
EAUM0037
Replacing the brake/taillight
bulb
1. Remove the brake/taillight lens by
removing the screws.
2. Remove the brake/taillight bulb
holder by turning it 1/4 turn
counter-clockwise.
3. Remove the defective bulb.
4. Place a new bulb into position,
and then secure it with the bulb
holder.
5. Place the brake/taillight lens in the
original position, and then install
the screw.
ZAUM0382
EAU03497
Replacing a turn signal light
bulb
1. Remove the turn signal light lens
by removing the screw.
2. Remove the defective bulb by
pushing it in and turning it
counterclockwise.
3. Insert a new bulb into the socket,
push it in, and then turn it
clockwise until it stops.
4. Install the lens by installing the
screw.
ECA00065
Do not overtighten the screw,
otherwise the lens may break.
ZAUM0383
6-21