4WD YAMAHA WOLVERINE 2018 Owners Manual
[x] Cancel search | Manufacturer: YAMAHA, Model Year: 2018, Model line: WOLVERINE, Model: YAMAHA WOLVERINE 2018Pages: 188, PDF Size: 5.4 MB
Page 6 of 188

EBU31120
CONTENTS
LOCATION OF THE WARNING AND
SPECIFICATION LABELS ....................... 1-1
SAFETY INFORMATION ......................... 2-1
DESCRIPTION......................................... 3-1Left view ............................................... 3-1
Right view ............................................. 3-2
Controls and instruments ..................... 3-3
INSTRUMENT AND CONTROL
FUNCTIONS............................................ 4-1 Main switch .......................................... 4-1
Indicator lights and warning lights ....... 4-2
Multi-function meter unit ...................... 4-6
Light switch ........................................ 4-11
On–Command drive knob “2WD/4WD/DIFF LOCK” .................. 4-11
Horn switch ....................................... 4-12
Accelerator pedal ............................... 4-12
Brake pedal ........................................ 4-13 Parking brake lever ............................ 4-13
Drive select lever ................................ 4-14
Fuel tank cap...................................... 4-14
Doors .................................................. 4-14
Seats .................................................. 4-15
Adjusting the driver seat position....... 4-16
Seat belts ........................................... 4-17
Glove compartment ........................... 4-18
Storage compartments ...................... 4-18
Cup holders ........................................ 4-20
Cargo bed .......................................... 4-20
Front shock absorbers ....................... 4-22
Rear shock absorbers ........................ 4-27
Trailer hitch bracket and receiver....... 4-32
Auxiliary DC jack ................................ 4-33
FOR YOUR SAFETY –
PRE-OPERATION CHECKS.................... 5-1 Front and rear brakes ........................... 5-3
Fuel....................................................... 5-3
Engine oil.............................................. 5-5
Coolant ................................................. 5-6
Final gear.............................................. 5-6UB3D7AE0.book Page 1 Tuesday, November 7, 2017 9:38 AM
Page 41 of 188

4-3
4
EBU31290Neutral indicator light “N”
This indicator light comes on when the drive
select lever is in the “N” position.EBU31300Reverse indicator light “R”
This indicator light comes on when the drive
select lever is in the “R” position.EBU31310Parking brake indicator light “ ”
This indicator light comes on when the park-
ing brake is applied.EBU37220Differential gear lock indicator light “DIFF.
LOCK”
This indicator light comes on when the front
differential gear is locked.
TIPWhen the On–Command drive knob is set to
“DIFF LOCK”, the indicator light will flash until
the differential is locked. Turn the steering
wheel back and forth or drive slowly to help
the differential gear lock to engage. EBU37171Drivetrain icon “ / ”
This icon indicates the currently selected
drive mode. When 2WD is selected, the icon
is off. When 4WD is selected, “ ” is dis-
played. And when 4WD with differential lock
is selected “ ” is displayed.TIP See pages 4-11 and 6-5 for more informa-
tion on selecting the drive mode.
Due to the synchronizing mechanism in the
differential gear case, the drivetrain icon
may not come on until the vehicle starts
moving.
UB3D7AE0.book Page 3 Tuesday, November 7, 2017 9:38 AM
Page 42 of 188

4-4
4
When the On–Command drive knob is set
to “DIFF LOCK” or “4WD”, the drivetrain
icon will flash until the differential has
locked or unlocked. Turn the steering wheel
back and forth or drive slowly to help the
differential gear lock to engage or disen-
gage. EBU31333Coolant temperature warning light “ ”
This light comes on to warn that the coolant
temperature is too hot. If the light comes on
during operation, stop the vehicle as soon as
it is safe to do so and allow the engine to cool
down for about 10 minutes. (See page 8-60.)TIPIf you continue to drive the vehicle while the
engine is overheating, a buzzer will sound. NOTICEECB03460Continuous use while this warning light is
on will damage the engine.
The electrical circuit of the warning light can
be checked by turning the key to “ ” (on). If
the warning light does not come on initially
when the key is turned to “ ” (on), or if the
warning light remains on, have a Yamaha
dealer check the electrical circuit.EBU31341Engine trouble warning light “ ”
This warning light comes on or flashes if a
problem is detected in the electrical circuit
monitoring the engine. When this occurs, the
display will indicate an error code (see page
4-10). Have a Yamaha dealer check the self-
diagnosis system.
The electrical circuit of the warning light can
be checked by turning the key to “ ” (on). If
the warning light does not come on initially
when the key is turned to “ ” (on), or if the
warning light remains on, have a Yamaha
dealer check the vehicle.
UB3D7AE0.book Page 4 Tuesday, November 7, 2017 9:38 AM
Page 49 of 188

4-11
4
EBU31391Light switch “ / / ”Set the switch to “ ” to turn on the low
beam and the taillights.
Set the switch to “ ” to turn on the high
beam and the taillights.
Set the switch to “ ” to turn off the head-
lights and taillights.NOTICEECB02061Do not use the headlights with the engine
turned off for an extended period of time.
The battery may discharge to the pointthat the electric starter will not have
enough power to crank the engine. If this
should happen, remove the battery and re-
charge it.
EBU31402On–Command drive knob
“2WD/4WD/DIFF LOCK”Stop the vehicle and move the On–Command
drive knob to change the drive mode to two–
wheel drive, four–wheel drive, or four–wheel
1. Light switch “ / / ”
L
H
1
L
HLH
1. On-Command drive knob “2WD/4WD/DIFF LOCK”
1
UB3D7AE0.book Page 11 Tuesday, November 7, 2017 9:38 AM
Page 50 of 188

4-12
4
drive with differential lock. Select the appro-
priate drive according to the terrain and driv-
ing conditions.
“2WD” (two–wheel drive): Power is sup-
plied to the rear wheels only.
“4WD” (four–wheel drive): Power is sup-
plied to the front and rear wheels.
“DIFF LOCK” (four–wheel drive with the dif-
ferential gear locked): Power is supplied to
the front and rear wheels with the differen-
tial gear locked. Unlike standard four–wheel
drive, all wheels turn at the same speed re-
gardless of traction.EBU33192Horn switch “ ”Press the switch to sound the horn.
EBU31413Accelerator pedal1. Horn switch “ ”
1. Accelerator pedal
1
1
UB3D7AE0.book Page 12 Tuesday, November 7, 2017 9:38 AM
Page 87 of 188

6-5
6
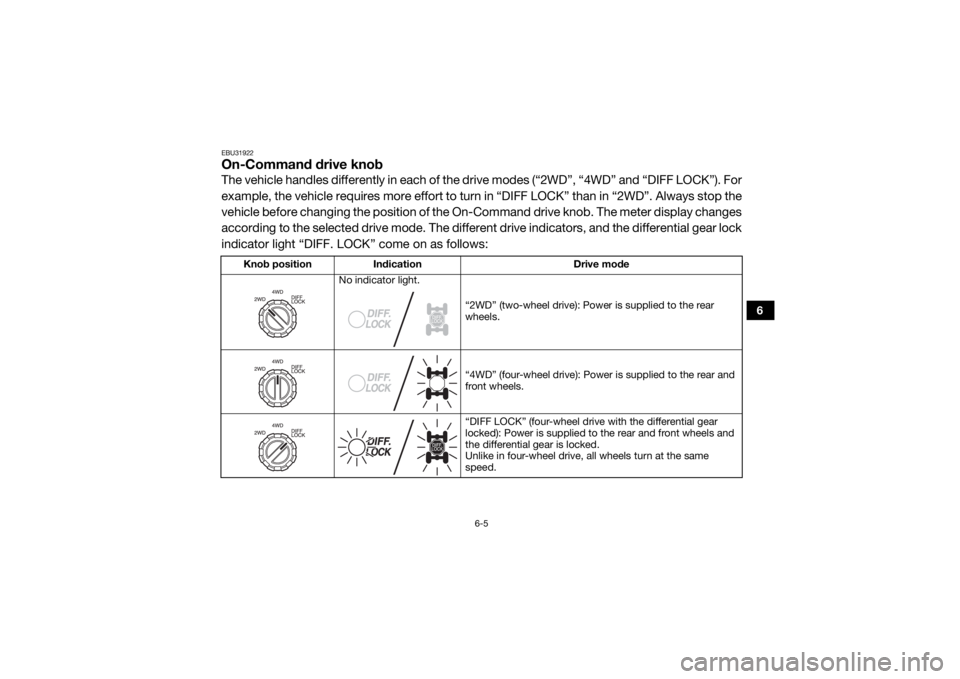
EBU31922On-Command drive knobThe vehicle handles differently in each of the drive modes (“2WD”, “4WD” and “DIFF LOCK”). For
example, the vehicle requires more effort to turn in “DIFF LOCK” than in “2WD”. Always stop the
vehicle before changing the position of the On -Command drive knob. The meter display changes
according to the selected drive mode. The different drive indicators, and the differential gear lock
indicator light “DIFF. LOCK” come on as follows:
Knob position Indication Drive mode
No indicator light.
“2WD” (two-wheel drive): Power is supplied to the rear
wheels.
“4WD” (four-wheel drive): Power is supplied to the rear and
front wheels.
“DIFF LOCK” (four-wheel drive with the differential gear
locked): Power is supplied to the rear and front wheels and
the differential gear is locked.
Unlike in four-wheel drive, all wheels turn at the same
speed.
UB3D7AE0.book Page 5 Tuesday, November 7, 2017 9:38 AM
Page 88 of 188

6-6
6
TIPWhen the knob is set to “DIFF LOCK” or “4WD”, the differential gear lock indicator and indica-
tor light will flash until the differential gear is completely locked or unlocked.
When the indicator and indicator light are flas hing, turning the steering wheel back and forth
will help the differential gear lock to engage or disengage.
Driving with the differential gear not properly engaged or disengaged (e.g., when the indicator
and indicator light are flashing) will cause the vehicle speed to be limited until the differential
gear is completely engaged or disengaged. UB3D7AE0.book Page 6 Tuesday, November 7, 2017 9:38 AM
Page 105 of 188

7-14
7
Become familiar with the way the vehicle feels
in low and high ranges, first in two-wheel
drive “2WD” and then in four-wheel drive
“4WD” and four-wheel drive with the differen-
tial locked “DIFF LOCK”. Steering may take
more effort in four-wheel drive with the differ-
ential locked “DIFF LOCK”. Also practice
driving in reverse.
Take the time to learn basic operation of the
vehicle before attempting more difficult ma-
neuvers.Getting ready to ride
Perform the Pre-Operation Checks on page
5-1. Follow the instructions starting on page
6-2 to start the engine.
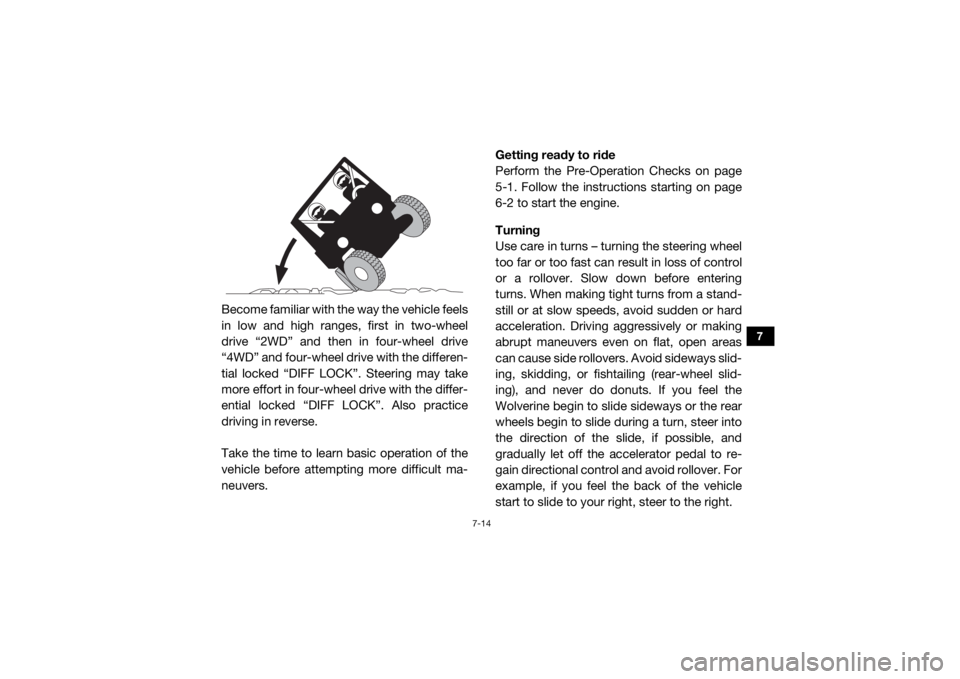
Turning
Use care in turns – tu
rning the steering wheel
too far or too fast can result in loss of control
or a rollover. Slow down before entering
turns. When making tight turns from a stand-
still or at slow speeds, avoid sudden or hard
acceleration. Driving aggressively or making
abrupt maneuvers even on flat, open areas
can cause side rollovers. Avoid sideways slid-
ing, skidding, or fishtailing (rear-wheel slid-
ing), and never do donuts. If you feel the
Wolverine begin to slide sideways or the rear
wheels begin to slide during a turn, steer into
the direction of the slide, if possible, and
gradually let off the accelerator pedal to re-
gain directional control and avoid rollover. For
example, if you feel the back of the vehicle
start to slide to your right, steer to the right.UB3D7AE0.book Page 14 Tuesday, November 7, 2017 9:38 AM
Page 109 of 188

7-18
7
to see far enough ahead of you. Use common
sense and remember that some hills are too
steep for you to climb or descend. Use proper
driving techniques to avoid rearward, for-
ward, or sideways rollovers on hills and
slopes.
Drive straight up and down inclines, not
across them. If crossing a hill is unavoidable,
drive slowly. Turn downhill immediately if you
feel the vehicle may tip.
If you think or feel the vehicle may tip or
roll:
Brace yourself by pressing your feet firmly
on the floorboard and keep a firm grip on
the steering wheel or passenger handhold.
Do not put your hands or feet outside of the
vehicle for any reason.
Uphill
Do not attempt to climb hills until you have
mastered basic maneuv ers on flat ground.
Drive straight up hills, and avoid crossing the side of a hill, which increases your risk of roll-
over. Practice first on gentle slopes before at-
tempting steeper hills. Always check the
terrain carefully before attempting any hill.
To climb a hill, you need traction, momentum,
and steady throttle. For more traction and
control for climbing steeper and/or rougher
slopes, shift into low gear and select “4WD”
or “DIFF LOCK”. Travel fast enough to main-
tain momentum, but not so fast that you can-
not react to changes in the terrain as you
climb.
Slow down when you reach the crest of the
hill if you cannot see clearly what is on the
other side – there could be another person, an
obstacle, or a sharp drop-off.
If you start to lose traction or momentum
when climbing, and decide you will be unable
to continue, use the brakes to stop. Do not at-
tempt to turn the vehicle around. With your
foot on the brake pedal, look behind you and
plan your descent. Shift the drive select lever
into reverse so you can use engine braking toUB3D7AE0.book Page 18 Tuesday, November 7, 2017 9:38 AM
Page 110 of 188

7-19
7
slow your descent. Release the brake and be-
gin to coast down the hill. Use engine braking
as much as possible, gently applying the
brakes when necessary.
Downhill
Check the terrain carefully before going
downhill. When possible, choose a path that
lets you drive your vehicle straight downhill.
Choose your path carefully and drive slowly
enough to be able to react to obstacles that
you encounter.
For more traction and control, before going
down steeper and/or rougher slopes, shift
into low gear and select “4WD” or “DIFF
LOCK”. Engine braking will help you go
downhill slowly. Go as slowly as possible. If
you begin to go too fast, apply the brakes
gently. Avoid hard application of the brakes,
which could cause the vehicle to slide.If you are sliding or skidding, try to steer in the
direction the vehicle is sliding, to regain con-
trol. For example, if you feel the back of the
vehicle start to slide to your right, steer to the
right.
If you must turn on the hill to avoid an obsta-
cle, do so slowly and carefully. If the vehicle
starts to tip, immediately steer in the downhill
direction if there are no obstacles in your
path. As you regain proper balance, gradually
steer again in the direction you want to go.
Rough terrain
Operation over rough terrain should be done
with caution.
Look for and avoid obstacles that could
cause damage to the vehicle or could lead
to a rollover or accident.
Do not drive in a way that will get the vehicle
airborne, as injury, loss of control, and
damage to the vehicle could occur.UB3D7AE0.book Page 19 Tuesday, November 7, 2017 9:38 AM